マガジン
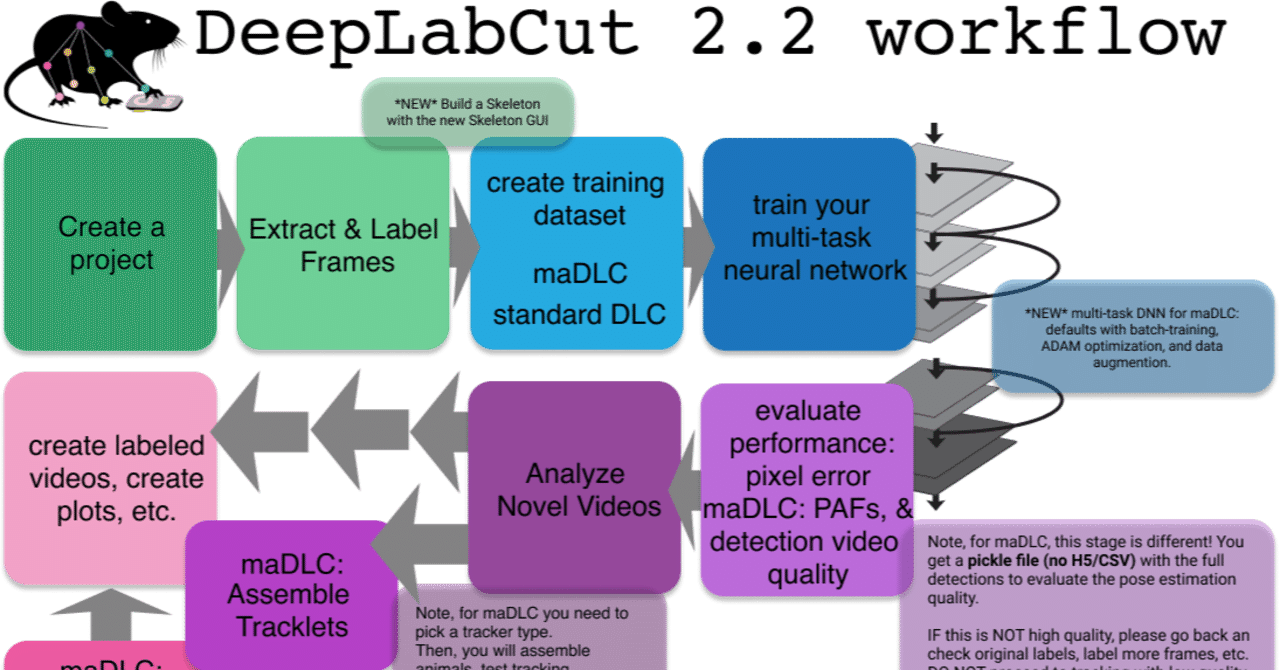
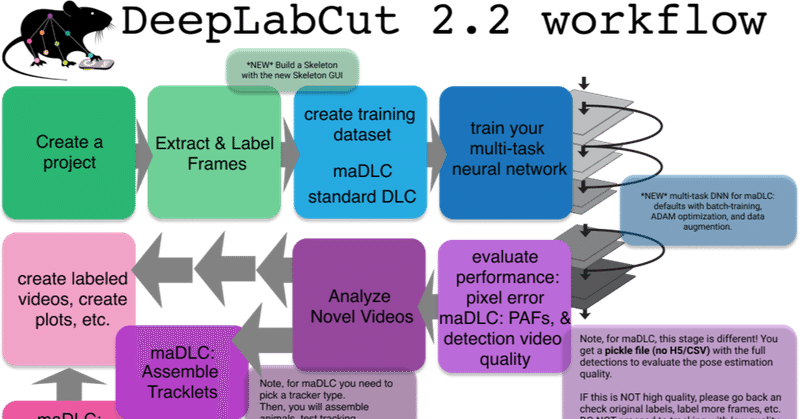
DeepLabCut multi-animal

SakuLab
- 7本
DeepLabCut multi-animal support DeepLabCut multi-animal supportの使い方の説明 DeepLabCut: Markerless 3D Animal Pose Estimation インストール・使い方ガイド

DeepLabCut - Standalone GUI
SakuLab
- 10本
DeepLabCutのStandalone GUIの使い方説明 DeepLabCut: Markerless 3D Animal Pose Estimation インストール・使い方ガイド