
【コト】【ハウツー】推し活×EXCEL

本記事は有料設定しておりますが、すべて無料でお読みいただけます。
本記事に使用されている一部データのみ有料で販売しております。
『オタクはねえ、辛い日常から逃避する為にオタク趣味やってるんじゃないのよ。遊ぶ金欲しさに仕事してんのよ。』
オタク(19??~????)
まえがき
MAACoの嫁と娘はジャニヲタだ。
・・・ジャニヲタ?スタヲタ?今はなんて呼べばいいんだ?
コンサート手前になるとだいたいうちわ作りを依頼される。
今はアプリでも作成できるのだが、スマホの画面サイズでは個人的にどうにも細部の調整がやりづらい。
なのでPCにデフォルトで入っていたMicrosoftのEXCELを使ってうちわデータを作成している。
この方法なら、MS Office入りのPCさえ持っていれば多くの方が特殊な技術も追加ツールもなくうちわ作りができると思う。
ちなみにノーコストのデザイン作成ならWEBアプリのCANVAも簡単かもしれないが、EXCELならWEBセキュリティの厳しい会社でも導入されているケースが多いので、今回のノウハウがビジネスで生きる可能性も高い。
難しくないので初心者でもやってみる価値ありだ。
EXCELの仕様やバージョンによって若干違いはあるだろうから、そこは個別に調べてほしい。
うちわ作成の流れ
その①A3サイズで印刷範囲設定

まずはパレットとなるEXCELの背景サイズを設定する。
最終的にこのサイズで印刷されるから整えておいたほうがいい。
POP作成時の設定は
【余白→ユーザー設定の余白→全て0】
【印刷の向き→横】
【サイズ→A3】
【印刷範囲→点線が表示された範囲】
これが無難。POP作成の時は全部これでいいと思うくらい。
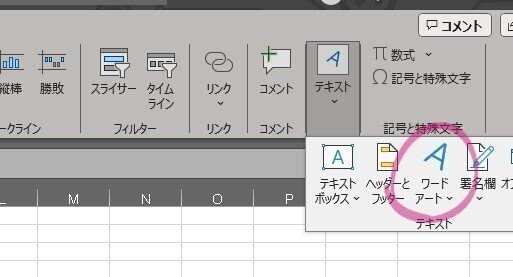
その②好きなワードアートを挿入

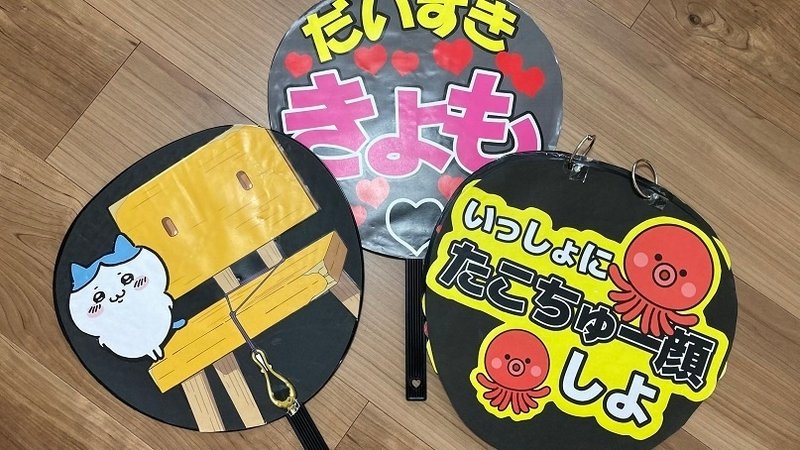
作ってみるとこんな感じ。
字体を変えたり、太字にしたり、文字間を調整したり、斜体にしたり、色を変えたり、重ねたり。
案外いろんなことができる。


その③好きなデータを挿入

文字だけでなく、もちろん写真やイラストも挿入できる。
うちの嫁はSixTONESの松村北斗が好きらしい。
と、言うことでそれ関連のデータをダウンロード。
うちわ用のガイドラインに沿って画像を挿入する。
※このガイドラインは印刷時はいらないので配置確認に使うだけだ。

その④ファイル形式PDFで出力
うちわのデザインが完成したら印刷もしくはエクスポートからA3でPDF出力ができる。
これで一つのデータとして様々なプリンターから印刷可能になる。

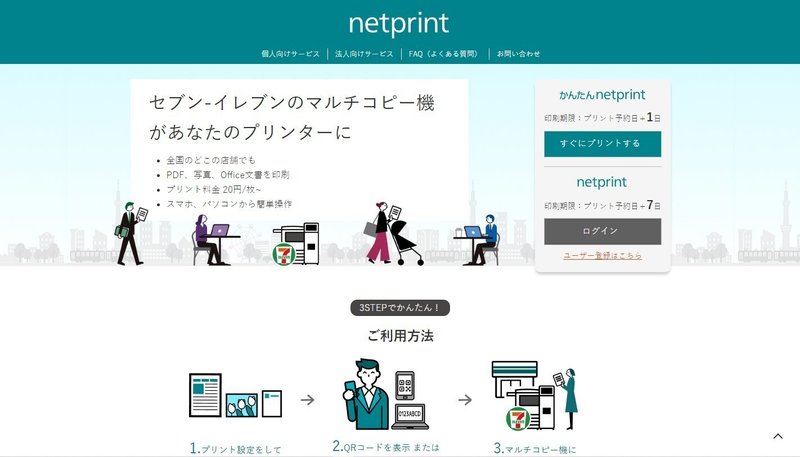
その⑤ネットプリントにデータ転送
画像を作ったらセブンイレブンのネットプリントにデータ転送すれば、プリンターを持ってなくてもなかなかきれいに印刷できる。
おそらくローソンやファミリーマートでも同じようにできるが、MAACoはセブンイレブンでしかやったことがないので参考まで。
その⑥印刷して貼り付け&カット
背景色に合わせてカットしてから貼ってもよし、貼ってしまってからうちわの縁に沿ってカットしてもよしだ。
PDFデータプレゼント
どうだっただろうか?
案外エクセルでもちゃんと作れるでしょう?
今回作った『だいすききょも』と、記事には載せてない『だいすき北斗』のPDFデータは一緒に貼っておくので欲しい方はご自由にどうぞ。
これらは編集不可能ですがネットプリントにてそのまま使えます。
編集可能なエクセルデータ版は有料エリアより販売しております。
Rethink MAACo
#コト #ハウツー #ジャニヲタ #スタヲタ #推し活 #うちわ #エクセル #EXCEL #プレゼント #×カケル #Rethink #MAACo
[The text below is an English translation generated by chatGPT.
I am not responsible for the accuracy of the information provided by this translation.]
[Blog] [How-To] Supporting Your Favorite with EXCEL
This article is set as paid content, but you can read it all for free. Some of the data used in this article is available for sale.
"Hey, you know, otaku aren't doing otaku hobbies to escape from their tough daily lives. They're working to earn money to play." - Otaku (19??-????)
Introduction:
MAACo's wife and daughter are Johnny's fans.
...Johnny's fans? Star fans? What should we call them now?
When it comes close to a concert, they often ask for fan creation.
You can create it with apps now, but personally, it's difficult to adjust the details on the smartphone app screen.
However, it's not worth installing specialized design tools, so I use Microsoft's EXCEL, which is installed by default on my PC.
With this method, as long as you have a PC with MS Office, many people can create fans without special skills or additional tools. It's not that difficult, so it's worth trying even for beginners.
There may be some differences depending on the specifications and versions of EXCEL, so please forgive me for that.
Process of Fan Creation:
Step 1: Set printing range to A3 size
First, set the size of the EXCEL background that will be the palette.
It's better to adjust it because it will be printed in this size in the end.
For setting when creating a POP:
[Margins → User-Defined Margins → All 0]
[Print Orientation → Landscape]
[Size → A3]
[Print Range → Area indicated by dotted lines]
This is safe. I think this is all you need when creating POP.
Step 2: Insert your favorite WordArt
It looks like this when you make it.
You can change the font, make it bold, adjust the spacing between characters, italicize, change colors, or overlay.
You can do surprisingly many things.
Step 3: Insert your favorite data
You can insert not only text but also photos and illustrations, of course.
My wife seems to like Matsumura Hokuto from SixTONES.
So, download data related to that.
Insert the image according to the guidelines for the fan.
This guideline is not necessary when printing, so use it only to check the arrangement.
Step 4: Output file in PDF format
Once the design of the fan is complete, you can print or export it as a PDF in A3 size.
This makes it possible to print from various printers as a single data.
Step 5: Transfer data to net print
Once you have created the image, transfer the data to Seven-Eleven's net print, and you can print it beautifully even if you don't have a printer.
You can probably do the same at Lawson or FamilyMart, but MAACo has only done it at Seven-Eleven, so I'll leave it as a reference.
Step 6: Print, paste & cut
It's okay to cut to match the background color, or cut along the edge of the fan after pasting.
PDF data giveaway
How was it?
You can actually make it properly with Excel, right?
I'll paste the PDF data of "Daisuki Kiyomo" and "Daisuki Hokuto," which I made this time and didn't put in the article, so feel free to use them.
This is not editable, but you can use it as it is in net print.
The editable Excel data version is available for purchase from the paid area.
Rethink MAACo
The data for "Daisuki Kiyomo" and "Daisuki Hokuto" used in this article will be sold as editable xlsx files from now on as paid content. If you find it troublesome to make from scratch, feel free to modify it for your own use as a template.
本記事にて使用されている『だいすききょも』と『だいすき北斗』のデータは編集可能なxlsxファイルとしてこれより先、有料コンテンツ内で販売しております。
ゼロから作るのがめんどうな方はテンプレートとして、ご自身用に修正してお使いください。
また、ご自身で作成は難しいという方向けに
うちわデータの作成も承ります
のでお気軽にお問い合わせください。
ここから先は
¥ 500
いつか誰かのためになる。 そんな好循環を夢見て活動しています。 お力添えをよろしくお願いしますm(_ _)m