
【Swift】【初心者用】TableViewのあれこれ

はいどうも!
フリーランスエンジニアの南だいすけです!
今日はSwiftのTableViewについてあれこれ書きたいと思います。
TableViewとは
こんなやつですね!
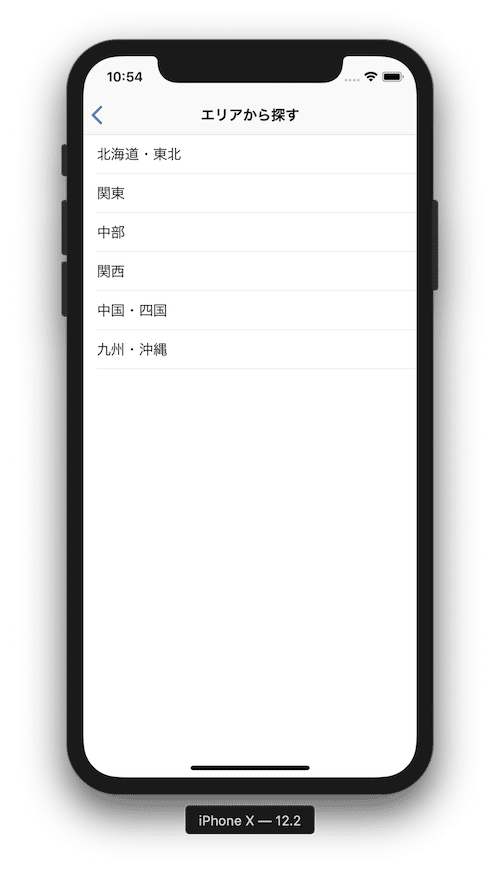
あなたが使っているアプリのどこかの画面には、
ほぼ必ず使われていると思います。
ちなみに
TableViewはこのように、
おおもとのTableViewの上に
上の画像でいう都道府県が書かれている
一つ一つの行(Cell)で構成されています。
Cellは主にsectionとrowがあって、
これはよく1年〜組みたいな例えをされます。
"sectionは1年、rowは1組"
みたいな感じですね。
要するに1年の中に1組2組3組があり、
2年にも1組2組3組。。。というイメージです!
またTableViewを使うには、
最低限cellの数とcell自身の定義をしてあげる必要があります。
TableView作ってみた
まず前提としてStoryBoardにTableViewをおき、
画面いっぱいに制約をつけておきましょう。
そしてそのTableViewをOutletで繋いでおきます。
import UIKit
class ViewController: UIViewController {
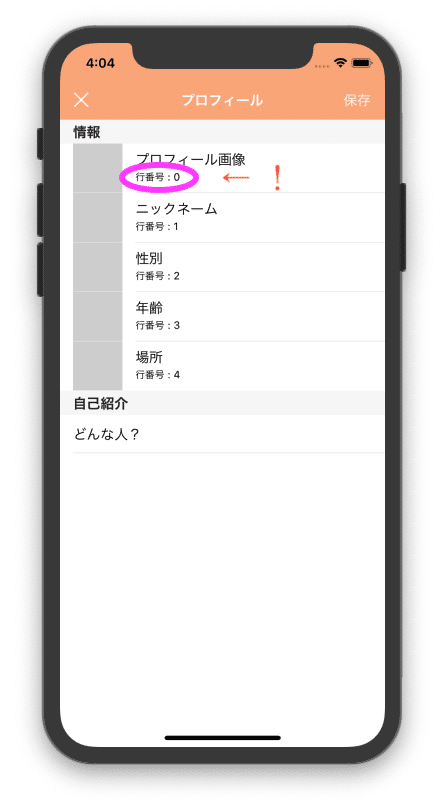
let aaa = ["プロフィール画像", "ニックネーム", "性別", "年齢", "場所"]
let bbb = ["どんな人?"]
let sectionTitle: NSArray = ["情報", "自己紹介"]
@IBOutlet weak var tableView: UITableView!
override func viewDidLoad() {
super.viewDidLoad()
tableView.delegate = self
tableView.dataSource = self
tableView.tableFooterView = UIView(frame: .zero)
}
}
extension ViewController: UITableViewDelegate, UITableViewDataSource {
// セクション数を指定
func numberOfSections(in tableView: UITableView) -> Int {
return sectionTitle.count
}
// セクションタイトルを指定
func tableView(_ tableView: UITableView, titleForHeaderInSection section: Int) -> String? {
return sectionTitle[section] as? String
}
// セル数を指定
// これはマスト!
func tableView(_ tableView: UITableView, numberOfRowsInSection section: Int) -> Int {
if section == 0 {
return aaa.count
}
else if section == 1 {
return bbb.count
}
else {
return 0
}
}
// 実際にCellを作る
// これはマスト!
func tableView(_ tableView: UITableView, cellForRowAt indexPath: IndexPath) -> UITableViewCell {
// let cell: UITableViewCell = tableView.dequeueReusableCell(withIdentifier: "cell", for: indexPath) //こっちは自分でcellをSBに作ってる書き方
let cell = UITableViewCell(style: UITableViewCell.CellStyle.subtitle, reuseIdentifier: "aaa\(indexPath.section)-\(indexPath.row)") //こっちはコードで生成している書き方(こっちだと画像の!が簡単に書けるcell.detailTextLabel)
if indexPath.section == 0 {
cell.textLabel?.text = String(describing: aaa[indexPath.row])
cell.detailTextLabel?.text = "行番号 : \(indexPath.row)"
cell.imageView?.image = UIImage(named: "gray")
cell.textLabel?.textColor = Color.Palette.bwDark80
cell.textLabel?.font = Font.bold18
}
else if indexPath.section == 1 {
cell.textLabel?.text = String(describing: bbb[indexPath.row])
cell.textLabel?.textColor = Color.Palette.bwDark80
cell.textLabel?.font = Font.bold18
}
return cell
}
// Cellがタップされた時の処理はここ
func tableView(_ tableView: UITableView, didSelectRowAt indexPath: IndexPath) {
print("\(indexPath.row)がtapされたよ")
}
}
}すると以下のような画面ができるかと思います。
TableViewのあれこれ
いらない分の線を消す
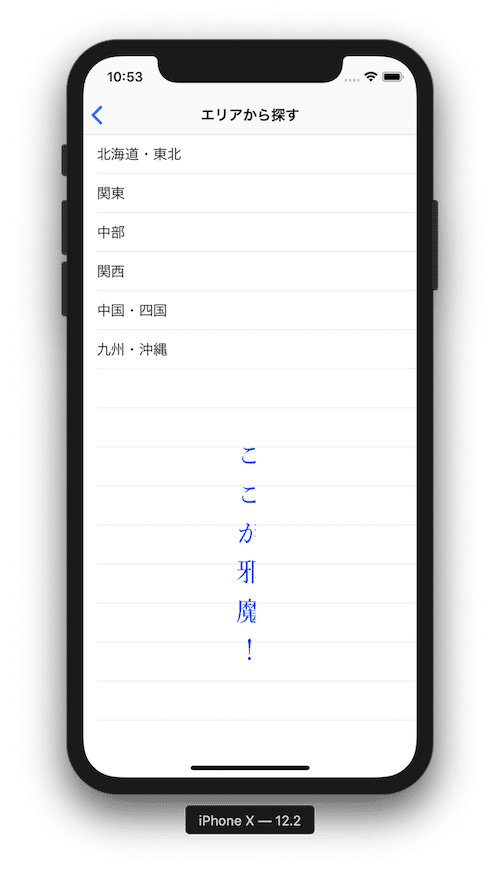
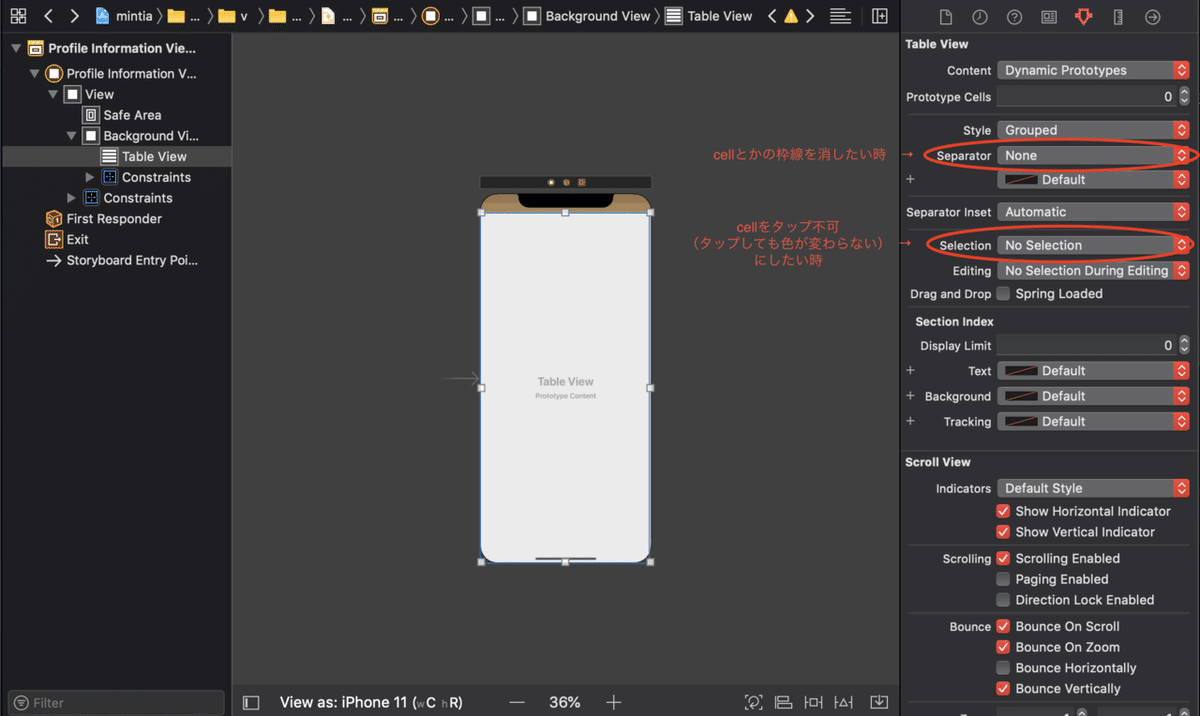
上画像のここが邪魔!の部分を消したい場合、
以下のコードをviewDidLoad内に追加します。
tableView.tableFooterView = UIView(frame: .zero)任意の下の線を消す
また任意のcellの下の線を消したい場合はこうします。
if indexPath.row == 0 {
       cell.separatorInset = UIEdgeInsets(top: 0, left: 0, bottom: 0, right: .greatestFiniteMagnitude)
   }
TableViewをスクロールした時の下のviewの色を変える
これは単純にbackgroundViewの色を変更してあげましょう。
TextViewをタップ不可にする
messageText.isEditable = falseタップしたcellの色を変えない
func tableView(_ tableView: UITableView, cellForRowAt indexPath: IndexPath) -> UITableViewCell {
の中で以下を記入
cell.selectionStyle = UITableViewCell.SelectionStyle.noneあとはfunc tableView(_ tableView: UITableView, didSelectRowAt indexPath: IndexPath) {
の中で以下の記入も忘れずにしましょう!
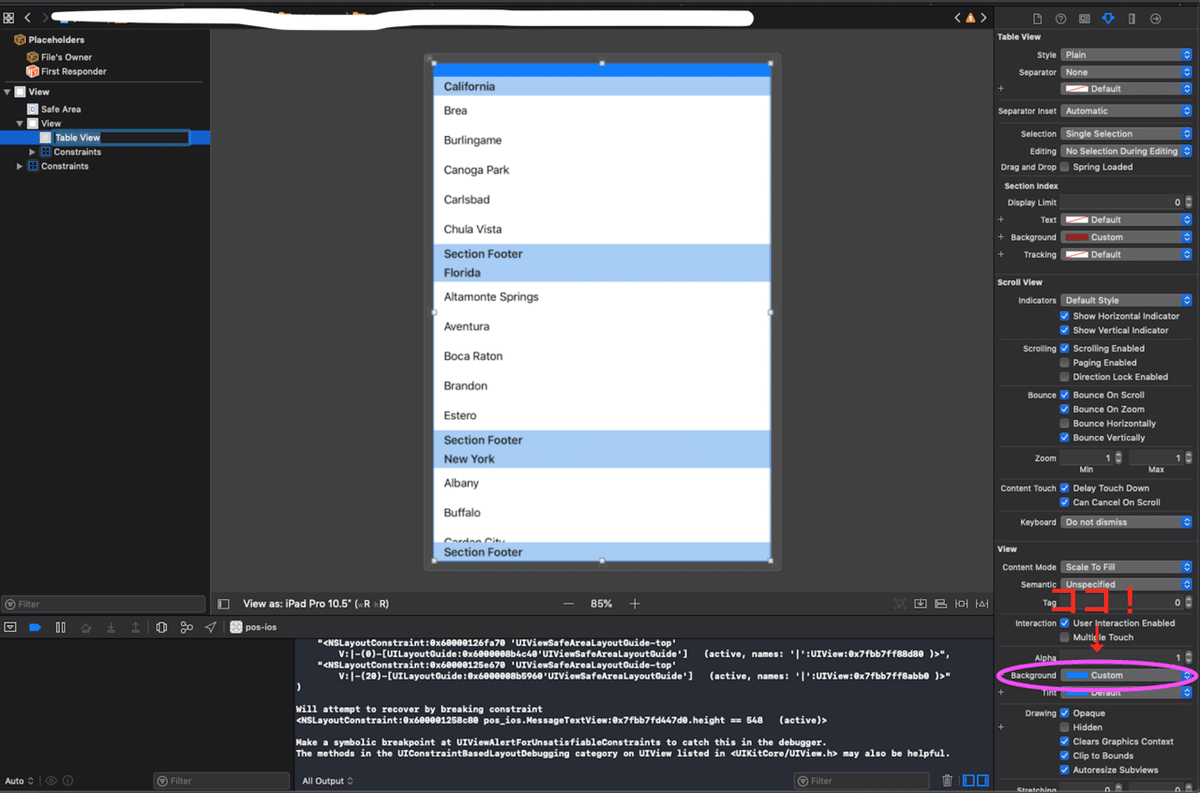
tableView.deselectRow(at: indexPath, animated: true)StoryBoardの設定ではこんな感じでしょうか?
TableViewをスライドし、sectionのみを一番上で残したい
StyleをPlainに変更する。
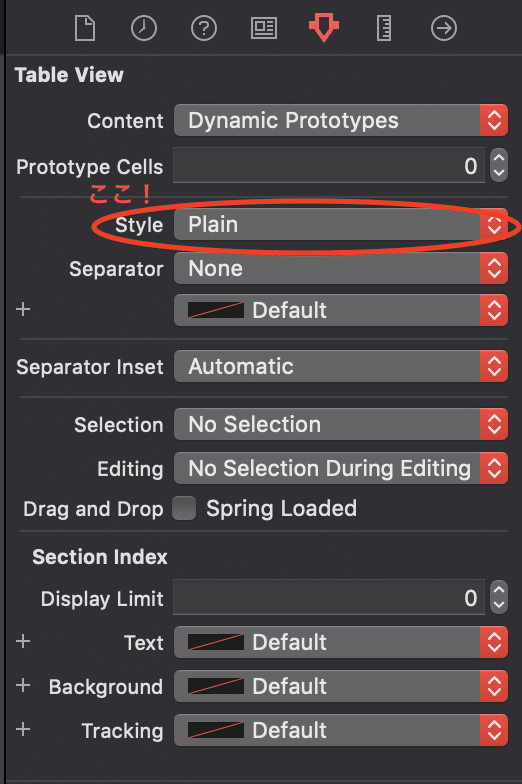
plain
こっちがデフォルト
スクロールしてもsectionが残る。
twitterのMyPageのツイートなどのBarMenuを残したい時のような画面を作りたい時に便利。
grouped
逆にsectionを流すことができる
っとまぁこんな感じです。
今回は長くなってしまいましたね。。!
TableViewはよく使われる分、
奥が深く使える機能もたくさんあるので、
いつかより実用的なサジェスト(検索履歴)
の作り方なども載せていきたいと思います!
さいごに
プログラミングって難しいですよね。。
僕も文系大学を出て、全くの未経験からスタートしたので
気持ちは痛いほどよくわかります。。!
少しずつ勉強していけば知識が蓄積され、
いつかはそれが線として繋がる日が絶対きます!!
一緒にがんばっていきましょう!
この記事で少しでも初心者の方が、
「お!そういうことか!」とか「ちょっとわかったぞ!!」
っとなっていただけたら幸いです。
最後まで見ていただきありがとうございました!
ではまた次の記事でお会いしましょう!
この記事が気に入ったらサポートをしてみませんか?