Postmaster Tools APIを利用して迷惑メール報告率を監視したい

こんにちは。エンジニアの矢田です。
先日Googleから新しくGmailの迷惑メールに関するガイドラインが発表されました。
クラシコムでも以前からメールがどうにかして迷惑メールにならないようお客様に届けられるよう対策を行ってきました。が、ガイドラインが変更になるとまた対策を取る必要があります。
その中でGoogleが提供しているツールで送信メールドメインのデータを取得できるPostmaster Toolsというものがあります。
Postmaster Tools でドメインの迷惑メール率を定期的に監視します。
迷惑メール率が 0.10% 未満に維持されることを目指します。
迷惑メール率が 0.30% 以上にならないようにします(特に、ある一定の期間にわたって)。
GoogleはPostmaster Toolsを定期的に監視して迷惑メール率を0.10%未満に保つことと0.30%以上にならないことを推奨しています。
一方で、Postmaster Toolsでは特に閾値を決めて連絡してくれるような機能がなく、毎日ツールにウェブ上でアクセスして見るしかありません。
それはちょっと現実的ではないですよね。
そこで、Postmaster Tools APIを利用して定期的に迷惑メール率を取得して監視することにしました。
仕組みとしては以下の図のようにAmazon EventBridge Schedulerで毎朝9時にLambdaを起動してそのLambdaでPostmaster Tools APIを叩き、返ってきた値をMackerelにポストするようにします。
Mackerelで監視ルールを作成することで、迷惑メール率が0.10%を超える日が続くと通知してくれるようにしました。

手順
上記の仕組みを実装するやり方を紹介したいと思います。
Postmaster ToolsとPostmaster ToolsAPIの有効化
まず、Postmaster Toolsを有効にします。
DKIMを登録して認証したら見れるようになります。
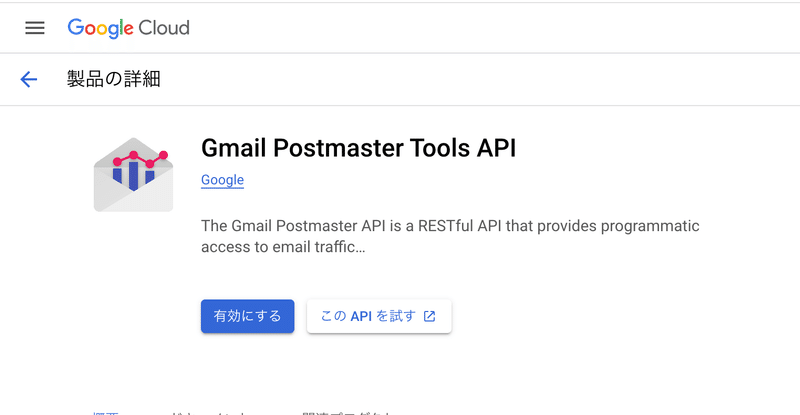
次にGoogle Cloud ConsoleからPostmaster Tools APIを有効にし、サービスアカウントを発行します。

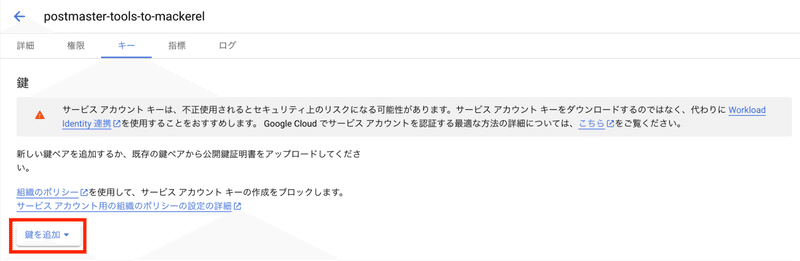
その作成したサービスアカウントの鍵を作成します。
Lambda関数の実装
次にAWSの方の設定をします。
サービスアカウントの鍵とMackerelにポストするためのAPIキーをSSMのパラメータストアに保存します。(Lambdaに生で置いておきたくないため)
実際の実装は以下のソースコードになります。今回はNode.jsで実装しました。
3日前のメトリックを取得しているのは、Schedulerを定期実行している朝9:00の段階でPostmaster Toolsに3日前までのデータしか反映されておらず、エラーが出てしまうためです。
またMackerelに送る際に3日前のエポック秒で送ると24時間以上前のメトリックはグラフに反映してくれないため、実行した日時で送るようにしています。実際には3日前のデータのためグラフを見る際に注意が必要です。
▽ index.mjs
'use strict';
import { SSMClient, GetParameterCommand } from "@aws-sdk/client-ssm";
import { google } from "googleapis";

async function getParameter(name) {
  const client = new SSMClient();
  const command = new GetParameterCommand({
    Name: name,
    WithDecryption: true,
  });
  const res = await client.send(command);
  return res.Parameter.Value;
}

export const handler = async () => {
  try {
    const date = new Date();
    date.setDate(date.getDate() - 3); // 3日前のメトリックを取得

    // Get Postmaster Tools data
    const credentials = JSON.parse((await getParameter("SSMに保存しているGoogleクレデンシャルのキー")).replace(/\n/g, "\\n")); // JSONに改行が含まれてエラーになるので置換

    const auth = new google.auth.GoogleAuth({
      credentials: { client_email: credentials.client_email, private_key: credentials.private_key },
      scopes: ['https://www.googleapis.com/auth/postmaster.readonly'],
    });
    const gmailpostmastertools = google.gmailpostmastertools({
      version: 'v1',
      auth,
    });
    const targetDateString = date.toISOString().split('T')[0].replaceAll('-', '');
    const res = await gmailpostmastertools.domains.trafficStats.get({ name: `domains/example.com/trafficStats/${targetDateString}` });
    console.log('--- Postmaster tools API request success ---');

    // Post to Mackerel
    const url = "https://mackerel.io/api/v0/services/example/tsdb";
    const headers = {
      "X-Api-Key": await getParameter("SSMに保存しているMackerel APIキーのキー"),
      "Content-Type": "application/json",
    };
    const time = Math.floor(new Date() / 1000); // Mackerelは24時間以上前のメトリックを更新してくれないので、現在時刻を指定する
    const body = [
      {
        "name": 'postmaster-tools.user-reported-spam-ratio',
        "time": time,
        "value": res.data.userReportedSpamRatio ?? 0.0,
      },
      {
        "name": 'postmaster-tools.spf-success-ratio',
        "time": time,
        "value": res.data.spfSuccessRatio ?? 0.0,
      },
      {
        "name": 'postmaster-tools.dkim-success-ratio',
        "time": time,
        "value": res.data.dkimSuccessRatio ?? 0.0,
      },
      {
        "name": 'postmaster-tools.dmarc-success-ratio',
        "time": time,
        "value": res.data.dmarcSuccessRatio ?? 0.0,
      },
    ];
    const mackerelResponse = await fetch(url, { method: 'POST', headers, body: JSON.stringify(body) });

    console.log('--- Mackerel metric post success ---');
    console.log(await mackerelResponse.json());
  } catch (e) {
    console.log('--- Lambda invoke failed ---');
    console.error(e);
    return 500;
  }
};
Google Postmaster Tools APIやMackerel APIの詳細は公式のドキュメントを参考にしてください。
Lambda関数用のIAM Role, Policyの設定
次にAWSのリソースの準備をします。
クラシコムではAWS周りの設定はTerraformで管理しているので、Terraformのソースコードを参考までに貼っておきます。
IAM RoleがLambdaの実行に必要なため作成します。Lambda内でSSMにアクセスするのでそのための権限をつけています。
▽ iam.tf
data "aws_iam_policy_document" "postmaster_tools_to_mackerel_assume_role_policy" {
  version = "2012-10-17"

  statement {
    sid    = ""
    effect = "Allow"
    actions = [
      "sts:AssumeRole"
    ]
    principals {
      type        = "Service"
      identifiers = ["lambda.amazonaws.com"]
    }
  }
}

resource "aws_iam_role" "postmaster_tools_to_mackerel" {
  name               = "postmaster-tools-to-mackerel"
  path               = "/"
  description        = ""
  assume_role_policy = data.aws_iam_policy_document.postmaster_tools_to_mackerel_assume_role_policy.json
}

resource "aws_iam_role_policy_attachment" "postmaster_tools_to_mackerel_execution" {
  role       = aws_iam_role.postmaster_tools_to_mackerel.name
  policy_arn = "arn:aws:iam::aws:policy/service-role/AWSLambdaBasicExecutionRole"
}

resource "aws_iam_role_policy_attachment" "postmaster_tools_to_mackerel_ssm_ro" {
  role       = aws_iam_role.postmaster_tools_to_mackerel.name
  policy_arn = "arn:aws:iam::aws:policy/AmazonSSMReadOnlyAccess"
}
この内容のLambdaをデプロイします。
クラシコムではlambrollを利用しデプロイを行っているため以下のようなfunction.jsonをおいています。
▽ function.json
{
  "Architectures": ["arm64"],
  "FunctionName": "postmaster-tools-to-mackerel",
  "Handler": "index.handler",
  "MemorySize": 128,
  "Role": "{{tfstate `aws_iam_role.postmaster_tools_to_mackerel.arn`}}",
  "Runtime": "nodejs18.x",
  "Timeout": 30
}
EventBridge Schedulerの作成
最後にLambdaをキックするためのEventBridge Schedulerを作成します。
▽ eventbridge.tf
resource "aws_scheduler_schedule" "postmaster_tools_to_mackerel" {
  name       = "postmaster-tools-to-mackerel"
  group_name = "default"

  flexible_time_window {
    mode = "OFF"
  }

  schedule_expression_timezone = "Asia/Tokyo"
  schedule_expression          = "cron(0 9 * * ? *)" // 毎日9:00 JSTに実行

  target {
    arn      = data.aws_lambda_function.postmaster_tools_to_mackerel.arn
    role_arn = aws_iam_role.postmaster_tools_to_mackerel_scheduler.arn

    retry_policy {
      maximum_retry_attempts = 3
    }
  }
}
SchedulerにアタッチするためのIAM Roleも必要です。Lambdaの関数をキックできる権限を与えています。
▽ iam.tf
resource "aws_iam_role" "postmaster_tools_to_mackerel_scheduler" {
  name               = "postmaster-tools-to-mackerel-scheduler-role"
  assume_role_policy = data.aws_iam_policy_document.postmaster_tools_to_mackerel_scheduler_assume_role.json
}

data "aws_iam_policy_document" "postmaster_tools_to_mackerel_scheduler_assume_role" {
  statement {
    actions = ["sts:AssumeRole"]

    principals {
      type        = "Service"
      identifiers = ["scheduler.amazonaws.com"]
    }
  }
}

resource "aws_iam_policy" "postmaster_tools_to_mackerel_scheduler" {
  name   = "postmaster-tools-to-mackerel-scheduler-policy"
  policy = data.aws_iam_policy_document.postmaster_tools_to_mackerel_scheduler_invoke_policy.json
}

data "aws_iam_policy_document" "postmaster_tools_to_mackerel_scheduler_invoke_policy" {
  statement {
    actions   = ["lambda:InvokeFunction"]
    resources = [data.aws_lambda_function.postmaster_tools_to_mackerel.arn]
  }
}

resource "aws_iam_role_policy_attachment" "postmaster_tools_to_mackerel_scheduler" {
  role       = aws_iam_role.postmaster_tools_to_mackerel_scheduler.name
  policy_arn = aws_iam_policy.postmaster_tools_to_mackerel_scheduler.arn
}
以上の内容をTerraform applyを実行し作成します。
まとめ
これで毎朝9:00にMackerelに迷惑メール率が送られるようになりました。
この後良い感じに監視を設定して完了です。
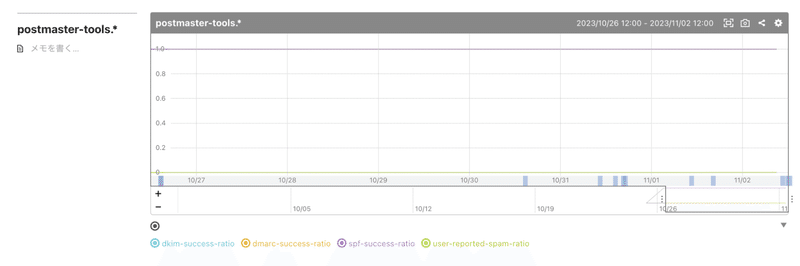
このようにして迷惑メール率の監視を作成しました。
今の所アラートは来ていないですがメトリックはきちんと送られているようです。知らせがないのは良い知らせですね。アラートが来ないことが一番ですが、もし来ても気付けるようになり早めの対応が取れるようになったのではないでしょうか。
今後もお客様に確実にメールが届けられるよう、必要な対策をしていければと思っています。
クラシコムでは安定したサービスを運営し、より事業を発展できるプラットフォームを開発できるようチームメンバーを募集しています。
もし興味がありましたらぜひカジュアル面談にてお話ししましょう!