
Pythonライブラリ 画質向上(超解像):Real-ESRGAN

1.緒言
低い画質の画像を高画質に変える技術である”超解像”技術のライブラリである"Real-ESRGAN"ライブラリを紹介します。
公式より、Real-ESRGANの使用方法は下記3つがあり、とにかく簡単に試したいならOnline inferenceが便利であり「https://arc.tencent.com/en/ai-demos/imgRestore」からWebアプリベースで実施できます。
【Real-ESRGANの使用方法】
Online inference:Webアプリで簡単に実行できる
Python script:今回の記事で作成した通りPythonで実行
2.環境構築
基本的な実装方法はGitHubの"Installation"を参照しました。
私のPC環境ではCUDAのメモリに乗らないためGoogle Colabを使用しており全コードは下記の通りです(コード詳細は次節参照)。
[IN]
!git clone https://github.com/xinntao/Real-ESRGAN.git
%cd Real-ESRGAN
!pip install basicsr
!pip install facexlib
!pip install gfpgan
!pip install -r requirements.txt
!python setup.py develop
!wget https://github.com/xinntao/Real-ESRGAN/releases/download/v0.1.0/RealESRGAN_x4plus.pth -P experiments/pretrained_models
#Google Driveのマウント
from google.colab import drive
drive.mount('/content/drive')
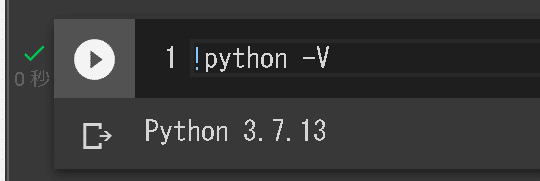
参考までにPython Versionは3.7か3.8が必須であり3.9以上ではエラーが出るらしいです。現状のGoogle ColabのVersionは下記の通りです。
2-1.Real-ESRGANファイルをDL
Gitコマンドを使用してGitHubからファイルをダウンロードします。完了すると"Real-ESRGAN"フォルダが作成されるためcdコマンドで作業ディレクトリを変更します。
[IN]
!git clone https://github.com/xinntao/Real-ESRGAN.git
%cd Real-ESRGAN
2-2.必要なライブラリのインストール/Setup
必要なライブラリのインストールおよび"setup.py"の実行でセットアップを実施します。
[IN]
!pip install basicsr
!pip install facexlib
!pip install gfpgan
!pip install -r requirements.txt
!python setup.py develop
2-3.学習済みモデルのDL:RealESRGAN_x4plus
下記コマンドを実行して学習済みモデルをダウンロードします。完了後に"experiments"フォルダが作成されその中に"RealESRGAN_x4plus.pth"という名前のファイル(学習済みモデル)を取得します。
[IN]
https://github.com/xinntao/Real-ESRGAN/releases/download/v0.1.0/RealESRGAN_x4plus.pth -P experiments/pretrained_models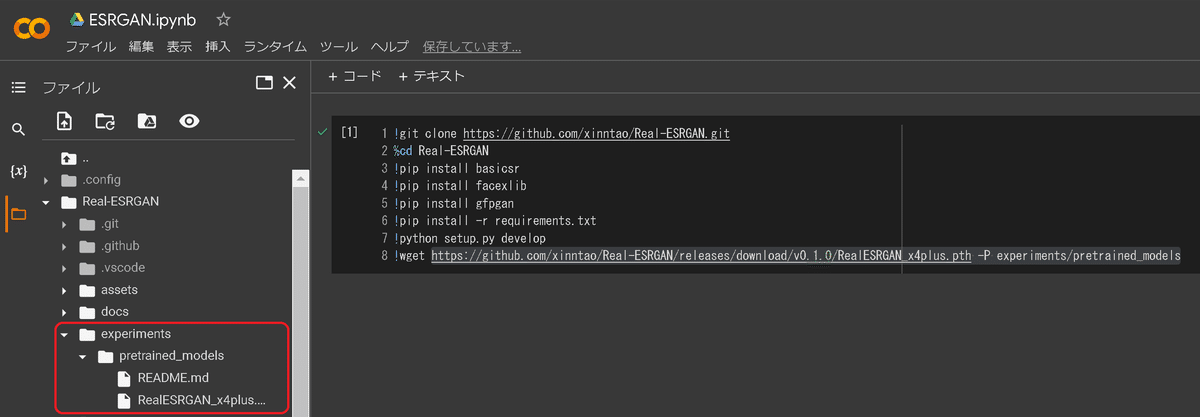
【参考:他のモデル】
他のモデルは下記から手動でダウンロードも可能です。
2-4.Google Driveのマウント(任意)
Google Driveから画像を処理させたい場合は下記コマンドでDriveをマウントさせてColab内からDriveにアクセスできるようにします。
[IN]
#Google Driveのマウント
from google.colab import drive
drive.mount('/content/drive')なお私は画像の入出力用にDrive内に"inputs"と"outpus"を作成してinputフォルダには処理したい画像を入れました。
[Path]
/content/drive/MyDrive/AI/ESRGAN/inputs
/content/drive/MyDrive/AI/ESRGAN/outputs
3.画像処理:初級編
超解像の使用方法は"inference_realesrgan.py"にオプションを渡して実行するだけです。
3-1.オプションの確認
オプションは"inference_realesrgan.py"内のmain()関数内に記載がありますが一部抜粋しました。
【inference_realesrgan.pyのオプション】
●-n{default:'RealESRGAN_x4plus'}:モデル名 (一覧はコードブロック参照)
●-i {default : 'inputs'}:処理したい画像の入力先(フォルダ)
●-o {default : 'results'}:画像の出力先(フォルダ)
●-s {default : 4}:upsample scale(多分拡大率)
●-t {default : 0}:tileの略であり "-t 256"のようにすると256×256の画像に分割して処理する(メモリ不足の時に使用)。0だとtile処理はしない。
●--suffix{default : 'out'}:出力する画像につける名前の後ろの文字
●-h:ヘルプ表示【出力は下記参照)
[IN]
!python inference_realesrgan.py -h

[OUT]
usage: inference_realesrgan.py [-h] [-i INPUT] [-n MODEL_NAME] [-o OUTPUT]
                               [-s OUTSCALE] [--suffix SUFFIX] [-t TILE]
                               [--tile_pad TILE_PAD] [--pre_pad PRE_PAD]
                               [--face_enhance] [--fp32]
                               [--alpha_upsampler ALPHA_UPSAMPLER] [--ext EXT]
                               [-g GPU_ID]

optional arguments:
  -h, --help            show this help message and exit
  -i INPUT, --input INPUT
                        Input image or folder
  -n MODEL_NAME, --model_name MODEL_NAME
                        Model names: RealESRGAN_x4plus | RealESRNet_x4plus |
                        RealESRGAN_x4plus_anime_6B | RealESRGAN_x2plus |
                        realesr-animevideov3
  -o OUTPUT, --output OUTPUT
                        Output folder
  -s OUTSCALE, --outscale OUTSCALE
                        The final upsampling scale of the image
  --suffix SUFFIX       Suffix of the restored image
  -t TILE, --tile TILE  Tile size, 0 for no tile during testing
  --tile_pad TILE_PAD   Tile padding
  --pre_pad PRE_PAD     Pre padding size at each border
  --face_enhance        Use GFPGAN to enhance face
  --fp32                Use fp32 precision during inference. Default: fp16
                        (half precision).
  --alpha_upsampler ALPHA_UPSAMPLER
                        The upsampler for the alpha channels. Options:
                        realesrgan | bicubic
  --ext EXT             Image extension. Options: auto | jpg | png, auto means
                        using the same extension as inputs
  -g GPU_ID, --gpu-id GPU_ID
                        gpu device to use (default=None) can be 0,1,2 for
                        multi-gpu
3-2.実演1:シンプルVer
使用方法はフォルダ(2章通りなら"Real-ESRGAN")内にある"inputs"フォルダに処理したい画像を入れて下記コマンドを実行します。成功すると"results"フォルダが作成されます。
デフォルトで複数の画像が既に入っているため自分用の画像がなくても問題ありません。
[IN]
!python inference_realesrgan.py -n RealESRGAN_x4plus -i inputs -o results

[OUT]
inputs内のファイルを処理した画像を含むresultsフォルダが作成される
※videoはフォルダのため処理されずエラーとなる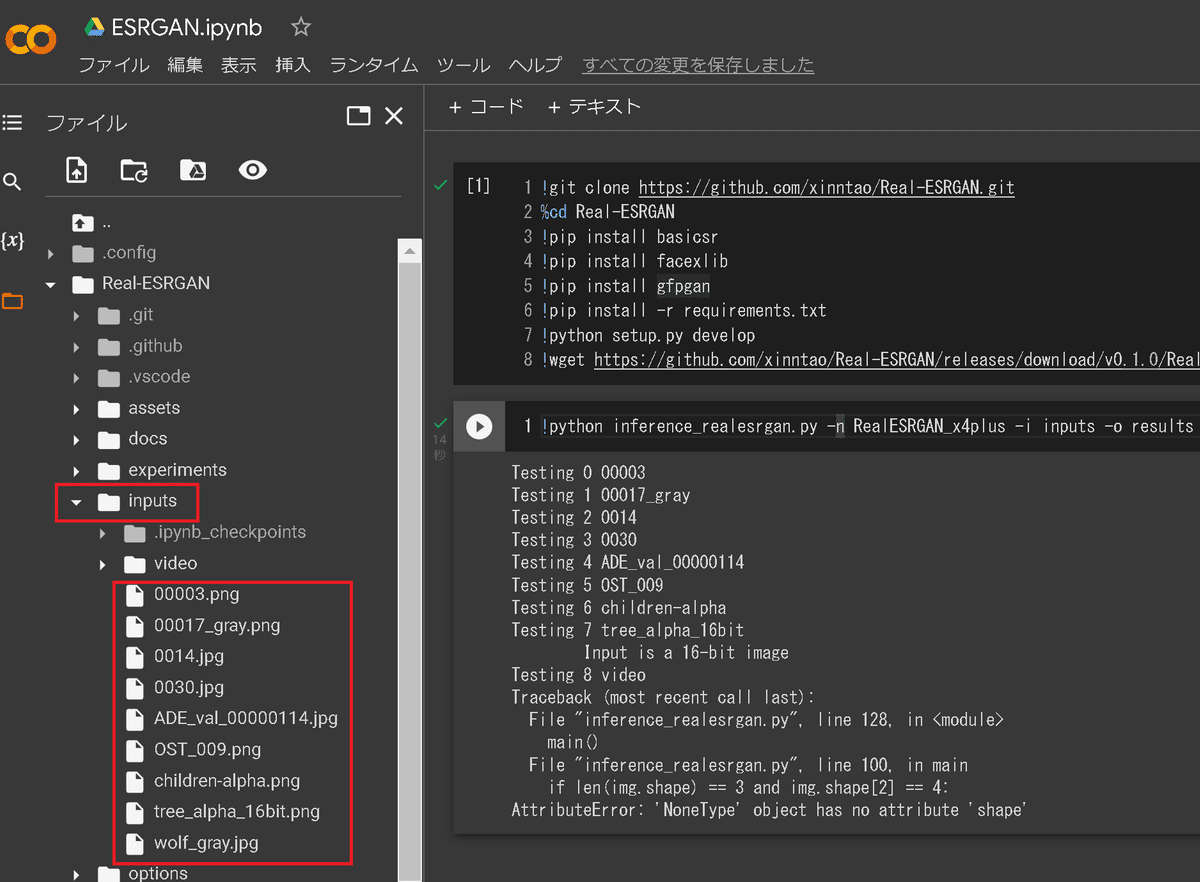
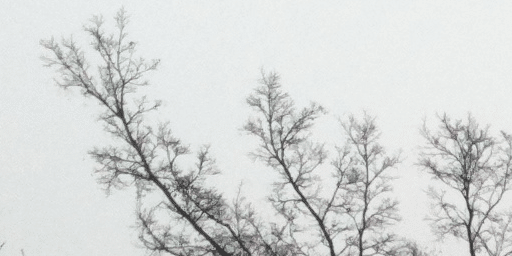
出力結果としていくつか見ていきましょう。上がオリジナル画像、下が加工画像です。確かに鮮明になっているように見えます。


3-3.実演2:Google Driveから処理
2-4節でDriveのマウント実行済みであれば"-i"と"-o"にそれぞれ指定のDriveパスを指定すれば同様のコマンドで実行できます。
[IN]
!python inference_realesrgan.py -n RealESRGAN_x4plus -i /content/drive/MyDrive/AI/ESRGAN/inputs  -o /content/drive/MyDrive/AI/ESRGAN/outputs
参考までに処理前後の画像のサイズを比較するコマンドは下記の通りです。upsampling scale=4(defalut)のため画像が4倍になっています。
[IN]
from PIL import Image
import glob
import os

path_in = '/content/drive/MyDrive/AI/ESRGAN/inputs'
path_out = '/content/drive/MyDrive/AI/ESRGAN/outputs'

def check_imgsize(path_in, path_out):
    imgs_in = sorted(glob.glob(path_in+'/*'))
    imgs_out = sorted(glob.glob(path_out+'/*'))
    for img_in, img_out in zip(imgs_in, imgs_out):
        name_in, name_out = os.path.basename(img_in), os.path.basename(img_out)
        size_in, size_out = Image.open(img_in).size,Image.open(img_out).size
        print(name_in, size_in, name_out, size_out)

check_imgsize(path_in, path_out)

[OUT]
Iverson.jpg (1366, 768) Iverson_out.jpg (5464, 3072)
a.jpg (319, 427) a_out.jpg (1276, 1708)
michael jordan.jpg (336, 188) michael jordan_out.jpg (1344, 752)
処理後の結果を見ると色の鮮明さは非常に明るくなっていますが人の顔を復元するのはそのままだと弱いです。
【画像処理前後の比較】


3-4.実演3(Option -s):解像度を増加
解像度を上げるには"-s"オプションを指定します。デフォルトは4ですが今回は8を指定してみました。
画像サイズは大きくなっておりますがこの画像では明確な差は分かりませんでした。
[IN]
!python inference_realesrgan.py -n RealESRGAN_x4plus -i /content/drive/MyDrive/AI/ESRGAN/inputs  -o /content/drive/MyDrive/AI/ESRGAN/outputs

[IN2]
check_imgsize(path_in, path_out)

[OUT2]
Iverson.jpg (1366, 768) Iverson_out.jpg (10928, 6144)
a.jpg (319, 427) a_out.jpg (2552, 3416)
michael jordan.jpg (336, 188) michael jordan_out.jpg (2688, 1504)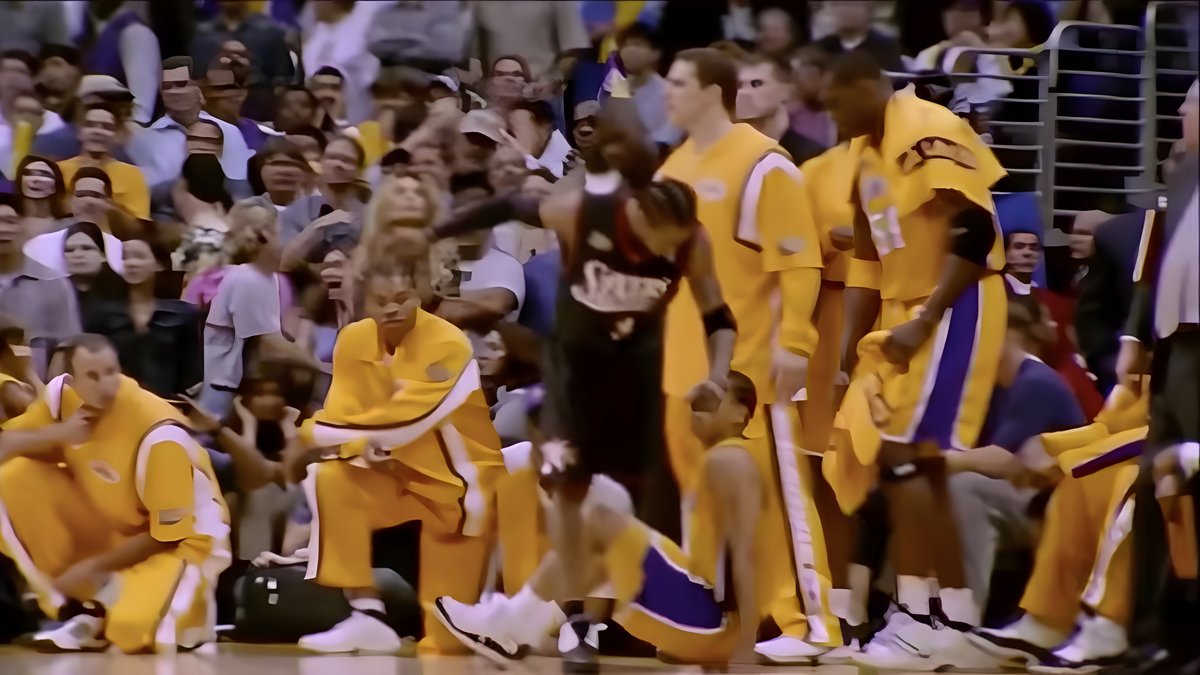


3-5.実演4(Option --face_enhance):顔を強調
オプションとして"--face_enhance" を渡すとGFPGANを使用して顔を鮮明にすることが出来ます。コードは下記の通りです。
実行すると下記の通り作者であるXinntao氏作成の顔認識モデル(FaceXLib)とGFPGANのモデルをダウンロードして処理します。
[IN]
!python inference_realesrgan.py -n RealESRGAN_x4plus -i /content/drive/MyDrive/AI/ESRGAN/inputs  -o /content/drive/MyDrive/AI/ESRGAN/outputs --face_enhance

[OUT]
/usr/local/lib/python3.7/dist-packages/torchvision/models/_utils.py:209: UserWarning: The parameter 'pretrained' is deprecated since 0.13 and will be removed in 0.15, please use 'weights' instead.
  f"The parameter '{pretrained_param}' is deprecated since 0.13 and will be removed in 0.15, "
/usr/local/lib/python3.7/dist-packages/torchvision/models/_utils.py:223: UserWarning: Arguments other than a weight enum or `None` for 'weights' are deprecated since 0.13 and will be removed in 0.15. The current behavior is equivalent to passing `weights=None`.
  warnings.warn(msg)
Downloading: "https://github.com/xinntao/facexlib/releases/download/v0.1.0/detection_Resnet50_Final.pth" to /content/Real-ESRGAN/gfpgan/weights/detection_Resnet50_Final.pth

100% 104M/104M [00:00<00:00, 311MB/s]
Downloading: "https://github.com/xinntao/facexlib/releases/download/v0.2.2/parsing_parsenet.pth" to /content/Real-ESRGAN/gfpgan/weights/parsing_parsenet.pth

100% 81.4M/81.4M [00:00<00:00, 276MB/s]
Downloading: "https://github.com/TencentARC/GFPGAN/releases/download/v1.3.0/GFPGANv1.3.pth" to /usr/local/lib/python3.7/dist-packages/gfpgan/weights/GFPGANv1.3.pth

100% 332M/332M [01:22<00:00, 4.25MB/s]
Testing 0 Iverson
Testing 1 a
Testing 2 michael jordan
本当にあってるかわかりませんが顔がそれっぽく認識されていることが確認できます。


4.画像処理:中級編
特に難しいことはありませんが前章とは異なる処理を追加します。
4-1.別モデル1:RealESRGAN_x4plus_anime_6B
アニメ画像に強い学習モデルとして"RealESRGAN_x4plus_anime_6B"を使用してみます(下図は公式サンプル)。
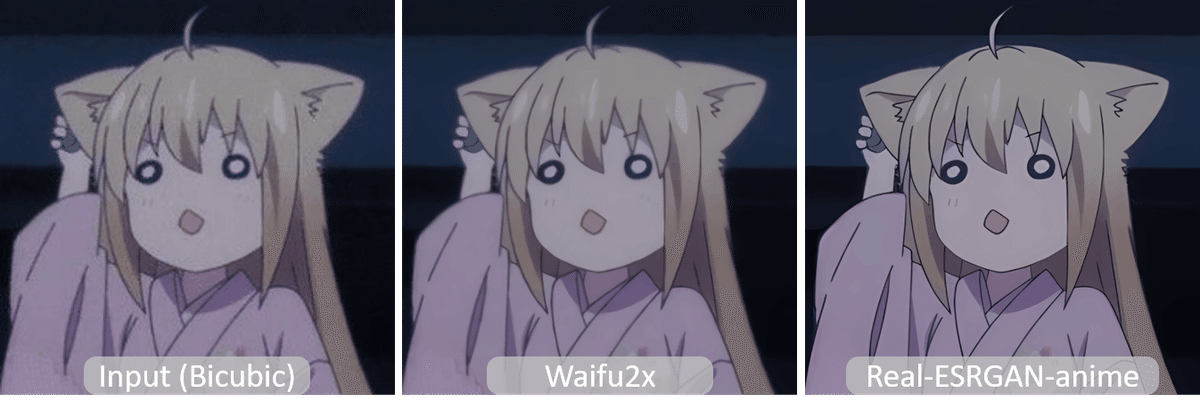
使用方法は①学習モデルのDL、②option -nに学習モデルを指定します。
[IN]
# download model
!wget https://github.com/xinntao/Real-ESRGAN/releases/download/v0.2.2.4/RealESRGAN_x4plus_anime_6B.pth -P experiments/pretrained_models
# inference
!python inference_realesrgan.py -n RealESRGAN_x4plus_anime_6B -i /content/drive/MyDrive/AI/ESRGAN/inputs -o /content/drive/MyDrive/AI/ESRGAN/outputs
[OUT]
--2022-09-05 14:39:31-- https://github.com/xinntao/Real-ESRGAN/releases/download/v0.2.2.4/RealESRGAN_x4plus_anime_6B.pth
Resolving github.com (github.com)... 20.205.243.166
Connecting to github.com (github.com)|20.205.243.166|:443... connected.
HTTP request sent, awaiting response... 302 Found
Location: https://objects.githubusercontent.com/github-production-release-asset-2e65be/387326890/4f59d7c8-d03f-494e-8595-ae23af075393?X-Amz-Algorithm=AWS4-HMAC-SHA256&X-Amz-Credential=AKIAIWNJYAX4CSVEH53A%2F20220905%2Fus-east-1%2Fs3%2Faws4_request&X-Amz-Date=20220905T143918Z&X-Amz-Expires=300&X-Amz-Signature=e9d144604afc3d69f056cc3dd36e5640379109336ac1cd5bbd634610e71df822&X-Amz-SignedHeaders=host&actor_id=0&key_id=0&repo_id=387326890&response-content-disposition=attachment%3B%20filename%3DRealESRGAN_x4plus_anime_6B.pth&response-content-type=application%2Foctet-stream [following]
--2022-09-05 14:39:31-- https://objects.githubusercontent.com/github-production-release-asset-2e65be/387326890/4f59d7c8-d03f-494e-8595-ae23af075393?X-Amz-Algorithm=AWS4-HMAC-SHA256&X-Amz-Credential=AKIAIWNJYAX4CSVEH53A%2F20220905%2Fus-east-1%2Fs3%2Faws4_request&X-Amz-Date=20220905T143918Z&X-Amz-Expires=300&X-Amz-Signature=e9d144604afc3d69f056cc3dd36e5640379109336ac1cd5bbd634610e71df822&X-Amz-SignedHeaders=host&actor_id=0&key_id=0&repo_id=387326890&response-content-disposition=attachment%3B%20filename%3DRealESRGAN_x4plus_anime_6B.pth&response-content-type=application%2Foctet-stream
Resolving objects.githubusercontent.com (objects.githubusercontent.com)... 185.199.108.133, 185.199.109.133, 185.199.110.133, ...
Connecting to objects.githubusercontent.com (objects.githubusercontent.com)|185.199.108.133|:443... connected.
HTTP request sent, awaiting response... 200 OK
Length: 17938799 (17M) [application/octet-stream]
Saving to: ‘experiments/pretrained_models/RealESRGAN_x4plus_anime_6B.pth’
RealESRGAN_x4plus_a 100%[===================>] 17.11M --.-KB/s in 0.06s
2022-09-05 14:39:32 (293 MB/s) - ‘experiments/pretrained_models/RealESRGAN_x4plus_anime_6B.pth’ saved [17938799/17938799]
Testing 0 Iverson
Testing 1 a
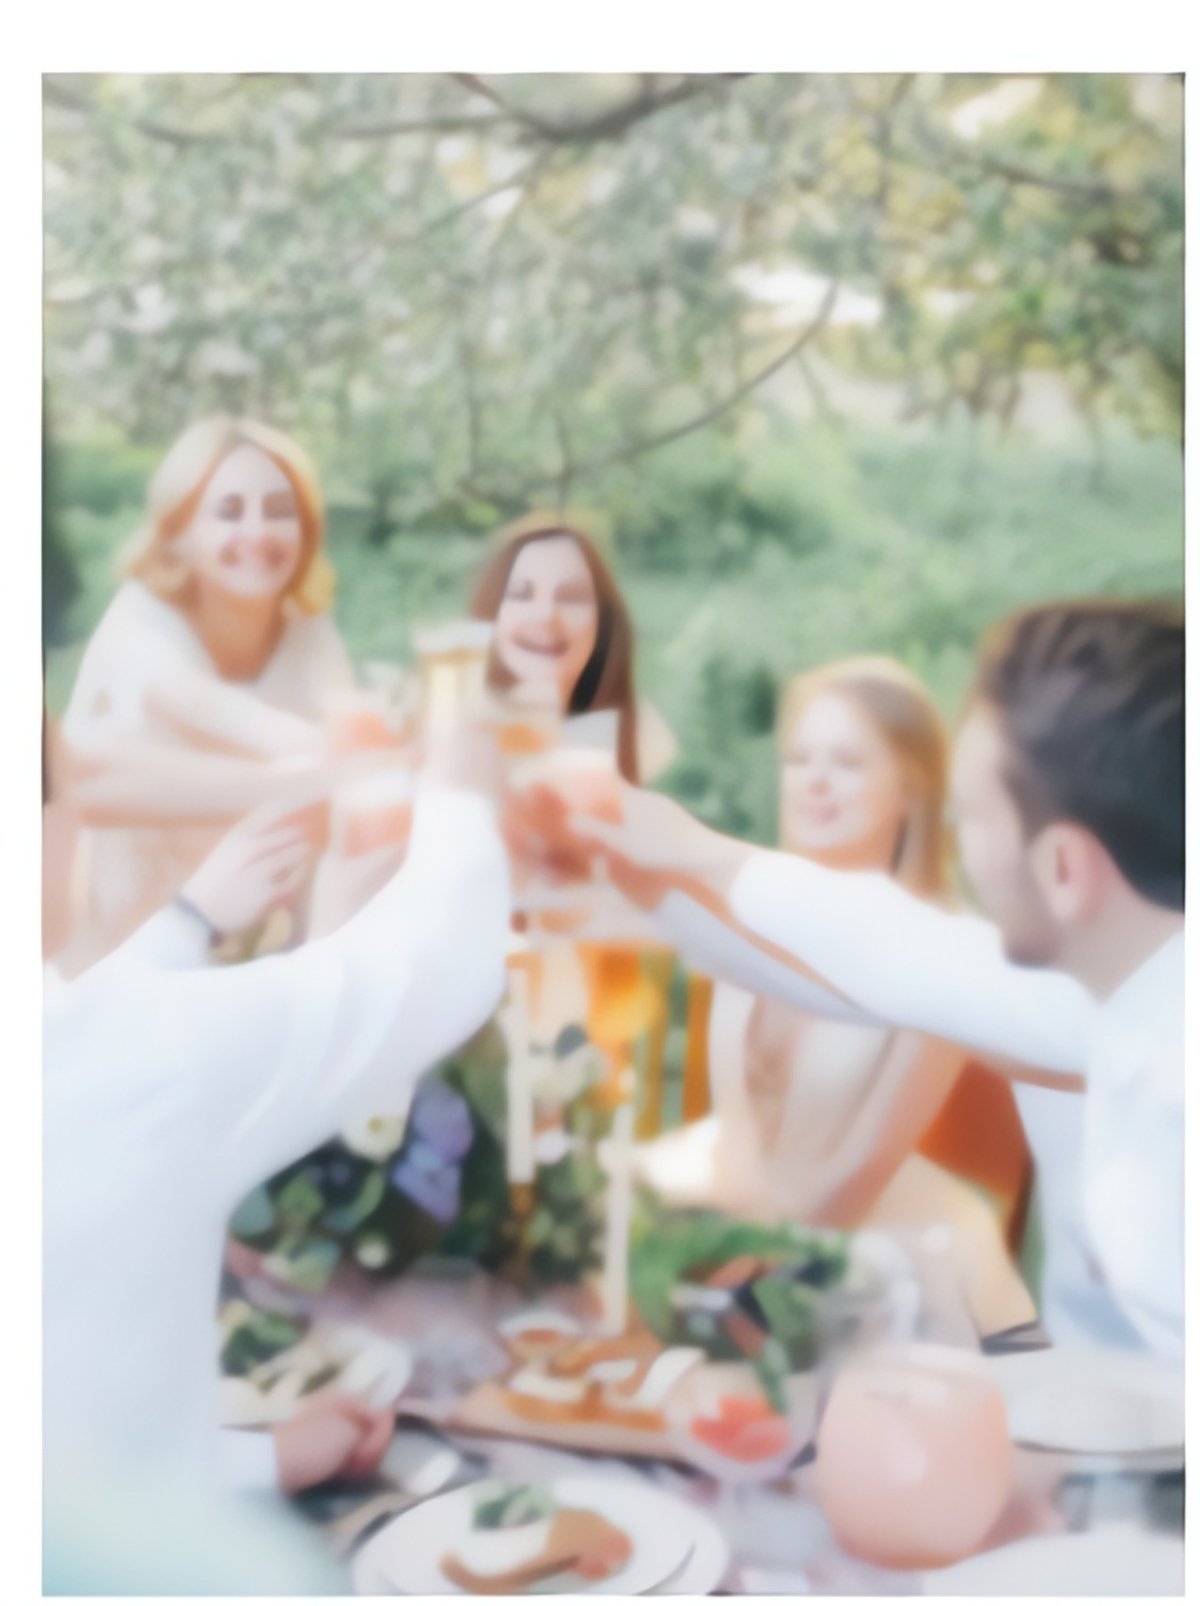
Testing 2 michael jordan今回の結果では特に集合写真で大きな変化があり、前回のような粒だったピクセルが確認できないですがペタッとしたアニメ風基調に変わってます。


4-2.別モデル2:realesr-animevideov3
こちらは次章の動画処理で使用されるモデルですが画像に適用しました。こちらは前モデルよりはアニメっぽくはないですね。


5.動画処理
次に動画処理を実施します。動画を処理する場合は事前に"ffmpeg"ライブラリをインストールします。なお手順は公式Docsを参照しました。
[Terminal]
!pip install ffmpeg
5-1.処理方法/オプションの確認
基本的には画像処理と変わりませんが下記が異なります。
動画の場合はパスではなくファイルを指定して1個だけ処理させる。
推論時のGPU数とプロセス数を指定する必要がある(下記参照)
[Sample Code]
# single gpu and single process inference
CUDA_VISIBLE_DEVICES=0 python inference_realesrgan_video.py -i inputs/video/onepiece_demo.mp4 -n realesr-animevideov3 -s 2 --suffix outx2

# single gpu and multi process inference (you can use multi-processing to improve GPU utilization)
CUDA_VISIBLE_DEVICES=0 python inference_realesrgan_video.py -i inputs/video/onepiece_demo.mp4 -n realesr-animevideov3 -s 2 --suffix outx2 --num_process_per_gpu 2

# multi gpu and multi process inference
CUDA_VISIBLE_DEVICES=0,1,2,3 python inference_realesrgan_video.py -i inputs/video/onepiece_demo.mp4 -n realesr-animevideov3 -s 2 --suffix outx2 --num_process_per_gpu 2
【オプション】
●--num_process_per_gpu:The total number of process is num_gpu * num_process_per_gpu. The bottleneck of the program lies on the IO, so the GPUs are usually not fully utilized. To alleviate this issue, you can use multi-processing by setting this parameter. As long as it does not exceed the CUDA memory
●--extract_frame_first:If you encounter ffmpeg error when using multi-processing, you can turn this option on.
5-2.実演1:シンプルVer.
Google ColabではシングルGPU、シングルプロセスを指定して処理させることでエラーなく実行できました。
サンプルはinputsフォルダにある"onepiece_demo.mp4"を使用しました。
[IN]
!CUDA_VISIBLE_DEVICES=0 python inference_realesrgan_video.py -i inputs/video/onepiece_demo.mp4 -n realesr-animevideov3 -s 2 --suffix outx2
【処理前:動画サイズ579kB】

【処理後:動画サイズ1080K】

別サンプルとして「ビジ動サンプル動画」の動画も使用してみました(コードは-iオプションの指定パス変更のみ)。
【処理前:動画サイズ743kB】

【処理後:動画サイズ6518K】

6.Fine Tuning(自前データセットで学習)
追って
参考資料
参考資料1:実装
参考資料2:技術
参考資料3:その他
あとがき
昔の写真を綺麗に見たいという需要もあるけど個人的には昔(昭和)のテレビを高画質で見てみたい!
TecoGANもやりたかったけど実装が地獄だったので似たような結果になるならあきらめよう・・・・後そろそろしっかり論文を読めるようにならないと発展が弱い・・・・
この記事が気に入ったらサポートをしてみませんか?