
【テスト駆動開発】Springboot & React - 第3回 : ログイン機能

1. はじめに
こんにちは、今日はログイン機能を実装してみます!バックエンドではSpring Securityを、フロントエンドではPendingApiCallとSpinnerを活用してみます。

スピナーが回って待機させます。
しかし、重要なのはpendingApiCallは非同期処理のためのものなので、ボタン以外の操作はできないようにする必要があります。
2. ログインとSpringSecurity
Spring Securityは、Javaベースのアプリケーションにセキュリティ機能を提供するSpringプロジェクトの一部です。Spring Securityを使用すると、アプリケーションのセキュリティを強化し、認証、認可、ユーザーセッション管理、CSRF(Cross-Site Request Forgery)対策などのセキュリティ関連の機能を簡単に実装できます。
認証(Authentication): ユーザーを認識するためのプロセス。Spring Securityは、ユーザーの認証を簡単にカスタマイズでき、データベース、LDAP、OAuth、ユーザー名とパスワード、または他の方法を使用して認証を処理できます。
認可(Authorization): 認証されたユーザーがどのリソースや操作にアクセスできるかを制御するプロセス。Spring Securityでは、ロールベースのアクセス制御やメソッドレベルのセキュリティなどがサポートされます。
フィルターチェーン(Filter Chain): Spring Securityは、リクエストとレスポンスをフィルターチェーンを介して処理し、セキュリティ機能を適用します。これにより、セキュリティルールを柔軟に定義できます。
セッション管理(Session Management): ユーザーセッションの作成、管理、無効化などのタスクを簡単に処理できます。
CSRF対策: Spring Securityは、CSRF(Cross-Site Request Forgery)からアプリケーションを保護するための機能も提供します。
3.バックエンド実装過程
3.1. ログイン
/configuration/SecurityConfiguration.java
@EnableWebSecurity
public class SecurityConfiguration extends WebSecurityConfigurerAdapter{

	@Override
	protected void configure(HttpSecurity http) throws Exception {
		http.csrf().disable();

		http.httpBasic();

		http
			.authorizeRequests().antMatchers(HttpMethod.POST, "/api/1.0/login").authenticated()
			.and()
			.authorizeRequests().anyRequest().permitAll();
	}

}
Spring Securityを使用してWebセキュリティの設定を構成するJavaのクラスを示しています。
@EnableWebSecurity: このアノテーションは、Webセキュリティを有効にするためにクラスに付けられています。
configure(HttpSecurity http): WebSecurityConfigurerAdapterを継承したクラスのメソッドで、セキュリティ設定を構成します。
http.csrf().disable():CSRF(クロスサイトリクエストフォージェリ)保護を無効にします。
http.authorizeRequests():リクエストの認証とアクセス権を構成します。
.antMatchers(HttpMethod.POST, "/api/1.0/login").authenticated():POSTリクエストを使用して/api/1.0/loginエンドポイントにアクセスする場合、認証が必要であることを設定します。
/LoginControllerTest.java
@RunWith(SpringRunner.class)
@SpringBootTest(webEnvironment = WebEnvironment.RANDOM_PORT)
@ActiveProfiles("test")
public class LoginControllerTest {

	private static final String API_1_0_LOGIN = "/api/1.0/login";

	@Autowired
	TestRestTemplate testRestTemplate;

	@Test
	public void postLogin_withoutUserCredentials_receiveUnauthorized() {
		ResponseEntity<Object> response = login(Object.class);
		assertThat(response.getStatusCode()).isEqualTo(HttpStatus.UNAUTHORIZED);
	}

	@Test
	public void postLogin_withIncorrectCredentials_receiveUnauthorized() {
		authenticate();
		ResponseEntity<Object> response = login(Object.class);
		assertThat(response.getStatusCode()).isEqualTo(HttpStatus.UNAUTHORIZED);
	}

	private void authenticate() {
		testRestTemplate.getRestTemplate()
			.getInterceptors().add(new BasicAuthenticationInterceptor("test-user", "P4ssword"));
	}

	public <T> ResponseEntity<T> login(Class<T> responseType){
		return testRestTemplate.postForEntity(API_1_0_LOGIN, null, responseType);
	}

}
postLogin_withoutUserCredentials_receiveUnauthorized(): ユーザーの認証情報なしで/api/1.0/loginエンドポイントにPOSTリクエストを送信し、HTTPステータスコードがUNAUTHORIZED(401)であることを検証するテストメソッドです。
postLogin_withIncorrectCredentials_receiveUnauthorized(): 不正確な認証情報で認証し、/api/1.0/loginエンドポイントにPOSTリクエストを送信し、HTTPステータスコードがUNAUTHORIZED(401)であることを検証するテストメソッドです。
/user/LoginController.java
@RestController
public class LoginController {

	@PostMapping("/api/1.0/login")
	void handleLogin() {

	}

}
3.2. ログインエラー
/LoginControllerTest.java
  @Test
	public void postLogin_withoutUserCredentials_receiveApiError() {
		ResponseEntity<ApiError> response = login(ApiError.class);
		assertThat(response.getBody().getUrl()).isEqualTo(API_1_0_LOGIN);
	}

	@Test
	public void postLogin_withoutUserCredentials_receiveApiErrorWithoutValidationErrors() {
		ResponseEntity<String> response = login(String.class);
		assertThat(response.getBody().contains("validationErrors")).isFalse();
	}

	@Test
	public void postLogin_withIncorrectCredentials_receiveUnauthorizedWithoutWWWAuthenticationHeader() {
		authenticate();
		ResponseEntity<Object> response = login(Object.class);
		assertThat(response.getHeaders().containsKey("WWW-Authenticate")).isFalse();
	}
postLogin_withoutUserCredentials_receiveApiError(): ユーザーの認証情報なしでログインを試み、ApiErrorオブジェクトのResponseEntityを受け取ります。
postLogin_withoutUserCredentials_receiveApiErrorWithoutValidationErrors(): ユーザーの認証情報なしでログインを試み、StringオブジェクトのResponseEntityを受け取ります。
postLogin_withIncorrectCredentials_receiveUnauthorizedWithoutWWWAuthenticationHeader(): 認証情報を不正確にした状態でログインし、ObjectオブジェクトのResponseEntityを受け取ります。その後、HTTPヘッダー内に"WWW-Authenticate"が含まれていないことを検証します。
/error/ErrorHandler.java
@RestController
public class ErrorHandler implements ErrorController {

	@Autowired
	private ErrorAttributes errorAttributes;

	@RequestMapping("/error")
	ApiError handleError(WebRequest webRequest) {
		Map<String, Object> attributes = errorAttributes.getErrorAttributes(webRequest, true);

		String message = (String) attributes.get("message");
		String url = (String) attributes.get("path");
		int status = (Integer) attributes.get("status");
		return new ApiError(status, message, url);
	}

	@Override
	public String getErrorPath() {
		return "/error";
	}

}
ApiError handleError(WebRequest webRequest): このメソッドはウェブリクエスト(WebRequest)からエラー情報を取得してApiErrorオブジェクトを生成して返します。ErrorAttributesを使ってエラー関連の属性を取得してこれをApiErrorオブジェクトに変換します。このApiErrorオブジェクトはエラー応答をクライアントに返すために使われます。
/configuration/SecurityConfiguration.java
	@Override
	protected void configure(HttpSecurity http) throws Exception {
		http.csrf().disable();

		http.httpBasic().authenticationEntryPoint(new BasicAuthenticationEntryPoint());

		http
			.authorizeRequests().antMatchers(HttpMethod.POST, "/api/1.0/login").authenticated()
/configuration/BasicAuthenticationEntryPoint.java
public class BasicAuthenticationEntryPoint implements AuthenticationEntryPoint{

	@Override
	public void commence(HttpServletRequest request, HttpServletResponse response,
			AuthenticationException authException) throws IOException, ServletException {

		response.sendError(HttpStatus.UNAUTHORIZED.value(), HttpStatus.UNAUTHORIZED.getReasonPhrase());

	}

}
BasicAuthenticationEntryPointクラスは認証されていないリクエストに対する応答を処理します。
/error/ApiError.java
@Data
@NoArgsConstructor
@JsonInclude(value = Include.NON_NULL)
public class ApiError {

	private long timestamp = new Date().getTime();
@JsonInclude(value = Include.NON_NULL)
JsonIncludeアノテーションは、Jacksonライブラリを使用してJavaオブジェクトをJSONにシリアル化する際に、どのフィールドをどの条件で含めるか除外するかを制御するために使用されます。主にJacksonを使用してJavaオブジェクトをJSONに変換するときに使用されます。
3.3 認証(Authentication)
/LoginControllerTest.java
	@Autowired
	UserRepository userRepository;

	@Autowired
	UserService userService;

	@Before
	public void cleanup() {
		userRepository.deleteAll();
		testRestTemplate.getRestTemplate().getInterceptors().clear();
	}
...
	@Test
	public void postLogin_withValidCredentials_receiveOk() {
		userService.save(TestUtil.createValidUser());
		authenticate();
		ResponseEntity<Object> response = login(Object.class);
		assertThat(response.getStatusCode()).isEqualTo(HttpStatus.OK);
	}
postLogin_withValidCredentials_receiveOk テストメソッド: このテストは、有効な認証情報を使用してログインを試み、HTTPステータスコードがOK (200)であることを確認します。
/TestUtil.java
public class TestUtil {

	public static User createValidUser() {
		User user = new User();
		user.setUsername("test-user");
		user.setDisplayName("test-display");
		user.setPassword("P4ssword");
		return user;
	}
}
/UserRepositoryTest.java
	@Test
	public void findByUsername_whenUserExists_returnsUser() {
		testEntityManager.persist(TestUtil.createValidUser());

		User inDB = userRepository.findByUsername("test-user");
		assertThat(inDB).isNotNull();

	}

	@Test
	public void findByUsername_whenUserDoesNotExist_returnsNull() {
		User inDB = userRepository.findByUsername("nonexistinguser");
		assertThat(inDB).isNull();
	}
}
UserRepositoryTest.java ファイルは、findByUsername メソッドをテストし、ユーザーが存在する場合はそのユーザーを返し、存在しない場合は null を返すことを確認します。
/user/User.java
public class User implements UserDetails{

	/**
	 *
	 */
	private static final long serialVersionUID = 4074374728582967483L;
...
	@Override
	@Transient
	public Collection<? extends GrantedAuthority> getAuthorities() {
		return AuthorityUtils.createAuthorityList("Role_USER");
	}

	@Override
	@Transient
	public boolean isAccountNonExpired() {
		return true;
	}

	@Override
	@Transient
	public boolean isAccountNonLocked() {
		return true;
	}

	@Override
	@Transient
	public boolean isCredentialsNonExpired() {
		return true;
	}

	@Override
	@Transient
	public boolean isEnabled() {
		return true;
	}
User クラスは、Spring Securityの UserDetails インターフェースを実装しており、ユーザーの認証情報と権限情報を提供します。
@Transientを使うと、データベーススキーマに該当フィールドをマッピングしないので、データベーステーブルに影響を与えることなく、エンティティクラスの追加情報やメソッドを管理することができます。
getAuthorities(): このメソッドは、ユーザーの権限のリストを返します。通常、ユーザーの役割(Roles)を表す権限のリストを返し、このメソッドでは "Role_USER" という権限を1つ生成して返します。
isAccountNonExpired(): ユーザーアカウントの有効期限の状態を示すメソッドで、このメソッドでは常に true を返し、アカウントが有効期限切れでないことを示します。
isAccountNonLocked(): ユーザーアカウントがロックされているかどうかを示すメソッドで、このメソッドでは常に true を返し、アカウントがロックされていないことを示します。
isCredentialsNonExpired(): ユーザーの認証情報の有効期限を示すメソッドで、このメソッドでは常に true を返し、認証情報が有効期限切れでないことを示します。
isEnabled(): ユーザーアカウントが有効かどうかを示すメソッドで、このメソッドでは常に true を返し、アカウントが有効であることを示します。
/user/UserService.java
@Service
public class UserService {

	UserRepository userRepository;

	PasswordEncoder passwordEncoder;

	public UserService(UserRepository userRepository, PasswordEncoder passwordEncoder) {
		super();
		this.userRepository = userRepository;
		this.passwordEncoder = passwordEncoder;
	}
/configuration/SecurityConfiguration.java
@EnableWebSecurity
public class SecurityConfiguration extends WebSecurityConfigurerAdapter{

	@Autowired
	AuthUserService authUserService;

	@Override
	protected void configure(HttpSecurity http) throws Exception {
		http.csrf().disable();
		http.httpBasic().authenticationEntryPoint(new BasicAuthenticationEntryPoint());

		http
			.authorizeRequests().antMatchers(HttpMethod.POST, "/api/1.0/login").authenticated()
			.and()
			.authorizeRequests().anyRequest().permitAll();

		http.sessionManagement().sessionCreationPolicy(SessionCreationPolicy.STATELESS);
	}

	@Override
	protected void configure(AuthenticationManagerBuilder auth) throws Exception {
		auth.userDetailsService(authUserService).passwordEncoder(passwordEncoder());
	}

	@Bean
	public PasswordEncoder passwordEncoder() {
		return new BCryptPasswordEncoder();
	}
}
sessionManagement().sessionCreationPolicy(SessionCreationPolicy.STATELESS) は状態を維持しない(STATELESS)セッション管理を設定します。このように設定すると、セッションを使わず、毎リクエストごとにユーザーを再認証する必要があります。
configure(AuthenticationManagerBuilder auth): ユーザー認証に関する設定を設定します。 auth.userDetailsService(authUserService)はユーザーサービス(authUserService)を使ってユーザー情報を検索し、passwordEncoder()メソッドを使ってパスワードの暗号化を設定します。
/configuration/AuthUserService.java
@Service
public class AuthUserService implements UserDetailsService {

	@Autowired
	UserRepository userRepository;

	@Override
	public UserDetails loadUserByUsername(String username) throws UsernameNotFoundException {
		User user = userRepository.findByUsername(username);
		if(user == null) {
			throw new UsernameNotFoundException("User not found");
		}
		return user;
	}

}
AuthUserServiceクラスはSpring SecurityのUserDetailsServiceインターフェースを実装しており、ユーザー情報を検索するため使われます。
3.4. 認証ユーザー
/LoginControllerTest.java
	@Test
	public void postLogin_withValidCredentials_receiveLoggedInUserId() {
		User inDB = userService.save(TestUtil.createValidUser());
		authenticate();
		ResponseEntity<Map<String, Object>> response = login(new ParameterizedTypeReference<Map<String, Object>>() {});
		Map<String, Object> body = response.getBody();
		Integer id = (Integer) body.get("id");
		assertThat(id).isEqualTo(inDB.getId());
	}
...
	public <T> ResponseEntity<T> login(ParameterizedTypeReference<T> responseType){
		return testRestTemplate.exchange(API_1_0_LOGIN, HttpMethod.POST ,null, responseType);
	}
postLogin_withValidCredentials_receiveLoggedInUserId テスト: このテストは、有効な認証情報を使ってログインした場合、ログインしたユーザーのIDを返すかどうかを確認します。
login(ParameterizedTypeReference<T> responseType) メソッド: このメソッドはログインリクエストを実行して、応答を指定された形式(ParameterizedTypeReference)で返す役割をします。
/user/LoginController.java
@RestController
public class LoginController {

	@PostMapping("/api/1.0/login")
	Map<String, Object> handleLogin(@CurrentUser User loggedInUser) {
		return Collections.singletonMap("id", loggedInUser.getId());
	}

}
CurrentUserアノテーションは現在ログインしているユーザーの情報を注入するために使用されます。この情報はUserオブジェクトに注入され、ログインしたユーザーを表します。
Collections.singletonMap("id", loggedInUser.getId()) はユーザーIDを持つマップを生成して返します。このマップはJSONレスポンスに変換されてクライアントに返されます。ログインしたユーザーのIDがクライアントに返されます。
Collections.singletonMap()はJavaでマップを生成するメソッドの一つです。 このように生成されたmapは不変マップ(immutable map)で、一度生成された後は修正することができません。 一般的に小規模なデータやテスト目的で使われます。
/shared/CurrentUser.java
@Target(ElementType.PARAMETER)
@Retention(RetentionPolicy.RUNTIME)
@AuthenticationPrincipal
public @interface CurrentUser {

}CurrentUserアノテーションはユーザー情報を注入するためのカスタムアノテーションで、Spring Securityと一緒に使って現在認証されたユーザーの情報をコントローラメソッドに注入するために使います。このアノテーションは次のようなメタアノテーションで構成されています。
Target(ElementType.PARAMETER): このアノテーションをメソッドのパラメータに適用できるように指定します。
Retention(RetentionPolicy.RUNTIME): このアノテーション情報がランタイムまで維持されるように指定します。
AuthenticationPrincipal: Spring Securityの@AuthenticationPrincipalアノテーションを使って現在のユーザーの情報を注入できるようにします。
3.5. ユーザ・ビュー・モデル
/LoginControllerTest.java
	@Test
	public void postLogin_withValidCredentials_receiveLoggedInUsersImage() {
		User inDB = userService.save(TestUtil.createValidUser());
		authenticate();
		ResponseEntity<Map<String, Object>> response = login(new ParameterizedTypeReference<Map<String, Object>>() {});
		Map<String, Object> body = response.getBody();
		String image = (String) body.get("image");
		assertThat(image).isEqualTo(inDB.getImage());
	}

	@Test
	public void postLogin_withValidCredentials_receiveLoggedInUsersDisplayName() {
		User inDB = userService.save(TestUtil.createValidUser());
		authenticate();
		ResponseEntity<Map<String, Object>> response = login(new ParameterizedTypeReference<Map<String, Object>>() {});
		Map<String, Object> body = response.getBody();
		String displayName = (String) body.get("displayName");
		assertThat(displayName).isEqualTo(inDB.getDisplayName());
	}

	@Test
	public void postLogin_withValidCredentials_receiveLoggedInUsersUsername() {
		User inDB = userService.save(TestUtil.createValidUser());
		authenticate();
		ResponseEntity<Map<String, Object>> response = login(new ParameterizedTypeReference<Map<String, Object>>() {});
		Map<String, Object> body = response.getBody();
		String username = (String) body.get("username");
		assertThat(username).isEqualTo(inDB.getUsername());
	}

	@Test
	public void postLogin_withValidCredentials_notReceiveLoggedInUsersPassword() {
		userService.save(TestUtil.createValidUser());
		authenticate();
		ResponseEntity<Map<String, Object>> response = login(new ParameterizedTypeReference<Map<String, Object>>() {});
		Map<String, Object> body = response.getBody();
		assertThat(body.containsKey("password")).isFalse();
	}
上記のテストは下記のような点をチェックします。ログイン後に有効な認証情報を使用すると、ログインしたユーザーの画像、表示名、ユーザー名を取得して確認し、パスワードは取得しません。
/TestUtil.java
		user.setUsername("test-user");
		user.setDisplayName("test-display");
		user.setPassword("P4ssword");
		user.setImage("profile-image.png");
		return user;
	}
user.setImage("profile-image.png");を追加します。
/user/User.java
@Data
@Entity
public class User implements UserDetails{
	/**
	 *
	 */
	private static final long serialVersionUID = 4074374728582967483L;

	@Id
	@GeneratedValue
	@JsonView(Views.Base.class)
	private long id;

	@NotNull(message = "{hoaxify.constraints.username.NotNull.message}")
	@Size(min = 4, max=255)
	@UniqueUsername
	@JsonView(Views.Base.class)
	private String username;

	@NotNull
	@Size(min = 4, max=255)
	@JsonView(Views.Base.class)
	private String displayName;

	@NotNull
	@Size(min = 8, max=255)
	@Pattern(regexp = "^(?=.*[a-z])(?=.*[A-Z])(?=.*\\d).*$", message="{hoaxify.constraints.password.Pattern.message}")
	private String password;

	@JsonView(Views.Base.class)
private String image;JsonViewアノテーションはJacksonライブラリを使ってオブジェクトをJSONでシリアル化する時、特定のビュー(View)に対してどのフィールドをシリアル化するかを制御するために使われます。API応答を様々な形式で使用したり、ビューごとにフィールドを制御する必要がある場合に便利です。
id, username, displayName, image フィールドに @JsonView(Views.Base.class) アノテーションが適用されています。 これは、これらのフィールドが 「Base」ビューに属していることを示します。
「Base」ビューに属するフィールドは、そのAPIエンドポイントでJSONにシリアル化されます。 したがって、これらのフィールドはAPIレスポンスに含まれます。
「Base」ビューはJacksonライブラリと@JsonViewアノテーションを使用してJSONシリアル化を制御するために使われる一つのビュー(View)です。 これは、オブジェクトをJSONに変換する時、どのフィールドを含めるか除外するかを定義します。
/user/LoginController.java
@RestController
public class LoginController {

	@PostMapping("/api/1.0/login")
	@JsonView(Views.Base.class)
	User handleLogin(@CurrentUser User loggedInUser) {
		return loggedInUser;
	}
/user/Views.java
public class Views {

	public interface Base{}

	public interface Sensitive extends Base{}

}
Baseインターフェース: このビューは基本ビューとして使用され、オブジェクトをJSONにシリアル化する際に一般的に必要なフィールドを含むビューを表します。「Base」ビューに属するフィールドは、API応答の基本情報として使用されます。
Sensitiveインターフェース:このビューは「Base」ビューを拡張し、機密情報や追加情報を含むビューを表します。"Sensitive"ビューに属するフィールドはすでに"Base"ビューに属しており、追加情報を含めることができます。
4.フロントエンド実装過程
4.1. ログインページ
/pages/LoginPage.spec.js
import React from 'react';
import { render } from '@testing-library/react';
import { LoginPage } from './LoginPage';

describe('LoginPage', () => {
  describe('Layout', () => {
    it('has header of Login', () => {
      const { container } = render(<LoginPage />);
      const header = container.querySelector('h1');
      expect(header).toHaveTextContent('Login');
    });

    it('has input for username', () => {
      const { queryByPlaceholderText } = render(<LoginPage />);
      const usernameInput = queryByPlaceholderText('Your username');
      expect(usernameInput).toBeInTheDocument();
    });

    it('has input for password', () => {
      const { queryByPlaceholderText } = render(<LoginPage />);
      const passwordInput = queryByPlaceholderText('Your password');
      expect(passwordInput).toBeInTheDocument();
    });

    it('has password type for password input', () => {
      const { queryByPlaceholderText } = render(<LoginPage />);
      const passwordInput = queryByPlaceholderText('Your password');
      expect(passwordInput.type).toBe('password');
    });
    it('has login button', () => {
      const { container } = render(<LoginPage />);
      const button = container.querySelector('button');
      expect(button).toBeInTheDocument();
    });
  });
});
次のような要素を検査します。
"Login" ヘッダーがあるか確認。
ユーザー名入力フィールドがあることを確認します。
パスワード入力フィールドがあることを確認します。
パスワード入力フィールドが"password"タイプであることを確認します。
ログインボタンがあるか確認。
合計5つのテストケースがレイアウト要素を検査してページが予想通りレンダリングされるか確認します。
/pages/LoginPage.js
import React from 'react';
import Input from '../components/Input';

export class LoginPage extends React.Component {
  render() {
    return (
      <div className="container">
        <h1 className="text-center">Login</h1>
        <div className="col-12 mb-3">
          <Input label="Username" placeholder="Your username" />
        </div>
        <div className="col-12 mb-3">
          <Input label="Password" placeholder="Your password" type="password" />
        </div>
        <div className="text-center">
          <button className="btn btn-primary">Login</button>
        </div>
      </div>
    );
  }
}

export default LoginPage;
このコードはReactコンポーネントであるLoginPageを定義します。LoginPageはログインページを表し、ユーザー名とパスワードを入力できる入力フィールドと「Login」ボタンを含む簡単なレイアウトをレンダリングします。
/src/index.js
import App from './App';
import * as serviceWorker from './serviceWorker';
import { UserSignupPage } from './pages/UserSignupPage';
import { LoginPage } from './pages/LoginPage';
import * as apiCalls from './api/apiCalls';

const actions = {
  postSignup: apiCalls.signup
};

ReactDOM.render(<LoginPage />, document.getElementById('root'));
4.2. 入力値の処理
/pages/LoginPage.spec.js
  describe('Interactions', () => {
    const changeEvent = (content) => {
      return {
        target: {
          value: content
        }
      };
    };
    it('sets the username value into state', () => {
      const { queryByPlaceholderText } = render(<LoginPage />);
      const usernameInput = queryByPlaceholderText('Your username');
      fireEvent.change(usernameInput, changeEvent('my-user-name'));
      expect(usernameInput).toHaveValue('my-user-name');
    });
    it('sets the password value into state', () => {
      const { queryByPlaceholderText } = render(<LoginPage />);
      const passwordInput = queryByPlaceholderText('Your password');
      fireEvent.change(passwordInput, changeEvent('P4ssword'));
      expect(passwordInput).toHaveValue('P4ssword');
    });
  });
ユーザー名の値がステータスに設定されていることを確認。
パスワードの値がステータスに設定されることを確認。
/pages/LoginPage.js
import Input from '../components/Input';

export class LoginPage extends React.Component {
  state = {
    username: '',
    password: ''
  };

  onChangeUsername = (event) => {
    const value = event.target.value;
    this.setState({
      username: value
    });
  };

  onChangePassword = (event) => {
    const value = event.target.value;
    this.setState({
      password: value
    });
  };

  render() {
    return (
      <div className="container">
        <h1 className="text-center">Login</h1>
        <div className="col-12 mb-3">
          <Input
            label="Username"
            placeholder="Your username"
            value={this.state.username}
            onChange={this.onChangeUsername}
          />
        </div>
        <div className="col-12 mb-3">
          <Input
            label="Password"
            placeholder="Your password"
            type="password"
            value={this.state.password}
            onChange={this.onChangePassword}
          />
        </div>
        <div className="text-center">
          <button className="btn btn-primary">Login</button>
LoginPageはログインページを表し、ユーザー名とパスワード入力フィールドを持ち、ユーザーの入力によって状態(state)を更新します。 各入力フィールドの値は状態(state)で管理され、ユーザーの入力によってその状態が更新されます。ユーザーが入力した内容を入力フィールドに反映し、この内容を状態として保存する方式でユーザーインタラクションを扱います。

4.3. クリックの処理
/pages/LoginPage.spec.js
    let usernameInput, passwordInput, button;

    const setupForSubmit = (props) => {
      const rendered = render(<LoginPage {...props} />);

      const { container, queryByPlaceholderText } = rendered;

      usernameInput = queryByPlaceholderText('Your username');
      fireEvent.change(usernameInput, changeEvent('my-user-name'));
      passwordInput = queryByPlaceholderText('Your password');
      fireEvent.change(passwordInput, changeEvent('P4ssword'));
      button = container.querySelector('button');

      return rendered;
    };
...
    it('calls postLogin when the actions are provided in props and input fields have value', () => {
      const actions = {
        postLogin: jest.fn().mockResolvedValue({})
      };
      setupForSubmit({ actions });
      fireEvent.click(button);
      expect(actions.postLogin).toHaveBeenCalledTimes(1);
    });
    it('does not throw exception when clicking the button when actions not provided in props', () => {
      setupForSubmit();
      expect(() => fireEvent.click(button)).not.toThrow();
    });

    it('calls postLogin with credentials in body', () => {
      const actions = {
        postLogin: jest.fn().mockResolvedValue({})
      };
      setupForSubmit({ actions });
      fireEvent.click(button);

      const expectedUserObject = {
        username: 'my-user-name',
        password: 'P4ssword'
      };

      expect(actions.postLogin).toHaveBeenCalledWith(expectedUserObject);
    });

    it('enables the button when username and password is not empty', () => {
      setupForSubmit();
      expect(button).not.toBeDisabled();
    });
    it('disables the button when username is empty', () => {
      setupForSubmit();
      fireEvent.change(usernameInput, changeEvent(''));
      expect(button).toBeDisabled();
    });
    it('disables the button when password is empty', () => {
      setupForSubmit();
      fireEvent.change(passwordInput, changeEvent(''));
      expect(button).toBeDisabled();
    });
    it('displays alert when login fails', async () => {
      const actions = {
        postLogin: jest.fn().mockRejectedValue({
          response: {
            data: {
              message: 'Login failed'
            }
          }
        })
      };
      const { queryByText } = setupForSubmit({ actions });
      fireEvent.click(button);

      const alert = await waitForElement(() => queryByText('Login failed'));
      expect(alert).toBeInTheDocument();
    });
    it('clears alert when user changes username', async () => {
      const actions = {
        postLogin: jest.fn().mockRejectedValue({
          response: {
            data: {
              message: 'Login failed'
            }
          }
        })
      };
      const { queryByText } = setupForSubmit({ actions });
      fireEvent.click(button);

      await waitForElement(() => queryByText('Login failed'));
      fireEvent.change(usernameInput, changeEvent('updated-username'));

      const alert = queryByText('Login failed');
      expect(alert).not.toBeInTheDocument();
    });
    it('clears alert when user changes password', async () => {
      const actions = {
        postLogin: jest.fn().mockRejectedValue({
          response: {
            data: {
              message: 'Login failed'
            }
          }
        })
      };
      const { queryByText } = setupForSubmit({ actions });
      fireEvent.click(button);

      await waitForElement(() => queryByText('Login failed'));
      fireEvent.change(passwordInput, changeEvent('updated-P4ssword'));

      const alert = queryByText('Login failed');
      expect(alert).not.toBeInTheDocument();
    });
テストケースは次のような動作を検証します。
1. ユーザーが入力フィールドに情報を入力してログインボタンをクリックした時、postLogin関数が呼び出されるか確認。
2. actionsがプロパティで指定されていない時、ログインボタンをクリックしても例外が発生しないか確認。
3. ユーザーが入力した情報がpostLogin関数に正しく渡されるか確認。
4. ユーザーが有効なユーザー名及びパスワードを入力した時、ログインボタンが有効になることを確認。
5. ユーザーがユーザー名を空欄にした時、ログインボタンが無効になることを確認。
6. ユーザーがパスワードを空欄にした時、ログインボタンが無効化されることを確認。
7. ログインに失敗した場合、警告メッセージが表示されるか確認。
8. ユーザーがユーザー名を変更すると警告メッセージが消えるか確認。
9. ユーザーがパスワードを変更すると警告メッセージが消えるか確認。
/pages/LoginPage.js
import React from 'react';
import Input from '../components/Input';
export class LoginPage extends React.Component {
  state = {
    username: '',
    password: '',
    apiError: undefined
  };

  onChangeUsername = (event) => {
    const value = event.target.value;
    this.setState({
      username: value,
      apiError: undefined
    });
  };

  onChangePassword = (event) => {
    const value = event.target.value;
    this.setState({
      password: value,
      apiError: undefined
    });
  };

  onClickLogin = () => {
    const body = {
      username: this.state.username,
      password: this.state.password
    };
    this.props.actions.postLogin(body).catch((error) => {
      if (error.response) {
        this.setState({ apiError: error.response.data.message });
      }
    });
  };

  render() {
    let disableSubmit = false;
    if (this.state.username === '') {
      disableSubmit = true;
    }
    if (this.state.password === '') {
      disableSubmit = true;
    }

    return (
      <div className="container">
        <h1 className="text-center">Login</h1>
        <div className="col-12 mb-3">
          <Input
            label="Username"
            placeholder="Your username"
            value={this.state.username}
            onChange={this.onChangeUsername}
          />
        </div>
        <div className="col-12 mb-3">
          <Input
            label="Password"
            placeholder="Your password"
            type="password"
            value={this.state.password}
            onChange={this.onChangePassword}
          />
        </div>
        {this.state.apiError && (
          <div className="col-12 mb-3">
            <div className="alert alert-danger">{this.state.apiError}</div>
          </div>
        )}
        <div className="text-center">
          <button
            className="btn btn-primary"
            onClick={this.onClickLogin}
            disabled={disableSubmit}
          >
            Login
          </button>
        </div>
      </div>
    );
  }
}

LoginPage.defaultProps = {
  actions: {
    postLogin: () => new Promise((resolve, reject) => resolve({}))
  }
};

export default LoginPage;
テストケースは次のような動作ログインボタンをクリックすると、onClickLoginメソッドが実行され、入力したユーザー名とパスワードをAPIに送信し、失敗した場合、エラーメッセージをステータスに保存します。
ユーザー名またはパスワードが空白の時、ログインボタンを無効化し、エラーメッセージが表示される場合、エラーメッセージを通知ウィンドウに表示します。 を検証します。
4.4. バックエンドへのリクエスト送信
/api/apiCalls.spec.js
  describe('login', () => {
    it('calls /api/1.0/login', () => {
      const mockLogin = jest.fn();
      axios.post = mockLogin;
      apiCalls.login({ username: 'test-user', password: 'P4ssword' });
      const path = mockLogin.mock.calls[0][0];
      expect(path).toBe('/api/1.0/login');
    });
  });
API呼び出しを模擬(mock)して/api/1.0/loginエンドポイントへのPOSTリクエストが呼び出されるか確認します。 axios.postメソッドをmockLoginに置き換えて、API呼び出しを実行した後、呼び出しパスを確認してテストします。
/api/apiCalls.js
export const login = (user) => {
  return axios.post('/api/1.0/login', {}, { auth: user });
};
ユーザー情報を受けて /api/1.0/login エンドポイントへ POST リクエストを送る login 関数を定義します。リクエスト時、ユーザー情報を認証情報として設定してサーバーへ送信します。
/src/index.js
const actions = {
  postLogin: apiCalls.login
};

ReactDOM.render(
  <LoginPage actions={actions} />,
  document.getElementById('root')
);
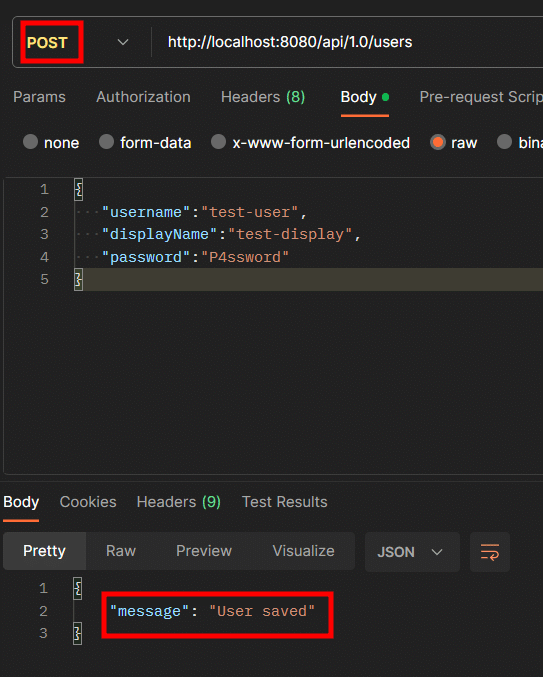
ユーザー情報を作って再試行してみましょう。

4.5. プログレスインジケータ
/src/components/ButtonWithProgress.js
import React from 'react';

const ButtonWithProgress = (props) => {
  return (
    <button
      className="btn btn-primary"
      onClick={props.onClick}
      disabled={props.disabled}
    >
      {props.pendingApiCall && (
        <div className="spinner-border text-light spinner-border-sm mr-1">
          <span className="sr-only">Loading...</span>
        </div>
      )}
      {props.text}
    </button>
  );
};

export default ButtonWithProgress;
ボタンをレンダリングし、ユーザーインタラクションを処理します。ボタンの有効または無効の状態を設定し、API呼び出しが進行中のときにローディングスピナーを表示することができます。
/pages/UserSignupPage.js
import React from 'react';
import Input from '../components/Input';
import ButtonWithProgress from '../components/ButtonWithProgress';

export class UserSignupPage extends React.Component {
  state = {
...
       />
        </div>
        <div className="text-center">
          <ButtonWithProgress
            onClick={this.onClickSignup}
            disabled={
              this.state.pendingApiCall || !this.state.passwordRepeatConfirmed
            }
            pendingApiCall={this.state.pendingApiCall}
            text="Sign Up"
          />
API呼び出しが進行中またはパスワード確認が一致しないときにボタンを無効にし、API呼び出しが進行中のときにローディングスピナーを表示することができます。
/pages/LoginPage.spec.js
import React from 'react';
import {
  render,
  fireEvent,
  waitForElement,
  waitForDomChange
} from '@testing-library/react';
import { LoginPage } from './LoginPage';

describe('LoginPage', () => {
...
...
    const mockAsyncDelayed = () => {
      return jest.fn().mockImplementation(() => {
        return new Promise((resolve, reject) => {
          setTimeout(() => {
            resolve({});
          }, 300);
        });
      });
    };
    let usernameInput, passwordInput, button;

    const setupForSubmit = (props) => {
	@@ -166,5 +179,62 @@ describe('LoginPage', () => {
      const alert = queryByText('Login failed');
      expect(alert).not.toBeInTheDocument();
    });

    it('does not allow user to click the Login button when there is an ongoing api call', () => {
      const actions = {
        postLogin: mockAsyncDelayed()
      };
      setupForSubmit({ actions });
      fireEvent.click(button);

      fireEvent.click(button);
      expect(actions.postLogin).toHaveBeenCalledTimes(1);
    });

    it('displays spinner when there is an ongoing api call', () => {
      const actions = {
        postLogin: mockAsyncDelayed()
      };
      const { queryByText } = setupForSubmit({ actions });
      fireEvent.click(button);

      const spinner = queryByText('Loading...');
      expect(spinner).toBeInTheDocument();
    });

    it('hides spinner after api call finishes successfully', async () => {
      const actions = {
        postLogin: mockAsyncDelayed()
      };
      const { queryByText } = setupForSubmit({ actions });
      fireEvent.click(button);

      await waitForDomChange();

      const spinner = queryByText('Loading...');
      expect(spinner).not.toBeInTheDocument();
    });
    it('hides spinner after api call finishes with error', async () => {
      const actions = {
        postLogin: jest.fn().mockImplementation(() => {
          return new Promise((resolve, reject) => {
            setTimeout(() => {
              reject({
                response: { data: {} }
              });
            }, 300);
          });
        })
      };
      const { queryByText } = setupForSubmit({ actions });
      fireEvent.click(button);

      await waitForDomChange();

      const spinner = queryByText('Loading...');
      expect(spinner).not.toBeInTheDocument();
    });
  });
});

console.error = () => {};
1.ログインボタンをクリックしたとき、API呼び出しが完了する前に再度クリックできないようにする。
2.API呼び出しが進行中のときにローディングスピナーが表示されることを確認。
3.API呼び出しが成功するとローディングスピナーが消えることを確認。
4.API呼び出しがエラーで終了するとローディングスピナーが消えることを確認。
/pages/LoginPage.js
import React from 'react';
import Input from '../components/Input';
import ButtonWithProgress from '../components/ButtonWithProgress';

export class LoginPage extends React.Component {
  state = {
    username: '',
    password: '',
    apiError: undefined,
    pendingApiCall: false
  };
...
    this.setState({ pendingApiCall: true });
    this.props.actions
      .postLogin(body)
      .then((response) => {
        this.setState({ pendingApiCall: false });
      })
      .catch((error) => {
        if (error.response) {
          this.setState({
            apiError: error.response.data.message,
            pendingApiCall: false
          });
        }
      });
ユーザーがログインボタンをクリックしたとき、API呼び出しが開始されると、pendingApiCallの状態をtrueに設定してローディングスピナーを有効にします。 その後、API呼び出しが成功またはエラーが発生した後は、pendingApiCallをfalseに設定してローディングスピナーを無効にし、エラーメッセージをapiError状態に保存します。

5. 最後に
今までSpring Bootを使ったバックエンド開発では、ログイン要求を処理するエンドポイントを実装し、ユーザー情報をデータベースから検索して認証を行うロジックを実装しました。 特に、Spring Securityを設定してユーザーパスワードを安全に保存し、ユーザーが要求したリソースに対する権限検査を行いました。
Reactを使ったフロントエンドのログイン開発では、ユーザー名とパスワード入力フィールドの状態(state)を管理し、API呼び出しをトリガーし、ローディングスピナーとエラーメッセージを表示する機能を実装しました。 また、ユーザーがボタンを複数回クリックしたり、API呼び出しが進行中、他の動作を実行できないようにする機能も実装しました。
ログイン機能はセキュリティの問題であり、アプリケーションの第一印象のようなものなので、必ず常に把握しておく必要があります!
エンジニアファーストの会社 株式会社CRE-CO
ソンさん
【参考】
[Udemy] Spring Boot and React with Test Driven Development
この記事が気に入ったらサポートをしてみませんか?