
Pythonで計算機作ってみた!!

今日の記事はPythonで計算機を作ってみたのでそれを勉強の記録として共有したいと思います。
是非、手を動かして作ってみて下さい。
まず、完成した形はこうなります。
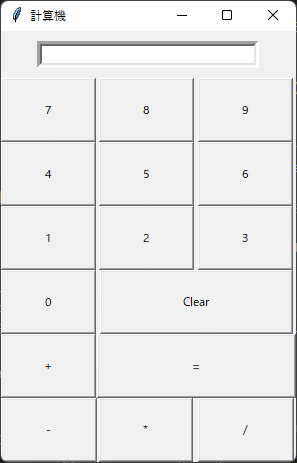
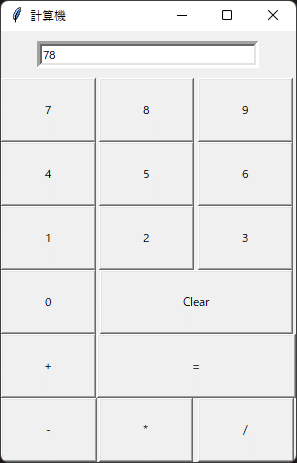
数字の部分をクリックするとボタンになっていて上に数字が表示されます。
下記の画像を参考にしてください。
+をクリックすると足し算などが出来ます。
このプログラムはPythonのtkinterというものを使用しています。
WEBサイトを作成するときに使われます。
初心者の方は是非このアプリを作ってみて下さい。
かなり勉強になります。
下記にコードを記載します。
基本的にコメントを書いているのでコード自体は理解できると思います。
何か分からない事がありましたらコメント欄で質問などをしてください。
プログラムコード
from tkinter import *
from sympy import Lambda

root = Tk()
root.title('計算機')

e = Entry(root, width=35, borderwidth=5)
e.grid(row=0, column=0, columnspan=3, padx=10, pady=10)

def button_click(number):
    # e.delete(0, END)
    current = e.get()
    e.delete(0, END) # クリックをしたら前のデータを消す。
    e.insert(0,str(current)+ str (number)) # 複数入力された場合には繋げる。
def button_clear():
    e.delete(0, END) # 全ての数字を消す。
def button_add():
    first_number = e.get()
    global f_num
    global math
    math = 'addition'
    f_num = int(first_number)
    e.delete(0, END)

def button_equal():
    """
    クリックされた場合のmathの値を見て計算を行う。
    """
    second_number = e.get() # 二番目に入力した値を受け取る。
    e.delete(0, END) # 削除
    if math == 'addition': # mathの中身を見て何の計算を行うのか判断をしている。
        e.insert(0, f_num + int(second_number)) # 足し算をして結果を表示
    if math == 'subtract':
        e.insert(0, f_num - int(second_number)) # 引き算をして結果を表示
    if math == 'multiply':
        e.insert(0, f_num * int(second_number)) # 掛け算をして結果を表示
    if math == 'divide':
        e.insert(0, f_num / int(second_number)) # 割り算をして結果を表示
def button_subtract():
    """
    -をクリックした時
    """
    first_number = e.get()
    global f_num
    global math
    math = 'subtract'
    f_num = int(first_number)
    e.delete(0, END)
def button_multiply():
    """
    *をクリックした時
    """
    first_number = e.get()
    global f_num
    global math
    math = 'multiply'
    f_num = int(first_number)
    e.delete(0, END)
def button_divide():
    """
    /をクリックした時
    """
    first_number = e.get()
    global f_num
    global math
    math = 'divide'
    f_num = int(first_number)
    e.delete(0, END)

# ボタンのプロパティ
button_1 = Button(root, text= '1', padx =40, pady =20, command=lambda: button_click(1)) # 数字を渡す。lambdaを使用する。
button_2 = Button(root, text= '2', padx =40, pady =20, command=lambda: button_click(2))
button_3 = Button(root, text= '3', padx =40, pady =20, command=lambda: button_click(3))
button_4 = Button(root, text= '4', padx =40, pady =20, command=lambda: button_click(4))
button_5 = Button(root, text= '5', padx =40, pady =20, command=lambda: button_click(5))
button_6 = Button(root, text= '6', padx =40, pady =20, command=lambda: button_click(6))
button_7 = Button(root, text= '7', padx =40, pady =20, command=lambda: button_click(7))
button_8 = Button(root, text= '8', padx =40, pady =20, command=lambda: button_click(8))
button_9 = Button(root, text= '9', padx =40, pady =20, command=lambda: button_click(9))
button_0 = Button(root, text= '0', padx =40, pady =20, command=lambda: button_click(0))

button_add = Button(root, text= '+', padx =39, pady =20, command=button_add)
button_equal = Button(root, text= '=', padx =91, pady =20, command=button_equal)
button_clear = Button(root, text= 'Clear', padx =79, pady =20, command=button_clear)

button_subtract = Button(root, text= '-', padx =41, pady =20, command=button_subtract)
button_multiply = Button(root, text= '*', padx =40, pady =20, command=button_multiply)
button_divide = Button(root, text= '/', padx =41, pady =20, command=button_divide)

# グリッドの形にする。
# 場所の設定
button_1.grid(row=3, column=0)
button_2.grid(row=3, column=1)
button_3.grid(row=3, column=2)

button_4.grid(row=2, column=0)
button_5.grid(row=2, column=1)
button_6.grid(row=2, column=2)

button_7.grid(row=1, column=0)
button_8.grid(row=1, column=1)
button_9.grid(row=1, column=2)

button_0.grid(row=4, column=0)
button_clear.grid(row=4, column=1, columnspan=2)
button_add.grid(row=5,column=0)
button_equal.grid(row=5, column=1, columnspan=2)

button_subtract.grid(row=6, column=0)
button_multiply.grid(row=6, column=1)
button_divide.grid(row=6, column=2)

root.mainloop() # 計算機アプリを表示
参考にした動画はこちらになります。
以上になります。
この記事が参加している募集
この記事が気に入ったらサポートをしてみませんか?