[Shopify]各商品ページにその商品についてのお問合せフォームをモーダルで表示(Dawn)56/100
こんにちは。Shopify専門エンジニアのまりん(@crowd37cord)です。
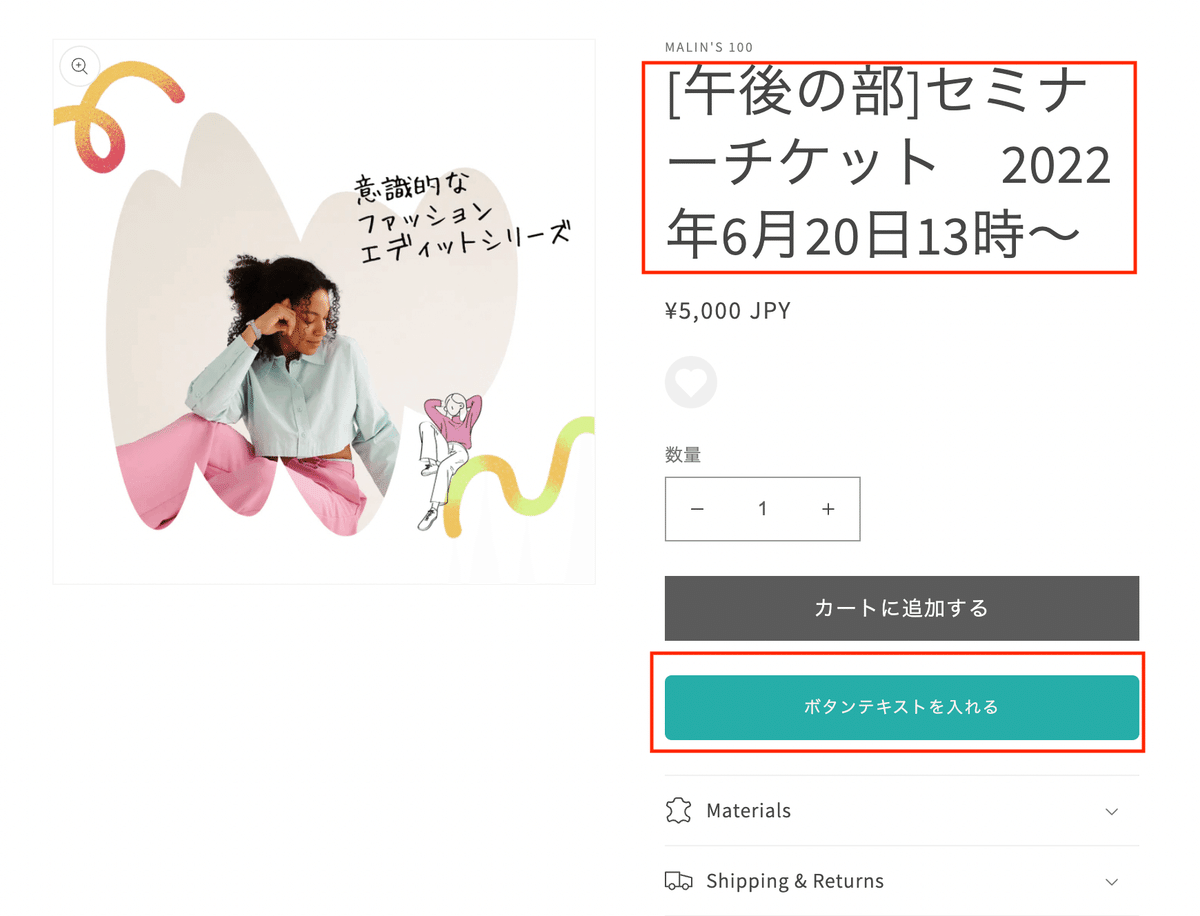
チャットbotのアプリとか入れてないので、商品について問合せを気軽にしてもらえるように各商品ページからフォームでその商品について問合せられるようにしてみました♪
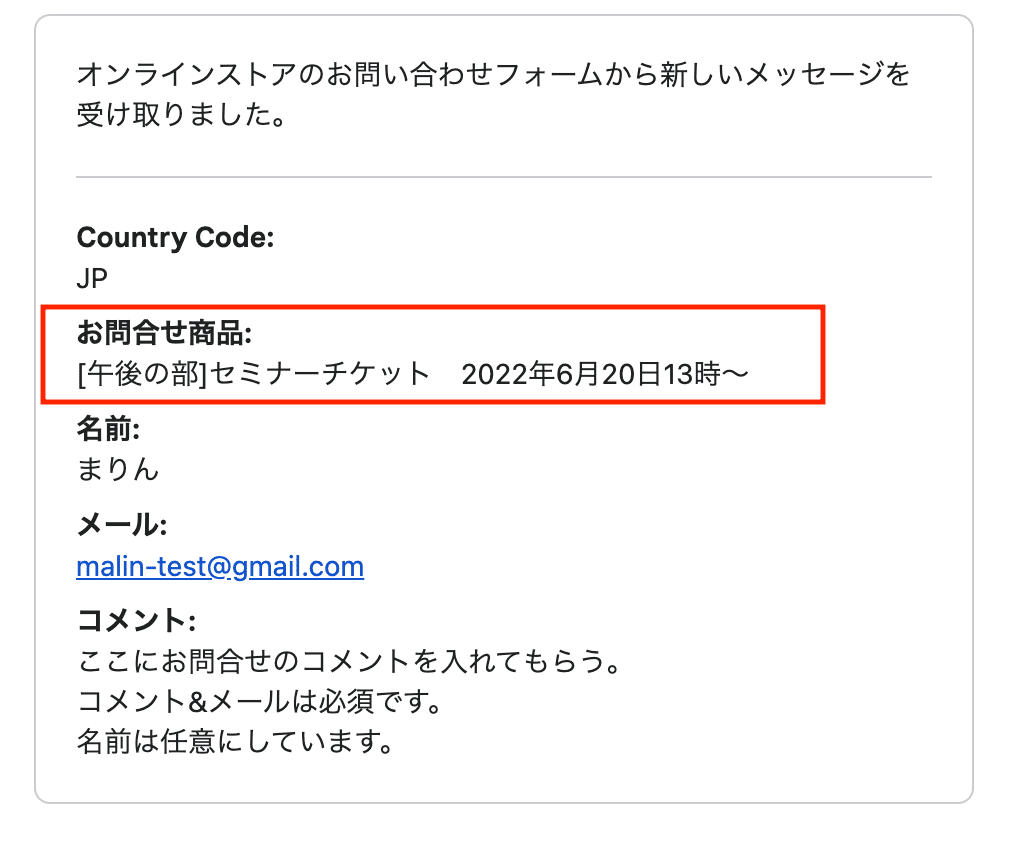
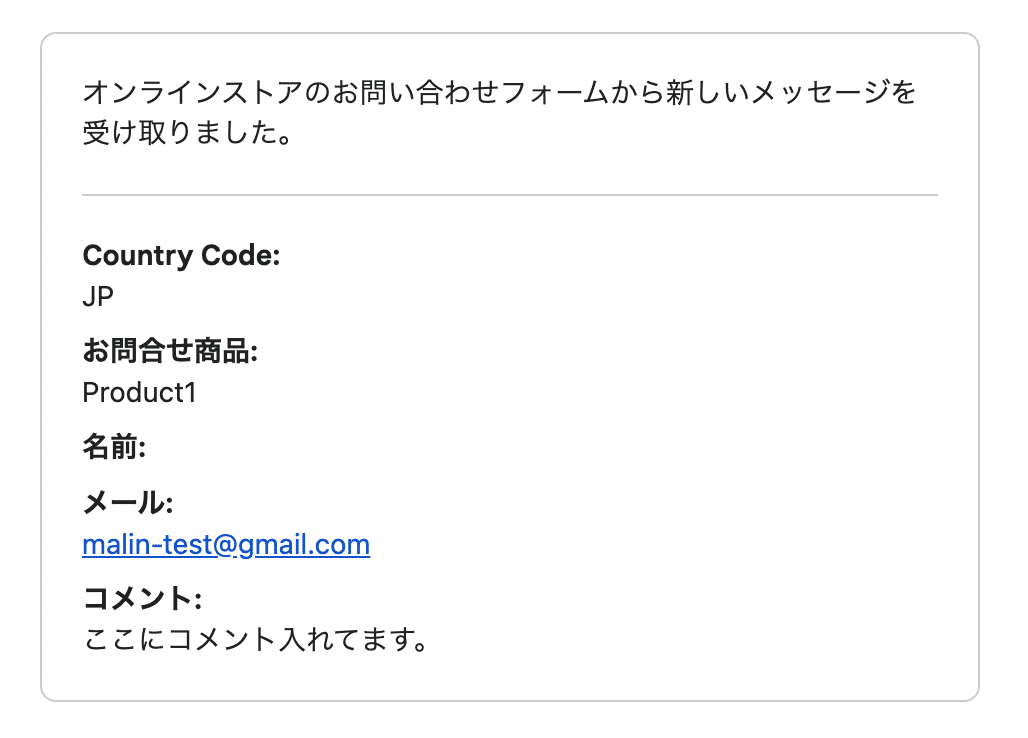
フォームのこの商品についてのところに自動的に今開いている商品ページの商品名が表示され(固定)、ショップオーナーの受信メールにはお問合せ商品名が自動的に反映されています。
購入に至らなくてもその後のアプローチに役立てられるかなぁと思います。
対象テーマ:Dawn
✔️今回のゴール
デモページ(PW:stahsk40jw1Mf)
デモ版では送信ボタンを押せないようにしています
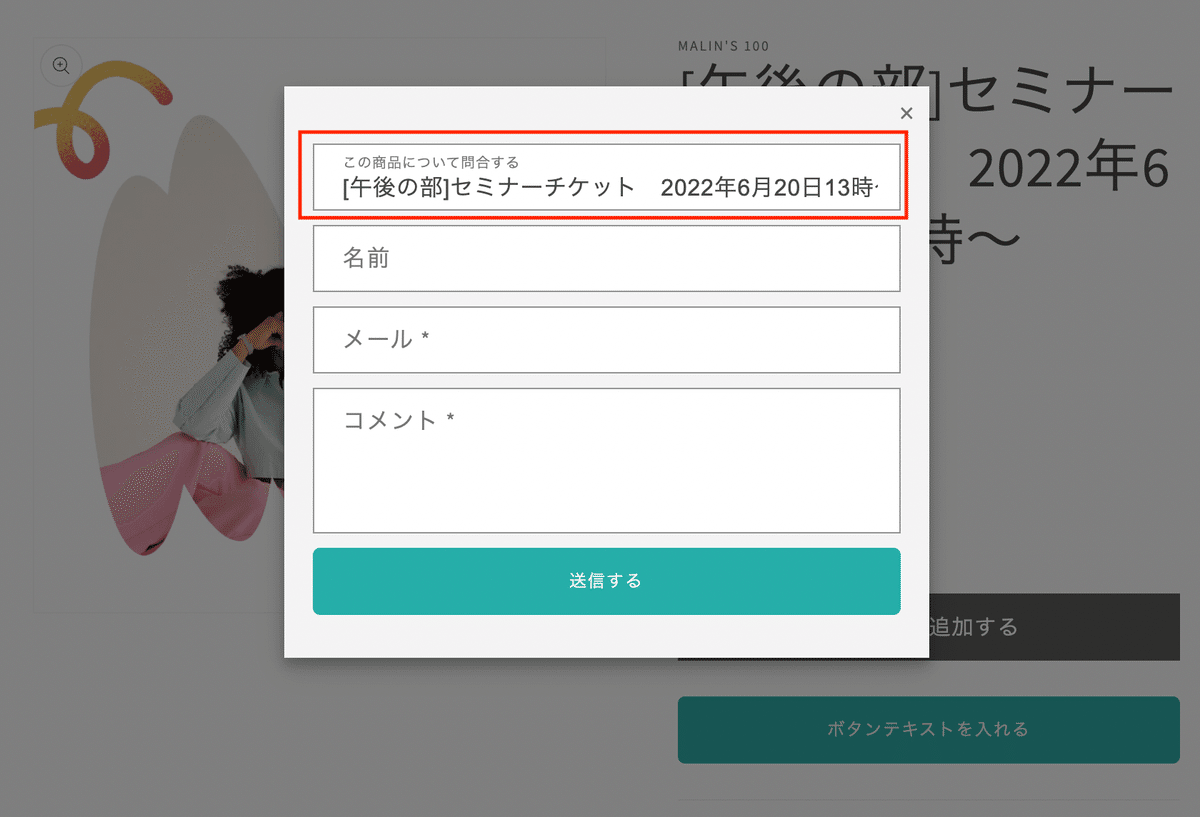
◆フォーム
・問合せ商品名
・名前:任意
・メール:必須
・コメント:必須
✔️CMSの特徴
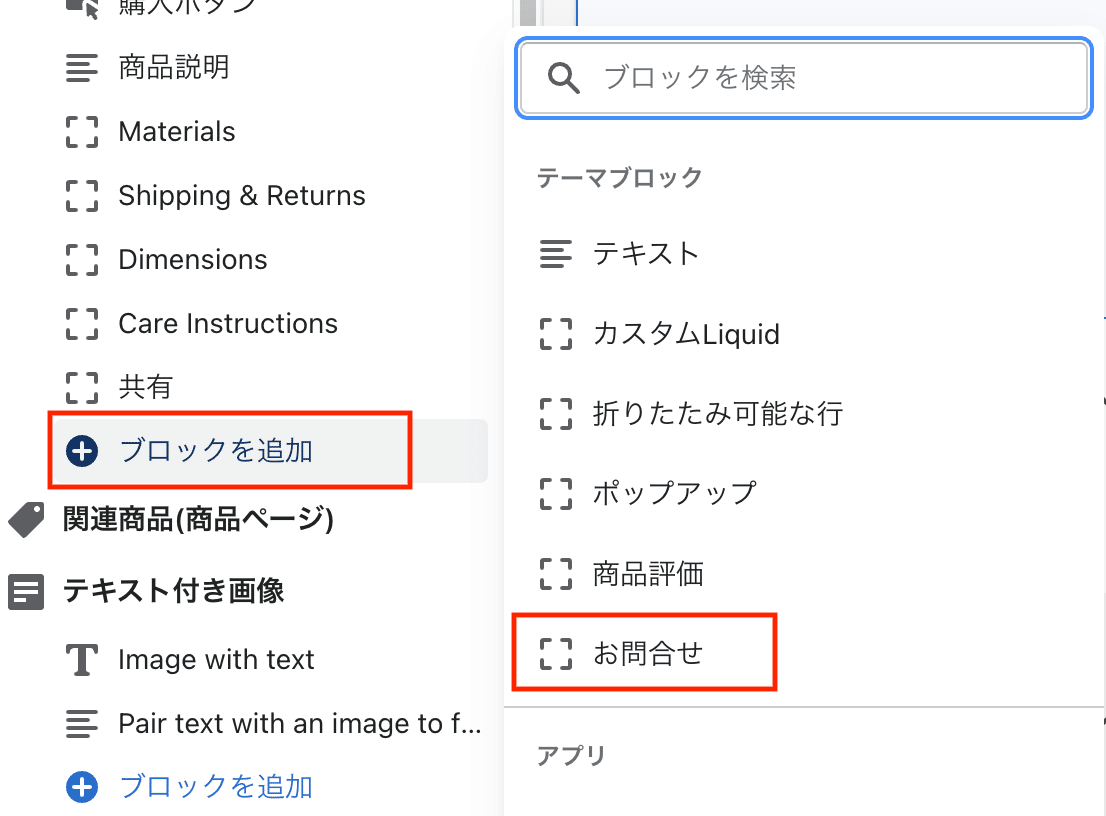
ブロック「お問合せ」。一回だけ使用できます。
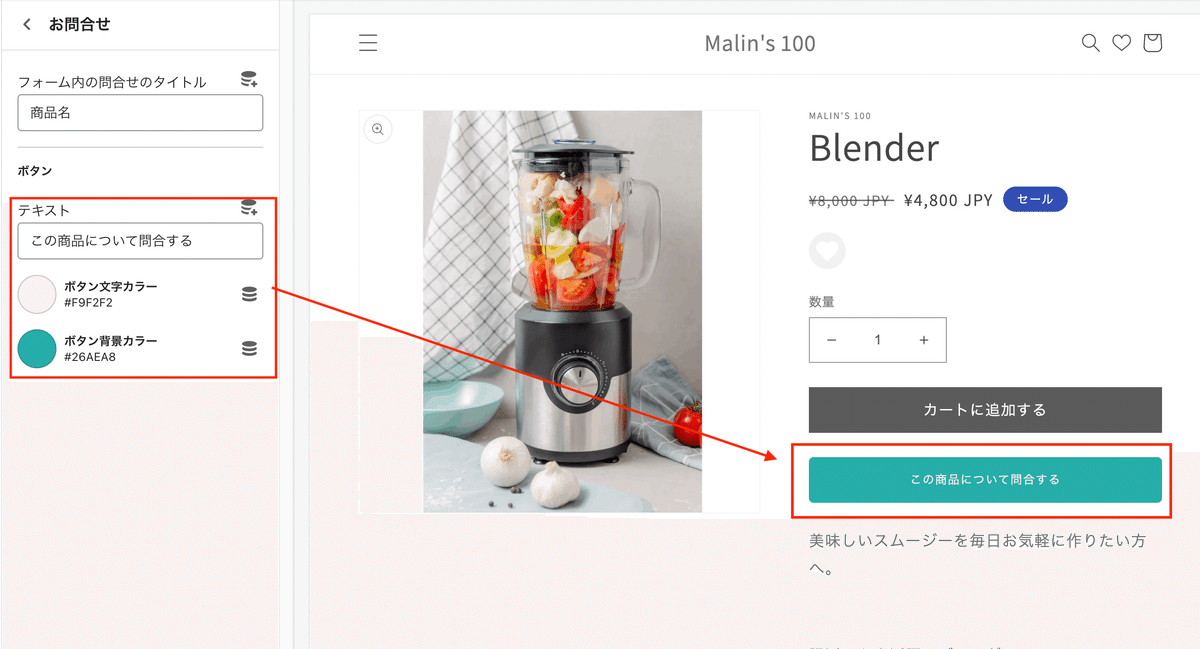
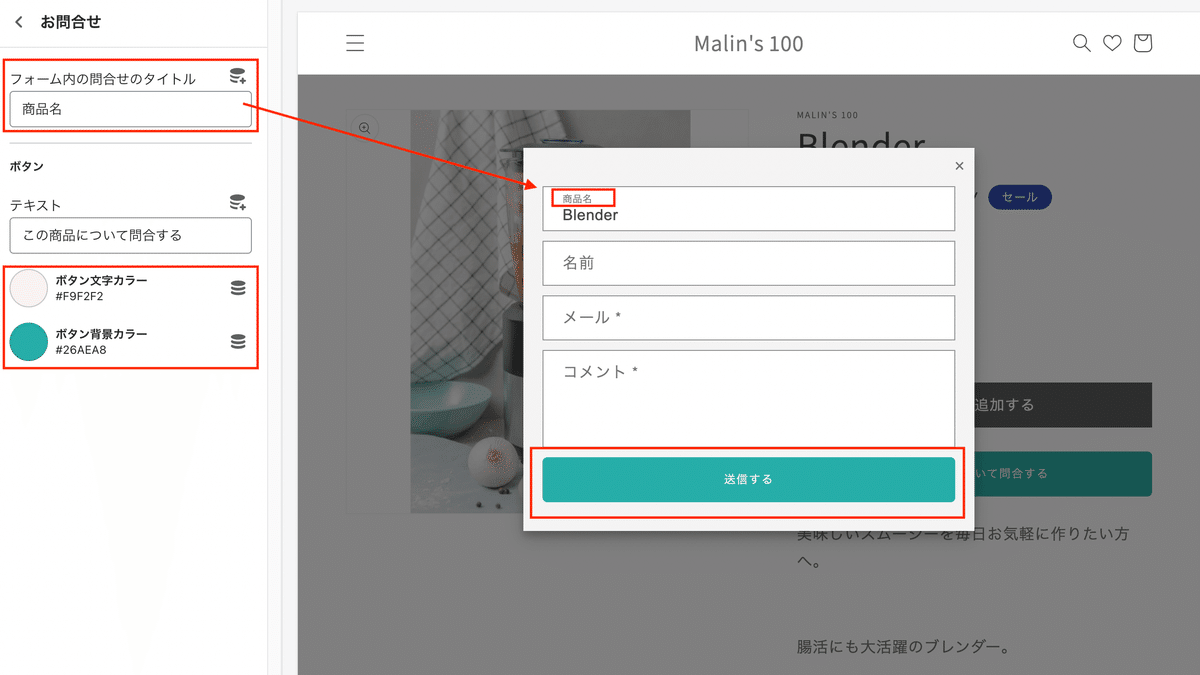
◆CMSで設定できるところ
・ボタンテキスト
・ボタンカラー(背景&テキスト)→モーダル開いた時のボタンも一緒
・モーダル開いた時のお問合せ商品タイトル
✔️設置手順
Step1 既存のプロダクトsectionを開く
管理画面>テーマ>コード編集>Section>main-product.liquid

Step2 Schema内に下記のコードをコピペ
SchemaのBlock内に挿入。"settings"を探してその前あたりだと簡単。
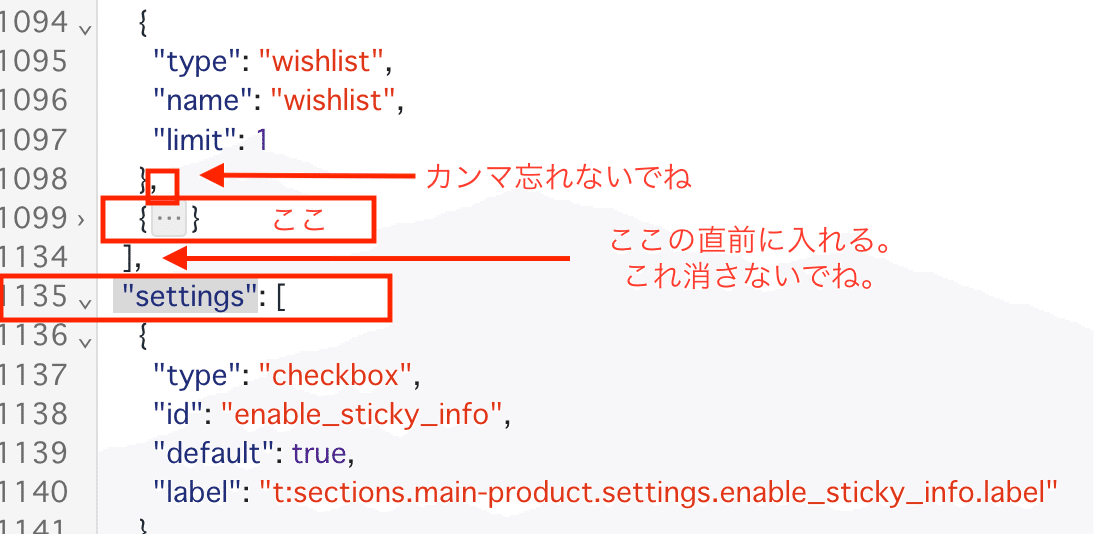
◆Schemaのコード
{
      "type": "otoiawase",
      "name": "お問合せ",
      "limit": 1,
      "settings": [
        {
          "type": "text",
          "id": "form_txt",
          "label": "フォーム内の問合せのタイトル",
          "default": "この商品について問合する"
        },
        {
          "type": "header",
          "content": "ボタン"
        },
        {
          "type": "text",
          "id": "btn_txt",
          "label": "テキスト",
          "default": "この商品について問合せしてみる"
        },
        {
          "type": "color",
          "id": "color_btnTxt",
          "label": "ボタン文字カラー",
          "default": "#fff"
        },
        {
          "type": "color",
          "id": "color_btnBk",
          "label": "ボタン背景カラー",
          "default": "#000"
        }
      ]
    }
Step3 HTMLエリアに"otoiawase"をコピペ
{% case %}{% endcase %}の間に下記のコードをコピペ。
「endcase」をCtl+Fで探してその直前に入れるのが早いかも。
 {%- when 'otoiawase' -%}
              <div class="product__otoiawase">
                  <button id="modalOpen" class="button" style="background: {{ block.settings.color_btnBk }}; color: {{ block.settings.color_btnTxt }};">{{ block.settings.btn_txt }}</button>
                  <div id="easyModal" class="modal">
                    <div class="modal-content">
                      <span class="modalClose">×</span>
                      <div class="modal-body">
                        {%- form 'contact', id: 'ContactForm', class: 'isolate' -%}

                          <div class="contact__fields">
                            <div class="field">
                              <input class="field__input" type="text" id="ContactForm-product" name="contact[お問合せ商品]" value="{{ product.title | escape }}" readonly>
                              <label class="field__label" for="ContactForm-product">{{ block.settings.form_txt }}</label>
                            </div>
                            <div class="field">
                              <input class="field__input" autocomplete="name" type="text" id="ContactForm-name" name="contact[{{ 'templates.contact.form.name' | t }}]" value="{% if form.name %}{{ form.name }}{% elsif customer %}{{ customer.name }}{% endif %}" placeholder="{{ 'templates.contact.form.name' | t }}">
                              <label class="field__label" for="ContactForm-name">{{ 'templates.contact.form.name' | t }}</label>
                            </div>
                            <div class="field field--with-error">
                              <input
                                autocomplete="email"
                                type="email"
                                id="ContactForm-email"
                                class="field__input"
                                name="contact[email]"
                                spellcheck="false"
                                autocapitalize="off"
                                value="{% if form.email %}{{ form.email }}{% elsif customer %}{{ customer.email }}{% endif %}"
                                aria-required="true"
                                {% if form.errors contains 'email' %}
                                  aria-invalid="true"
                                  aria-describedby="ContactForm-email-error"
                                {% endif %}
                                placeholder="{{ 'templates.contact.form.email' | t }}"
                              >
                              <label class="field__label" for="ContactForm-email">{{ 'templates.contact.form.email' | t }} <span aria-hidden="true">*</span></label>
                              {%- if form.errors contains 'email' -%}
                                <small class="contact__field-error" id="ContactForm-email-error">
                                  <span class="visually-hidden">{{ 'accessibility.error' | t }}</span>
                                  <span class="form__message">{% render 'icon-error' %}{{ form.errors.translated_fields['email'] | capitalize }} {{ form.errors.messages['email'] }}</span>
                                </small>
                              {%- endif -%}
                            </div>
                          </div>
                          <div class="field">
                            <textarea
                              rows="10"
                              id="ContactForm-body"
                              class="text-area field__input"
                              name="contact[{{ 'templates.contact.form.comment' | t }}]"
                              placeholder="{{ 'templates.contact.form.comment' | t }}"
                              required
                            >
                              {{- form.body -}}
                            </textarea>
                            <label class="form__label field__label" for="ContactForm-body">{{ 'templates.contact.form.comment' | t }} <span aria-hidden="true">*</span></label>
                          </div>
                          <div class="contact__button">
                            <button type="submit" class="button" style="background: {{ block.settings.color_btnBk }}; color: {{ block.settings.color_btnTxt }};">
                              {{ 'templates.contact.form.send' | t }}
                            </button>
                          </div>
                        {%- endform -%}
                      </div>
                    </div>
                  </div>
                </div>
Step4 JavaScriptのコードをコピペ
JSの下記のコードをコピペ。どこでもOK。
私はSchemaの直前に入れてみました。
<script>
   const buttonOpen = document.getElementById('modalOpen');
  const modal = document.getElementById('easyModal');
  const buttonClose = document.getElementsByClassName('modalClose')[0];
  const body = document.getElementsByTagName('body')[0];

  // ボタンがクリックされた時
  buttonOpen.addEventListener('click', modalOpen);
  function modalOpen() {
    modal.style.display = 'block';
    body.style.overflow = 'hidden';
  }

  // バツ印がクリックされた時
  buttonClose.addEventListener('click', modalClose);
  function modalClose() {
    modal.style.display = 'none';
    body.style.overflow = 'visible';
  }

  // モーダルコンテンツ以外がクリックされた時
  addEventListener('click', outsideClose);
  function outsideClose(e) {
    if (e.target == modal) {
      modal.style.display = 'none';
      body.style.overflow = 'visible';
    }
  }
</script>
この辺で一度、フロントに表示させてみます。
Step5 CMSを開き商品ページへ
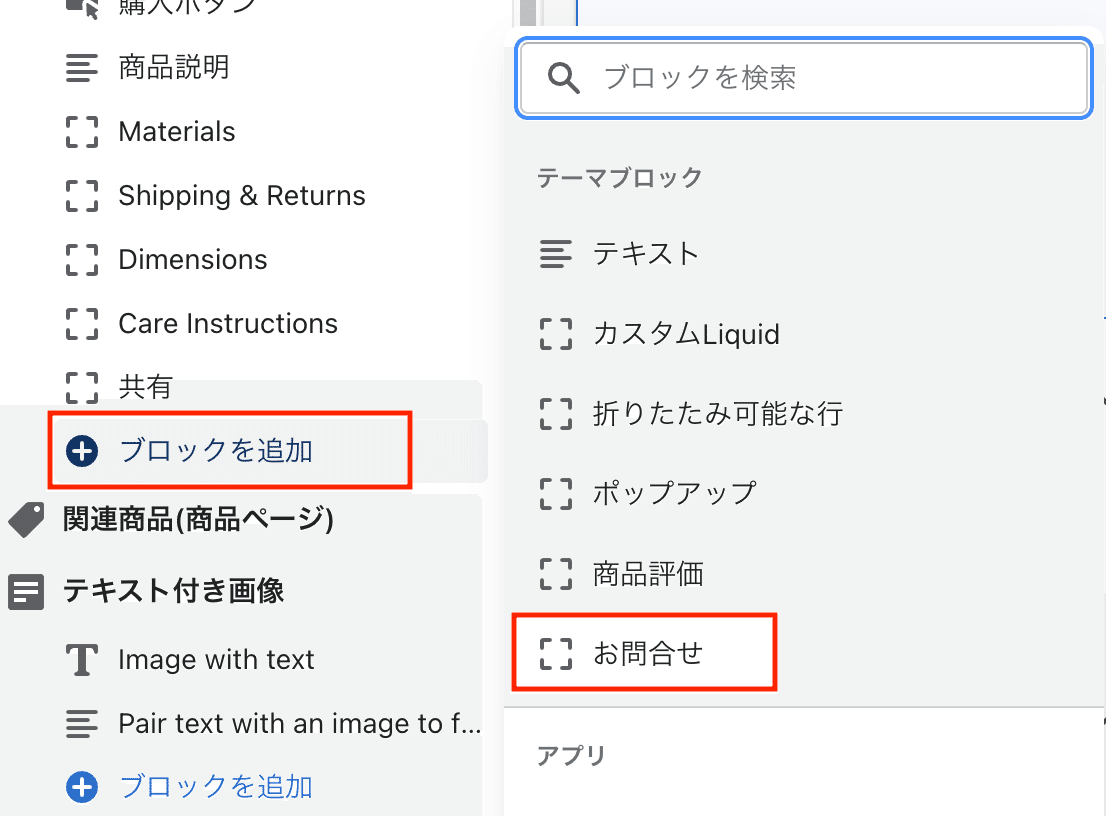
ブロックに「お問合せ」が追加されているので選択しお好みの位置に設置。
この時点ではレイアウトはおかしいですが一度メールを送信できるか試してみましょう!!
うまくメールが飛んでますね♪
Step6 CSSファイルを作成しコードをコピペ
①コード編集に戻り、アセット>新しいアセットを追加

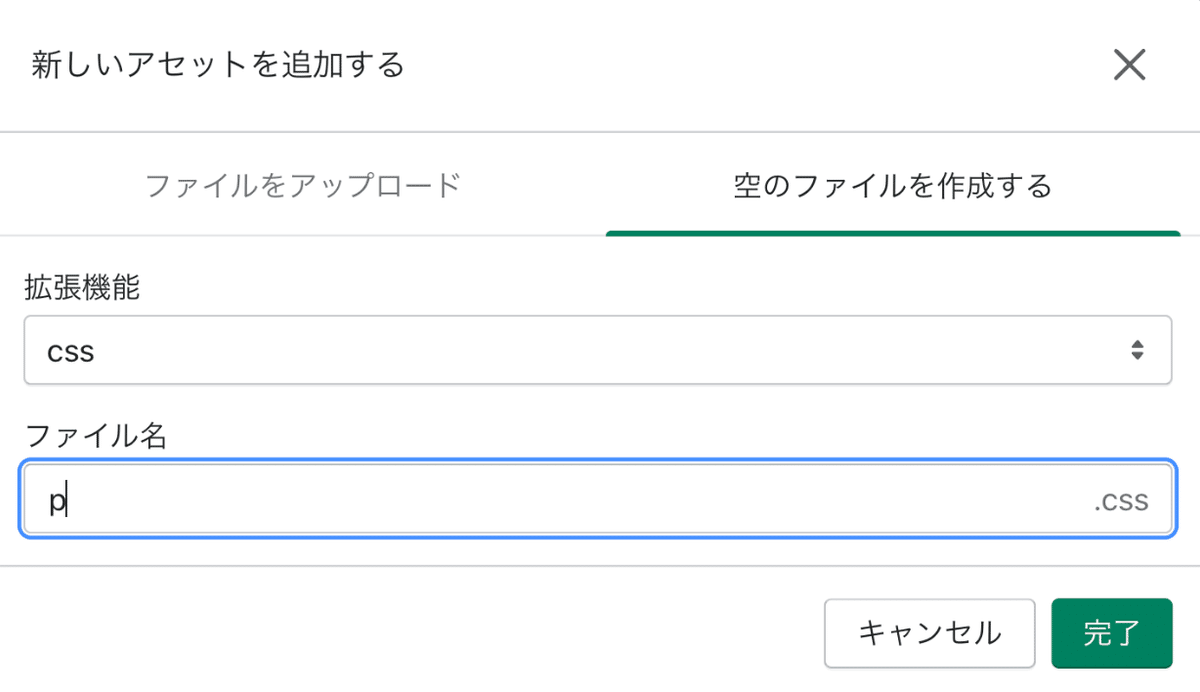
拡張機能:CSS
ファイル名:product-otoiawase
ここから先は
この記事が気に入ったらチップで応援してみませんか?
