
HealthKitから心拍の詳細な情報を取得する

HealthKitから心拍データを取得することはそれこそ10年前から可能だが、このあたりについてiOS 13 / WWDC19でいろんなAPIが追加されている。
それらについて調べて、試したのでメモ記事を書いておく。
量系列(Quantity series)とは
これまでの心拍データの表現は、
単一量のサンプル(Single quantity sample)
測定間隔全体にまたがって、センサーから受け取ったすべての測定値を単一量で表す

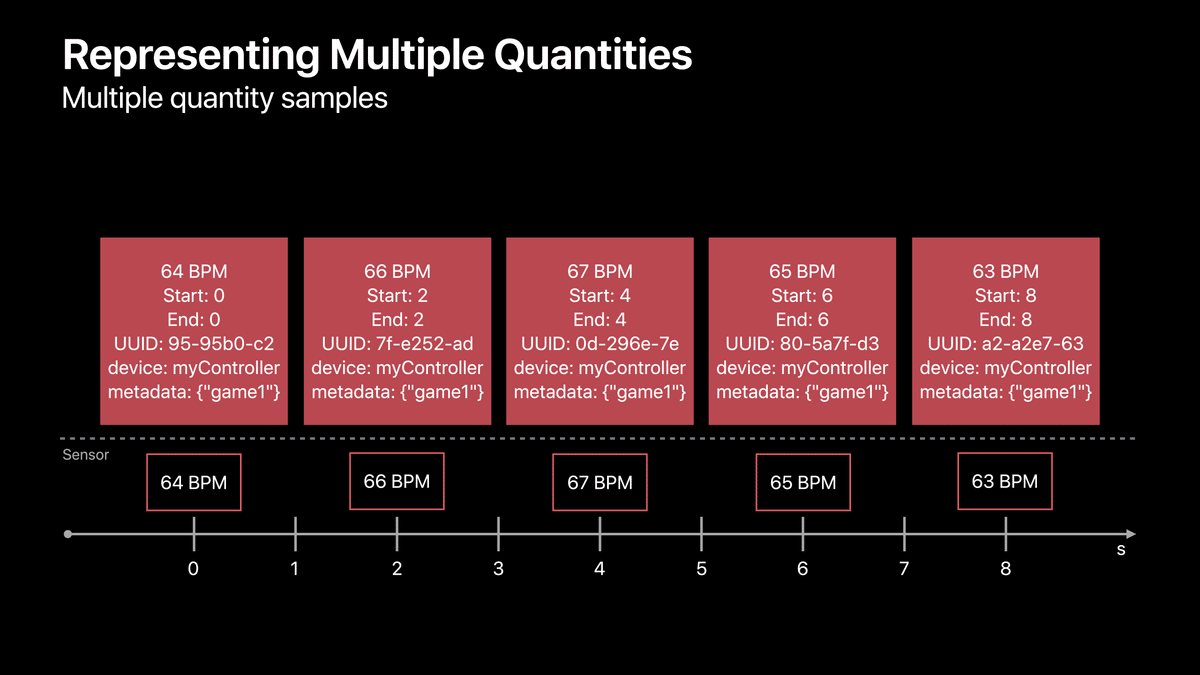
複数の量サンプル(Multiple quantity samples)
すべての測定値を異なる量サンプルで表す
の2種類だったが、iOS 13からは
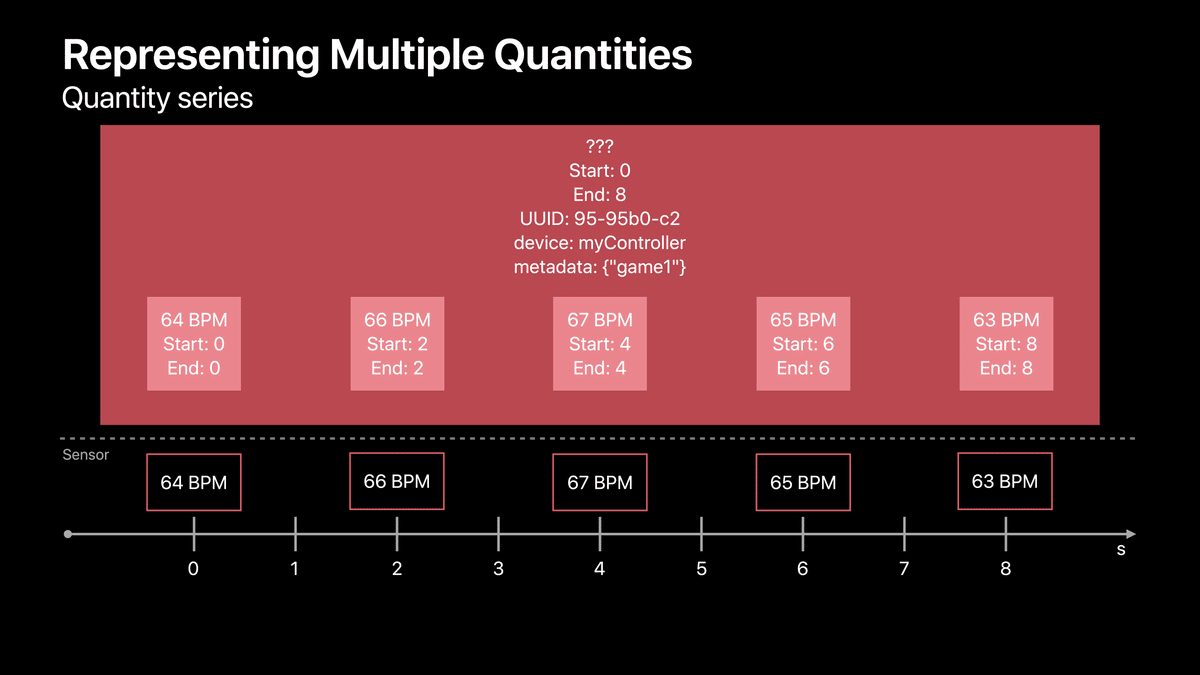
量系列(Quantity series)
センサーの完全な解像度を維持したまま、計測を表現する単一のオブジェクトが得られる
Single quantity sampleにあった冗長な情報を移動させ、1つのコピーだけを保存している
このQuantity Seriesを表現する手段として HKCumulativeQuantitySample や HKDiscreteQuantitySample といったAPIが追加された。

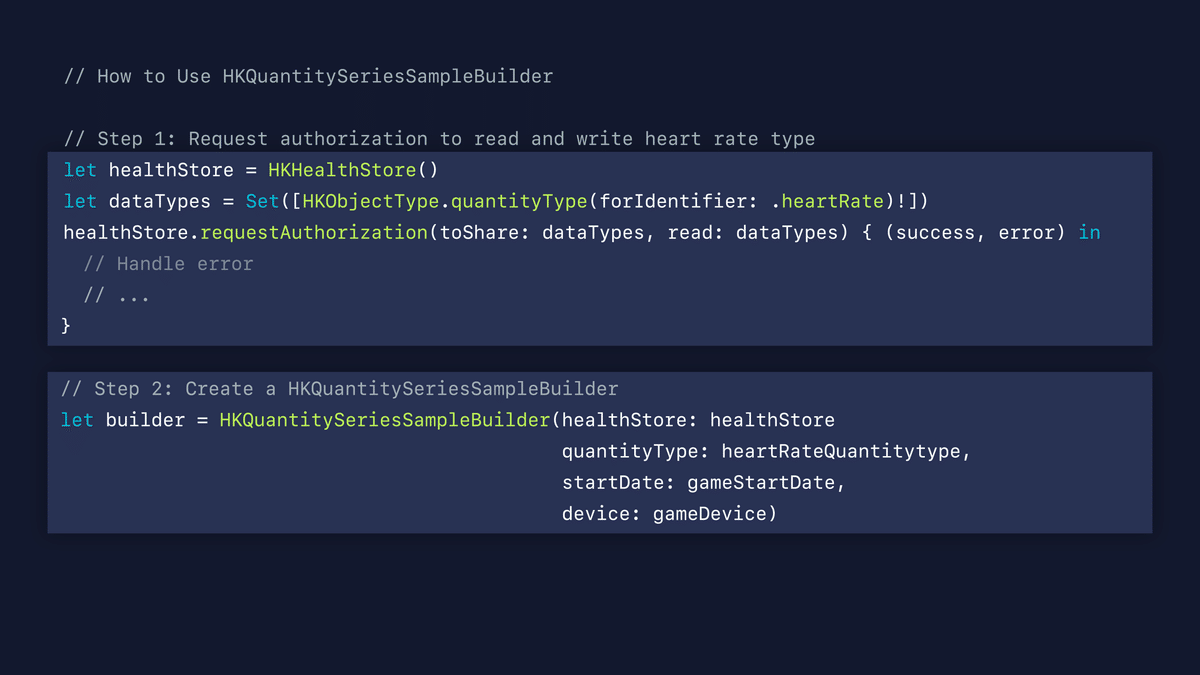
またこのQuantity Seriesデータを作成する手段として HKQuantitySeriesSampleBuilder といったクラスも追加された。
Quantity Seriesデータの取得方法
HKQuantitySeriesSampleQuery というクラスを使用する。

心拍数のQuantity Seriesを取得するコード:
let seriesSampleQuery = HKQuantitySeriesSampleQuery(quantityType: heartRateType, predicate: predicate) { (query, quantity, dateInterval, sample, done, error) in

    guard let quantity = quantity, let dateInterval = dateInterval else {
        // Handle errors during query enumeration
        ...
    }
    print("quantity: \(quantity), dateInterval: \(dateInterval)")
}
healthStore.execute(seriesSampleQuery)
手元ではOuraやApple Watchの心拍データをHealthKitに入れていて、上のコードを実行したところ、quantityHandlerの第4引数に入ってくる HKQuantitySample は常に nil だった。
以下のスライドにあるように、includeSample に true をセットすればおそらく取得できたのだと思う。

HKSampleQuery を利用する場合との違い
この HKQuantitySeriesSampleQuery を用いて心拍数の Quantity Series を取得したからといって、従来の HKSampleQuery を用いて取得する場合より詳細なデータが取れるわけではなかった。取得できるサンプルの総数は同じだった。
上にも載せた説明からいって、全体に共通する情報の取得について効率的になった、という感じなのだろう。
心拍の「鼓動」(Heartbeat)
iOS 13では、Heartbeat情報も取得できるようになった。WWDC19のセッションでは "Beat-to-beat heart measurements" (鼓動ごとの心臓の計測)とも表現されている。

HKHeartbeatSeriesSample
Heartbeatを表す型として、HKHeartbeatSeriesSample というものが追加されている。

So, you'll notice that each beat happens at a certain point of time and put together they form a series of heartbeats.
(つまり、各拍動はある時点で発生し、それらをまとめると一連の心拍動になることがわかります。)
To save this data to HealthKit, we have an HKHeartbeatSeriesSample that stores a series of heartbeats by the time stamps at which they occurred.
(このデータをHealthKitに保存するために、一連の心拍を発生したタイムスタンプごとに保存するHKHeartbeatSeriesSampleを用意しました。)
この HKHeartbeatSeriesSample の特徴として、HKQuantitySeriesSampleと違い、各サンプルは「値」を持たず、タイムスタンプの系列だけを保持する。

Heartbeatデータの取得方法

最後まで読んでいただきありがとうございます!もし参考になる部分があれば、スキを押していただけると励みになります。 Twitterもフォローしていただけたら嬉しいです。 https://twitter.com/shu223/