
Teamsでリアクションした人をPowerAutomateで一覧作成し取得する

PowerAutomateでTeamsのリアクション取得を自動化したので、紹介したいと思います。
ノーコードでできますので、非エンジニアの方も是非試してください!

今回の流れ
Teamsでリアクションを取得したいメッセージ選択
メッセージ詳細を取得
2を処理して、リアクション者を取得
CSVに吐き出す
OneDriveにCSVを格納(他サービスに代替え可能)

準備するもの
PowerAutomate
Temas
Office
OneDrive(他サービスに代替え可能)
1.フローの新規作成
まずはPowerAutomateサイトを立ち上げ、
マイフロー > 新しいフロー > 自動化したクラウドフロー を選択
選択すると下記画面が立ち上がり、スキップを選択。

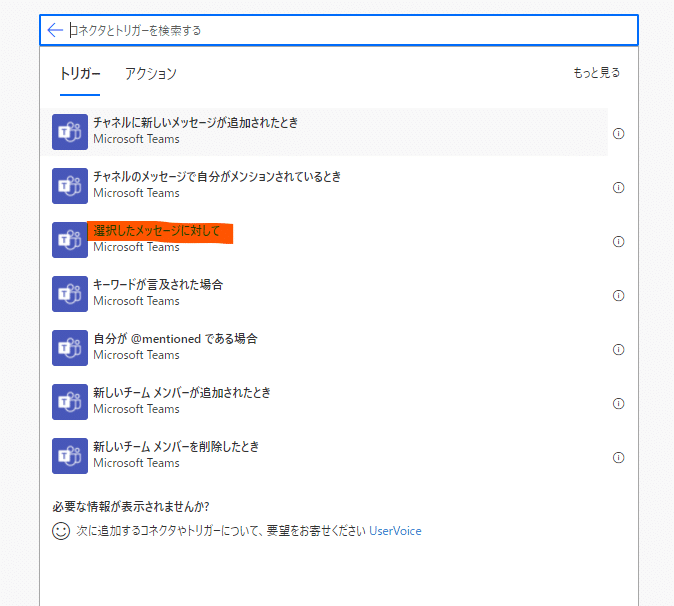
2.トリガーを選択
PowerAutomateにて新規作成から
Microsoft Temas(以降Teams) > 選択したメッセージに対してを選択する
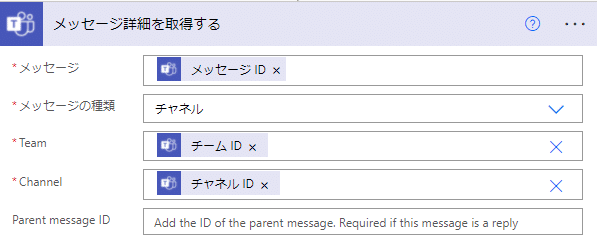
3.メッセージの詳細を取得
Teams > メッセージ詳細を取得するを選択
下記をそれぞれ埋めていく
メッセージ:メッセージID
メッセージの種類:チャンネル(今回はチャンネルのみでの使用を想定)
Team:チームID
Channel:チャンネルID
# メッセージ詳細を取得するのコード
# メッセージ
@triggerBody()?['entity']?['teamsFlowRunContext']?['messagePayload']?['id']
# Tema
@triggerBody()?['entity']?['teamsFlowRunContext']?['channelData']?['team']?['aadGroupId']
# Channel
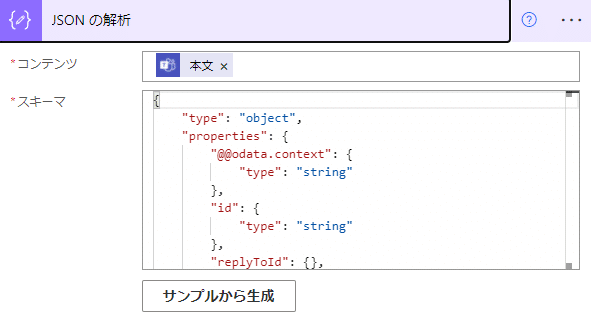
@triggerBody()?['entity']?['teamsFlowRunContext']?['channelData']?['channel']?['id']4.JSONの解析
データ操作 > JSONの解析を選択
コンテンツ:本文
スキーマ:下のスキーマのコードを参照
※スキーマをサンプルから生成する際は、一度テスト(Teamのボタンが生成れているので、クリックしてから)し、一つ前のメッセージ詳細を取得するの出力をサンプルとして張り付ければ、同様のものが生成されます。
# JSONの解析のコード
# コンテンツ
@body('メッセージ詳細を取得する')
スキーマのコード
{
"type": "object",
"properties": {
"@@odata.context": {
"type": "string"
},
"id": {
"type": "string"
},
"replyToId": {},
"etag": {
"type": "string"
},
"messageType": {
"type": "string"
},
"createdDateTime": {
"type": "string"
},
"lastModifiedDateTime": {
"type": "string"
},
"lastEditedDateTime": {},
"deletedDateTime": {},
"subject": {
"type": "string"
},
"summary": {},
"chatId": {},
"importance": {
"type": "string"
},
"locale": {
"type": "string"
},
"webUrl": {
"type": "string"
},
"policyViolation": {},
"eventDetail": {},
"from": {
"type": "object",
"properties": {
"application": {},
"device": {},
"user": {
"type": "object",
"properties": {
"id": {
"type": "string"
},
"displayName": {
"type": "string"
},
"userIdentityType": {
"type": "string"
}
}
}
}
},
"body": {
"type": "object",
"properties": {
"contentType": {
"type": "string"
},
"content": {
"type": "string"
},
"plainTextContent": {
"type": "string"
}
}
},
"channelIdentity": {
"type": "object",
"properties": {
"teamId": {
"type": "string"
},
"channelId": {
"type": "string"
}
}
},
"attachments": {
"type": "array"
},
"mentions": {
"type": "array"
},
"reactions": {
"type": "array",
"items": {
"type": "object",
"properties": {
"reactionType": {
"type": "string"
},
"createdDateTime": {
"type": "string"
},
"user": {
"type": "object",
"properties": {
"application": {},
"device": {},
"user": {
"type": "object",
"properties": {
"id": {
"type": "string"
},
"displayName": {},
"userIdentityType": {
"type": "string"
}
}
}
}
}
},
"required": [
"reactionType",
"createdDateTime",
"user"
]
}
},
"messageLink": {
"type": "string"
},
"threadType": {
"type": "string"
},
"teamId": {
"type": "string"
},
"channelId": {
"type": "string"
}
}
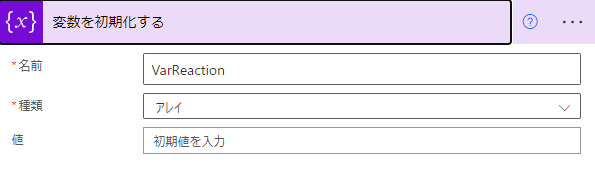
}5.変数を初期化する
変数 > 変数を初期化するを選択
名前:VarReaction
種類:アレイ
# 変数を初期化する
# 名前
VarReaction

# 種類(選択肢)
array
6-0.Apply to each
コントロール > Apply to eachを選択
リアクション者は基本複数いるので、繰り返し処理で取得していきます。
以前の手順から出力:reactions

# Apply to each
# 以前の手順から出力を選択
@body('JSON_の解析')?['reactions']
6-1.Apply to each:ユーザープロフィールの取得(V2)
Apply to each内のアクション追加で、
office 365 users > ユーザープロフィールの取得(V2)を選択
ユーザー(UPN):id
※おそらくIDは複数あるため、動的コンテンツ内の追加の式へ「item()?['user']['user']['id']」を入力→OKでIDが取得できます。
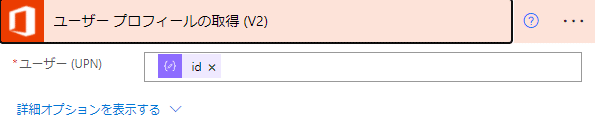
# ユーザープロフィールの取得(V2)
# ユーザー(UPN)
@item()?['user']['user']['id']
6-2.Apply to each:配列変数に追加
変数 > 配列変数に追加を選択
変数:VarReaction
値:※下記参照
{
"CreateDatetime":リアクション日時,
"ReactionType":リアクションタイプ,
"Email":メールアドレス,
"DisplayName":"表示名"
}
# 値
# CreateDatetime
@items('Apply_to_each')?['createdDateTime']

# ReactionType
items('Apply_to_each')?['reactionType']

# Email
@outputs('ユーザー_プロフィールの取得_(V2)')?['body/mail']

# DisplayName
@outputs('ユーザー_プロフィールの取得_(V2)')?['body/displayName']
7.CSVテーブルの作成
データ操作 > CSVテーブルの作成を選択
開始:VarReaction
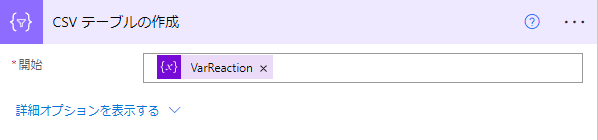
# 開始
@variables('VarReaction')
8.ファイルの作成
OneDrive > ファイル作成
フォルダのパス:保存したいOneDriveのパスを選択してください
ファイル名:一意になれば、何でもOK(私は「TeamsReactionメッセージID-タイムスタンプ」にしました。)
ファイルコンテンツ:出力
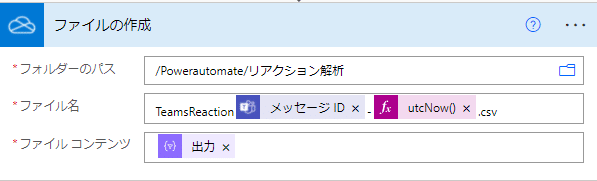
# ファイル名
TeamsReaction@{triggerBody()?['entity']?['teamsFlowRunContext']?['messagePayload']?['id']}-@{utcNow()}.csv

# ファイルコンテンツ
@body('CSV_テーブルの作成')
最後に
今回作成したリアクション者取得を応用して、リアクションしていない人に再度通知するなんかをつくれればと考えてます。(できるかな💦)
リアクション者と非リアクション者を比べるのが少々苦労しそう
この記事が気に入ったらサポートをしてみませんか?