
NLPの諸手法としてTextBlob、VADER、SO-CALをPythonでサクッと実行するための備忘録

0. とにかく参照モデルを作り続ける…
いま書いているLLM系の応用論文の参照モデルとして有名なルールベース系の手法でひたすら精度を比較をしているので、ついでにコードを(非常に簡単ながら)共有しておこうかと思う。手法は今のところ、TextBlob、VADER、SO-CALの3つ。本当はSupport Vector Machine、k-Nearest Neighbor、Naive Bayesでも比較してるんだけど、学習の過程を示すのが面倒なのでその辺はまた今度にします。
それら手法自体のことはわかっている前提で書きますが、よく知らない手法を闇雲に使うのは危ういのでやめましょう。
1. TextBlobを走らせる
TextBlob is a Python (2 and 3) library for processing textual data. It provides a consistent API for diving into common natural language processing (NLP) tasks such as part-of-speech tagging, noun phrase extraction, sentiment analysis, and more.
これは本当に簡単。textblob.TextBlob()にテキストを与えて、sentimentの中のpolarityを取り出してあげればいいだけ。
from textblob import TextBlob
t = 'This restaurant is so awesome!'
TextBlob(t).sentiment
うまり、カラム名textでテキスト情報を持ったpandasのDataFrameであるdfを考えると、単純にapplyしてあげればいいだけなので、
from textblob import TextBlob
df['sentiment'] = df['text'].apply(lambda x: TextBlob(x).sentiment.polarity)
こんな感じ。めちゃくちゃ簡単ですね。
2. VADER
Hutto, C., & Gilbert, E. (2014). Vader: A parsimonious rule-based model for sentiment analysis of social media text. In Proceedings of the international AAAI conference on web and social media (Vol. 8, No. 1, pp. 216-225).
VADERはnltkさえあればすぐに使えます。
NLTK is a leading platform for building Python programs to work with human language data. It provides easy-to-use interfaces to over 50 corpora and lexical resources such as WordNet, along with a suite of text processing libraries for classification, tokenization, stemming, tagging, parsing, and semantic reasoning, wrappers for industrial-strength NLP libraries, and an active discussion forum.
本当にnltkには頭が上がらんですね。
import nltk
nltk.download('vader_lexicon')
from nltk.sentiment.vader import SentimentIntensityAnalyzer
vader_analyzer = SentimentIntensityAnalyzer()

t = 'This restaurant is so awesome!'
vader_analyzer.polarity_scores(t)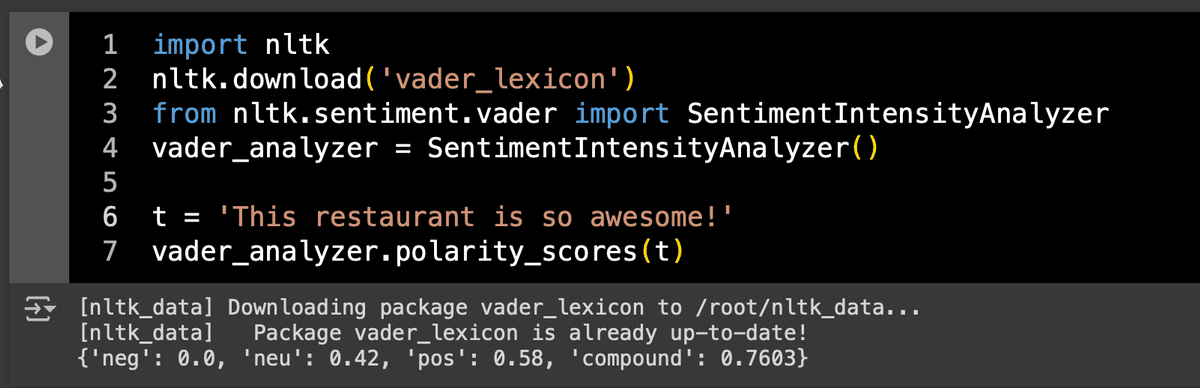
compoundの値を取り出してdfのカラムに格納することを考えるなら、
df['sentiment'] = df['text'].apply(lambda x: vader_analyzer.polarity_scores(x)['compound'])
こんな感じかな。これもかなり簡単ですね。
3. SO-CALを走らせる
Taboada, Maite, Julian Brooke, Milan Tofiloski, Kimberly Voll and Manfred Stede (2011) Lexicon-Based Methods for Sentiment Analysis. Computational Linguistics 37 (2): 267-307.
SO-CALの(おそらくオフィシャルの)ライブラリがGitHubに上がってるのでまあそれを使うことになるのだが、
これが本当に面倒臭かった。Colabだと結局multiprocessing使って裏でCore-NLPのサーバーを走らせながらSO-CALのPythonスクリプトを実行することが(僕の実力不足が故に)うまくできなかったのでAnaconda上の話だけ書いておくことにする。
今回は作業用にHDD直下にdirというディレクトリを置いた前提で書いてみる。とりあえずGitHubからSO-CALをcloneしてきつつ、必要なパッケージを入れておく。また、CoreNLPのバージョンは2024年6月11日現在最新の4.5.7の前提で書く。
%cd /dir
!git clone https://github.com/sfu-discourse-lab/SO-CAL
!wget https://nlp.stanford.edu/software/stanford-corenlp-4.5.7.zip
!unzip stanford-corenlp-4.5.7.zip
!pip install -q pycorenlp unidecode
import sys, os, json, time
from tqdm import tqdm
import numpy as np
import pandas as pd
これで/dir直下にcloneしたSO-CALとstanford-corenlp-4.5.7という2つのディレクトリができるはず。
3.1 とりあえずCoreNLPの動作チェックから。
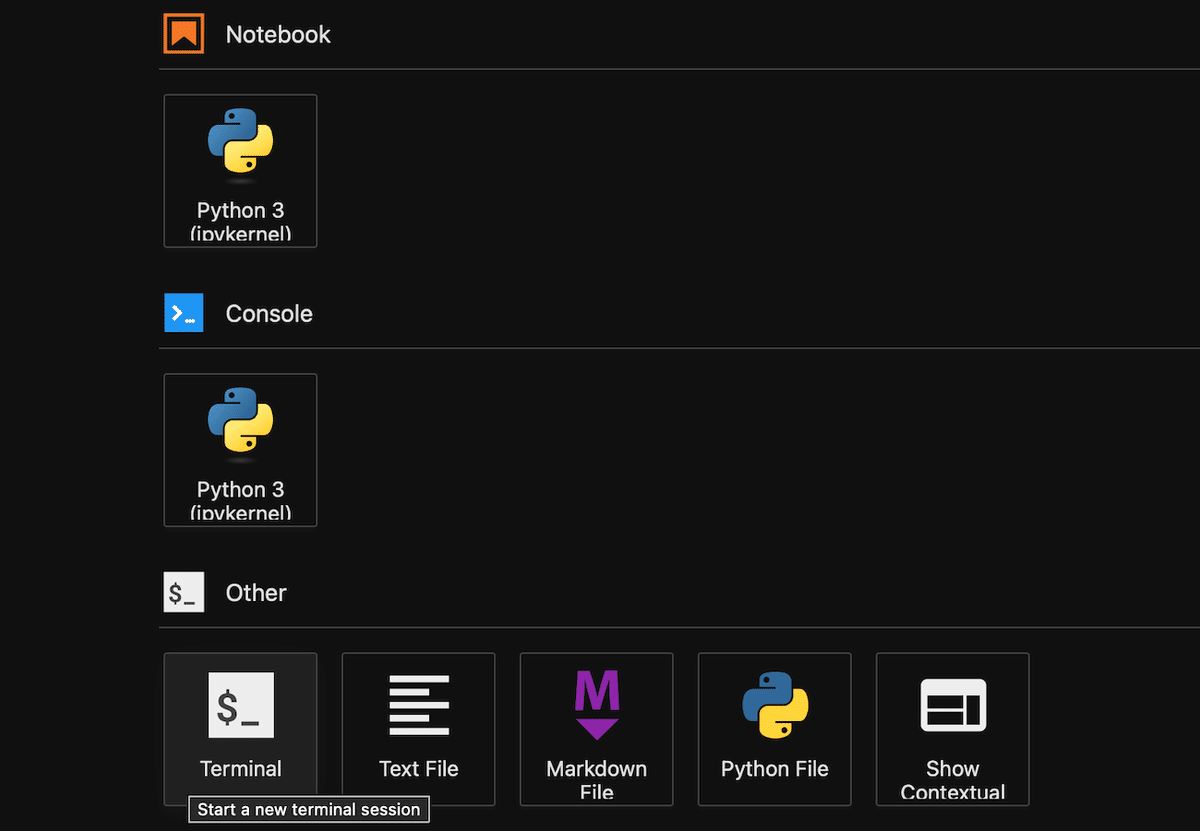
まずは別プロセスでサーバーを立ち上げる必要があるので、ランチャーからTerminalを立ち上げる。
そして出てきた端末画面で、CoreNLPのディレクトリに移動してサーバーの立ち上げコマンドを叩く。
cd /dir/stanford-corenlp-4.5.7
java -mx5g -cp "*" edu.stanford.nlp.pipeline.StanfordCoreNLPServer -timeout 10000
localhostの9000番ポートで立ち上がるので、試しにちゃんと動くかテストする。Jupyter側に戻って、
from pycorenlp import StanfordCoreNLP

nlp = StanfordCoreNLP('http://localhost:9000')
res = nlp.annotate("I love you. I hate him. You are nice. He is dumb",
                   properties={
                       'annotators': 'sentiment',
                       'outputFormat': 'json',
                       'timeout': 1000,
                   })
for s in eval(res)['sentences']:
    print("%d: '%s': %s %s" % (
        s["index"],
        " ".join([t["word"] for t in s["tokens"]]),
        s["sentimentValue"], s["sentiment"]))
こんな感じでCoreNLPの中のセンチメント分析を走らせてみる。
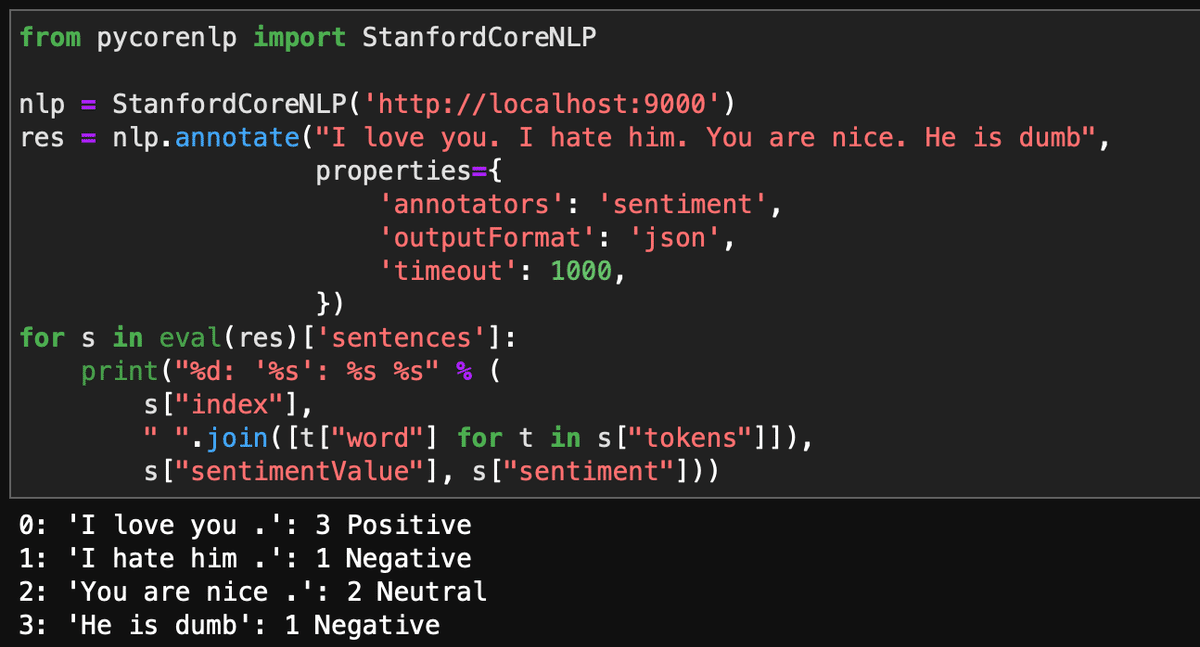
無事にセンチメントが表示される。
3.2 テキストの前処理
これもCoreNLPでやれって書いてあるので本当に面倒くさい。テキストファイルにしとけとか言われるので、適当にサンプルを作ってみる。今回は生データを/dir/inputに置くことにする。
!mkdir /dir/input
texts = [
    "I love you. I hate him. You are nice. He is dumb",
    "This restaurant is so awesome.",
    "What a beautiful lake!"
]

for i,t in enumerate(texts):
    with open('/dir/input/input'+str(i)+'.txt', 'w', encoding='utf-8') as file:
        file.write(t)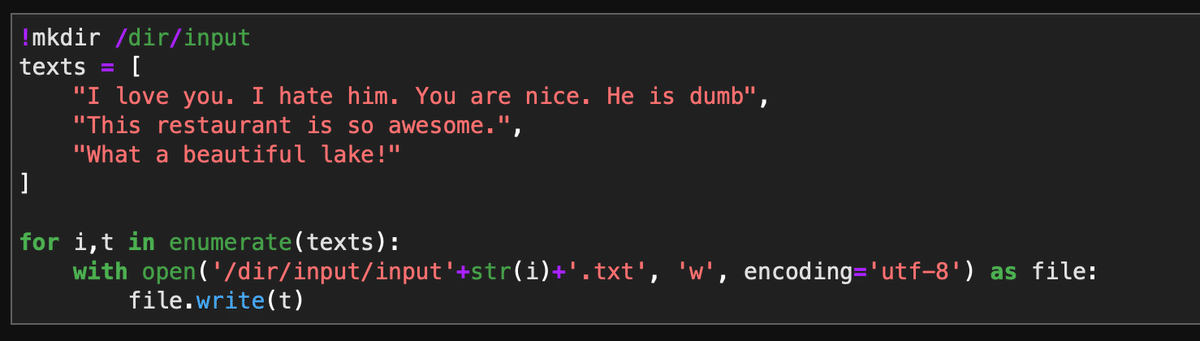
んでこれを前処理にかけるわけなんだけど、現時点(2024年6月11日現在)前処理のためのコード(SO-CAL/Source_Code/text_preprocessing/preprocess.py)が古くて動かなくなってるので、ちゃちゃっと直す。元ファイルを壊したくないのでpreprocess2.pyとする。
DIR = '/dir/SO-CAL/Source_Code/text_preprocessing/'
with open(DIR+'preprocess.py', 'r', encoding='utf-8') as file:
    text = file.read()
text = text.replace("for sent in json_input['sentences']", "for sent in eval(json_input)['sentences']")
with open(DIR+'preprocess2.py', 'w', encoding='utf-8') as file:
    file.write(text)
あとは前処理を実行する。前処理したファイルはoutputというところに入れることにする。先ほどのpreprocess2.pyに引数として入力フォルダと出力フォルダを指定してあげればあとは自動で走る。
!mkdir /dir/output
!python /dir/SO-CAL/Source_Code/text_preprocessing/preprocess2.py  -i '/dir/SO-CAL/input/' -o '/dir/SO-CAL/output/' -a 'tokenize,ssplit,pos'
試しに/dir/SO-CAL/output/input1.txtとかをみてみると、何が起きているかわかるかと思う。
3.3 SO-CALの実行
さてついにあとはSO-CALの実行だけかと思いきや、ここでもコードの修正が必要になる。sentiment_calculator内のSO_Run.pyがなぜか明示的にPython3.5でしか動作しないコードになっていて困るのでpython指定で動くように直す。
DIR = '/dir/SO-CAL/Source_Code/sentiment_calculator/'
with open(DIR+'SO_Run.py', 'r', encoding='utf-8') as file:
    text = file.read()
text = text.replace("python3.5", "python")
with open(DIR+'SO_Run2.py', 'w', encoding='utf-8') as file:
    file.write(text)
ここまでできたら最後は実行。出力ファイルはsentiment内に入るようにする。先ほど修正したSO_Run2.pyに、前処理済みのtxtファイルが入ったディレクトリを入力、最終的な出力先ディレクトリを出力として指定して実行する。
!mkdir /dir/SO-CAL/sentiment
%cd /dir/SO-CAL/Source_Code
!python /dir/SO-CAL/Source_Code/sentiment_calculator/SO_Run2.py  -i '/dir/SO-CAL/output/' -o '/dir/SO-CAL/sentiment/'
これでちょっと長めの処理が走り、出力先ディレクトリ(/dir/SO-CAL/sentiment/)内にfile_sentiment.csvというファイルができているので、こいつをpandasで読んであげれば、
f = '/dir/SO-CAL/sentiment/file_sentiment.csv'
sent = pd.read_csv(f)
sent[''] = sent['File_Name'].apply(lambda x: int(x.split('input')[1].split('.')[0])).astype(int)
sent = sent.set_index('').sort_index()

display(sent.sample(3))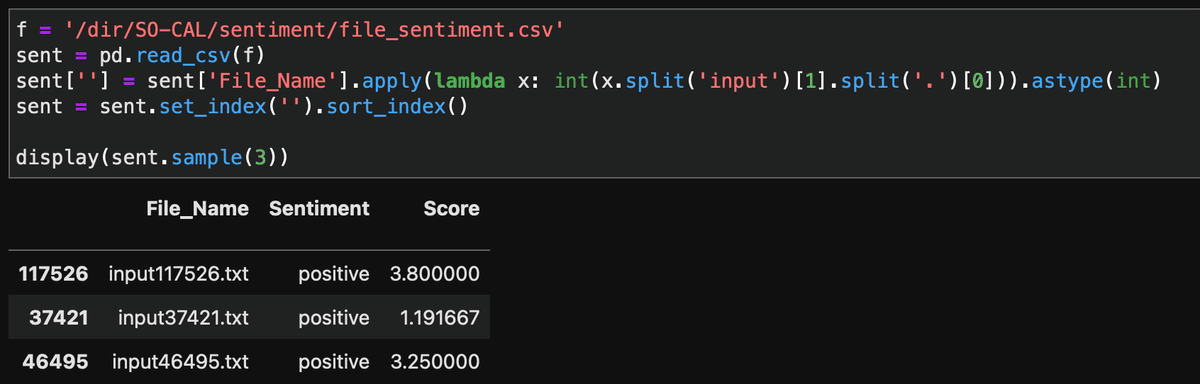
僕は別の文書データを使っているのでindexやらFile_Nameやらぐちゃぐちゃだけど、ともかくこれで実行はできる。
この記事が気に入ったらサポートをしてみませんか?