
TWSNMP開発日誌:画面サイズに我慢できなくなって4Kモニターとモニターアームを注文した、Flutterの学習

今朝も4時から開発開始です。TWLogAIANのマニュアルをZennのBookに移植し始めました。しかし、昨日から気になっているモニタ画面サイズに我慢できなくなって最初のページだけ書いて中断しました。また、1時間ぐらい4Kモニターを買うべきか悩んでいましたが、
を見つけて決断しました。4Kのモニターを増設して今使っている2560×1440(WQHD)のモニターと2画面にすることにしました。
モニターのアームも4Kのモニターも安くなっていて驚きました。
週末の楽しみが増えました。
モニターで悩んでいる間にFlutterの学習もしました。
昨日、
を見つけて画面のパーツをいろいろ試してみました。
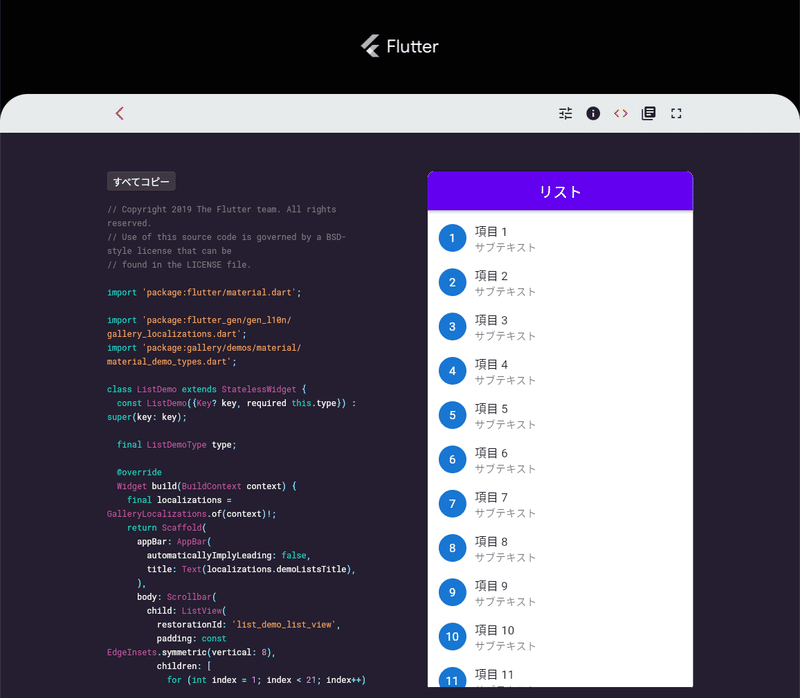
を見てコピペで作ったのが
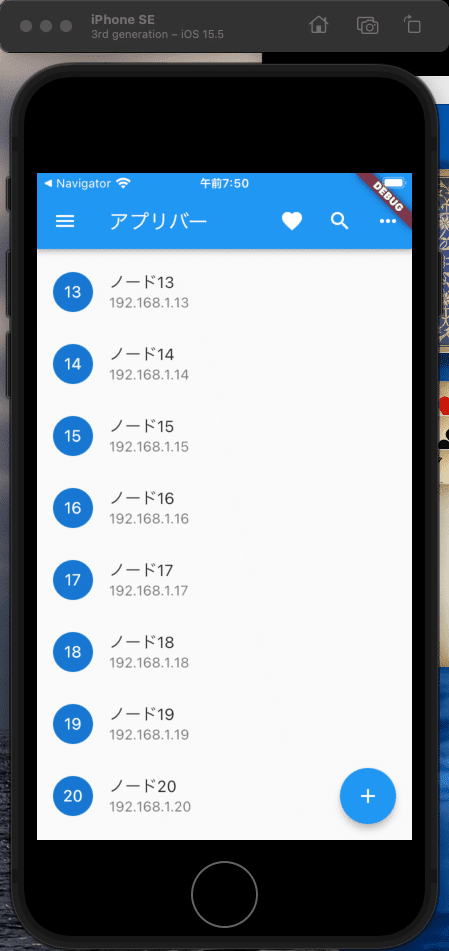
ソースコードは、
import 'package:flutter/material.dart';

void main() {
  runApp(const MyApp());
}

class MyApp extends StatelessWidget {
  const MyApp({Key? key}) : super(key: key);

  // This widget is the root of your application.
  @override
  Widget build(BuildContext context) {
    return MaterialApp(
      title: 'Flutter Demo',
      theme: ThemeData(
        // This is the theme of your application.
        //
        // Try running your application with "flutter run". You'll see the
        // application has a blue toolbar. Then, without quitting the app, try
        // changing the primarySwatch below to Colors.green and then invoke
        // "hot reload" (press "r" in the console where you ran "flutter run",
        // or simply save your changes to "hot reload" in a Flutter IDE).
        // Notice that the counter didn't reset back to zero; the application
        // is not restarted.
        primarySwatch: Colors.blue,
      ),
      home: const AppBarDemo(),
    );
  }
}

class AppBarDemo extends StatelessWidget {
  const AppBarDemo({Key? key}) : super(key: key);

  @override
  Widget build(BuildContext context) {
    return Scaffold(
      appBar: AppBar(
        leading: IconButton(
          tooltip: MaterialLocalizations.of(context).openAppDrawerTooltip,
          icon: const Icon(Icons.menu),
          onPressed: () {},
        ),
        title: const Text("アプリバー"),
        actions: [
          IconButton(
            tooltip: "お気に入り",
            icon: const Icon(
              Icons.favorite,
            ),
            onPressed: () {},
          ),
          IconButton(
            tooltip: "検索",
            icon: const Icon(
              Icons.search,
            ),
            onPressed: () {},
          ),
          PopupMenuButton<Text>(
            itemBuilder: (context) {
              return [
                const PopupMenuItem(
                  child: Text(
                    "1つめ",
                  ),
                ),
                const PopupMenuItem(
                  child: Text(
                    "2つ目",
                  ),
                ),
                const PopupMenuItem(
                  child: Text(
                    "3つ目",
                  ),
                ),
              ];
            },
          )
        ],
      ),
      body: Scrollbar(
        child: ListView(
          restorationId: 'list_demo_list_view',
          padding: const EdgeInsets.symmetric(vertical: 8),
          children: [
            for (int index = 1; index < 21; index++)
              ListTile(
                  leading: ExcludeSemantics(
                    child: CircleAvatar(child: Text('$index')),
                  ),
                  title: Text(
                    "ノード$index",
                  ),
                  subtitle: Text("192.168.1.$index")),
          ],
        ),
      ),
      floatingActionButton: FloatingActionButton(
        onPressed: () => {},
        tooltip: '追加',
        child: const Icon(Icons.add),
      ),
    );
  }
}
です。
Flutter Galleryのサンプルコードをコピペすると国際化対応しているので文字列の部分を置き換えなければなりません。
国際化の部分は、
を見て学習しました。TWSNMPのモバイル版は始めから英語にも対応しようという野望を持っています。
モニターが届いたら本格的に開発したい気持ちになってきました。
明日に続く
開発のための諸経費(機材、Appleの開発者、サーバー運用)に利用します。 ソフトウェアのマニュアルをnoteの記事で提供しています。 サポートによりnoteの運営にも貢献できるのでよろしくお願います。