ARKit+Metalでシャボン玉を飛ばす方法

ARKitは、MetalというグラフィックスAPIを使用することでより豊かな表現力を手に入れることができます。
今回は、ARKit+Metalでシャボン玉を飛ばしてみたので、その作り方を解説します。
Metalを使って、球体の表面にシェーダーで生成した虹色の模様を貼り付けています。
手順
1. Xcodeで、「Augmented Reality App」のプロジェクトを作成する
2. main.storyboardで、ARViewを削除し、ARSCNViewを追加する
今回は、ARViewではなく、ARSCNViewを使用します。
3. viewDidLoadにARKitの設定をするコードを書く
今回は、平面をタップしたらそこからシャボン玉が出る、という方法をとります。
そのため、平面検出ができるように設定します。
override func viewDidLoad() {
   super.viewDidLoad()

   // ARSCNViewDelegateのdelegateとしてselfを登録する
   sceneView.delegate = self

   sceneView.scene = SCNScene()

   sceneView.debugOptions = [ARSCNDebugOptions.showFeaturePoints]

   sceneView.autoenablesDefaultLighting = true;

   // 平面検出の設定
   let configuration = ARWorldTrackingConfiguration()
   configuration.planeDetection = .horizontal

   sceneView.session.run(configuration)
}
4. タップされたらアンカーを追加するコードを書く
タップされた平面の位置にアンカーを追加します。
ここではアンカーを追加するのみで、あとでこのアンカーに実際のシャボン玉を追加していきます。
override func touchesBegan(_ touches: Set<UITouch>, with event: UIEvent?) {
   guard let touch = touches.first else {return}
   // タッチされた場所のスクリーン座標を得る
   let touchPos = touch.location(in: sceneView)
   // タッチされた場所に該当するアンカーを見つける
   let hitTest = sceneView.hitTest(touchPos, types: .existingPlaneUsingExtent)
   if !hitTest.isEmpty {
       // アンカーを追加する
       let anchor = ARAnchor(transform: hitTest.first!.worldTransform)
       sceneView.session.add(anchor: anchor)
   }
}
5. アンカーを検出したらシャボン玉を追加するコードを書く
アンカーを検出するとrendererが呼ばれます。そこからシャボン玉を追加していきます。
// アンカーを検出すると呼ばれる
func renderer(_ renderer: SCNSceneRenderer, didAdd node: SCNNode, for anchor: ARAnchor) {
   guard !(anchor is ARPlaneAnchor) else { return }
   addBubble(node: node)
}

// シャボン玉を追加する
func addBubble(node: SCNNode) {
   let sphereNode = SCNNode()

   // シャボン玉の色を時間とともに変化させるために、時間情報を設定する(後ほど解説)
   Timer.scheduledTimer(withTimeInterval: 1.0/60.0, repeats: true, block: { (timer) in
       self.updateTime(sphereNode)
   })

   // 球体を作る
   sphereNode.geometry = SCNSphere(radius: 0.02)
   sphereNode.position.y += Float(0.05)

   // 球体にMetalのシェーダーを適用する
   let program = SCNProgram()
   program.vertexFunctionName = "vertexShader"
   program.fragmentFunctionName = "fragmentShader"
   sphereNode.geometry?.firstMaterial?.program = program

   let time = Float(Date().timeIntervalSince(startDate))
   globalData.time = time
   let uniformsData = Data(bytes: &globalData, count: MemoryLayout<GlobalData>.size)
   sphereNode.geometry?.firstMaterial?.setValue(uniformsData, forKey: "globalData")

   node.addChildNode(sphereNode)

   // シャボン玉を上に飛ばすためのアニメーションを指定する
   node.runAction(SCNAction.repeatForever(SCNAction.move(by: SCNVector3(0, 0.1, 0), duration: 1)))
}

// 経過時間をシェーダーに渡す
func updateTime(_ node: SCNNode) {
   let time = Float(Date().timeIntervalSince(startDate))
   globalData.time = time
   let uniformsData = Data(bytes: &globalData, count: MemoryLayout<GlobalData>.size)
   node.geometry?.firstMaterial?.setValue(uniformsData, forKey: "globalData")
}
上のコードを少し解説します。
球体にシェーダを適用するためには、SCNProgramを使います。このようにして、シェーダー関数名を登録しておけば適用されます。
let program = SCNProgram()
program.vertexFunctionName = "vertexShader"
program.fragmentFunctionName = "fragmentShader"
sphereNode.geometry?.firstMaterial?.program = program
また、シェーダーの描く模様は時間とともに変化するようにしたいので、経過時間の情報を渡す必要があります。
シェーダーに渡す情報はstructで定義し、インスタンス変数として生成しておきます。
struct GlobalData {
   var time: Float
}
private var globalData: GlobalData = GlobalData(time: Float(0))
また、経過時間の起点となる時間を現在日付としてインスタンス変数に代入しておきます。
private var startDate: Date = Date()そして、経過時間を用意してglobalDataに入れて、シェーダーに渡します。
let time = Float(Date().timeIntervalSince(startDate))
globalData.time = time
let uniformsData = Data(bytes: &globalData, count: MemoryLayout<GlobalData>.size)
sphereNode.geometry?.firstMaterial?.setValue(uniformsData, forKey: "globalData")
経過時間は、その後も引き続きシェーダーに渡し続ける必要があります。
Timerクラスを使って、1/60秒毎にupdateTimeメソッドを起動し、この中で経過時間を計算し直してシェーダーに渡しています。
Timer.scheduledTimer(withTimeInterval: 1.0/60.0, repeats: true, block: { (timer) in
   self.updateTime(sphereNode)
})

func updateTime(_ node: SCNNode) {
   let time = Float(Date().timeIntervalSince(startDate))
   globalData.time = time
   let uniformsData = Data(bytes: &globalData, count: MemoryLayout<GlobalData>.size)
   node.geometry?.firstMaterial?.setValue(uniformsData, forKey: "globalData")
}
6. シェーダーを書く
SceneKitのマテリアルに描くシェーダーの書き方は、こちらの記事がわかりやすいので参考にして下さい。
今回は、さらにFragmentシェーダーに経過時間を与える必要があるため、、device GlobalData &globalDataとして、swift側から渡したGlobalData構造体のデータを受け取っています。
また、今回はシェーダーで時間ともに変化する虹色を表現していますが、その実装はGLSLで実装されたものを転用しています。
シェーダーの実装は次のとおりです。
#include <metal_stdlib>
using namespace metal;
#include <SceneKit/scn_metal>
struct GlobalData {
float time;
};
struct VertexInput {
float3 position [[attribute(SCNVertexSemanticPosition)]];
float2 texCoords [[attribute(SCNVertexSemanticTexcoord0)]];
};
struct NodeBuffer {
float4x4 modelViewProjectionTransform;
};
struct ColorInOut
{
float4 position [[ position ]];
float2 texCoords;
};
vertex ColorInOut vertexShader(VertexInput in [[ stage_in ]],
constant NodeBuffer& scn_node [[ buffer(0) ]])
{
ColorInOut out;
out.position = scn_node.modelViewProjectionTransform * float4(in.position, 1.0);
out.texCoords = in.texCoords;
return out;
}
float3 hsv2rgb( float3 c )
{
float3 rgb = clamp( abs(fmod(c.x*6.0+float3(0.0,4.0,2.0),6.0)-3.0)-1.0, 0.0, 1.0 );
rgb = rgb*rgb*(3.0-2.0*rgb);
return c.z * mix( float3(1.0), rgb, c.y);
}
fragment float4 fragmentShader(ColorInOut in [[ stage_in] ],
device GlobalData &globalData [[buffer(1)]])
{
float2 position = in.texCoords;
float time =globalData.time;
float3 color = float3(0.1, 0.1, 0.1);
color = hsv2rgb(float3(time * 0.3 + position.x - position.y,0.5,1.0));
return float4(color,0.4);
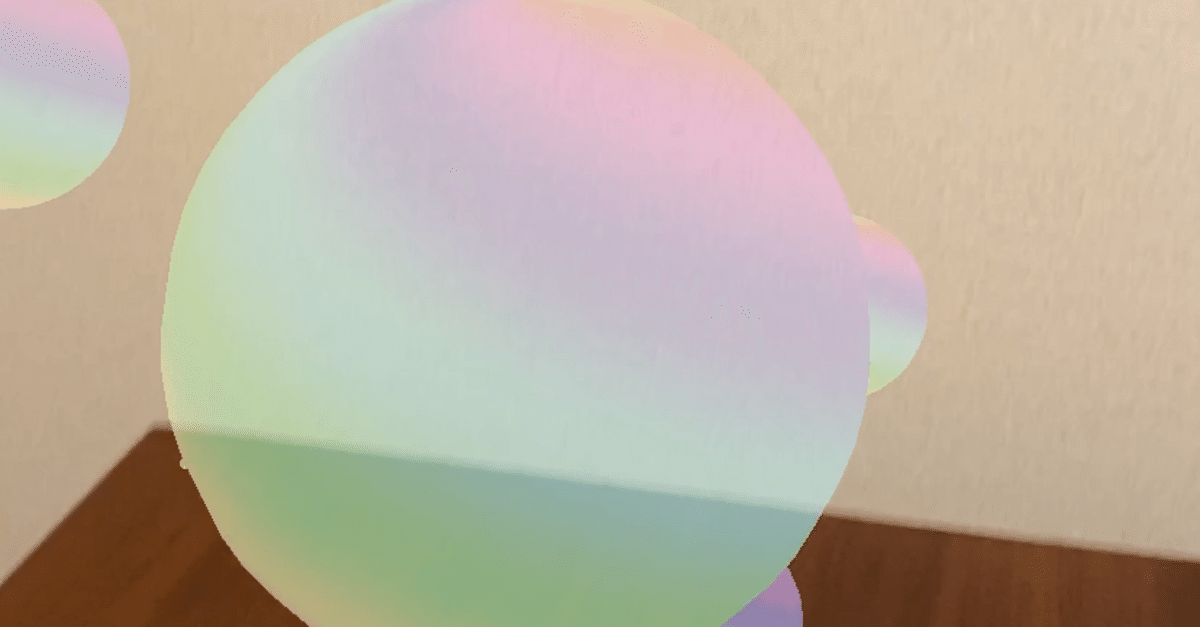
}仕上がり
シャボン玉1つ1つの大きさが同じなのと、同じ方向に飛んでいるので、このあたりを改良するとより本物っぽくなるかもしれません。
コード全体
class ViewController: UIViewController, ARSCNViewDelegate {
   @IBOutlet weak var button: UIButton!

   private var globalData: GlobalData = GlobalData(time: Float(0))
   private var startDate: Date = Date()

   @IBOutlet var sceneView: ARSCNView!

   override func viewDidLoad() {
       super.viewDidLoad()

       sceneView.delegate = self

       sceneView.scene = SCNScene()

       sceneView.debugOptions = [ARSCNDebugOptions.showFeaturePoints]

       sceneView.autoenablesDefaultLighting = true;

       let configuration = ARWorldTrackingConfiguration()
       configuration.planeDetection = .horizontal
       sceneView.session.run(configuration)
   }

   func updateTime(_ node: SCNNode) {
       let time = Float(Date().timeIntervalSince(startDate))
       globalData.time = time
       let uniformsData = Data(bytes: &globalData, count: MemoryLayout<GlobalData>.size)
       node.geometry?.firstMaterial?.setValue(uniformsData, forKey: "globalData")
   }

   func renderer(_ renderer: SCNSceneRenderer, didAdd node: SCNNode, for anchor: ARAnchor) {
       guard !(anchor is ARPlaneAnchor) else { return }
       addBubble(node: node)
   }

   func addBubble(node: SCNNode) {
       let sphereNode = SCNNode()

       Timer.scheduledTimer(withTimeInterval: 1.0/60.0, repeats: true, block: { (timer) in
           self.updateTime(sphereNode)
       })

       sphereNode.geometry = SCNSphere(radius: 0.02)
       sphereNode.position.y += Float(0.05)

       let program = SCNProgram()
       program.vertexFunctionName = "vertexShader"
       program.fragmentFunctionName = "fragmentShader"
       sphereNode.geometry?.firstMaterial?.program = program

       let time = Float(Date().timeIntervalSince(startDate))
       globalData.time = time
       let uniformsData = Data(bytes: &globalData, count: MemoryLayout<GlobalData>.size)
       sphereNode.geometry?.firstMaterial?.setValue(uniformsData, forKey: "globalData")

       node.addChildNode(sphereNode)

       node.runAction(SCNAction.repeatForever(SCNAction.move(by: SCNVector3(0, 0.1, 0), duration: 1)))
   }

   override func touchesBegan(_ touches: Set<UITouch>, with event: UIEvent?) {
       guard let touch = touches.first else {return}
       let touchPos = touch.location(in: sceneView)
       let hitTest = sceneView.hitTest(touchPos, types: .existingPlaneUsingExtent)
       if !hitTest.isEmpty {
           let anchor = ARAnchor(transform: hitTest.first!.worldTransform)
           sceneView.session.add(anchor: anchor)
       }
   }
}
githubに完全なコードがあります。完全なコードには録画するためののコードも入っています。
参考資料:
この記事が気に入ったらサポートをしてみませんか?