Python×tkinterで〇✕ゲームを作ろう

今日は、Pythonの標準GUIライブラリtkinterを使って、〇✕ゲームを作る方法について解説します。
1. 要件定義
まず、要件を整理します。
・トップ画面を表示
・スタートボタンを押したら画面遷移
・画面遷移したらウインドウに3×3の9マスを表示する
・各マスの初期表示はブランク
・各マスを押下したら、先攻なら〇・後攻なら✕が表示される
・縦・横・斜めのいずれか一列揃えばゲーム終了
・ゲーム終了したらボタン押下不可
2. ベースとなるウィジェットと処理を記載
ベースとして、tkinterモジュールのインポートや、ベースとなるウィジェットを用意します。
from tkinter import *
from tkinter import ttk
import time

#ウインドウ作成
root = Tk()
root.title("〇✕ゲーム")
root.geometry("315x305")

#game_frame作成
bord_frame = ttk.Frame(root, style="style.TFrame")
bord_frame.grid(row=0, column=0, sticky=(N,W,S,E))

root .mainloop()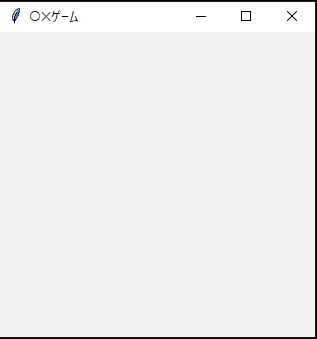
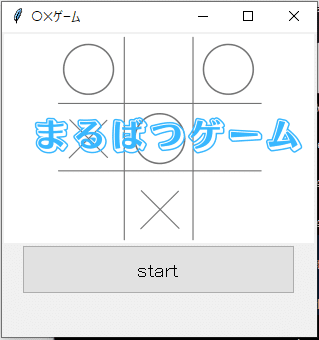
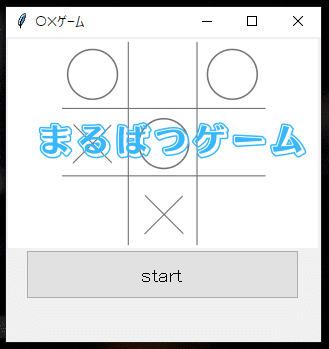
3. トップ画面の表示
トップ画面表示は以下のように記載しました。
画像は自分でCanvaで作りました。
#画像表示
top_image = PhotoImage(file="oxtop.png")
top_image_label = ttk.Label(bord_frame, image=top_image)
top_image_label.grid(row=0, column=0)

#ゲーム開始ボタン
#button_style
start_button_style = ttk.Style()
start_button_style.configure("start_button_style.TButton", font=("MS ゴシック", 16), width=20)
start_button = ttk.Button(bord_frame,
                          text="start",
                          style="start_button_style.TButton",
                          command="",
                          width = 15,
                          padding = [50, 10, 50, 10])
start_button.grid(row=1, column= 0, sticky=(S))
過去記事でも解説したように、ボタンを作成しgridで配置してます。
なお、ボタンのコマンド(command)は””として、未定義なので現時点でボタンを押しても何も起こりません。
4. 〇✕ゲームのメイン部分
今回一番のポイントとなる〇✕ゲームの実装方式としては、以下としました。
①スタートボタンを押したら、盤面を表示
➁3×3の多重リストと3×3のボタンを別に用意し、ボタンを盤面に表示
➂ターン変数を用意し奇数なら先攻、偶数なら後攻と判定
➃奇数時はボタン押下すると〇、偶数時はボタン押下すると✕の文字列をボタンに表示
➄ボタン押下時に、ボタン表示だけでなく多重リストの値も更新する
➅多重リストで勝敗判定する関数を定義
➆勝敗判定したら、全てのボタンを不活性にする
➇スペースキーでリスタートできるようにする
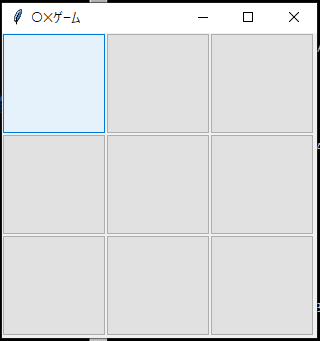
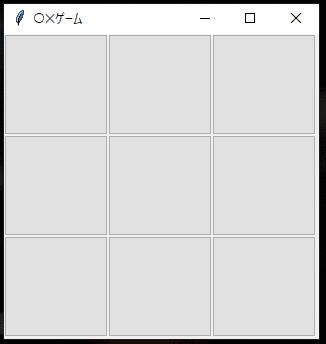
5. 盤面表示(3×3マスのボタン)①・➁
盤面へのボタン表示は以下のように実装しました。
先ほどのstart_buttonのcommandに以下のmake_button関数を渡してあげます。
#3×3のbuttonを用意する
def make_button(*arg):
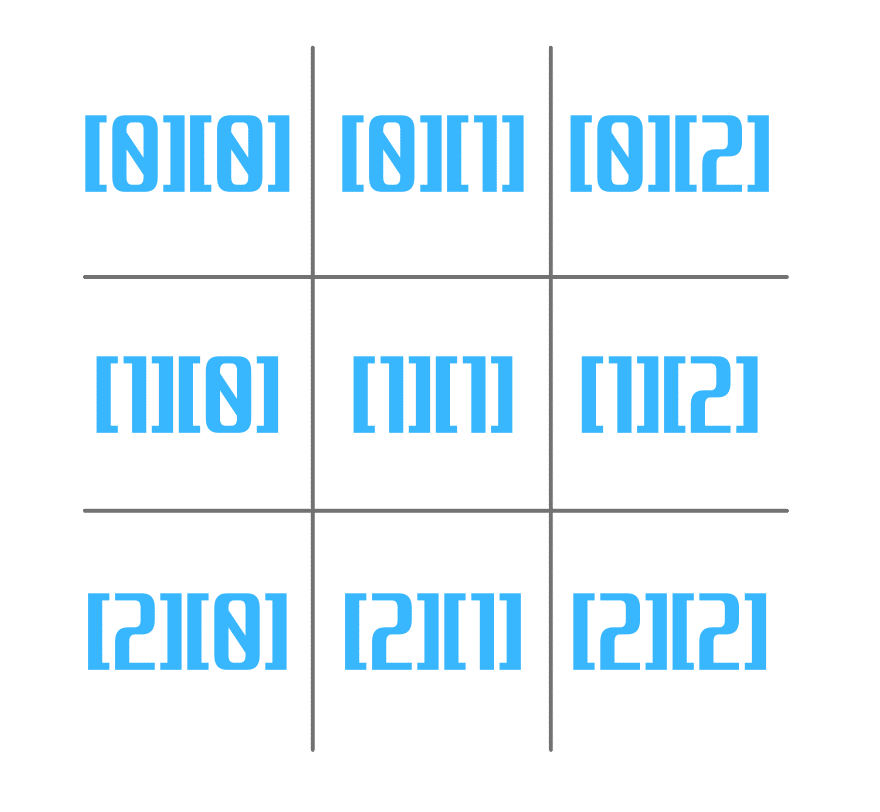
#[["","",""],["","",""],["","",""]]という多重リストを用意
global ox
ox = [ ["" for i in range(3)] for i in range(3)]
#スタートボタンとトップ画像を消去
start_button.destroy()
top_image_label.destroy()
#ボタンの方角と多重リスト上の位置を定義
directions = {'NW':[0, 0], 'N':[0, 1], 'NE':[0, 2], 'W':[1, 0], 'C':[1, 1], 'E':[1, 2], 'SW':[2, 0], 'S':[2, 1], 'SE':[2, 2]}
#button_styleを定義
button_style = ttk.Style()
button_style.configure("button_style.TButton", font=("MS ゴシック", 24), width=6)
#辞書からキー(方角)と座標をループ処理で取り出しながらボタンを作成していく
for key, item in directions.items():
#ボタン名を文字列で作成
button_name = key + "_button"
#ボタン機能を文字列で定義
button_command = key + "_button_on"
#ボタン名の文字列を変数とし、ボタンを作成
globals()[button_name] = ttk.Button(bord_frame,
text=ox[item[0]][item[1]], #テキストは多重リストより取得
command = "", #コマンドは一旦ブランクにする
style="button_style.TButton", #ボタンスタイル
padding=[0, 30]) #ボタンの大きさを調整
globals()[button_name].grid(row=item[0], column=item[1]) #ボタンを定義
global turn_num #turn変数を定義 ➂準備
turn_num = 1・directionsという辞書型を用意し、方角と多重リスト上の位置を格納しておくことでループ処理でボタン配置をできるようにしています。
・その際、文字列を変数名とする処理をglobals()で実現しています。
・ちょこちょこglobal変数を定義しているのは、関数外からも変数にアクセスできるようにしているものです。
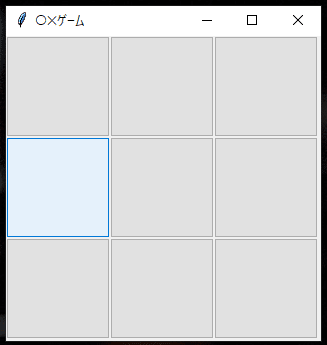
スタートボタン押下で盤面が表示されるようになりました。
6. 判定機能とボタン押下時の処理機能を定義
ボタン押下時に判定処理も行わせたいため、判定処理→ボタン押下時処理の順で記述します。
#判定処理
def judge():
if ox[0][0] == ox[0][1] and ox[0][1] == ox[0][2] and ox [0][1] != "":
if ox[0][0] == "〇":
print("先攻プレイヤーの勝利")
state_disabled()
else:
print("後攻プレイヤーの勝利")
state_disabled()
elif ox[1][0] == ox[1][1] and ox[1][1] == ox[1][2] and ox [1][1] != "":
if ox[1][0] == "〇":
print("先攻プレイヤーの勝利")
state_disabled()
else:
print("後攻プレイヤーの勝利")
state_disabled()
elif ox[2][0] == ox[2][1] and ox[2][1] == ox[2][2] and ox [2][1] != "":
if ox[2][0] == "〇":
print("先攻プレイヤーの勝利")
state_disabled()
else:
print("後攻プレイヤーの勝利")
state_disabled()
elif ox[0][0] == ox[1][0] and ox[1][0] == ox[2][0] and ox [1][0] != "":
if ox[0][0] == "〇":
print("先攻プレイヤーの勝利")
state_disabled()
else:
print("後攻プレイヤーの勝利")
state_disabled()
elif ox[0][1] == ox[1][1] and ox[1][1] == ox[2][1] and ox [1][1] != "":
if ox[0][1] == "〇":
print("先攻プレイヤーの勝利")
state_disabled()
else:
print("後攻プレイヤーの勝利")
state_disabled()
elif ox[0][2] == ox[1][2] and ox[1][2] == ox[2][2] and ox [1][2] != "":
if ox[0][2] == "〇":
print("先攻プレイヤーの勝利")
else:
print("後攻プレイヤーの勝利")
elif ox[0][0] == ox[1][1] and ox[1][1] == ox[2][2] and ox [1][1] != "":
if ox[0][0] == "〇":
print("先攻プレイヤーの勝利")
state_disabled()
else:
print("後攻プレイヤーの勝利")
state_disabled()
elif ox[0][2] == ox[1][1] and ox[1][1] == ox[2][0] and ox [1][1] != "":
if ox[0][2] == "〇":
print("先攻プレイヤーの勝利")
state_disabled()
else:
print("後攻プレイヤーの勝利")
state_disabled()
else:
pass
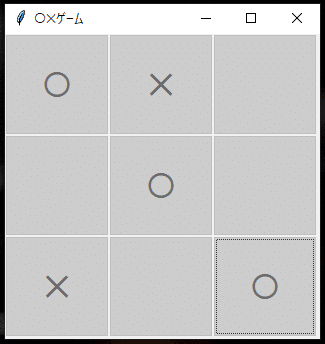
多重リストoxの位置情報とマスのイメージを重ねると以下のようになります。
次にボタン押下時の処理関数を定義します。
#ボタン押下時の処理
#NW_button
def NW_button_on(*arg):
   global turn_num
   if turn_num % 2 == 1:
       ox[0][0] = "〇"
       NW_button.configure(text = "〇", state=DISABLED)
       turn_num += 1
       judge()
   else:
       ox[0][0] = "✕"
       NW_button.configure(text = "✕", state=DISABLED)
       turn_num += 1
       judge()
#N_button
def N_button_on(*arg):
   global turn_num
   if turn_num % 2 == 1:
       ox[0][1] = "〇"
       N_button.configure(text = "〇", state=DISABLED)
       turn_num += 1
       judge()
   else:
       ox[0][1] = "✕"
       N_button.configure(text = "✕", state=DISABLED)
       turn_num += 1
       judge()
#NE_button
def NE_button_on(*arg):
   global turn_num
   if turn_num % 2 == 1:
       ox[0][2] = "〇"
       NE_button.configure(text = "〇", state=DISABLED)
       turn_num += 1
       judge()
   else:
       ox[0][2] = "✕"
       NE_button.configure(text = "✕", state=DISABLED)
       turn_num += 1
       judge()
#W_button
def W_button_on(*arg):
   global turn_num
   if turn_num % 2 == 1:
       ox[1][0] = "〇"
       W_button.configure(text = "〇", state=DISABLED)
       turn_num += 1
       judge()
   else:
       ox[1][0] = "✕"
       W_button.configure(text = "✕", state=DISABLED)
       turn_num += 1
       judge()
#C_button
def C_button_on(*arg):
   global turn_num
   if turn_num % 2 == 1:
       ox[1][1] = "〇"
       C_button.configure(text = "〇", state=DISABLED)
       turn_num += 1
       judge()
   else:
       ox[1][1] = "✕"
       C_button.configure(text = "✕", state=DISABLED)
       turn_num += 1
       judge()
#E_button
def E_button_on(*arg):
   global turn_num
   if turn_num % 2 == 1:
       ox[1][2] = "〇"
       E_button.configure(text = "〇", state=DISABLED)
       turn_num += 1
       judge()
   else:
       ox[1][2] = "✕"
       E_button.configure(text = "✕", state=DISABLED)
       turn_num += 1
       judge()
#SW_button
def SW_button_on(*arg):
   global turn_num
   if turn_num % 2 == 1:
       ox[2][0] = "〇"
       SW_button.configure(text = "〇", state=DISABLED)
       turn_num += 1
       judge()
   else:
       ox[2][0] = "✕"
       SW_button.configure(text = "✕", state=DISABLED)
       turn_num += 1
       judge()

#S_button_on
def S_button_on(*arg):
   global turn_num
   if turn_num % 2 == 1:
       ox[2][1] = "〇"
       S_button.configure(text = "〇", state=DISABLED)
       turn_num += 1
       judge()
   else:
       ox[2][1] = "✕"
       S_button.configure(text = "✕", state=DISABLED)
       turn_num += 1
       judge()
#SE_button
def SE_button_on(*arg):
   global turn_num
   if turn_num % 2 == 1:
       ox[2][2] = "〇"
       SE_button.configure(text = "〇", state=DISABLED)
       turn_num += 1
       judge()
   else:
       ox[2][2] = "✕"
       SE_button.configure(text = "✕", state=DISABLED)
       turn_num += 1
       judge()
あとは先ほどボタンを生み出すところに処理を追記します。
   #辞書からキー(方角)と座標をループ処理で取り出しながらボタンを作成していく
   for key, item in directions.items():
       #ボタン名を文字列で作成
       button_name = key + "_button"
       #ボタン機能を文字列で定義
       button_command = key + "_button_on"
       #ボタン名の文字列を変数とし、ボタンを作成
       globals()[button_name] = ttk.Button(bord_frame,
                                           text=ox[item[0]][item[1]], #テキストは多重リストより取得
                                           command = "globals)[button_command]", #コマンドは一旦ブランクにする
                                           style="button_style.TButton", #ボタンスタイル
                                           padding=[0, 30]) #ボタンの大きさを調整
       globals()[button_name].grid(row=item[0], column=item[1]) #ボタンを定義
もう一つ。判定時に、他のボタンを非活性にする処理を追加します。
これがないと、勝敗がついた後にもボタンが押せてしまいます。
#終了時のボタン非活性化処理
def state_disabled():
   NW_button.configure(state=DISABLED)
   N_button.configure(state=DISABLED)
   NE_button.configure(state=DISABLED)
   W_button.configure(state=DISABLED)
   C_button.configure(state=DISABLED)
   E_button.configure(state=DISABLED)
   SW_button.configure(state=DISABLED)
   S_button.configure(state=DISABLED)
   SE_button.configure(state=DISABLED)7
7. リスタート機能を用意(スペースキーで起動)
最後に、ゲームの途中でも盤面をリセットできるリスタート機能を用意します。
#リスタート(イベント)
root.bind('<KeyPress-space>', make_button)
8. 完成形
では実際に動かしてみましょう。
・プログラム起動
・startボタンを押下
・先攻・後攻とボタン押下で〇・✕が表示され、ボタンが不活性化
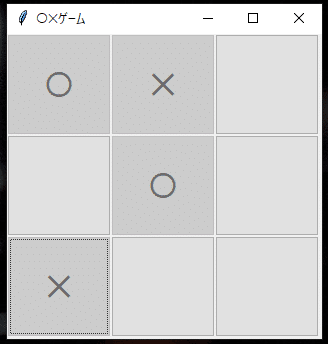
・〇・✕いずれかが揃うと、ゲーム終了しコマンドラインに結果表示
(他のボタンは未入力箇所も不活性化)

・スペースキーを押してリスタートできるかテスト
以上です。
9. コード全文
今回は気まぐれ価格500円です。(気まぐれですいません)
ここから先は
¥ 500
この記事が気に入ったらサポートをしてみませんか?