Vite+Vue3+Electron+Typescript
はじめに
デスクトップアプリの作成を支援するフレームワークElectronを使用して、メニューなしのシンプルなデスクトップアプリを作成します。
Vue
Vue.jsは、JavaScriptのフロントエンド開発用のオープンソースのプログレッシブフレームワークです。
プログレッシブフレームワークとは
プログレッシブフレームワークは、必要に応じて機能を追加できる柔軟なフレームワークです。つまり、開発者が必要に応じて機能を追加し、必要でない機能を除外することができます。これにより、開発者は、必要な機能だけを使用して、軽量で高速なアプリケーションを開発することができます。
Vite
Viteは、Evan Youによって開発された高速で軽量なWebアプリケーション開発ツールです。Viteは、開発者が現代的なWeb開発に必要な機能を備えたビルドツールで、主にVue.jsアプリケーションの開発に使用されます。(※ Vue.js以外でも使用できます。 )
Typescript
TypeScriptは、Microsoftが開発したJavaScriptの拡張言語です。TypeScriptは、JavaScriptに静的型付け、クラス、インターフェース、ジェネリック型などの機能を追加します。TypeScriptは、JavaScriptの弱い型付けによる問題を解決し、開発者が安全で信頼性の高いコードを書くことを支援します
Electron
Electronは、JavaScript、HTML、CSSを使用してデスクトップアプリケーションを開発するためのオープンソースのフレームワークです。Electronは、GitHub社によって開発され、AtomエディタやVisual Studio Codeなどの人気のあるアプリケーションがElectronで開発されています。
Electronは、Node.jsとChromiumをベースにしており、Web技術を使用してクロスプラットフォームのデスクトップアプリケーションを開発することができます。Web開発者は既に習得しているスキルを活用して、デスクトップアプリケーションを開発することができます。
Electronは、Node.jsの機能を活用することで、ファイル操作やネットワーク通信などのデスクトップアプリケーションに必要な機能を提供しています。また、Electronは、開発者がデスクトップアプリケーションに独自の機能を追加するために、豊富なプラグインシステムを提供しています。
Electronは、macOS、Windows、Linuxなどの主要なオペレーティングシステムで動作し、豊富なコミュニティとドキュメントがあるため、開発者にとって非常に使いやすいフレームワークとなっています。
Get Started
1. vite-vue3-electron-ts-templateをclone(ダウンロード)
git clone https://github.com/Yukun-Guo/vite-vue3-electron-ts-template.git2. モジュールをインストール
npm install3. 起動と確認
npm run app:devデスクトップアプリのひな型を作成
デスクトップアプリの開発の手順として、まず「ひな型」(何もない状態)のアプリを作りそこを起点(足場)として、要件に合わせて拡張する方法を取ります。
今回は、その為に必要な、 何も機能が用意されていない(ひな型の)デスクトップアプリを作ります。
1. Vite プロジェクトを作成
npm create vite@latest「Project name」に 任意の名前(pj)を入力。
「Select a framework」で「Vue」を選択
「Select a variant」で 「TypeScript」を選択
2. Vite プロジェクトに移動してモジュールをインストール
cd pj
npm install
3. electronとconcurrentlyモジュールをインストール
npm install --save-dev electron@latest electron-builder concurrently4. electronのtsファイルを作成
src/electron/main/main.ts
// src/electron/main/main.ts
import { join } from 'path';
import {
    app,
    BrowserWindow
} from 'electron';

const isDev = process.env.npm_lifecycle_event === "app:dev" ? true : false;

function createWindow() {
    // Create the browser window.
    const mainWindow = new BrowserWindow({
        width: 800,
        height: 600,
        webPreferences: {
            preload: join(__dirname, '../preload/preload.js'),
        },
    });

    // and load the index.html of the app.
    mainWindow.loadURL(
        isDev ?
        'http://localhost:3000' :
        join(__dirname, '../../index.html')
    );
    // Open the DevTools.
    if (isDev) {
        mainWindow.webContents.openDevTools();
    }
    mainWindow.setMenuBarVisibility(false);
}

// This method will be called when Electron has finished
// initialization and is ready to create browser windows.
// Some APIs can only be used after this event occurs.
app.whenReady().then(() => {
    createWindow()
    app.on('activate', function () {
        // On macOS it's common to re-create a window in the app when the
        // dock icon is clicked and there are no other windows open.
        if (BrowserWindow.getAllWindows().length === 0) createWindow()
    })
});

// Quit when all windows are closed, except on macOS. There, it's common
// for applications and their menu bar to stay active until the user quits
// explicitly with Cmd + Q.
app.on('window-all-closed', () => {
    if (process.platform !== 'darwin') {
        app.quit();
    }
});
src/electron/preload/preload.ts
// src/electron/preload/preload.ts
// All of the Node.js APIs are available in the preload process.
// It has the same sandbox as a Chrome extension.
window.addEventListener('DOMContentLoaded', () => {
    const replaceText = (selector:any, text:any) => {
      const element = document.getElementById(selector)
      if (element) element.innerText = text
    }

    for (const dependency of ['chrome', 'node', 'electron']) {
      replaceText(`${dependency}-version`, process.versions[dependency])
    }
  })
5. tsconfig.jsonを修正
4で作成したelectronのtsファイルをコンパイルできるように、修正します。
tsconfig.json
{
  "compilerOptions": {
    "target": "esnext",
    "useDefineForClassFields": true,
    "module": "commonjs",
    "moduleResolution": "node",
    "strict": true,
    "jsx": "preserve",
    "sourceMap": true,
    "resolveJsonModule": true,
    "isolatedModules": false,
    "esModuleInterop": true,
    "lib": ["esnext", "dom"],
    "skipLibCheck": true,
    "outDir": "dist/electron"
  },
  "include": ["src/electron/**/*"],
  "references": [{
    "path": "./tsconfig.node.json"
  }]
}
6. package.jsonを修正
起動することが目的で最低限の設定しかしていないので、プロジェクトに合わせて修正してください。
{
  "name": "pj",
  "private": true,
  "version": "0.0.0",
  "main": "dist/electron/main/main.js",
  "scripts": {
    "vite:dev": "vite",
    "vite:build": "vue-tsc --noEmit && vite build",
    "vite:preview": "vite preview",
    "ts": "tsc",
    "watch": "tsc -w",
    "lint": "eslint -c .eslintrc --ext .ts ./src",
    "app:dev": "tsc && concurrently vite \" electron .\" \"tsc -w\"",
    "app:build": "npm run vite:build && tsc && electron-builder",
    "app:preview": "npm run vite:build && tsc && electron ."
  },
  "build": {
    "appId": "YourAppID",
    "asar": true,
    "directories": {
      "buildResources": "assets",
      "output": "release/${version}"
    },
    "files": [
      "dist"
    ],
    "mac": {
      "artifactName": "${productName}_${version}.${ext}",
      "target": [
        "dmg"
      ]
    },
    "win": {
      "target": [{
        "target": "nsis",
        "arch": [
          "x64"
        ]
      }],
      "artifactName": "${productName}_${version}.${ext}"
    },
    "nsis": {
      "oneClick": false,
      "perMachine": false,
      "allowToChangeInstallationDirectory": true,
      "deleteAppDataOnUninstall": false
    }
  },
  "dependencies": {
    "vue": "^3.2.47"
  },
  "devDependencies": {
    "@vitejs/plugin-vue": "^4.1.0",
    "concurrently": "^8.0.1",
    "electron": "^24.0.0",
    "electron-builder": "^24.2.0",
    "typescript": "^4.9.3",
    "vite": "^4.2.0",
    "vue-tsc": "^1.2.0"
  }
}
7. vite.config.tsを修正
プロジェクトの起点(base)のディレクトリーを追加します
import { defineConfig } from 'vite'
import vue from '@vitejs/plugin-vue'
// https://vitejs.dev/config/export
default defineConfig({plugins: [vue()],  base: './' //add base path})
起動
開発モード
npm run app:dev プレビューモード
npm run app:preview ビルド
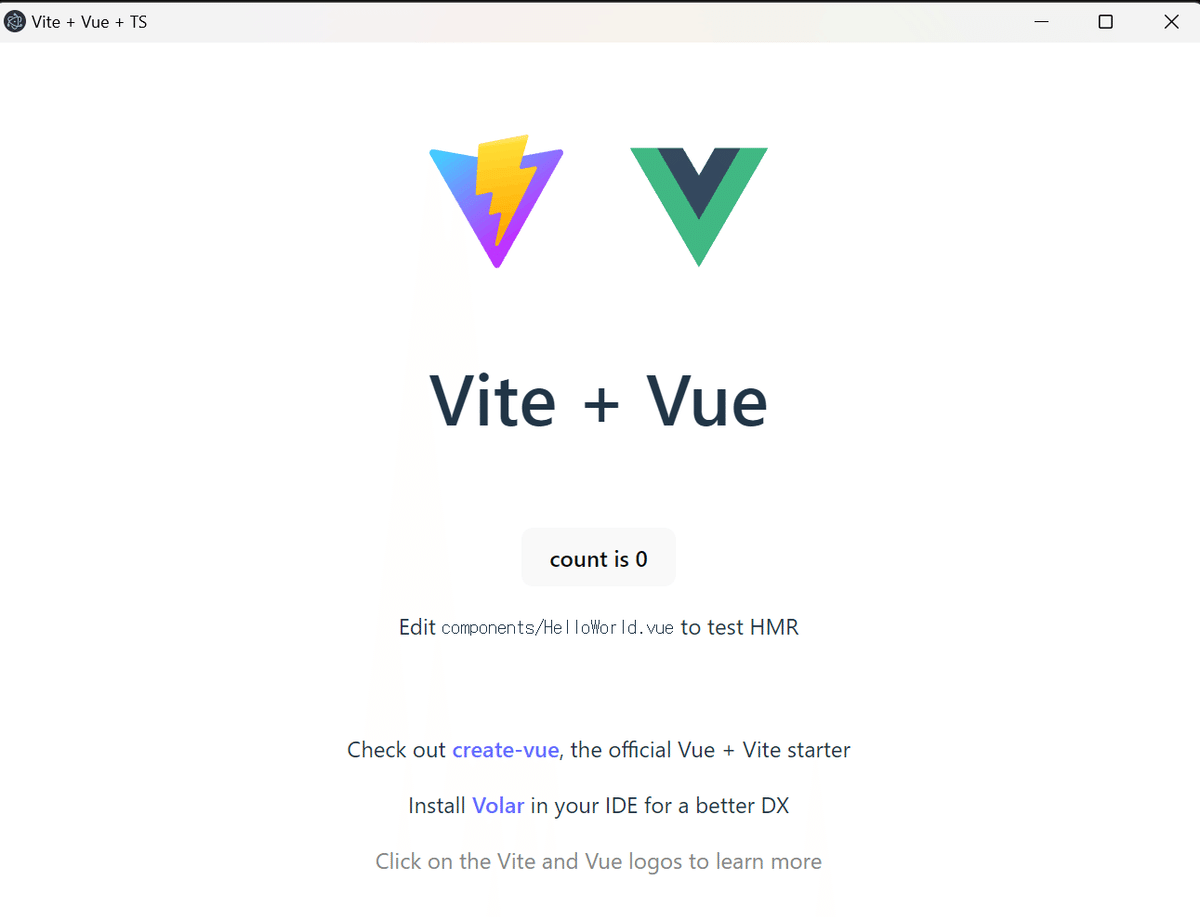
npm run app:buildプレビューモード(npm run app:preview)コマンドを実行して、デスクトップアプリが立ち上がることを確認します。
おめでとうございます 🎉。

ここから先は
Vue3 + Typescript 講座
Vue3 とTypescriptの開発の基礎から書き進める予定です。記事自体は全文を無料にしていますので、記事の更新を応援してくださる方が…
この記事が気に入ったらチップで応援してみませんか?
