
Flutter アプリ開発の道 〜その③ ダークモード〜

前回はサンプルアプリをWebブラウザ、Android端末、iOS端末のエミュレータで動作させる記事を書きました。
今回からFlutterサンプルプロジェクトを改造してノウハウを構築していきたいと思います。
さて、今回のお題の発表です。
ダークモード対応
今回はダークモード対応を記事のテーマにしていきたいと思います。
せっかくアプリを開発するのであれば、ダークモードに対応したアプリを開発したいです。
問題なのは、ダークモードを後から対応すると大変であるということです。
なので最初からダークモードに対応した開発をしていけば後からの対応がそれほど難しくなく対応できるはずです。
ダークモード時に表示が切り替える実装
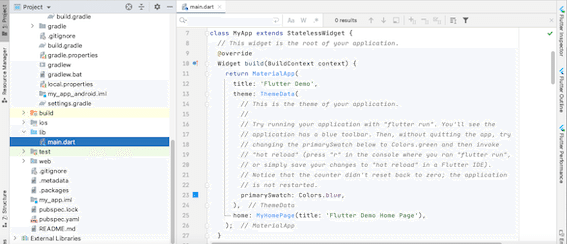
まず、サンプルアプリのソースコードで表示の色を制御している箇所はどこかというと
main.dart ファイルの theme: ThemeData() の部分です。
(Android Studio でプロジェクトを開いています)
class MyApp extends StatelessWidget {
 // This widget is the root of your application.
 @override
 Widget build(BuildContext context) {
   return MaterialApp(
     title: 'Flutter Demo',
     theme: ThemeData(
       // This is the theme of your application.
       //
       // Try running your application with "flutter run". You'll see the
       // application has a blue toolbar. Then, without quitting the app, try
       // changing the primarySwatch below to Colors.green and then invoke
       // "hot reload" (press "r" in the console where you ran "flutter run",
       // or simply save your changes to "hot reload" in a Flutter IDE).
       // Notice that the counter didn't reset back to zero; the application
       // is not restarted.
       primarySwatch: Colors.blue,
     ),
     home: MyHomePage(title: 'Flutter Demo Home Page'),
   );
 }
}
ここに
darkTheme: ThemeData(brightness: Brightness.dark)
の記述を足します。
これでダークモード時にテーマが設定できます。
brightness: Brightness.dark はデフォルトで用意されているテーマです。
今回、細かいフォントは一旦考えず、ダークモード時にテーマが切り替わるかの確認を簡単にしたいと思います。
class MyApp extends StatelessWidget {
 // This widget is the root of your application.
 @override
 Widget build(BuildContext context) {
   return MaterialApp(
     title: 'Flutter Demo',
     theme: ThemeData(
       // This is the theme of your application.
       //
       // Try running your application with "flutter run". You'll see the
       // application has a blue toolbar. Then, without quitting the app, try
       // changing the primarySwatch below to Colors.green and then invoke
       // "hot reload" (press "r" in the console where you ran "flutter run",
       // or simply save your changes to "hot reload" in a Flutter IDE).
       // Notice that the counter didn't reset back to zero; the application
       // is not restarted.
       primarySwatch: Colors.blue,
     ),
     darkTheme: ThemeData(brightness: Brightness.dark),
     home: MyHomePage(title: 'Flutter Demo Home Page'),
   );
 }
}
これで準備完了です。
Android のエミュレータでダークモードの切り替えをテストする
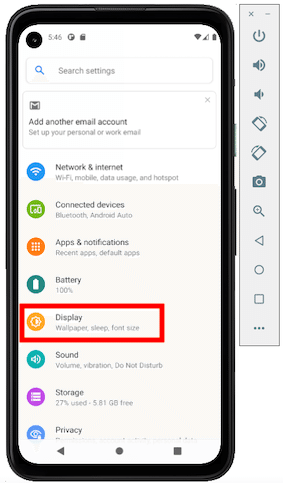
Android でダークモードに切り替えるには
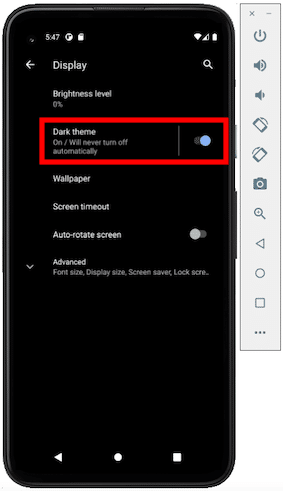
Settings → Display → Dark theme をONにします。
ONにすると背景が黒くなります。
端末をダークモードに切り替えたらサンプルプロジェクト起動してみます。
まずはダークモード未対応の状態で起動してみます。
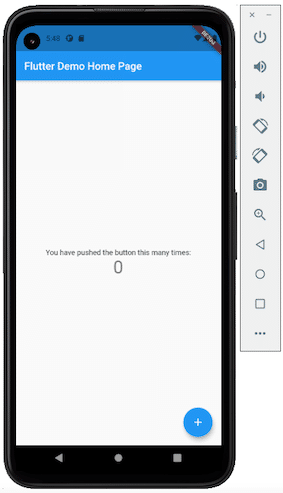
当然、表示に何も変化はありません。
(勝手に暗くはなりません)
次に
darkTheme: ThemeData(brightness: Brightness.dark)
をの対応を記述したアプリをインストールして起動してみます。
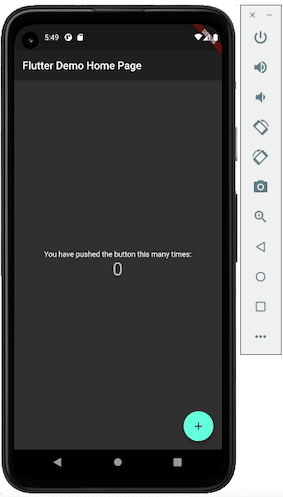
ダークモード用の表示になっています。
1行の変更でダークモードの対応ができることがわかりました。
エミュレータのダークモードをOFFにすると、表示はちゃんと切り替わります。
iOS のエミュレータでダークモードの切り替えをテストする
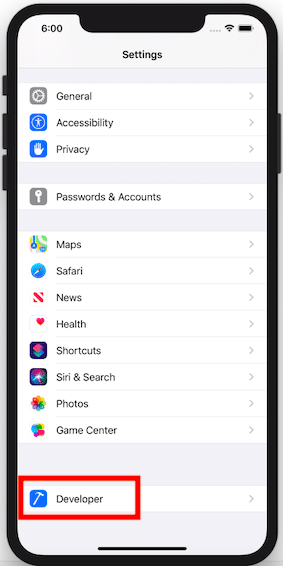
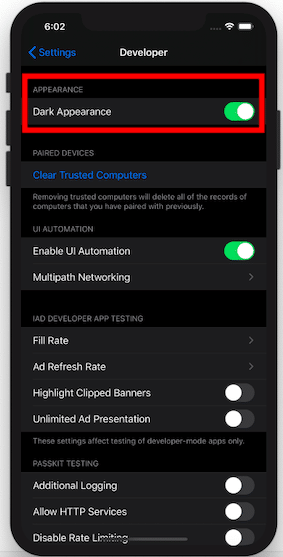
iOS でダークモードに切り替えるには
Settings → Developer → Dark Appearance をONにします。
ONにすると背景が黒くなります。
ダークモードに切り替えたらサンプルプロジェクト起動してみます。
まずはダークモード未対応の状態で起動してみます。
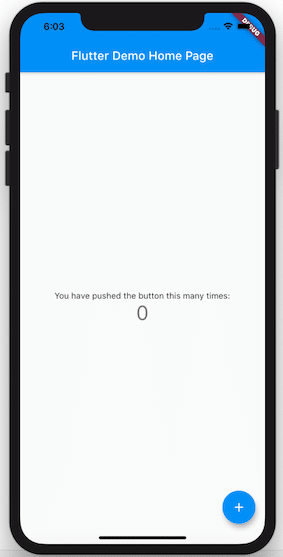
Android の時と同じで何も変わりません。
darkTheme: ThemeData(brightness: Brightness.dark)
を記述したアプリをインストールして起動してみます。
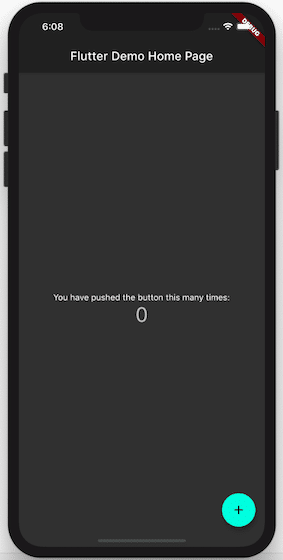
ダークモード用の表示になっています。
1行の変更で Android と iOS 両OS ダークモードの対応ができることがわかりました。
次回の予定
1行の変更で簡単に両OSのダークモード対応ができることがわかったと思います。
次回は設定しているダークテーマを深掘ってみたいと思います。
この記事が気に入ったらサポートをしてみませんか?