
ROS入門 (51) - toio風ロボットをURDFで作成して、Unityに配置して、Nav2で操作

toio風ロボットをURDFで作成して、Unityに配置して、Nav2で操作する手順をまとめました。
・Galactic
・Unity 2020.3
前回
1. URDFの作成
toio風のロボットを作成します。
(1) URDFファイルを作成して編集。
「ROS入門 (43) - toio風ロボットをURDFで作成して、Unityに配置して、ROS2コマンドで操作」のURDFに「フットポイント」と「レーザースキャナー」を追加しています。
・toio_style.urdf
<?xml version="1.0"?>
<robot name="toio_style">
  <!--フットプリント-->
  <link name="base_footprint" />
  <joint name="base_joint" type="fixed">
    <origin xyz="0 0 0.126" />
    <parent link="base_footprint" />
    <child link="base_link" />
  </joint>

  <!--ボディ-->
  <link name="base_link">
    <visual>
      <geometry>
        <box size="0.3 0.3 0.23" />
      </geometry>
      <material name="white">
        <color rgba="1.0 1.0 1.0 1.0" />
      </material>
    </visual>
    <collision>
      <geometry>
        <box size="0.3 0.3 0.23" />
      </geometry>
    </collision>
    <inertial>
      <mass value="1.0" />
      <inertia ixx="0.015" iyy="0.0375" izz="0.0375" ixy="0" ixz="0" iyz="0" />
    </inertial>
  </link>

  <!--右車輪-->
  <link name="right_wheel">
    <visual>
      <geometry>
        <cylinder length="0.05" radius="0.035" />
      </geometry>
      <material name="gray">
        <color rgba="0.2 0.2 0.2 1" />
      </material>
    </visual>
    <collision>
      <geometry>
        <cylinder length="0.05" radius="0.035" />
      </geometry>
    </collision>
    <inertial>
      <mass value="0.1" />
      <inertia ixx="5.1458e-5" iyy="5.1458e-5" izz="6.125e-5" ixy="0" ixz="0" iyz="0" />
    </inertial>
  </link>
  <joint name="right_wheel_joint" type="continuous">
    <axis xyz="0 0 1" />
    <parent link="base_link" />
    <child link="right_wheel" />
    <origin rpy="-1.5708 0 0" xyz="0.0 -0.125 -.09" />
  </joint>

  <!--左車輪-->
  <link name="left_wheel">
    <visual>
      <geometry>
        <cylinder length="0.05" radius="0.035" />
      </geometry>
      <material name="gray" />
    </visual>
    <collision>
      <geometry>
        <cylinder length="0.05" radius="0.035" />
      </geometry>
    </collision>
    <inertial>
      <mass value="0.1" />
      <inertia ixx="5.1458e-5" iyy="5.1458e-5" izz="6.125e-5" ixy="0" ixz="0" iyz="0" />
    </inertial>
  </link>
  <joint name="left_wheel_joint" type="continuous">
    <axis xyz="0 0 1" />
    <parent link="base_link" />
    <child link="left_wheel" />
    <origin rpy="-1.5708 0 0" xyz="0.0 0.125 -.09" />
  </joint>

  <!--レーザースキャナー-->
  <link name="base_scan">
    <visual>
      <origin xyz="0 0 0" rpy="0 0 0" />
      <geometry>
        <box size="0.1 0.1 0.1" />
      </geometry>
    </visual>
    <collision>
      <origin xyz="0 0 0" rpy="0 0 0" />
      <geometry>
        <box size="0.1 0.1 0.1" />
      </geometry>
    </collision>
    <inertial>
      <mass value="1e-5" />
      <origin xyz="0 0 0" rpy="0 0 0" />
      <inertia ixx="1e-6" ixy="0" ixz="0" iyy="1e-6" iyz="0" izz="1e-6" />
    </inertial>
  </link>
  <joint name="scan_joint" type="fixed">
    <axis xyz="0 1 0" />
    <origin xyz="0 0 0.2" rpy="0 0 0" />
    <parent link="base_link" />
    <child link="base_scan" />
  </joint>
</robot>
(2) rviz2で確認。
rviz2をインストールして、以下のコマンドで確認します。
ros2 launch urdf_tutorial display.launch.py model:=toio_style.urdf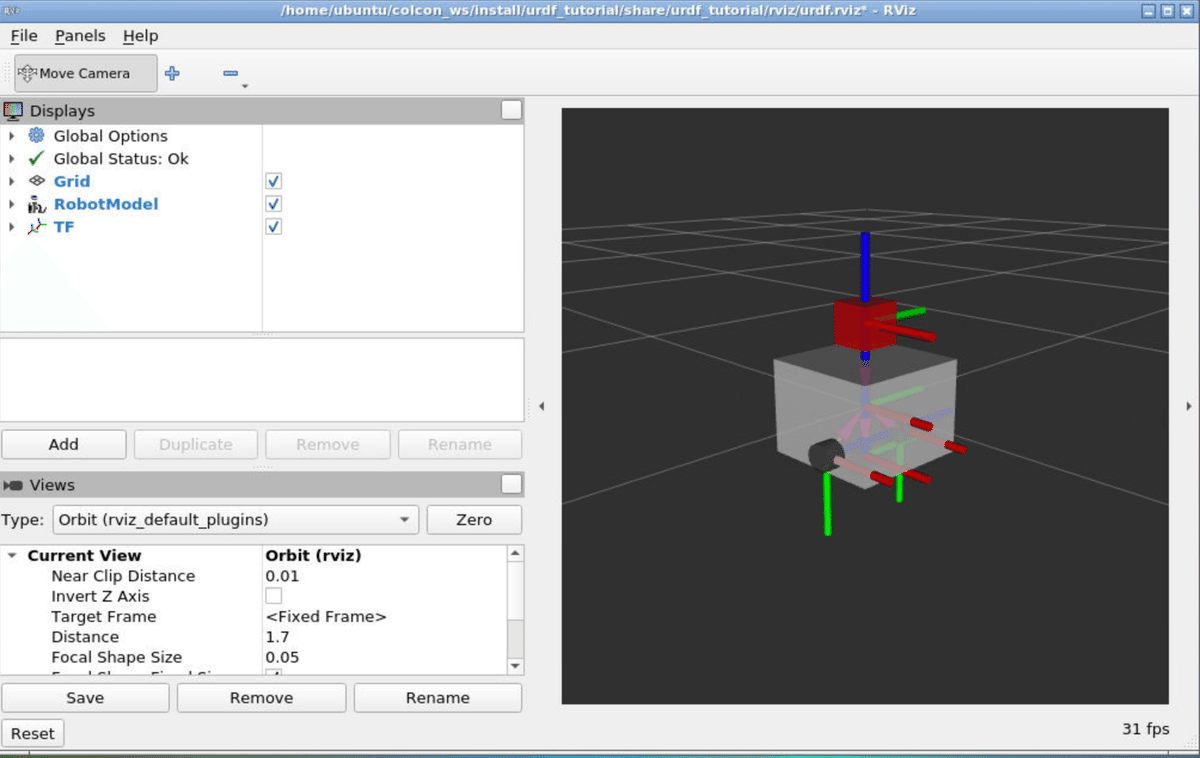
2. ROS側の準備
ROS側の準備の手順は、次のとおりです。
(1) Dockerイメージの起動時に、ポート番号「10000」「5005」のオープンを指定。
UnityとROSの間の通信は、ポート番号「10000」「5005」が必要です。
$ docker run -v ~/ros2_ws:/home/ubuntu/colcon_ws:cached -p 6080:80 -p 10000:10000 -p 5005:5005 --shm-size=1024m tiryoh/ros2-desktop-vnc:galactic(2) resdepとaptのアップデート。
$ rosdep update
$ sudo apt update
$ sudo apt dist-upgrade
(3) 「ROS-TCP-Endpoint」パッケージのインストール。
「main-ros2」ブランチの「ROS-TCP-Endpoint」を使います。
$ cd ~/colcon_ws/src
$ git clone -b main-ros2 https://github.com/Unity-Technologies/ROS-TCP-Endpoint
(4) 「unity_slam_example」を「~/colcon_ws/src」に配置。
「ROS-TCP-Endpoint」と「Nav2」と「rviz2」を起動するlauncherファイルになります。
(5) Nav2のインストール。
$ sudo apt install ros-galactic-navigation2
$ sudo apt install ros-galactic-nav2-bringup
$ sudo apt install ros-galactic-turtlebot3*
$ source ~/.bashrc(6) Nav2の環境変数を「~/.bashrc」に追加。
export TURTLEBOT3_MODEL=waffle
export GAZEBO_MODEL_PATH=$GAZEBO_MODEL_PATH:/opt/ros/galactic/share/turtlebot3_gazebo/models
$ source ~/.bashrc(7) ワークスペースのビルドとセットアップ。
$ cd ~/colcon_ws
$ colcon build
$ source ~/colcon_ws/install/setup.bash
3. Unity側の準備
Unity側の準備の手順は、次のとおりです。
(1) Unityのメニュー「Window → Package Manager」で「Package Manager」を開く。
(2) 「+ → Add Package from Git URL」で以下のパッケージをインストール。
・ROS-TCP-Connector
https://github.com/Unity-Technologies/ROS-TCP-Connector.git?path=/com.unity.robotics.ros-tcp-connector・URDF Importer
https://github.com/Unity-Technologies/URDF-Importer.git?path=/com.unity.robotics.urdf-importer・Visualizations Package
https://github.com/Unity-Technologies/ROS-TCP-Connector.git?path=/com.unity.robotics.visualizations(3) Unityのメニュー「Robotics → ROS Settings」で「ROS2」を指定。
(4)「Robotics-Nav2-SLAM-Example」のUnity用のスクリプトをプロジェクトのAssetsにコピー。
・AGVController.cs
・TimeStamp.cs
・Clock.cs
・ROSClockPublisher.cs
・TransformExtensions.cs
・TransformTreeNode.cs
・ROSTransformTreePublisher.cs
・LaserScanSensor.cs
(5) UnityのProjectウィンドウの「Packages/Robotics Visualization」にある「DefaultVisualizationSuite」をHierarchyウィンドウにドラッグ&ドロップ。
4. URDFのインポート
UnityのシーンにURDFモデルをインポートします。
(1) UnityのAssetsに「toio_style.urdf」を配置。
(2) Projectウィンドウで、「toio_style.urdf」を右クリックして、「Import Robot Select form URDF file」を選択。
(3) 「Import URDF」を押す。
5. 実験環境の準備
平面(Plane)と壁(Cube)と柱(Cube)を追加して、Unityの実験環境を準備します。

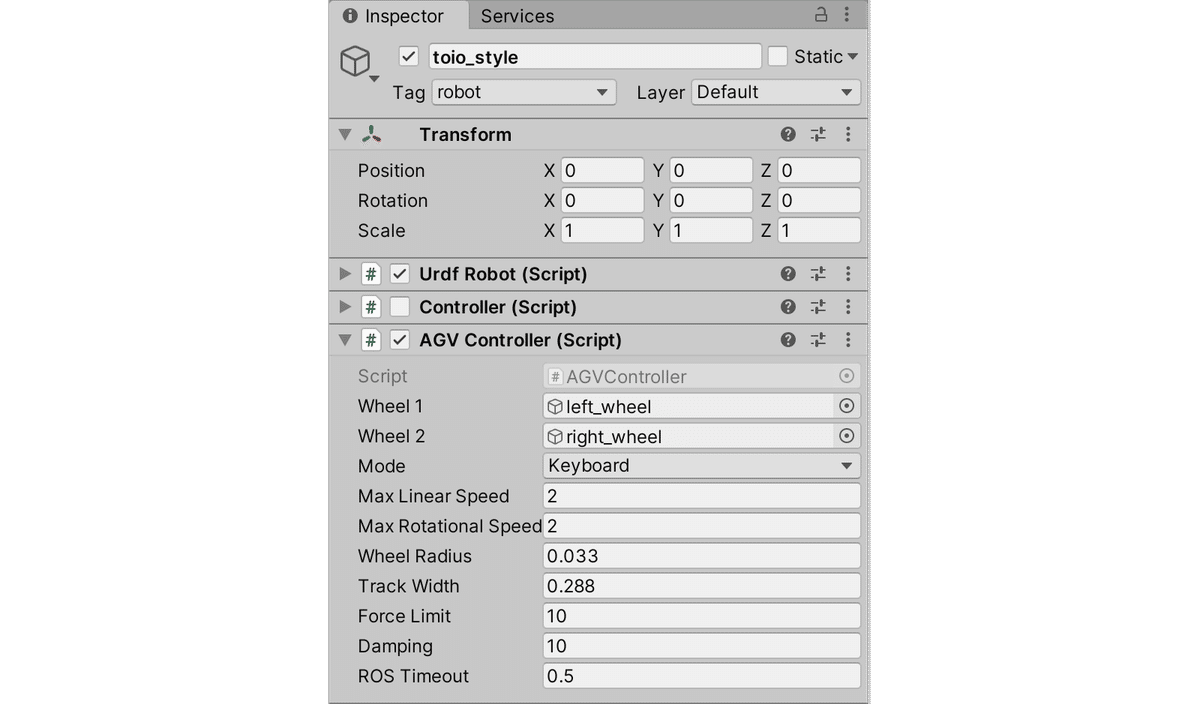
6. AGVControllerの追加
「AGVController」の追加手順は、次のとおりです。
(1) Hierarchyウィンドウで「toio_style」を選択。
(2) Controllerのチェックを解除。
(3) Inspectorウィンドウで、AGVControllerを追加し、以下のように設定。
7. ROSPublisherの追加
「ROSPublisher」の追加手順は、次のとおりです。
(1) Hierarchyウィンドウで「toio_style」の下に空のGameObjectを追加し、「ROSPublishers」と名前を指定。
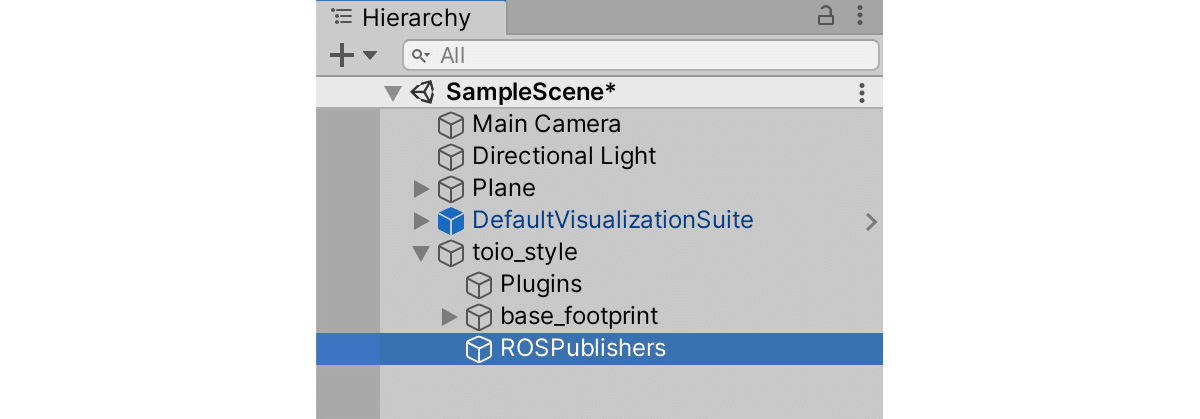
(2) Hierarchyウィンドウで「ROSPublishers」を選択し、Inspectorウィンドウで「ROSClockPublisher」と「ROSTransformTreePublisher」を追加し、以下のように設定。

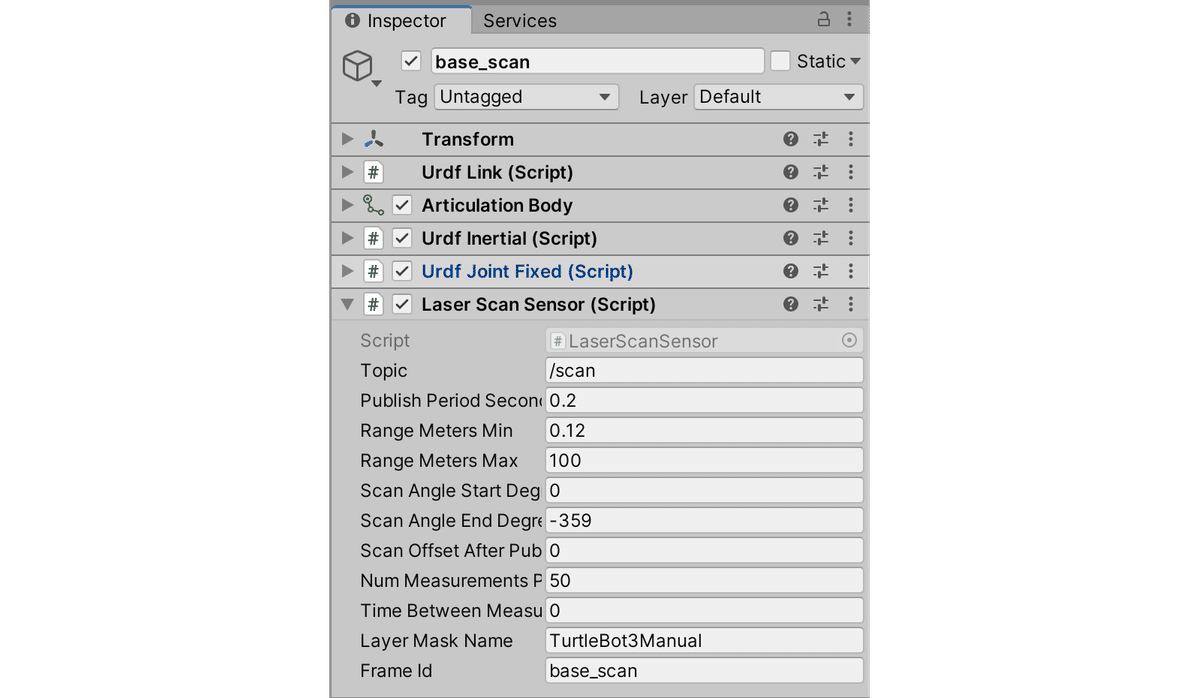
8. LaserScanSensorの追加
(1) Hierarchyウィンドウで「toio_style → base_footprint → base_link → scan_base」を選択。
(2) Inspectorウィンドウで「LaserScanSensor」を追加し、以下のように設定。
9. キーボードによる操作
キーボードによる操作の手順は、次のとおりです。
(1) ROS側で、「Nav2」「SMAL Toolbox」「rviz2」を起動するlaunchファイルを実行。
$ ros2 launch unity_slam_example unity_slam_example.py(2) Unity側で、「toio_style → AGVController」で「Mode」に「Keyboard」を指定し、Playボタンで実行。
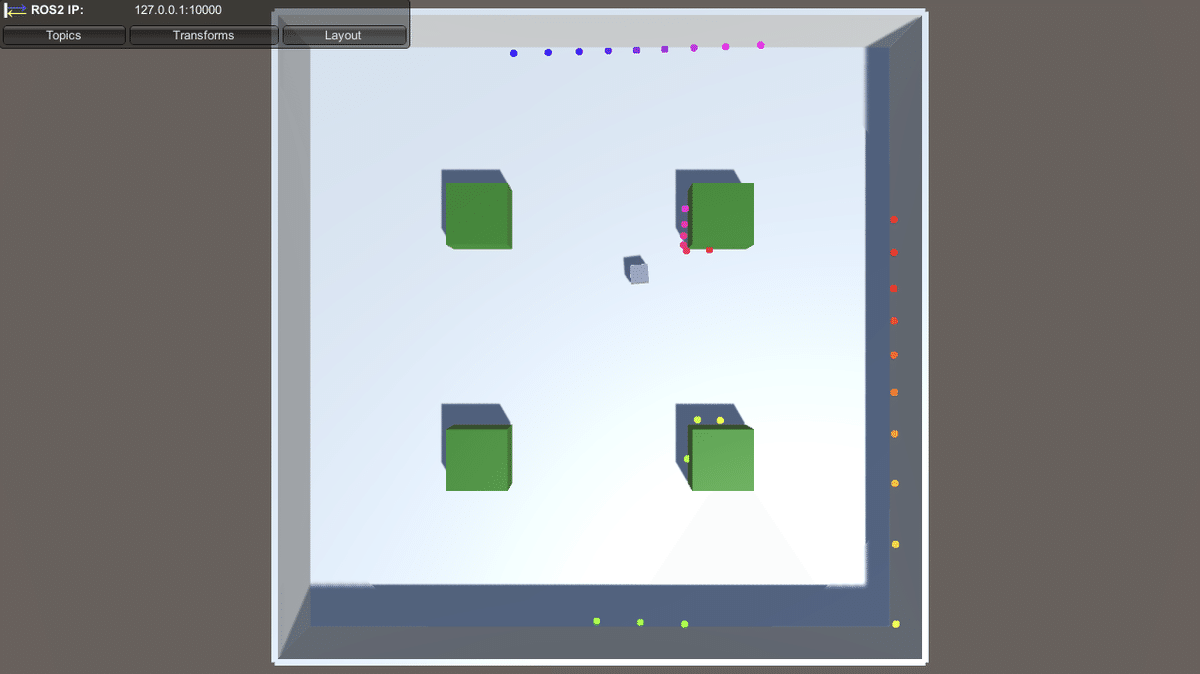
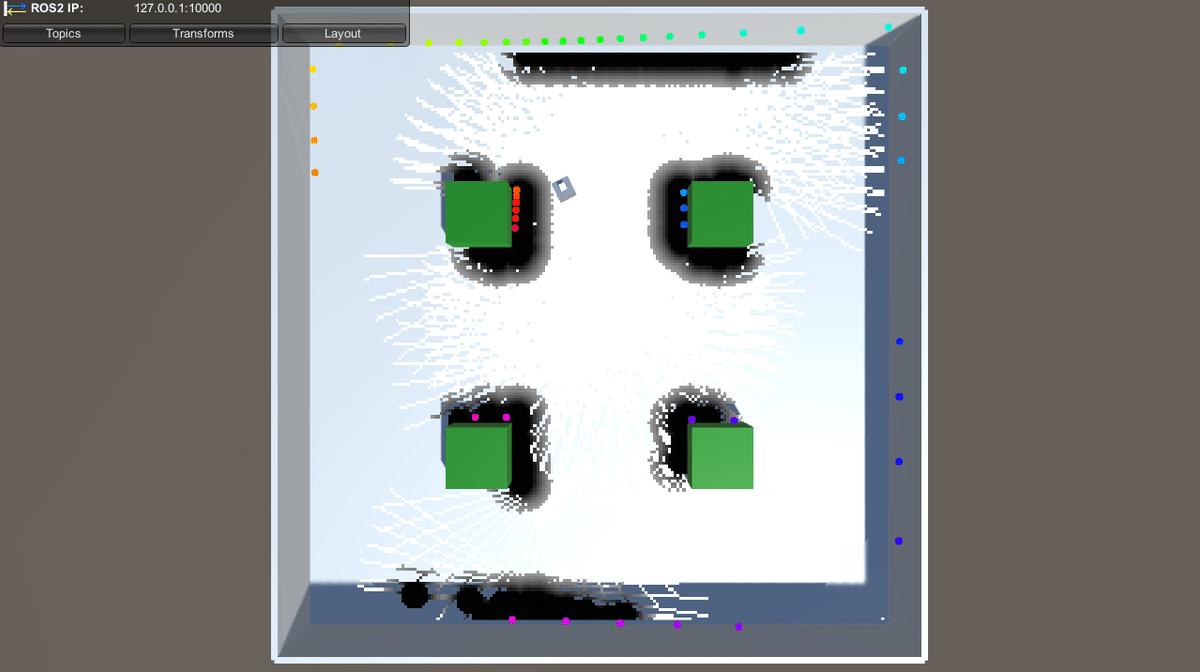
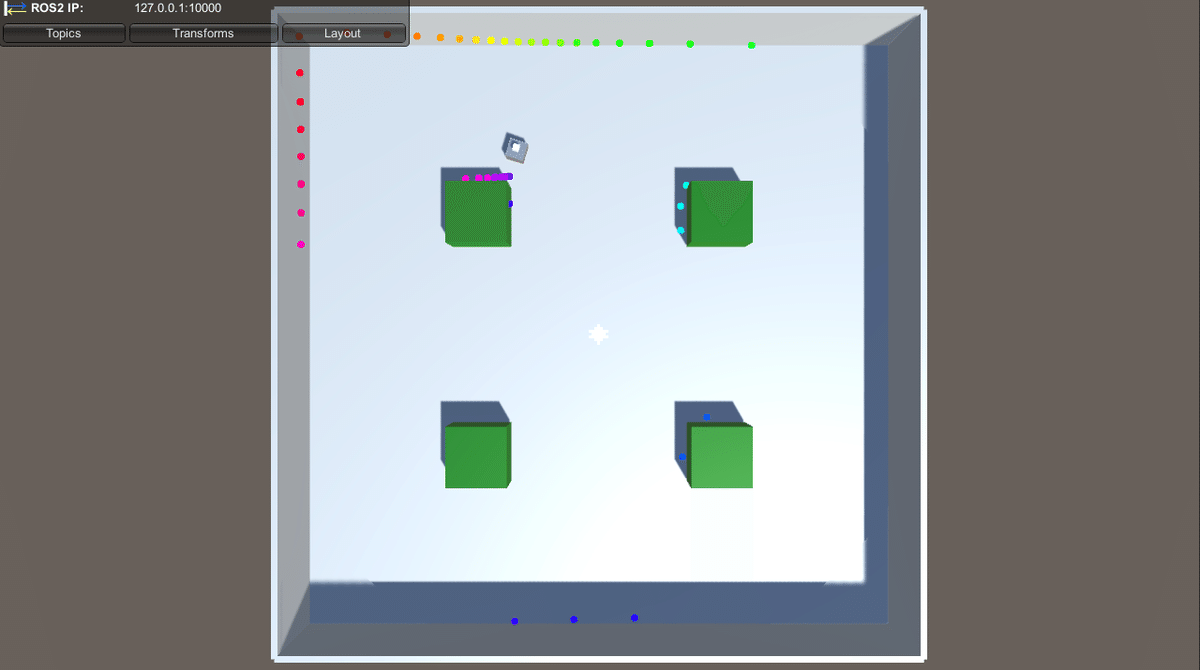
(3) HUDの「topic」の以下の可視化を有効にすることで、レーザースキャンで地図を作成していることを確認。
・/scan : レーザースキャンのポイント。
・/map : マップ
・/global_costmap/costmap : コストマップ
・/goal_pose : ゴールポーズ
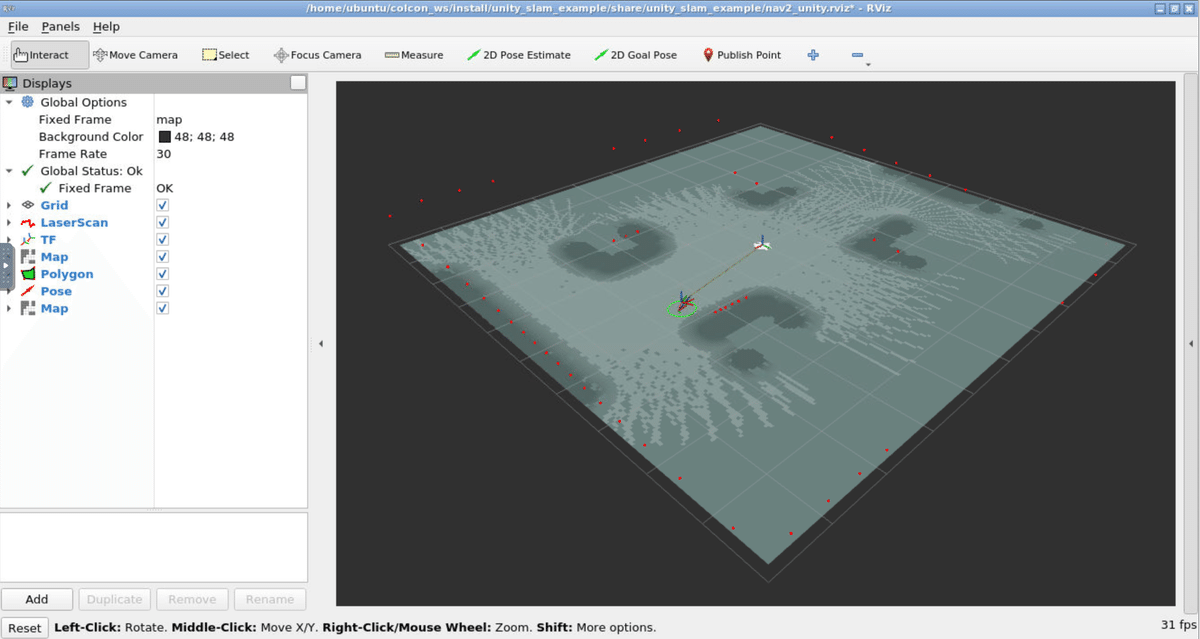
(4) rviz2でも確認。
10. Nav2による操作
Nav2による操作の手順は、次のとおりです。
(1) ROS側で、「Nav2」「SMAL Toolbox」「rviz2」を起動するlaunchファイルを実行。
$ ros2 launch unity_slam_example unity_slam_example.py(2) Unity側で、「toio_style → AGVController」で「Mode」に「ROS」を指定し、Playボタンで実行。
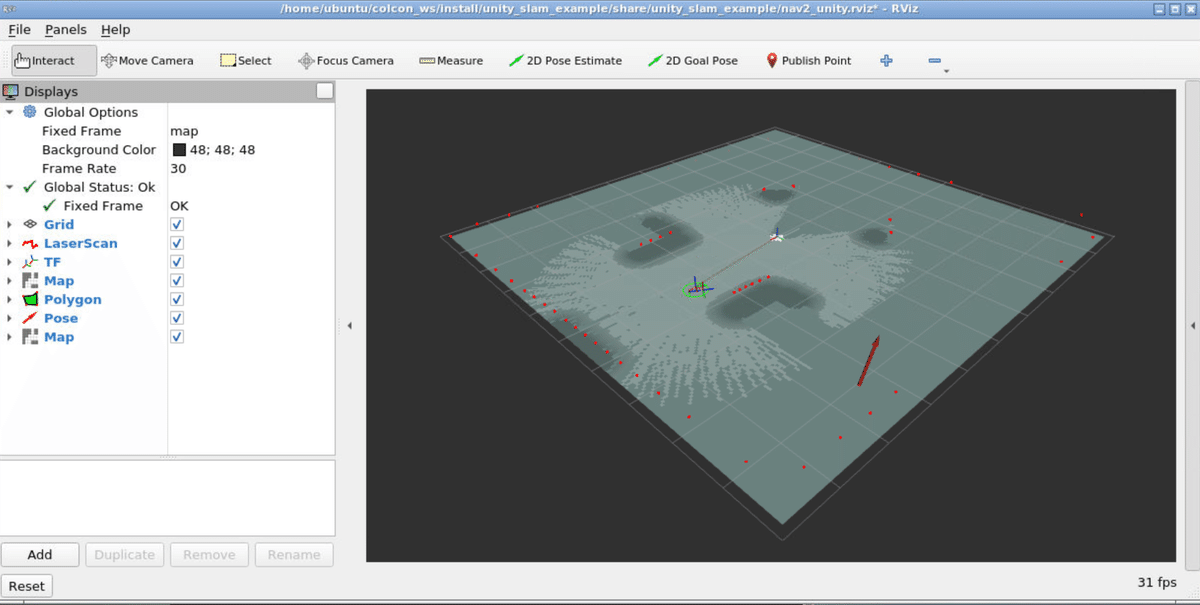
(3) 「rviz」のツールバー「2D Goal Pose」を選択し、マップをドラッグ&ドロップ。
ゴール姿勢を設定します。障害物を避けてそこまで自動運転します。
次回
この記事が気に入ったらサポートをしてみませんか?