mozilla/TTSによる英語の音声合成の学習

「mozilla/TTS」による英語の音声合成の学習手順をまとめました。
・mozilla/TTS v0.0.9
1. Googleドライブのフォルダの準備
学習時間が長いので、Googleドライブに結果出力するようにします。
(1) 「Google Colab」のメニュー「編集→ノートブックの設定」で「GPU」を選択。
(2) 以下のコマンドを実行。
# Googleドライブのフォルダの準備
from google.colab import drive
drive.mount('/content/drive')
!mkdir -p /content/drive/'My Drive'/mozilla_tts/
%cd /content/drive/'My Drive'/mozilla_tts/
2. データセットの準備
「LJSpeechデータセット」を使います。
(1) LJSpeechデータセットのダウンロード。
# LJSpeechデータセットのダウンロード
!wget http://data.keithito.com/data/speech/LJSpeech-1.1.tar.bz2
!tar -xjf LJSpeech-1.1.tar.bz2
(2) 学習データと検証データに分割。
# 学習データと検証データに分割
!shuf LJSpeech-1.1/metadata.csv > LJSpeech-1.1/metadata_shuf.csv
!head -n 12000 LJSpeech-1.1/metadata_shuf.csv > LJSpeech-1.1/metadata_train.csv
!tail -n 1100 LJSpeech-1.1/metadata_shuf.csv > LJSpeech-1.1/metadata_val.csv
・metadata_train.csv : 学習データ
・metadata_val.csv : 検証データ
3. TTSのインストール
「TTS」のインストールを行います。
(1) 依存関係のインストール。
# 依存関係のインストール
!sudo apt-get install espeak
(2) TTSのインストール。
# TTSのインストール
!git clone https://github.com/mozilla/TTS
%cd TTS
!pip install -e .
4. 設定ファイルの生成
デフォルト設定「TTS/tts/configs/config.json」をベースに設定ファイル「config.json」を作成します。パスの変更とエポック数の変更(1000→250)を行っています。
# 設定ファイルの生成
import json
from TTS.utils.io import load_config
CONFIG = load_config('TTS/tts/configs/config.json')
CONFIG['datasets'][0]['path'] = '../LJSpeech-1.1/'
CONFIG['audio']['stats_path'] = '../LJSpeech-1.1/scale_stats.npy'
CONFIG['output_path'] = '..'
CONFIG['phoneme_cache_path'] = '../phoneme_cache/'
CONFIG['epochs'] = 250
with open('config.json', 'w') as fp:
    json.dump(CONFIG, fp)
4. 統計情報ファイルの生成
学習に利用するデータセットの統計情報ファイル「scale_stats.npy」を生成します。1時間ほどかかります。
%%time

# 統計情報の生成
!python TTS/bin/compute_statistics.py --config_path=config.json --out_path='../LJSpeech-1.1/scale_stats.npy'
5. 音声合成の学習
音声合成の学習を行います。250エポックで8時間ほどかかります。
%%time

# 音声合成の学習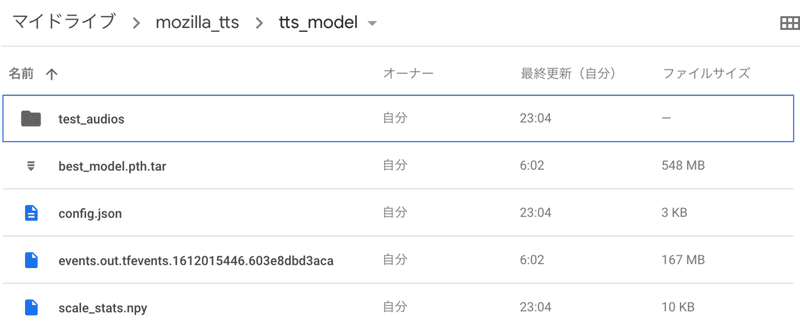
!python TTS/bin/train_tacotron.py --config_path config.json成功すると、プロジェクトフォルダ下の「ljspeech-ddc-<DAYTIME>」フォルダに出力されます。フォルダ名が長いので、「tts_model」に変更します。
・test_audios : 確認用のステップ別のテスト音声。
・config.json : 設定ファイル。
・scale_stats.npy : 統計情報ファイル。
・best_model.pth.tar : 学習済みモデル。
・events.out.tfevents.XXXX : Tensorboardのログ。
6. 推論の実行
学習した音声合成を試してみます。
(1) ボコーダーのダウンロード。
# ボコーダーモデルのダウンロード
!gdown --id 1Ty5DZdOc0F7OTGj9oJThYbL5iVu_2G0K -O vocoder_model.pth.tar
!gdown --id 1Rd0R_nRCrbjEdpOwq6XwZAktvugiBvmu -O config_vocoder.json
!gdown --id 11oY3Tv0kQtxK_JPgxrfesa99maVXHNxU -O scale_stats.npy
(2) TTS関数の定義。
# TTS関数の定義
def tts(model, text, CONFIG, use_cuda, ap, use_gl, figures=True):
    t_1 = time.time()

    # テキスト → メルスペクトログラム
    waveform, alignment, mel_spec, mel_postnet_spec, stop_tokens, inputs = synthesis(model, text, CONFIG, use_cuda, ap, speaker_id, style_wav=None,
        truncated=False, enable_eos_bos_chars=CONFIG.enable_eos_bos_chars)

    # メルスペクトログラム → 音声
    if not use_gl:
        waveform = vocoder_model.inference(torch.FloatTensor(mel_postnet_spec.T).unsqueeze(0))
        waveform = waveform.flatten()
    if use_cuda:
        waveform = waveform.cpu()

    # 出力
    waveform = waveform.numpy()
    rtf = (time.time() - t_1) / (len(waveform) / ap.sample_rate)
    tps = (time.time() - t_1) / len(waveform)
    print(waveform.shape)
    print(" > Run-time: {}".format(time.time() - t_1))
    print(" > Real-time factor: {}".format(rtf))
    print(" > Time per step: {}".format(tps))
    IPython.display.display(IPython.display.Audio(waveform, rate=CONFIG.audio['sample_rate']))
    return alignment, mel_postnet_spec, stop_tokens, waveform
(3) モデルの生成。
import os
import torch
import time
import IPython

from TTS.tts.utils.generic_utils import setup_model
from TTS.utils.io import load_config
from TTS.tts.utils.text.symbols import symbols, phonemes
from TTS.utils.audio import AudioProcessor
from TTS.tts.utils.synthesis import synthesis

from TTS.vocoder.utils.generic_utils import setup_generator

# ランタイム設定
use_cuda = False

# TTSモデルパス
TTS_MODEL = "../tts_model/best_model.pth.tar"
TTS_CONFIG = "config.json"

# ボコーダーモデルパス
VOCODER_MODEL = "vocoder_model.pth.tar"
VOCODER_CONFIG = "config_vocoder.json"

# コンフィグの読み込み
TTS_CONFIG = load_config(TTS_CONFIG)
VOCODER_CONFIG = load_config(VOCODER_CONFIG)

# オーディオプロセッサの読み込み
ap = AudioProcessor(**TTS_CONFIG.audio)

# TTSモデルの読み込み
speaker_id = None
speakers = []
num_chars = len(phonemes) if TTS_CONFIG.use_phonemes else len(symbols)
model = setup_model(num_chars, len(speakers), TTS_CONFIG)
cp =  torch.load(TTS_MODEL, map_location=torch.device('cpu'))
model.load_state_dict(cp['model'])
if use_cuda:
    model.cuda()
model.eval()
if 'r' in cp:
    model.decoder.set_r(cp['r'])

# ボコーダーモデルの読み込み
vocoder_model = setup_generator(VOCODER_CONFIG)
vocoder_model.load_state_dict(torch.load(VOCODER_MODEL, map_location="cpu")["model"])
vocoder_model.remove_weight_norm()
vocoder_model.inference_padding = 0
ap_vocoder = AudioProcessor(**VOCODER_CONFIG['audio'])
if use_cuda:
    vocoder_model.cuda()
vocoder_model.eval()
(4) 推論の実行。
エポック数が少ないので粗いですが、学習できていることがわかります。
# 推論の実行
sentence =  "Bill got in the habit of asking himself “Is that thought true?” and if he wasn’t absolutely certain it was, he just let it go."
align, spec, stop_tokens, wav = tts(model, sentence, TTS_CONFIG, use_cuda, ap, use_gl=False, figures=True)![]()
7. 関連
この記事が気に入ったらサポートをしてみませんか?