
【VRChat】unity初心者がオリジナルアバター作成から販売記録 unity編①

今回からはunity編です。
調べたり人に聞いたりしてなんか出来たって感じなので、間違っていたらやさーーーしくTwitterの方に連絡くれると嬉しいです。
●VCCの導入
VRCにアップロードするにはVCCというやつが必要です。
分かりやす記事がすでにあったので載せておきます。
こちらのサイトのunityプロジェクトを開いたところからやっていきます。
●インポート
まず最初にGesture Managerというアドオンをいれておきます。
Assetsにダウンロードしたunityパッケージをドラック&ドロップします。
そしたらインポートをクリック。
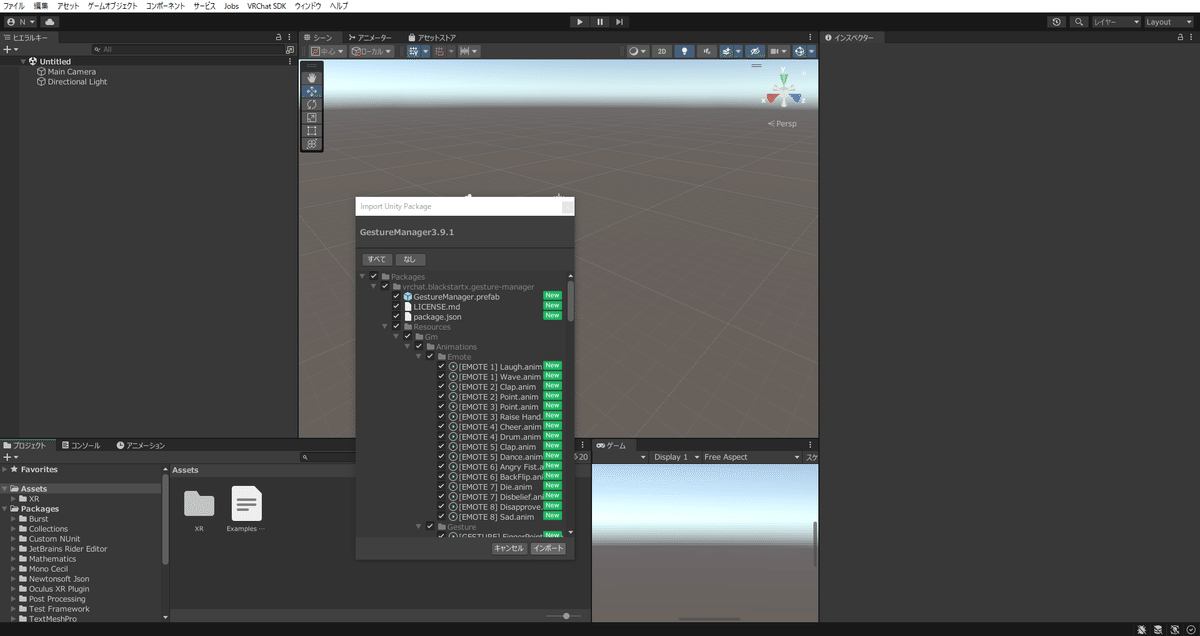
今回はこのアドオンだけですが、他にも入れたいアドオンやシェーダーなどがあれば入れておいて下さい。
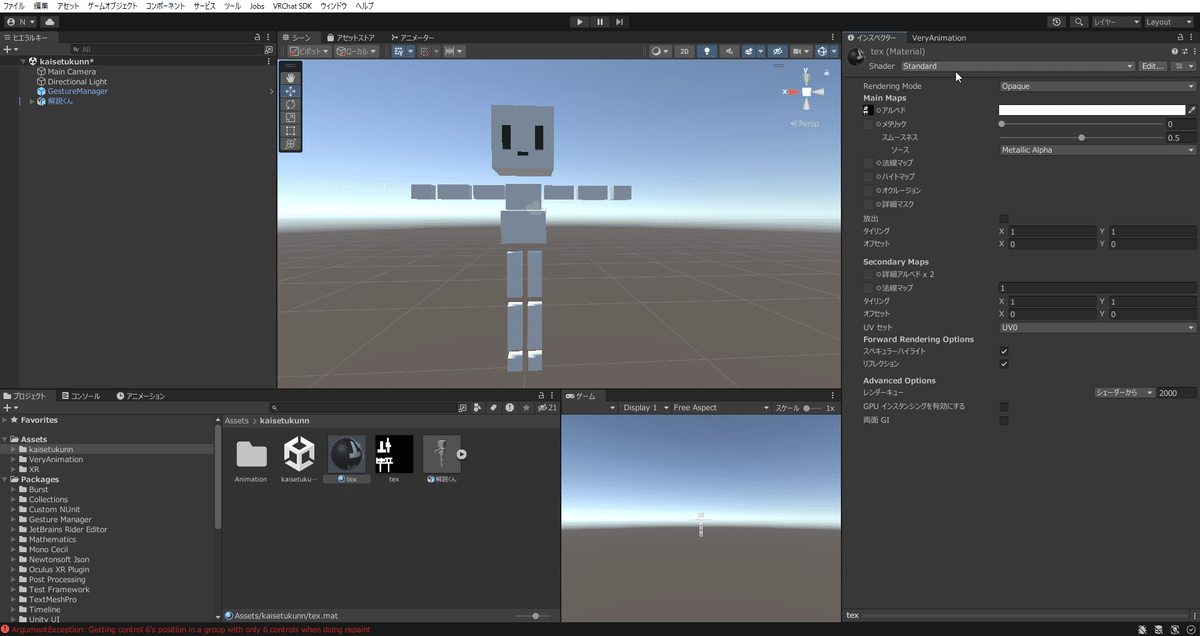
次に作成したアバターをtexと一緒にAsseteにドラック&ドロップします。
フォルダにまとめて入れても便利です

●Materialの設定
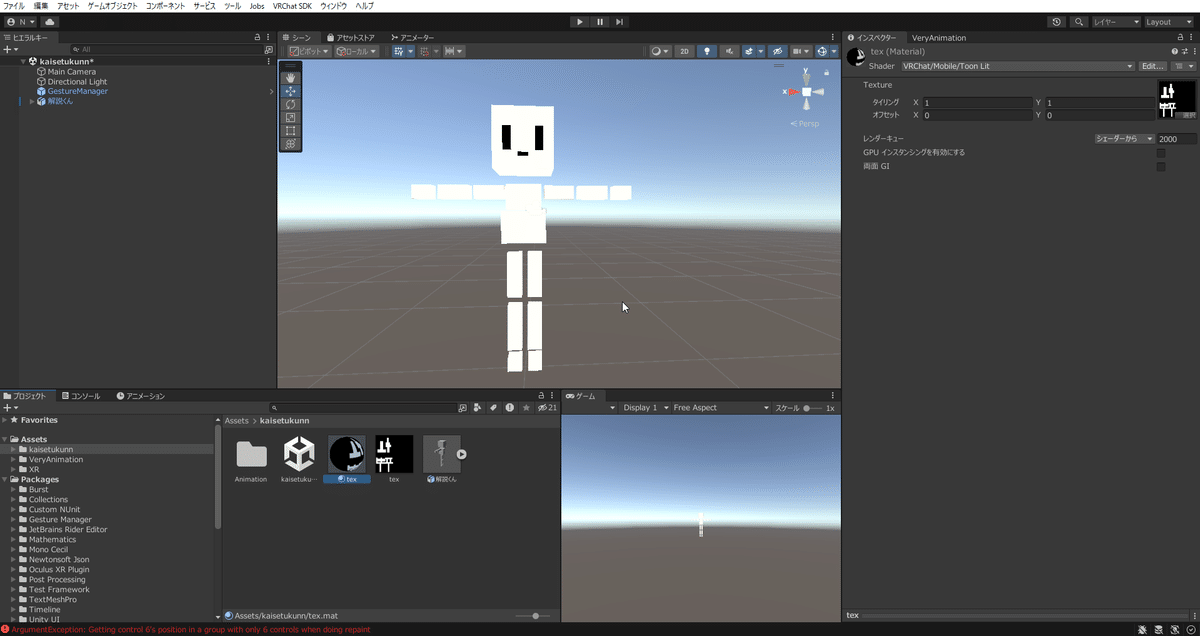
インポートしたFBXを選択し、Material欄からマテリアルを抽出を選択。好きなフォルダを選択します。

するとフォルダ内にマテリアルが追加されるので、設定していきます。
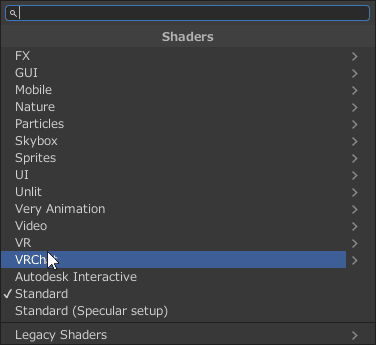
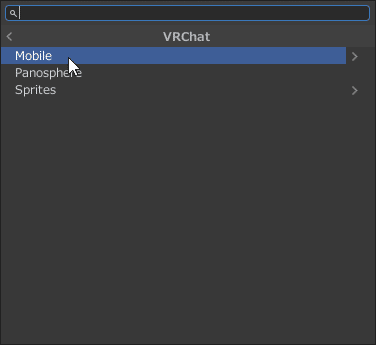
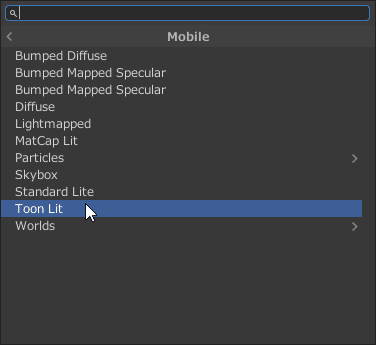
最初はStandardになっているのでここをVRC→Modile→Toon Litに変更します。
●Rigの設定
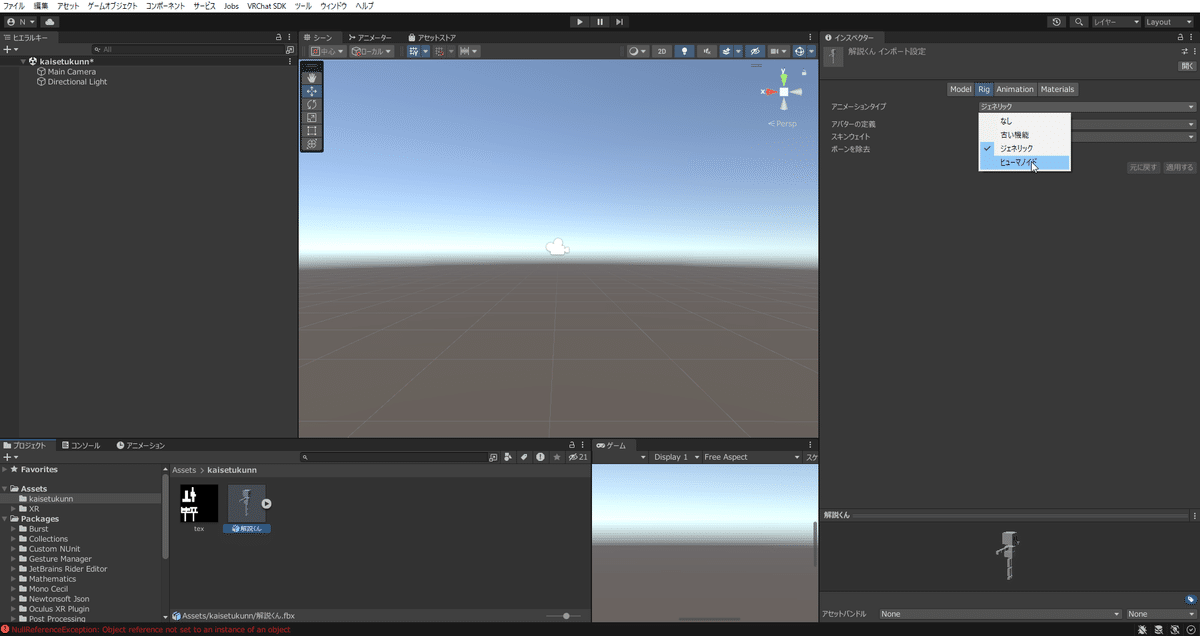
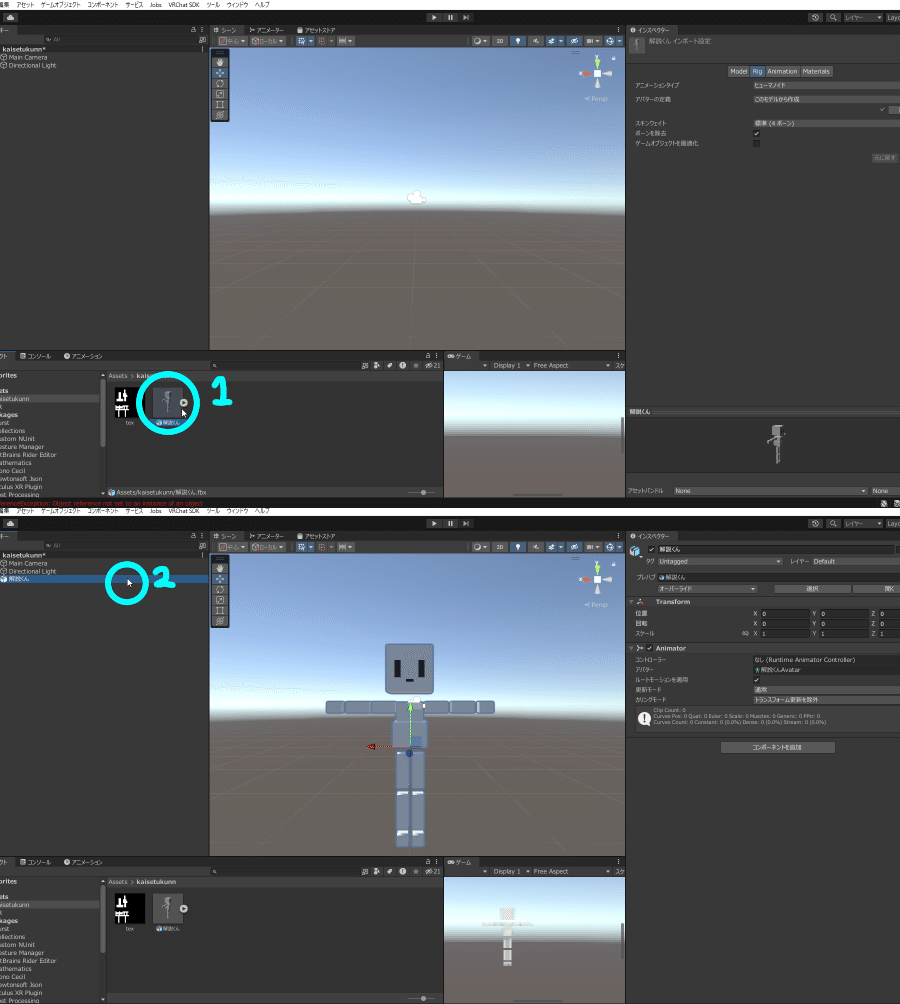
Assetsにあるアバターを選択した状態でRigを選択します。
アニメーションタイプをヒューマノイドに変更します。
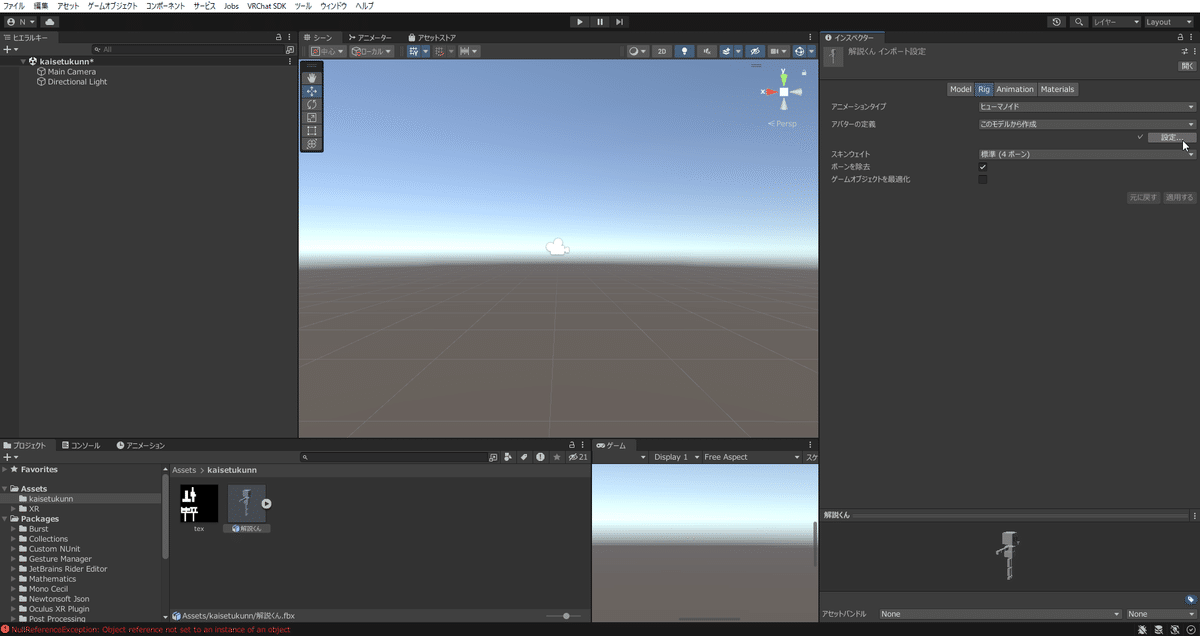
そしたら適用するを選択。
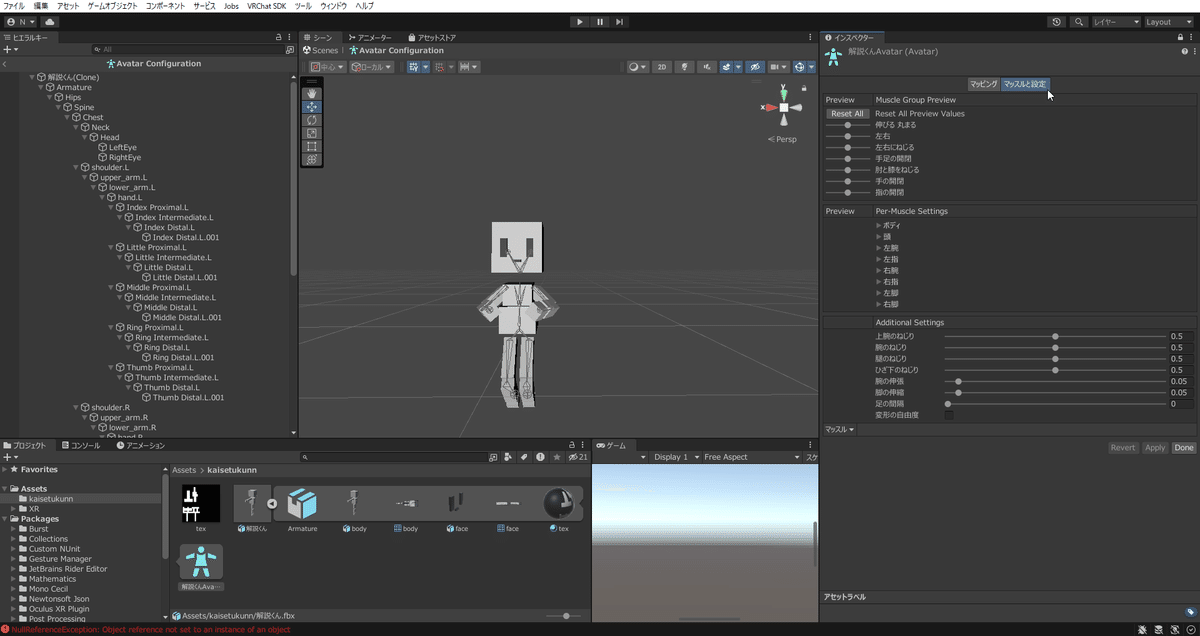
設定を押してボーンの設定をします。
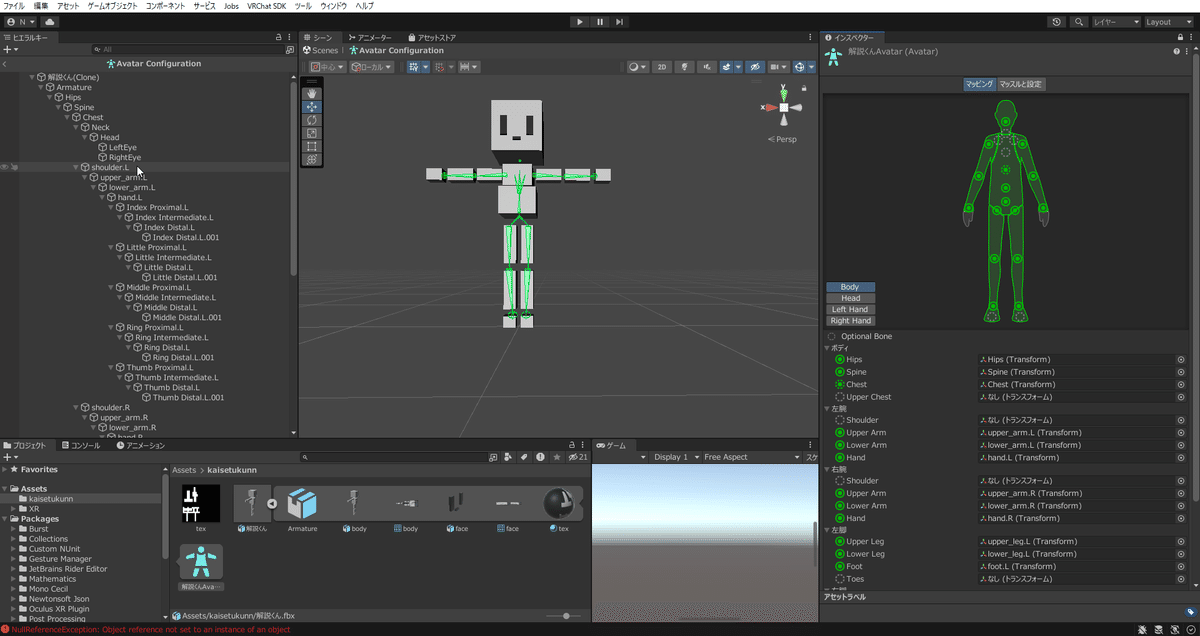
そうすると緑色になっていないボーンがあると思います。
そこに当てはまるボーンをドラック&ドロップで設定していきます。
必須なのは以下の通りです。指は今回無いので設定しなくても問題ありません。
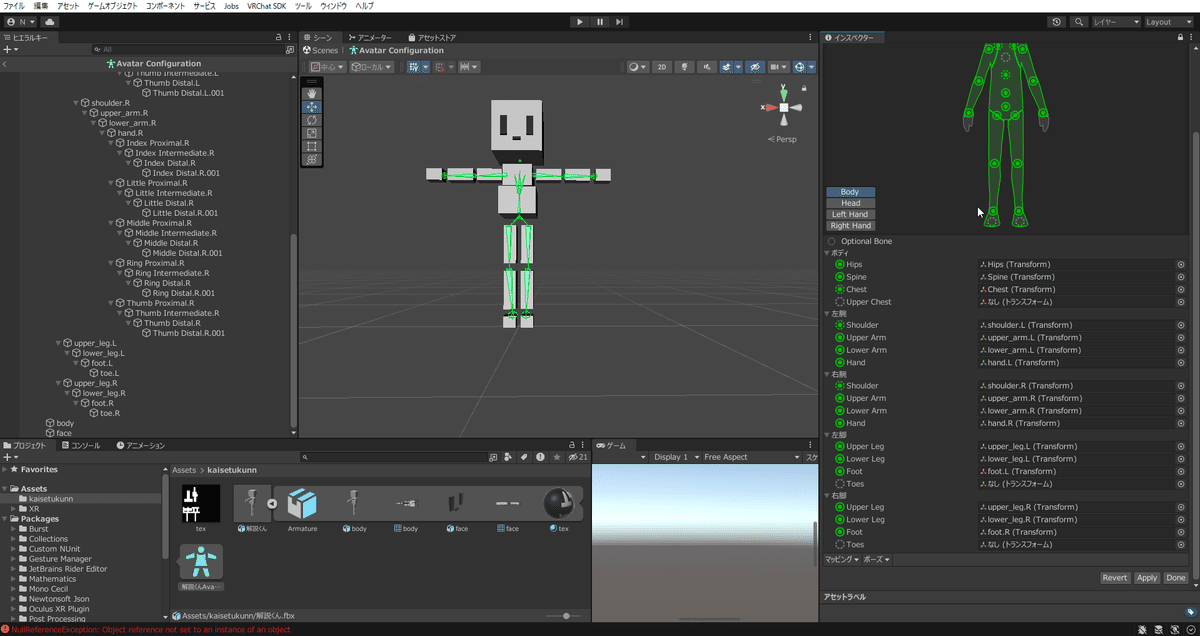
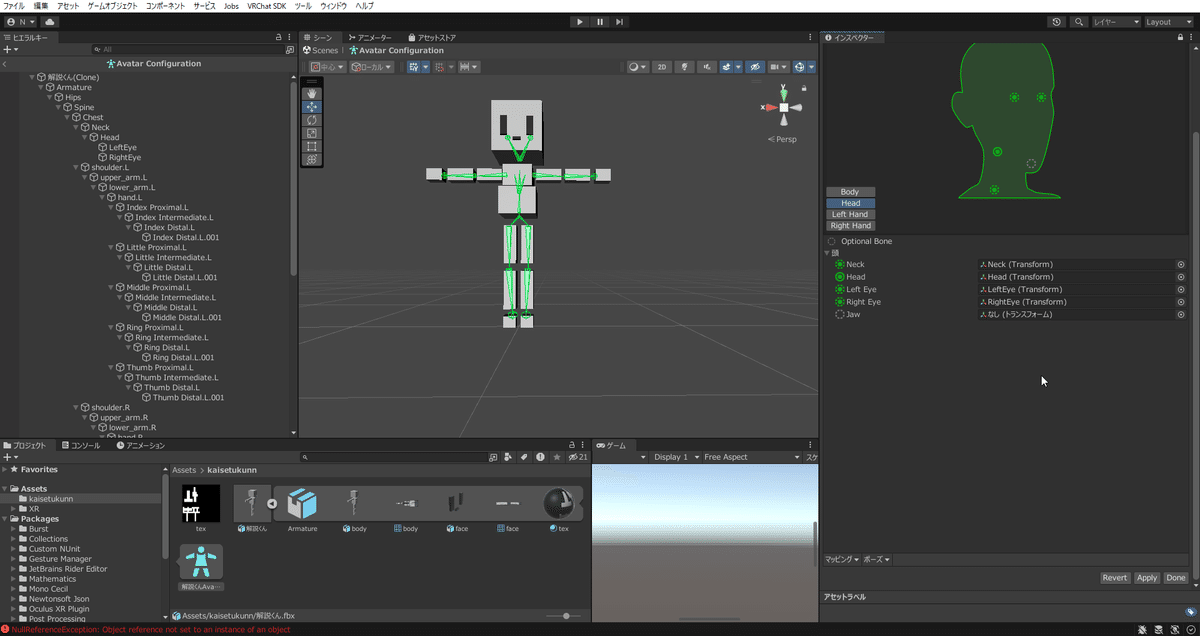
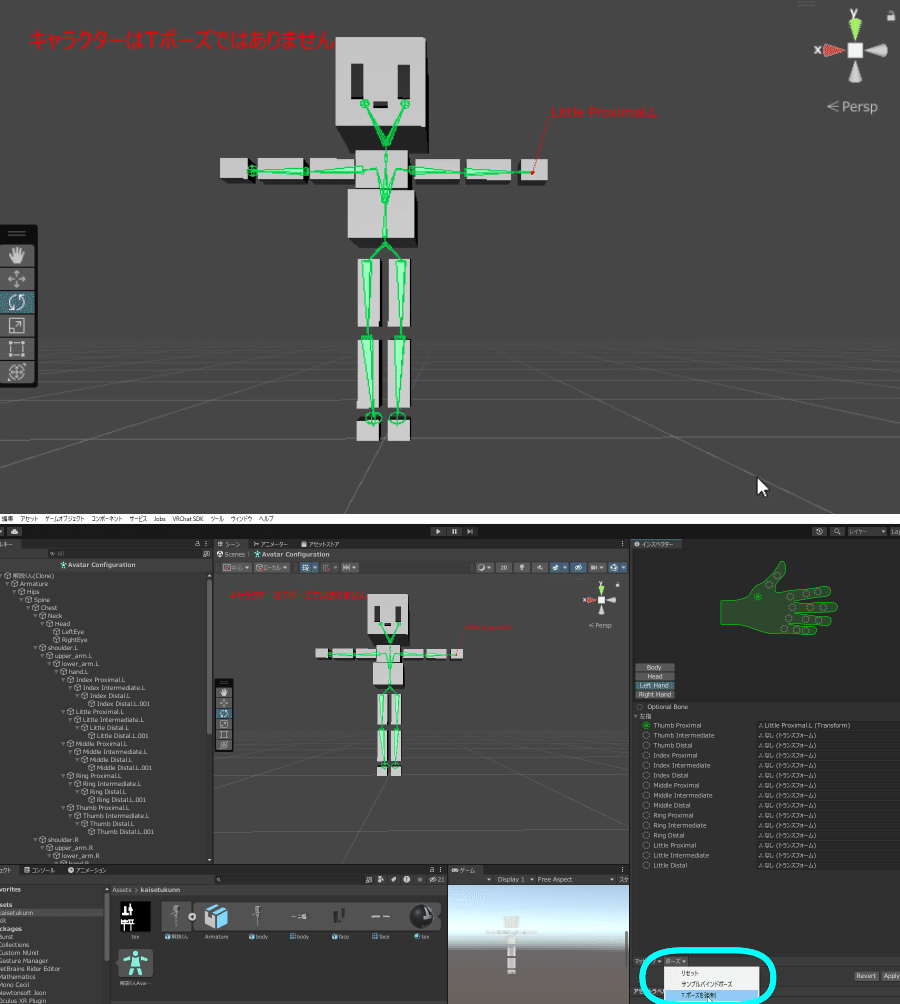
Jawに変なボーンが入ってしまう場合があるのでしっかりNone(なし)に設定しておきましょう。
そしたらApplyを押し、マッスルと設定で動きの確認をします。
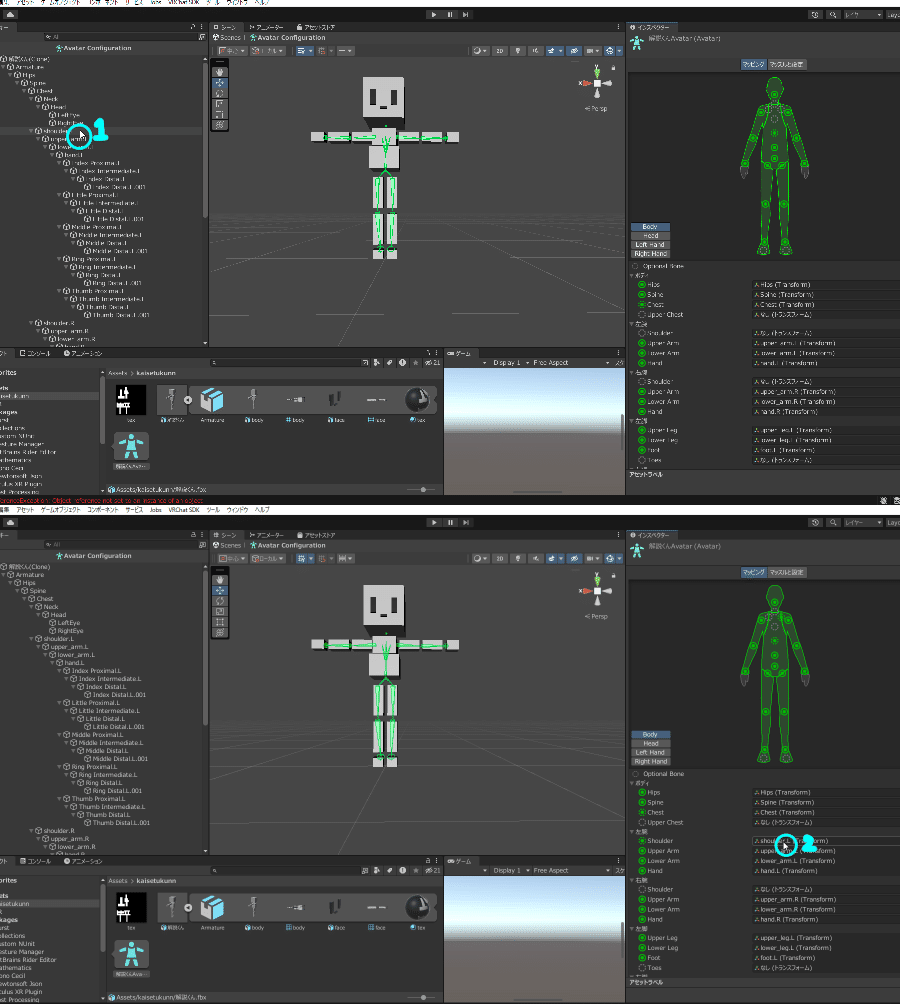
このようなエラーが出た場合は同じボーンがはいってしまってるのでしゅうせいしてください。

キャラクターはTポーズではありませんというエラーの場合は、ポーズからTポーズを強制を押してください。
●VRC Avatar Descriporの設定
まずアバターをヒエラルキーにドラック&ドロップします。
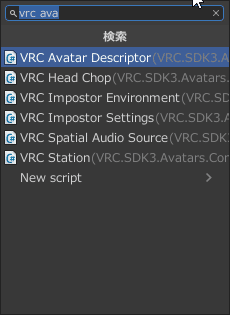
右側のコンポーネントを追加からVRC Avatar Descriporを追加します
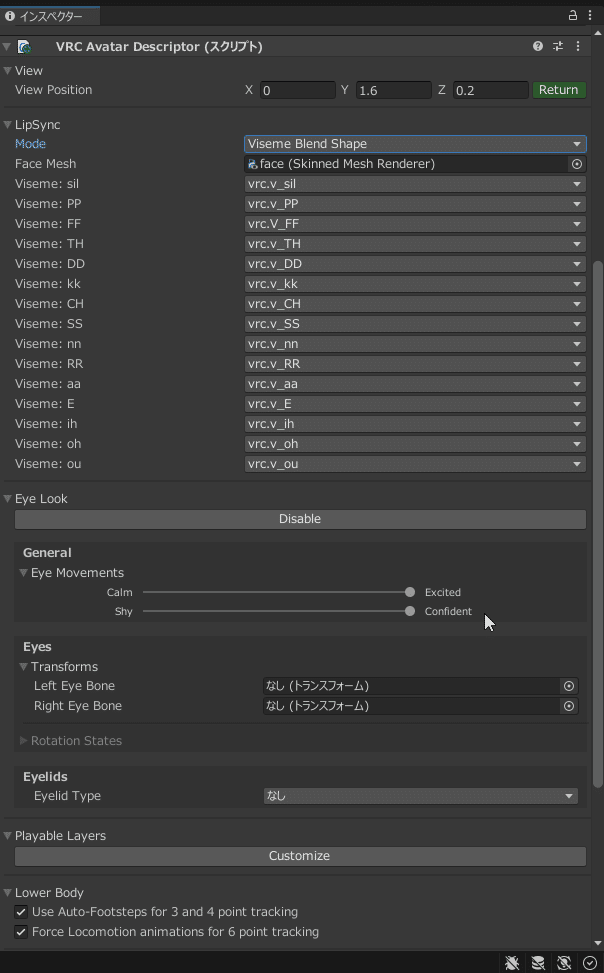
View(ビュー)の設定をしていきます。
Editを押すと画面上の丸い物体が動かせるようになります。これが視点になります。
これを目の間のちょうどいい位置に移動させて、身体の中心に来るように設定します。
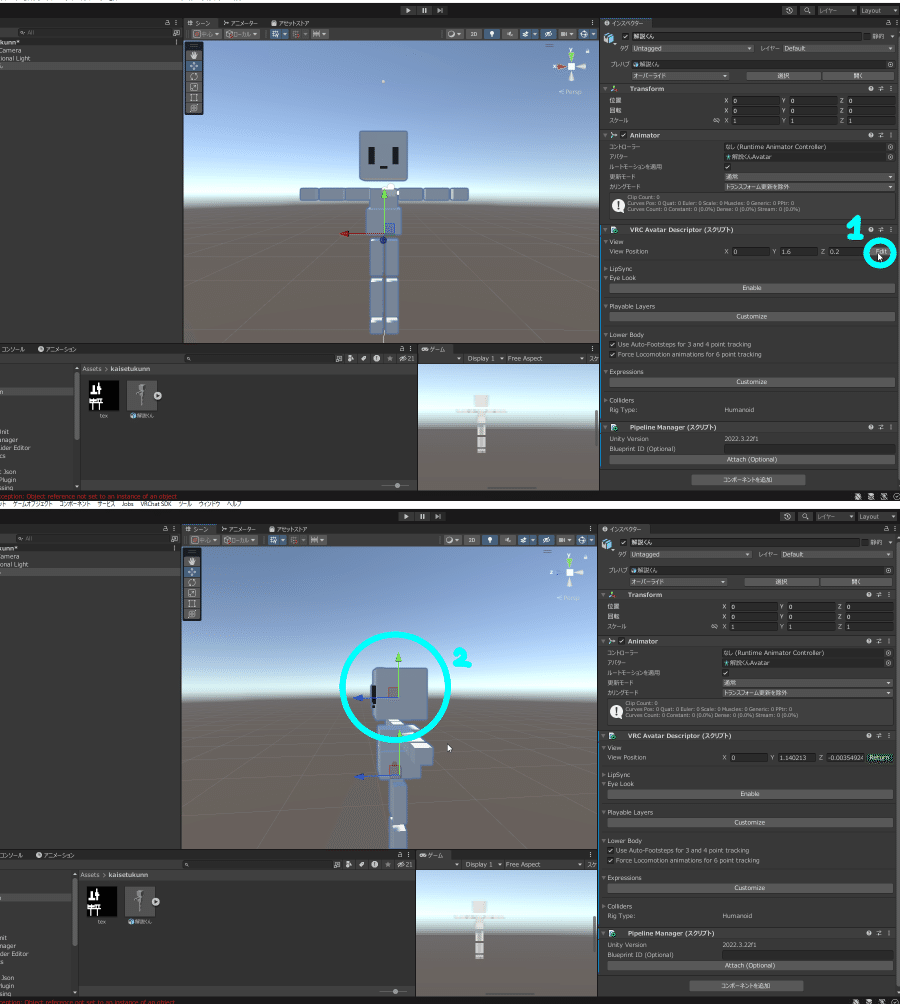
Returmを押して編集を終わります。(この後押し忘れているスクショが続きます。みなさんは忘れないでください……)
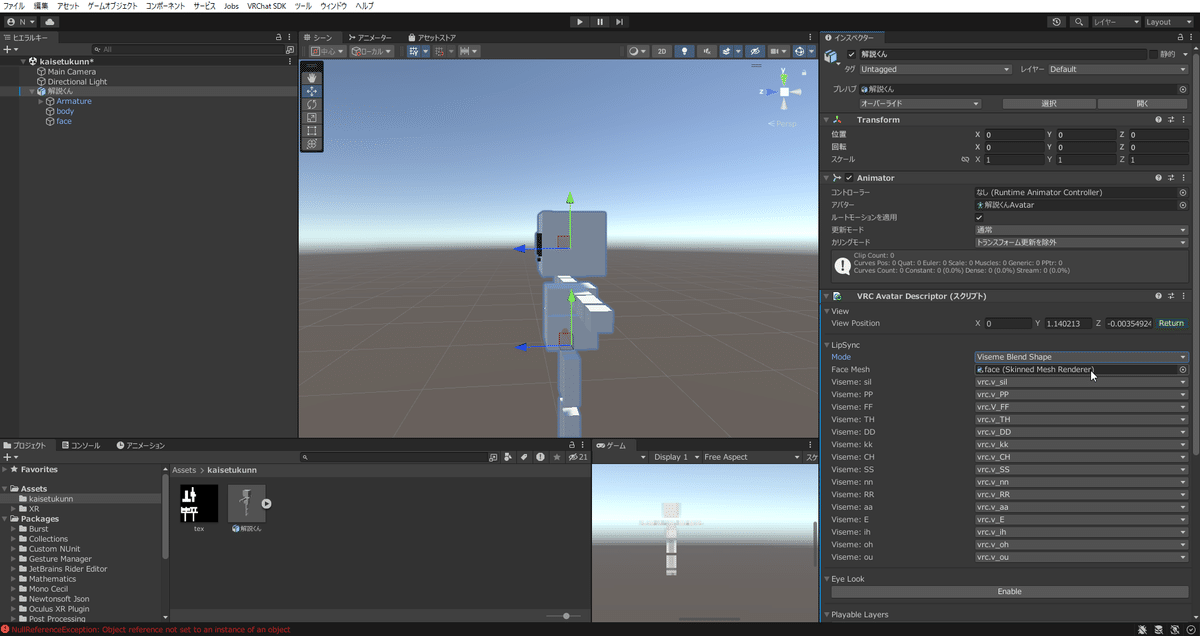
LipSync(リップシンク)の設定をしていきます。
まずModeをViseme Blend Shapeに変更します。
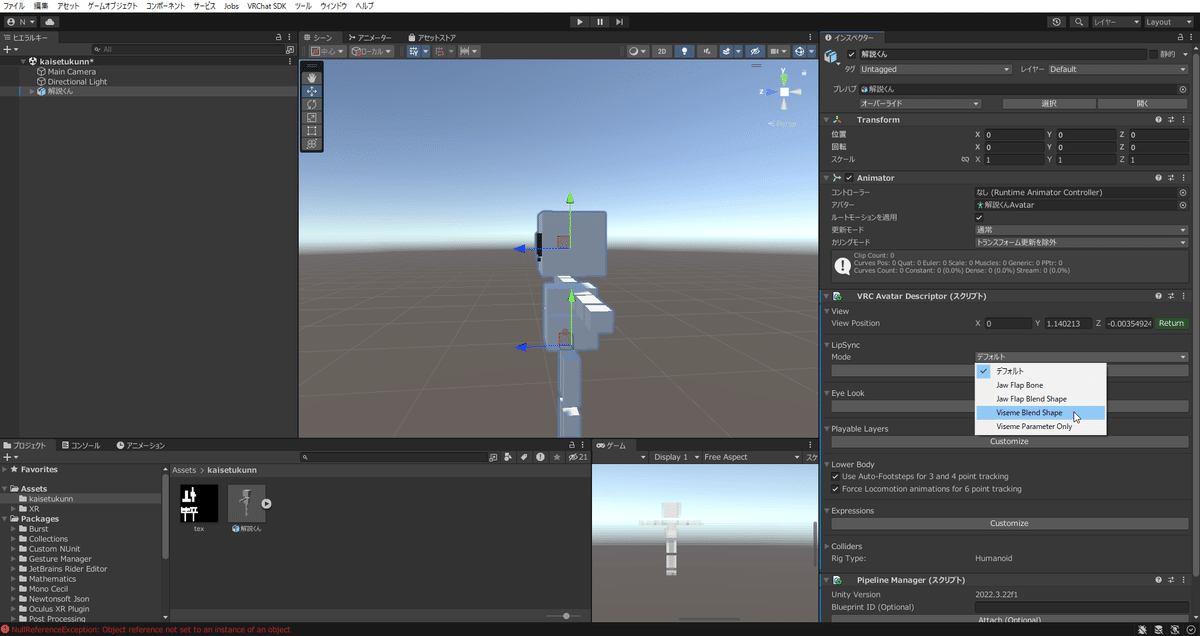
Face Meshにリップシンクを設定したメッシュをヒエラルキーからドラック&ドロップでいれます。名前が問題なければ自動で入りますが、入らなかった場合は手動で選択してください。
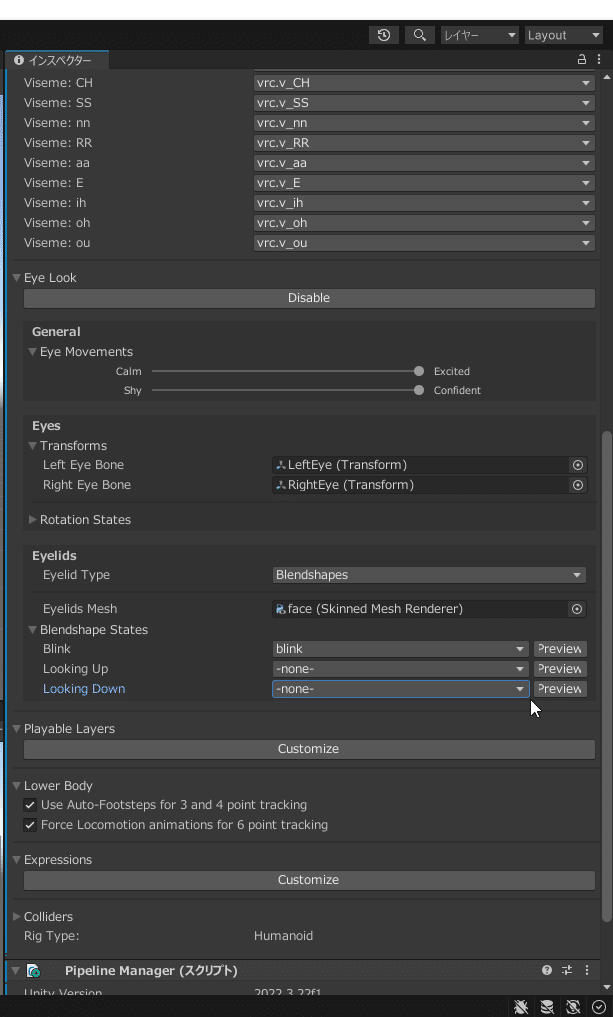
Eye Lookの設定をしていきます。
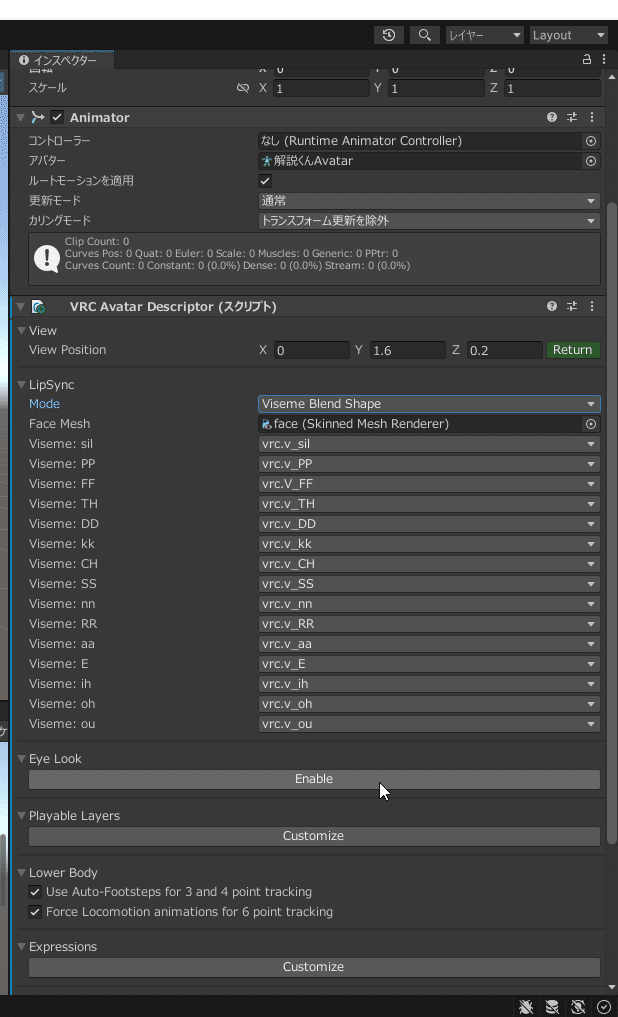
Enableを押します。
GeneralのEey Movementsを設定します。
Calm-Excitedがまばたきの頻度、shy-Confidentが他のアバターを見る頻度と時間らしいです。右にバーを動かすほど増えます。
私は両方マックスにしてますがshy-Confidentは下げても良いかもです。
Eyesを設定します。それぞれに対応する目のボーンをヒエラルキーからドラック&ドロップしてください。

Eyelidsを設定します。
Eyelids TypeをBlendshapesにします。そしたらEyelids Meshにblinkを設定したメッシュをヒエラルキーからドラック&ドロップします。
Blenkにblinkを他はnoneに設定します。
●VRCへエクスポート
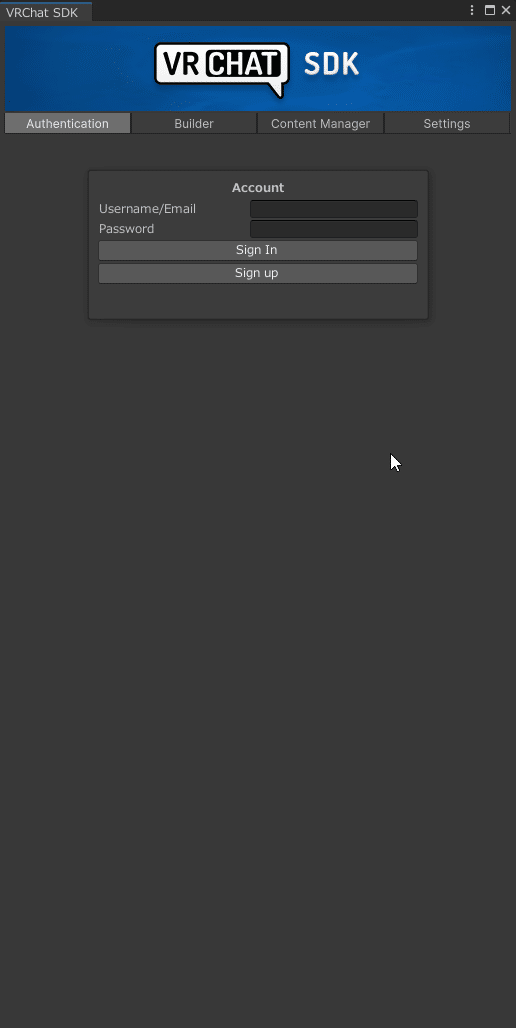
VRChat SDKからShow Control Panelを選択します。
そしたらログイン画面が出るのでIDかメアドとパスワードを入力してください。メールに二段階認証が送られてくる場合もあるので、そちらも入力します。
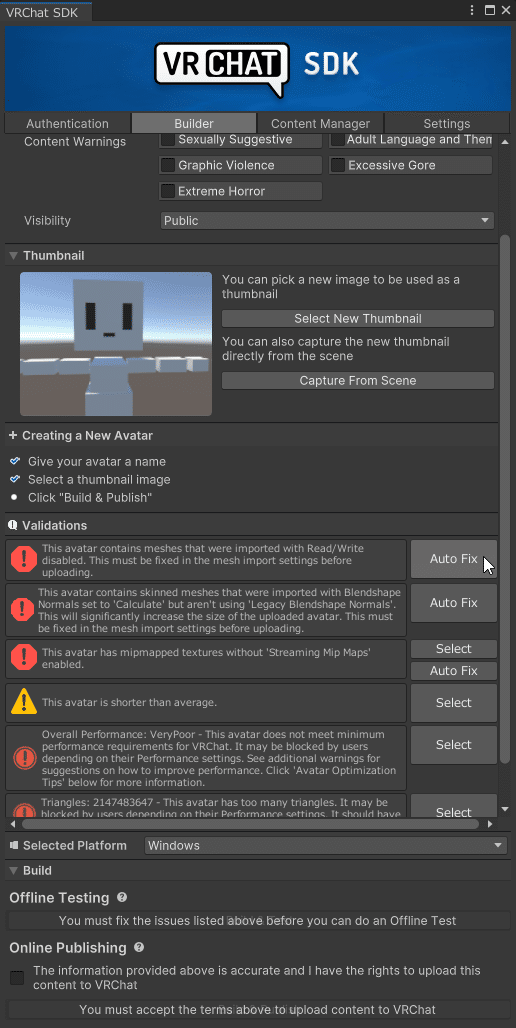
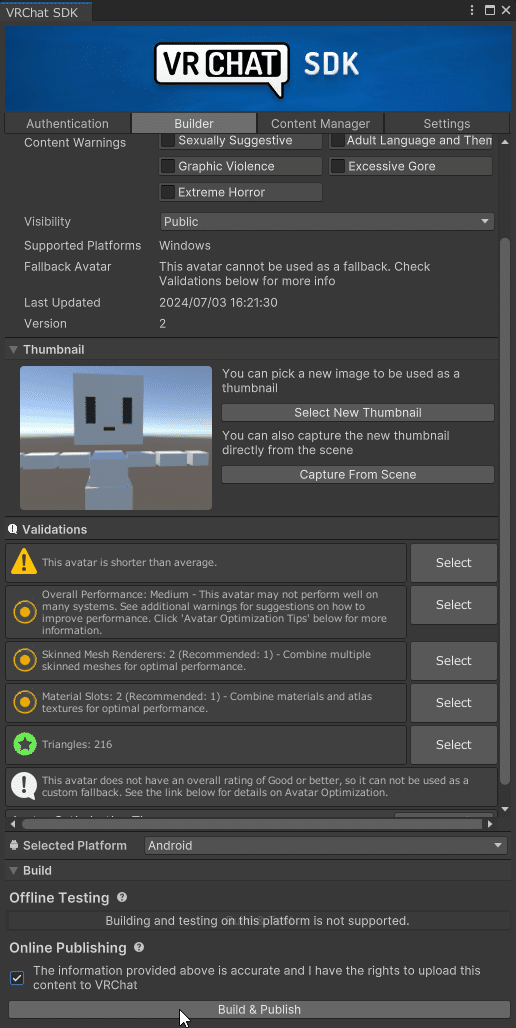
そしたらBuliderタブを開いて名前、警告、PriateかPublicか(Publicだとアバターをコピー出来ます。多分……)
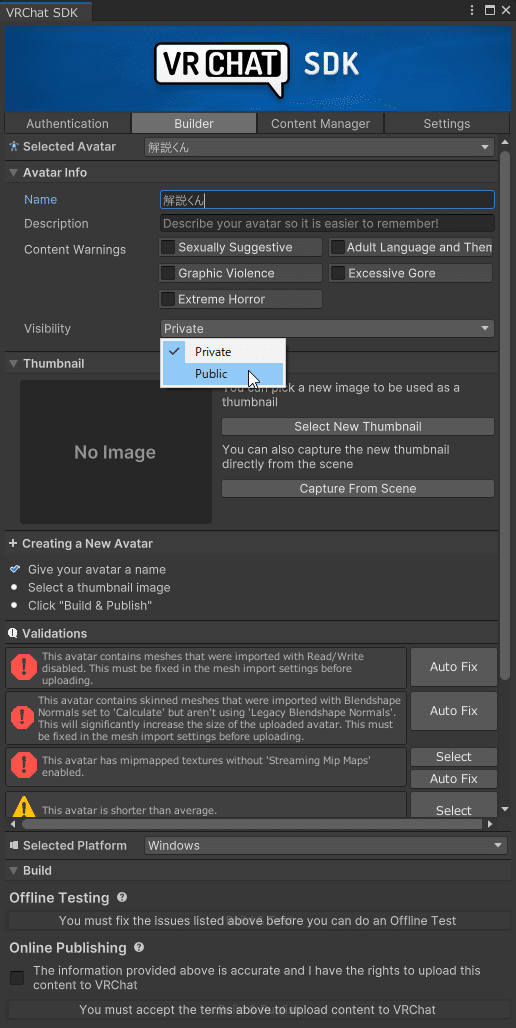
そしたらThubnailのcapture From Sceneを選択します。
するとシーンが映るので好きなように映してCaptureを押します。
これがVRC内のアバターのサムネイルになります。

Validationsに八角形のビックリマークが出ているので、すべてAuto Fixします。
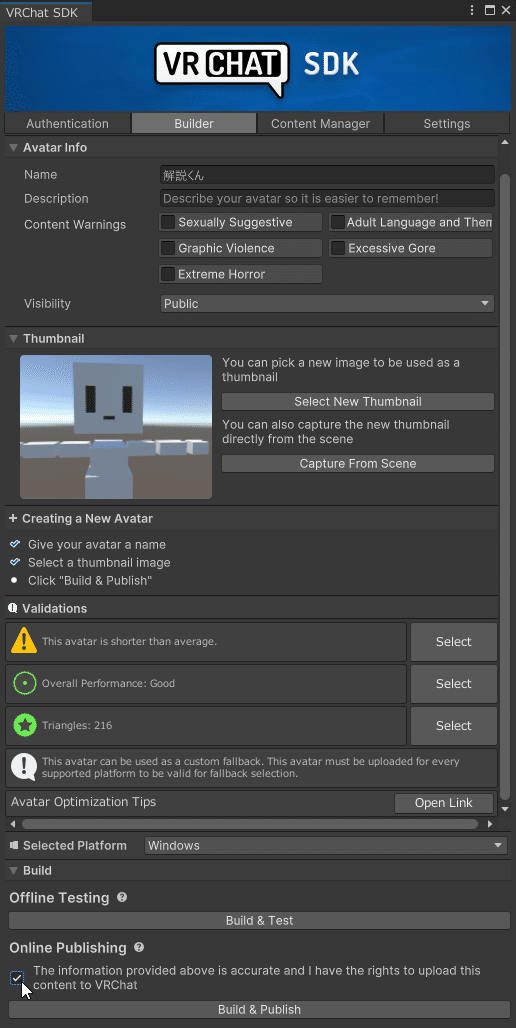
あとは規約に同意のチェックをいれてBuild&Publishを押せば完了です~!!
VRChatでテストしましょう。
●おまけ①Oculus版(android版)
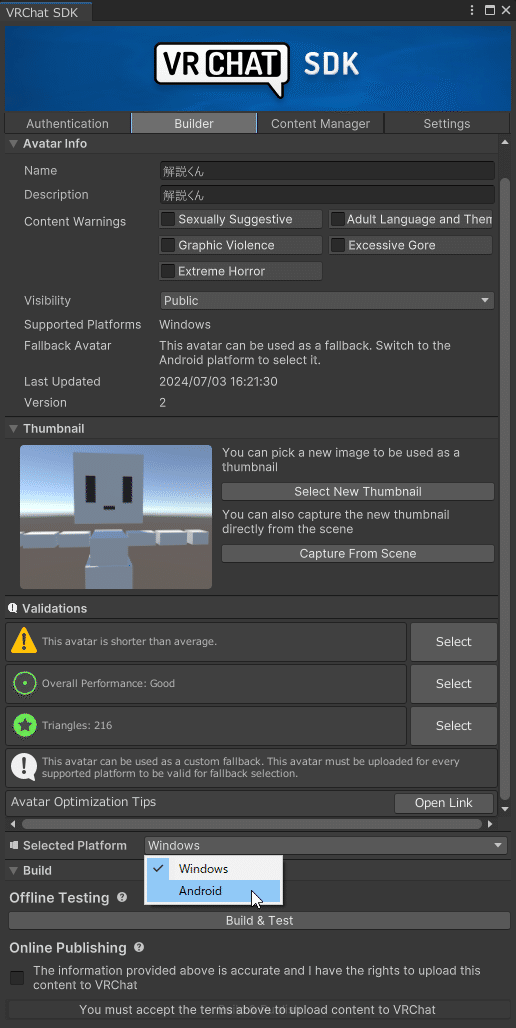
今回のアバターはVRCのマテリアルを使用しているため、簡単にOculus版(android版)に出来ます。
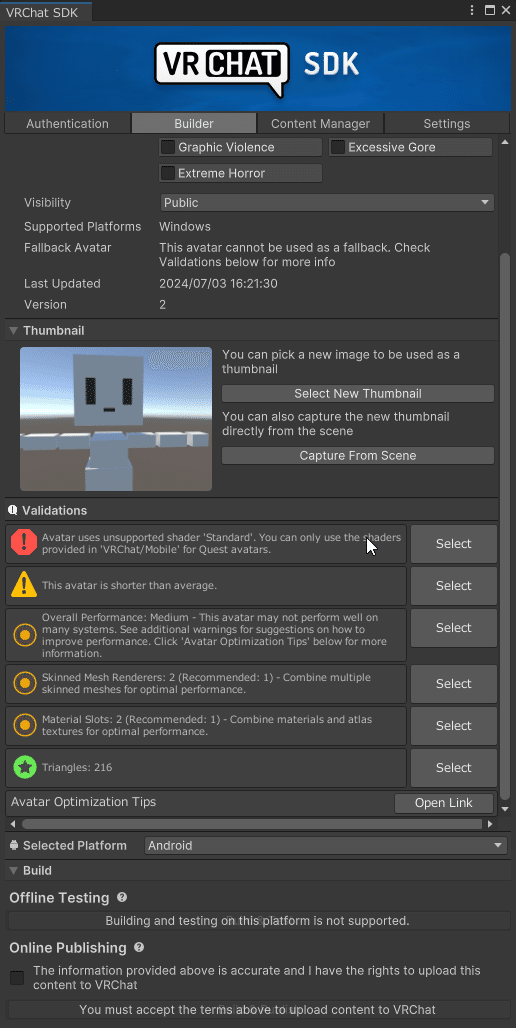
まずSelected PlatformでWindowsからandroidに切り替えます。
そしたらこんな画面が出るのでConfrmを押します。
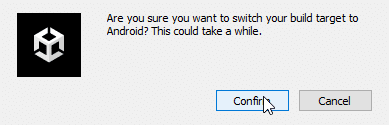
あとはまたBuild&Publishを押せば完了です。Oculusをかぶってテストしましょう。
また、こんなエラーが出た場合はマテリアルが対応していないので、変更しましょう。
身長が小さいアバターの場合、最初腕の挙動がおかしくなると思います。
VRChatの設定のトラッキングとIKからユーザーの身長を 1m前後にしてください。多分直ります。
しっかりとしたアバターの場合verypoor(重さの基準)になると思います。
PC版とQUEST(android版)で基準が異なるので、こちらを参考にしてください。
PC版
QUEST(android版)
●おまけ②揺れもの設定(PhysBone)
今回のアバターには揺れものがないので、ここではざっくり説明していきます。
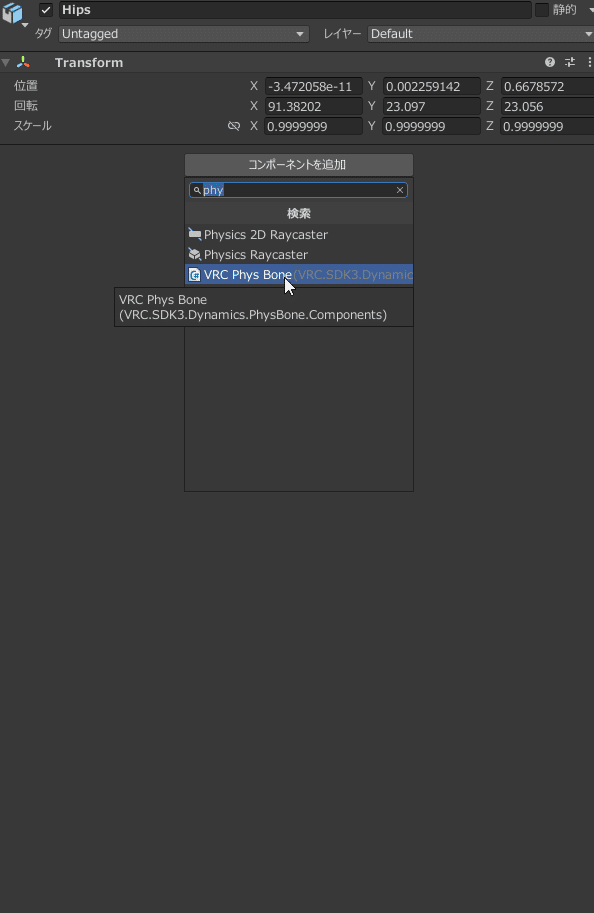
まず揺らしたい物の根元のボーンを選択します。
そしたらコンポーネントを追加からVRC Phys Boneを選択。
TransformsのRoot Trasformに根元のボーンをいれます。
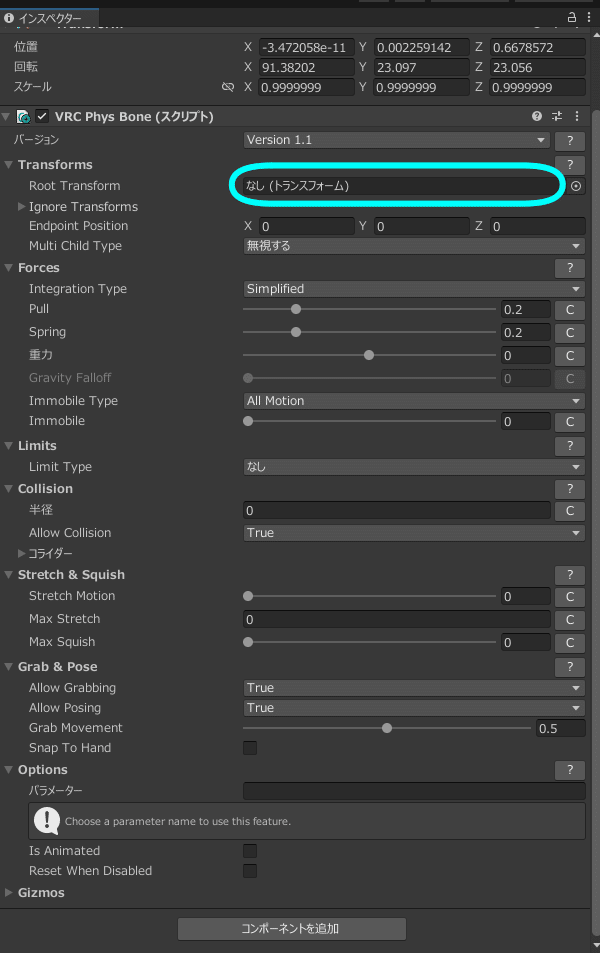
とりあえずこれで揺れます。
PhysBoneの設定については、以下の記事が参考になります
詳しい解説はこちらをご覧ください。
私の設定した庭乃冴ちゃんの設定も載せておきます。
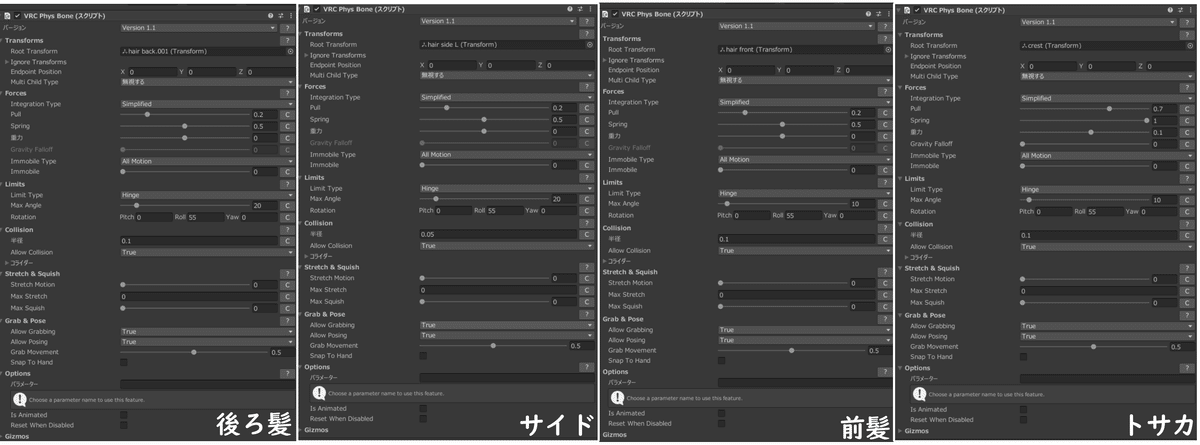
見づらくなってしまったのでドライブに置いておきます。
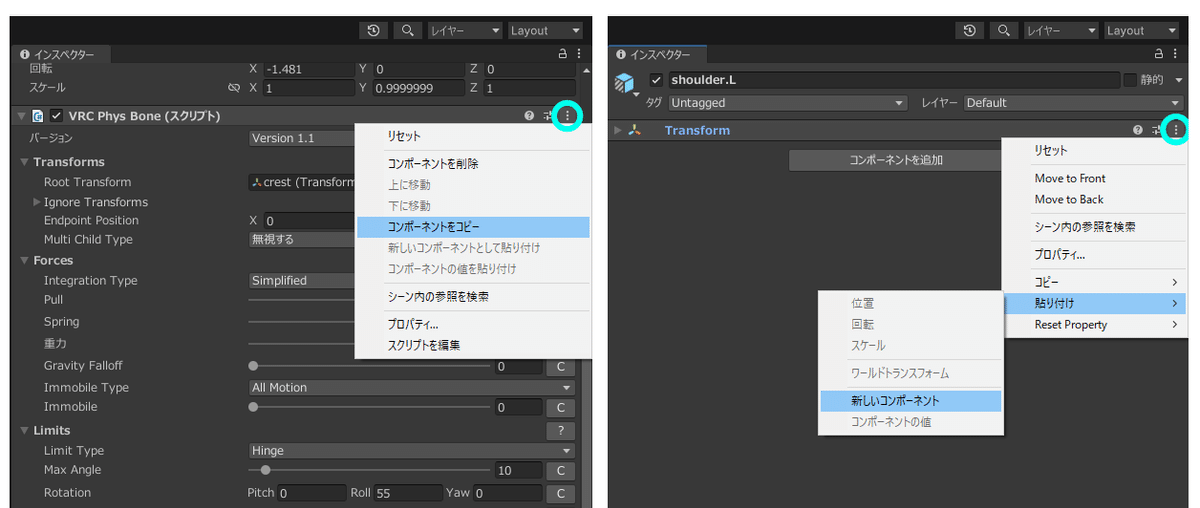
コンポーネントのコピー&ペーストは三つの点から出来ます。
お疲れ様でした。今回はここまでで終了となります。
次回はブレンドシェイプによるハンドジェスチャーを作っていきます。
●一覧
・blender編
https://note.com/preview/n830b289d1b32?prev_access_key=3fcda4e2be07af3bfb8ddd3e7c3f3f63
・unityからVRCへ
https://note.com/preview/nf83047b654a3?prev_access_key=87f4a3b6cce34d6c494a13dcc16f3711
・ハンドジェスチャー
https://note.com/niwatorivrc/n/nb41a38344f1c
・エクスプレッション
・販売