NeoPixelはじめました
はじめに
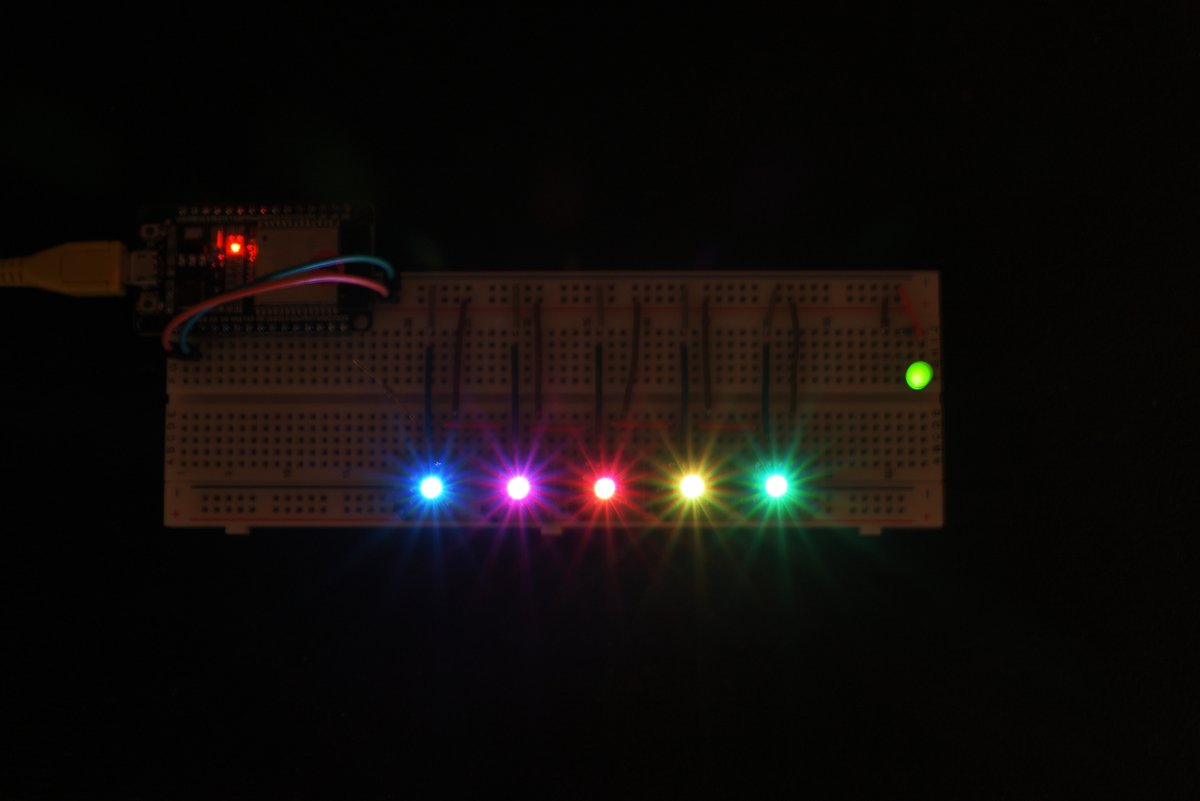
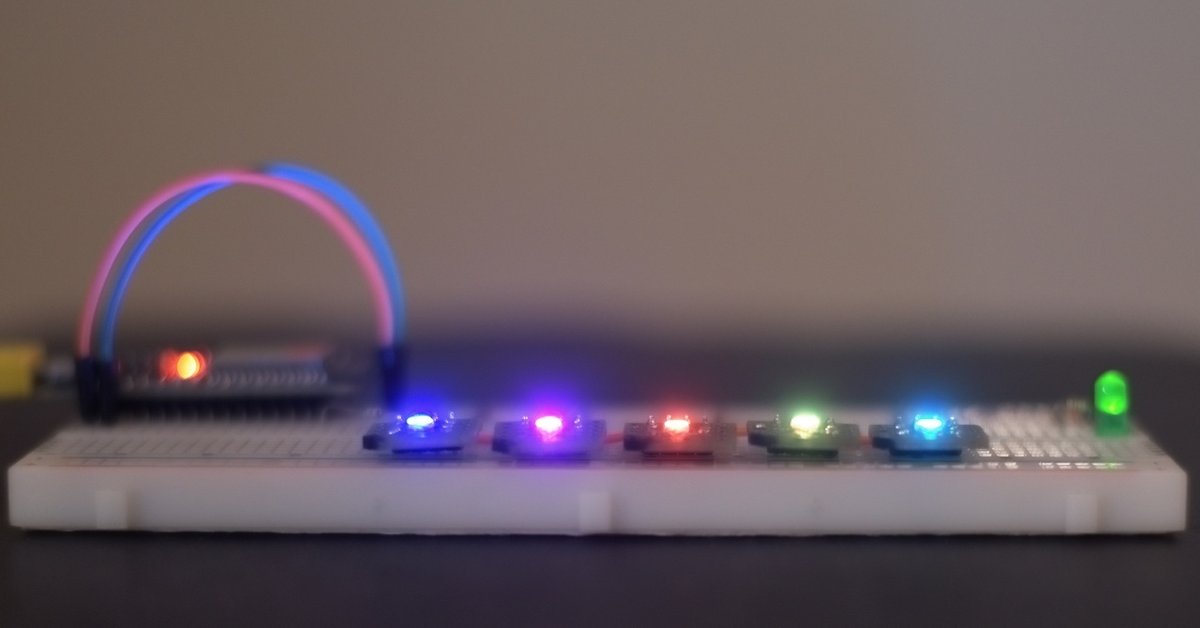

(下部に高品質の動画を掲載)
遅ればせながらNeoPixelを触ってみました。
巷で派手にLEDを光らせているのを見て羨ましく思っていましたが、私もようやく一歩、踏み出せました。
応答性、発色、輝度において期待通りの品質でした。
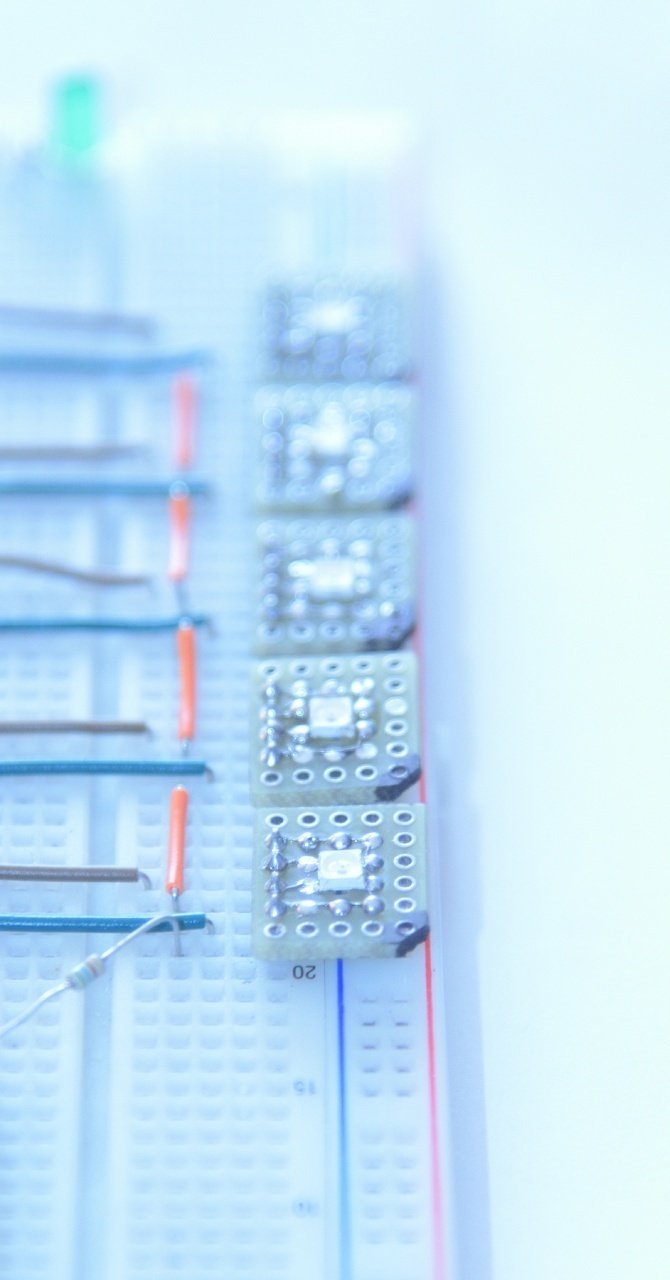
ブレッドボードに配置しただけなのに映える!
写真でも映える!
実物はもっと映える!
購入する商品を間違え、実装するのに非常に苦労した点(下部に記述)を除けば大満足
NeoPixelとは
NeoPixelは、RGBのLEDとマイコンが内蔵されていて、複数のNeoPixelをカスケード接続(数珠つなぎに接続)して使う、1つの信号で制御できる
「電圧をかけただけでは光らない」、「抵抗やPWMで光を制御できない」、「光らせるのにコントローラー(マイコンなど)が必要」なので直感的ではない(内部仕様を理解するのが難しい)と感じる方もいるかもしれない
内部仕様を考えずに、ライブラリに任せてしまえば、マイコンのHello Worldレベルの知識で、複数のNeoPixelの光を制御できる
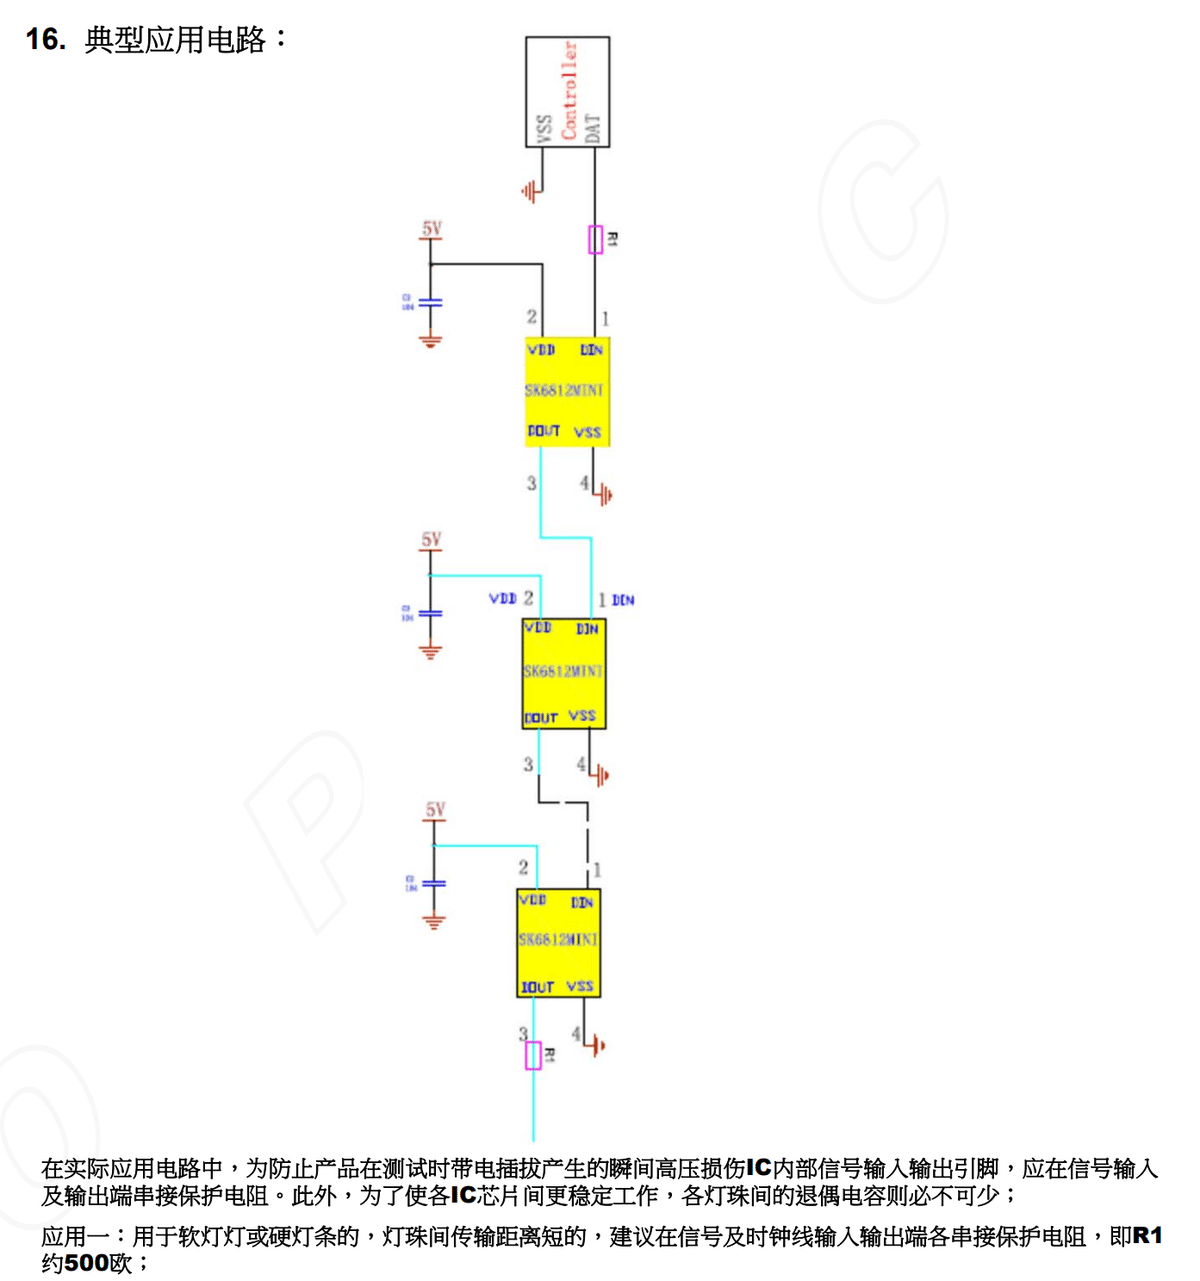
接続方法
5VとGNDをつなぐ
capacitanceを入れると安定するようだ
適当なコントローラー(Arduino・RaspberryPi、ESP32)のGPIOに最初のNeoPixelのDINにつなぐ
最初のNeoPixelのDOUTを2番目のDINにつなぐ(以下、数珠繋ぎ)
コントローラーの出力と最初のNeoPixelの間に500Ωの抵抗を入れる
一連のNeoPixel毎にも500Ωの抵抗を入れる
全部に抵抗を入れてもよいのかもしれない
動作確認環境
MicroPythonをインストールしたESP32で動作確認。
5V駆動ということですが、3.3Vで動作を確認。
早く光らせたくて、無茶してしまいました。おすすめできません。
capacitanceをつけていません。おすすめできません。
実装の奮闘記
あまり調べずに、秋月電子通商の店舗に出向く。
ネットで検索してみつけたSK6812MINI(5個入)を2つください、とお店の方にお願いする。
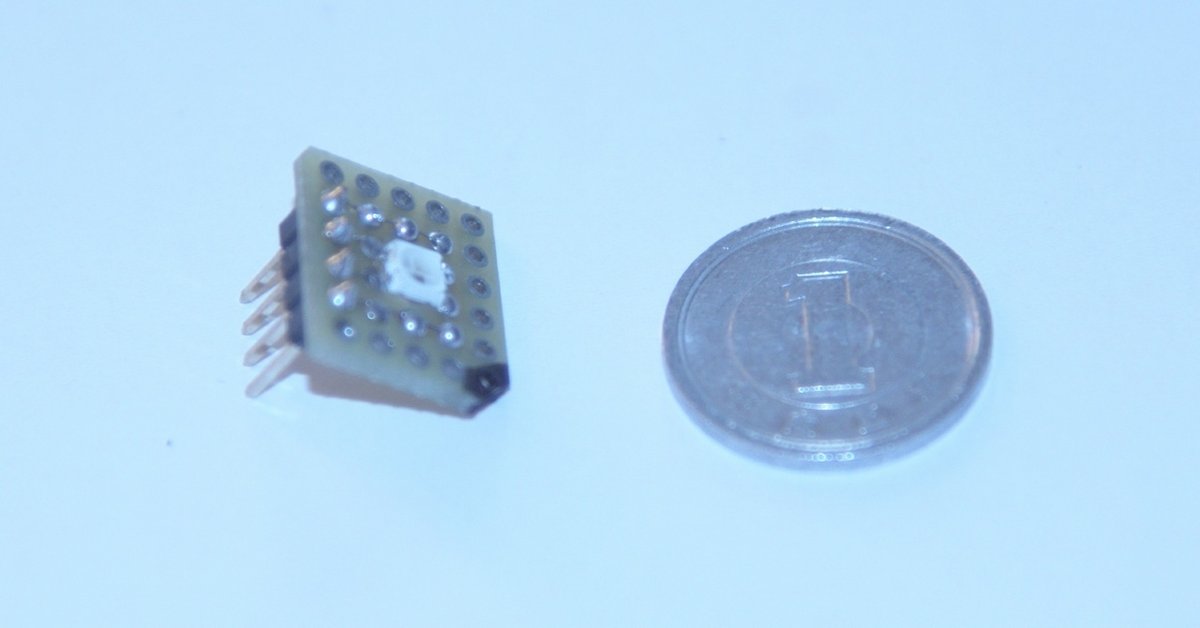
実際に商品を見て、「これ実装できないんじゃないか?」とかなり動揺したが、探してもらって、申し訳ないという気持ちもあり、購入する。
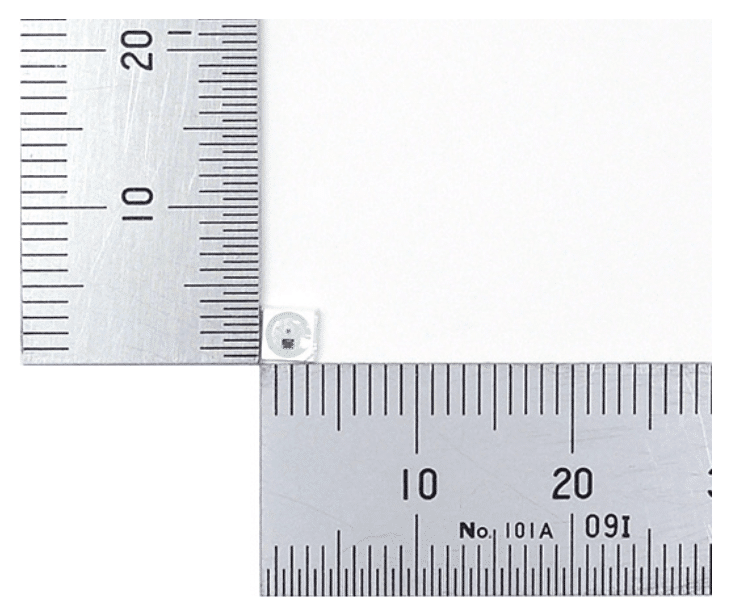
https://akizukidenshi.com/catalog/g/gI-15477/ より引用
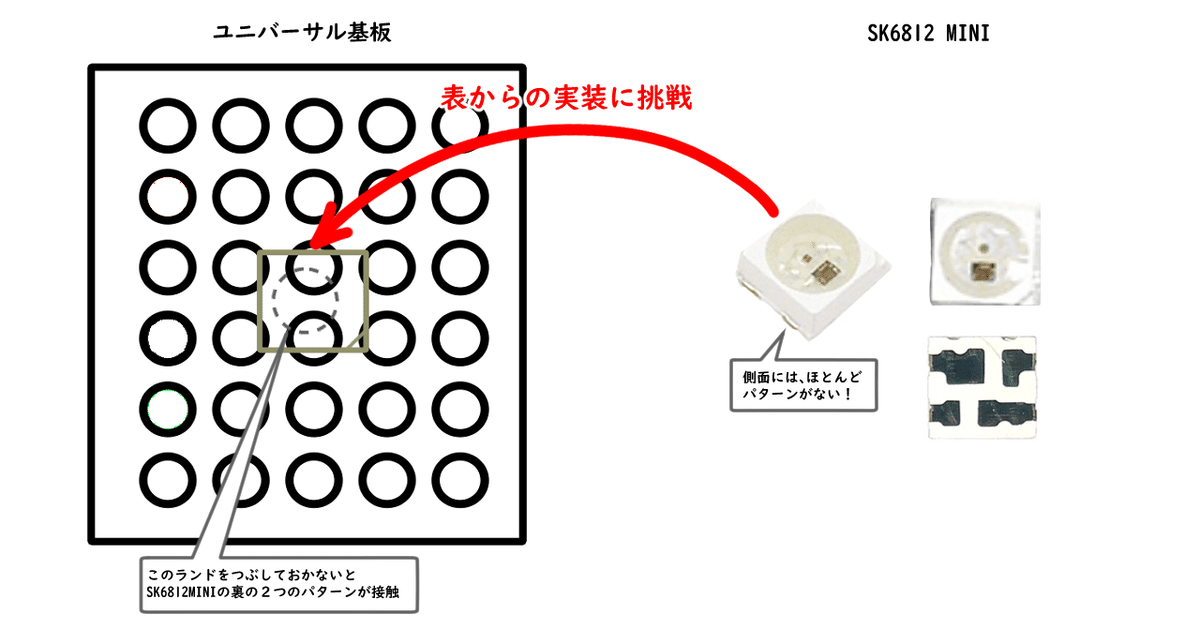
画像は https://akizukidenshi.com/catalog/g/gI-15477/ より引用
(この記事を書いているときに、調べて、裏から実装する代物だと理解。)
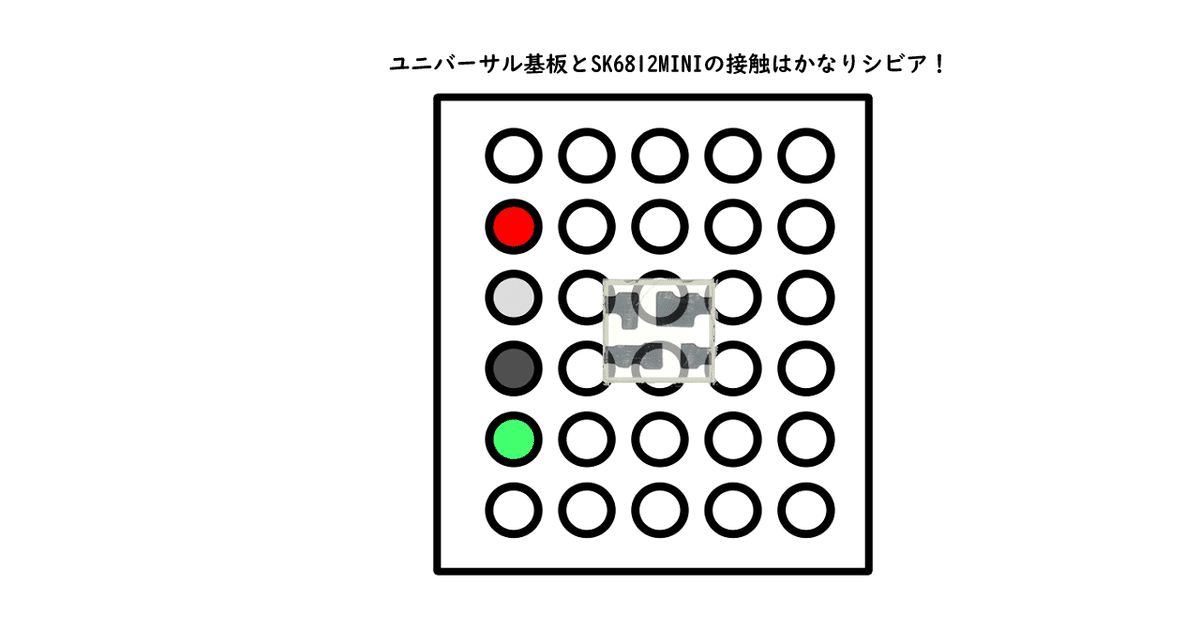
基板の中央の2つのランドをつぶしておかないと、NeoPixelの2つのパターンがつながってしまう
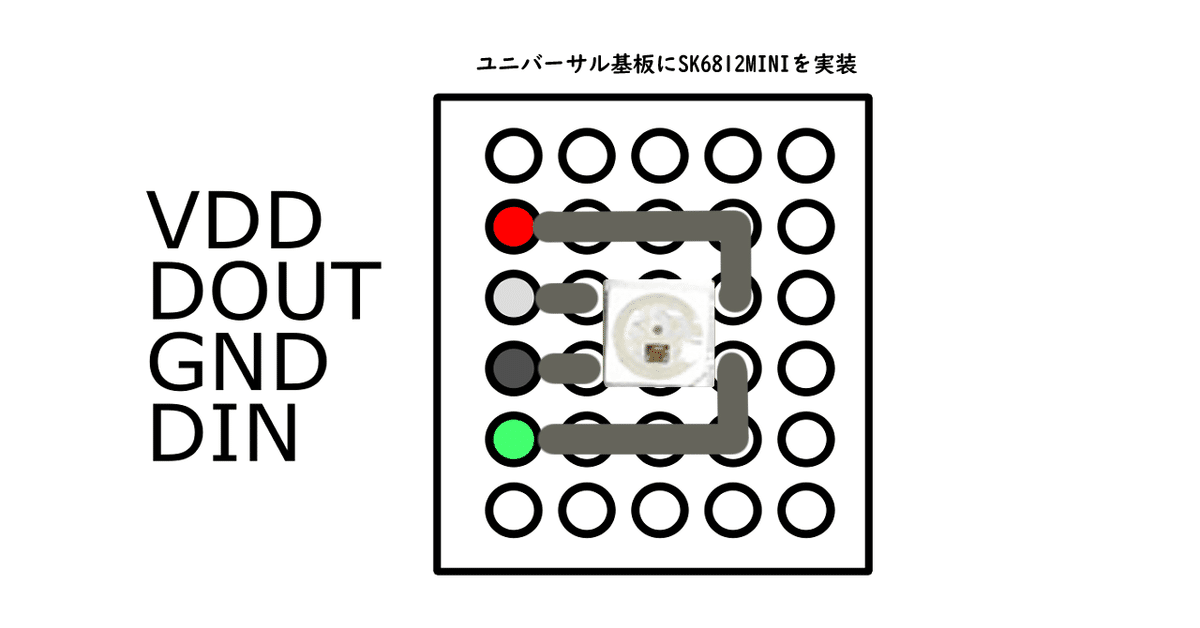
プログラミングの方法
以下、ESP32において、MicroPythonのNeoPixel/APA106 ドライバーを利用した例
初期化、色設定、出力の3行!
from machine import Pin
from neopixel import NeoPixel

pin = Pin(23, Pin.OUT)  # NeoPixel 駆動のための GPIO 23 を出力に設定
np = NeoPixel(pin, 5)   # 5ピクセル用の NeoPixel ドライバーを GPIO 23 で作成
np[0] = (255, 255, 255) # 第1ピクセルを白に設定
np[1] = (255, 255, 255) # 第2ピクセルを白に設定
np[2] = (255, 255, 255) # 第3ピクセルを白に設定
np[3] = (255, 255, 255) # 第4ピクセルを白に設定
np[4] = (255, 255, 255) # 第5ピクセルを白に設定
np.write()              # 全ピクセルにデータ書込み
動画
今回のMicroPythonコード
neopixeltest.py
import machine, neopixel
import time
import math
from hsv_util import *

num_of_leds = 5
np = neopixel.NeoPixel(machine.Pin(23), num_of_leds)

cycle = 0
while (True):
    for i in range(num_of_leds):
        hue = (int((360 / num_of_leds) * i + cycle) % 360) / 360.0
        saturation = (math.sin(cycle / 360 * 2 * math.pi)) * 0.2 + 0.8
        value = math.sin((cycle / 360 ) * 2 * math.pi + i) * 0.5 + 0.5
        color = float_rgb_to_byte_rgb(hsv_to_rgb((hue , saturation, value)))
        np[i] = color

    np.write()
    cycle += 1
    time.sleep(0.001)
    if cycle >= 360:
        cycle = 0
hsv_util.py
def hsv_to_rgb(hsv):
    """https://github.com/python/cpython/blob/main/Lib/colorsys.py
       all values is 0 to 1.
    """
    h, s, v = hsv
    if s == 0.0:
        return v, v, v
    i = int(h*6.0) # XXX assume int() truncates!
    f = (h*6.0) - i
    p = v*(1.0 - s)
    q = v*(1.0 - s*f)
    t = v*(1.0 - s*(1.0-f))
    i = i%6
    if i == 0:
        return v, t, p
    if i == 1:
        return q, v, p
    if i == 2:
        return p, v, t
    if i == 3:
        return p, q, v
    if i == 4:
        return t, p, v
    if i == 5:
        return v, p, q


def float_to_byte(f):
    return int(round(f * 255))


def float_rgb_to_byte_rgb(rgb):
    return (float_to_byte(rgb[0]), float_to_byte(rgb[1]), float_to_byte(rgb[2]))
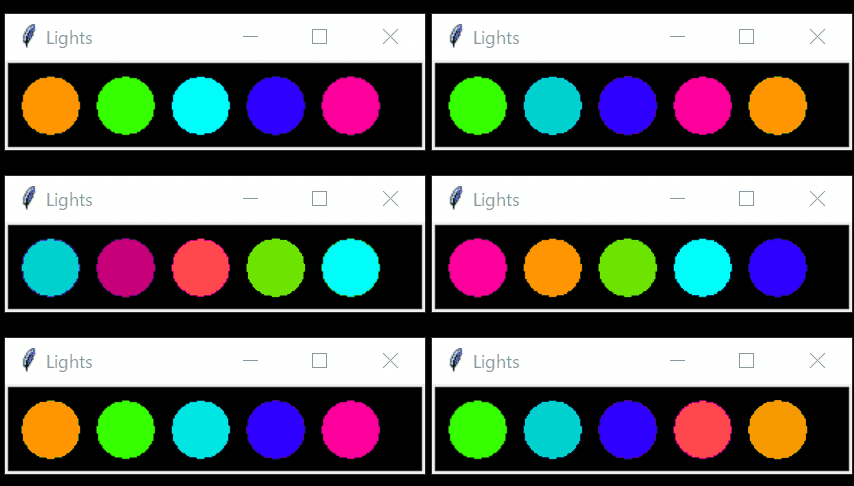
PythonによるNeoPixelシミュレーター
おまけ
シミュレーターの実行イメージ
MicroPythonはすぐに動作確認できるので不要だった
シミュレーターのPythonコード
import tkinter


def hsv_to_rgb(hsv):
    """https://github.com/python/cpython/blob/main/Lib/colorsys.py
       all values is 0 to 1.
    """
    h, s, v = hsv
    if s == 0.0:
        return v, v, v
    i = int(h * 6.0)  # XXX assume int() truncates!
    f = (h * 6.0) - i
    p = v * (1.0 - s)
    q = v * (1.0 - s * f)
    t = v * (1.0 - s * (1.0 - f))
    i = i % 6
    if i == 0:
        return v, t, p
    if i == 1:
        return q, v, p
    if i == 2:
        return p, v, t
    if i == 3:
        return p, q, v
    if i == 4:
        return t, p, v
    if i == 5:
        return v, p, q


def float_to_byte(f):
    return int(round(f * 255))


def float_rgb_to_byte_rgb(rgb):
    return float_to_byte(rgb[0]), float_to_byte(rgb[1]), float_to_byte(rgb[2])


class MyApp:
    window_width = 280
    window_height = 60
    animation_refresh_ms = 10

    def __init__(self):
        self.window = None
        self.canvas = None
        self.lights = []
        self.cycle = 0

    def create_window(self):
        self.window = tkinter.Tk()
        self.window.title("Lights")
        self.window.geometry(f'{MyApp.window_width}x{MyApp.window_height}')

    def create_canvas(self):
        self.canvas = tkinter.Canvas(self.window)
        self.canvas.configure(bg="black")
        self.canvas.pack(fill="both", expand=True)

    def create_lights(self):
        for i in range(0, 5):
            offset = (i * 50)
            light = self.canvas.create_oval(10 + offset, 10, 50 + offset, 50, fill=MyApp.from_rgb((255, 255, 255)))
            self.lights.append(light)

    def animate(self):
        for i in range(5):
            color = self.from_rgb(float_rgb_to_byte_rgb(hsv_to_rgb((((self.cycle + 360 / 5 * i) % 360) / 360, 1, 1))))
            self.canvas.itemconfig(self.lights[i], fill=color)

        self.cycle += 1
        if self.cycle >= 360:
            self.cycle = 0

        self.canvas.update_idletasks()
        self.canvas.update()
        # self.window.update()

        self.window.after(self.animation_refresh_ms, self.animate)


    @staticmethod
    def from_rgb(rgb):
        """translates an rgb tuple of int to a tkinter friendly color code
        https://stackoverflow.com/questions/51591456/can-i-use-rgb-in-tkinter
        """
        r, g, b = rgb
        return f'#{r:02x}{g:02x}{b:02x}'


my_app = MyApp()
my_app.create_window()
my_app.create_canvas()
my_app.create_lights()
my_app.animate()

my_app.window.mainloop()
さいごに
今後もNeoPixelを楽しんでいこうと思います。
この記事が気に入ったらサポートをしてみませんか?
