Vue+Docker+Firebase環境構築202005

参考
Vue.js+Firebase+Dockerで環境構築をして、初期画面をデプロイするまで
https://qiita.com/azul915/items/975082747e971025ca40
Dockerで作るGitHub環境
https://qiita.com/Y-Kanoh/items/94b3ea3df97fcd1546ce
alpineを使用しているときのgitインストール
https://qiita.com/hym816/items/a40bd66395f17b78344b
環境
macOS Catalina 10.15.4
20200531一部修正(gitを使うための追加)
Docker for Macインストール
公式サイトからDockerアカウントを作成後、DockerHubからダウンロードしてインストール
確認
$ docker version
Client: Docker Engine - Community
Version:           19.03.8
API version:       1.40
Go version:        go1.12.17
Git commit:        afacb8b
Built:             Wed Mar 11 01:21:11 2020
OS/Arch:           darwin/amd64
Experimental:      false
Server: Docker Engine - Community
Engine:
 Version:          19.03.8
 API version:      1.40 (minimum version 1.12)
 Go version:       go1.12.17
 Git commit:       afacb8b
 Built:            Wed Mar 11 01:29:16 2020
 OS/Arch:          linux/amd64
 Experimental:     false
containerd:
 Version:          v1.2.13
 GitCommit:        7ad184331fa3e55e52b890ea95e65ba581ae3429
runc:
 Version:          1.0.0-rc10
 GitCommit:        dc9208a3303feef5b3839f4323d9beb36df0a9dd
docker-init:
 Version:          0.18.0
 GitCommit:        fec3683
Dockerコンテナの構築、起動、ログイン
プロジェクトのフォルダを作成、直下にDockerfileとdocker-compose.ymlを作成する
Dockerfile
FROM node:8.16.1-alpine //nodeのバージョンが違うと上手くいかない場合があるので注意

WORKDIR /app

RUN apk update && \
   npm install -g npm \
   npm install -g @vue/cli \
   npm install -g firebase-tools \
   && rm -rf /var/lib/apt/lists/

//githubでバージョン管理を行うため
RUN apk add git
RUN apk add openssh

CMD ["/bin/ash"]
volumesでホスト側とコンテナ側の同期部分を指定しているので、このあとbuildとupをするとコンテナ内のappフォルダが、ローカル側にも反映される
docker-compose.yml
version: '3'

services:
   vue:
       build: .
       volumes:
           - ./app:/app
       ports:
           - '8080:8080'
       stdin_open: true
       tty: true
コンテナの構築と起動、ログイン
project_folder/ $ docker-compose build //コンテナの構築
project_folder/ $ docker-compose up -d // バックグラウンドでコンテナを起動
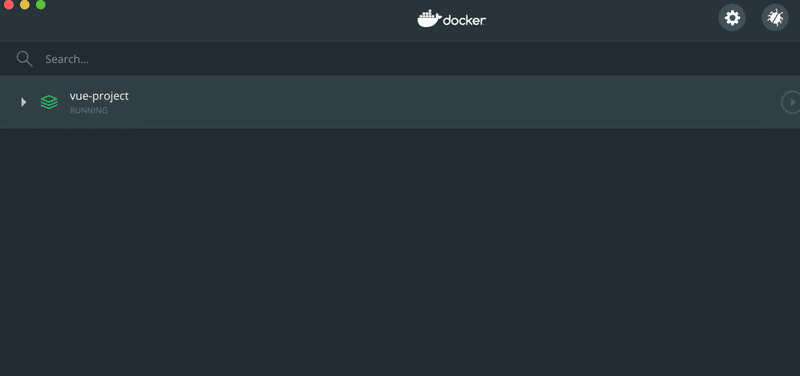
project_folder/ $ docker ps -a // コンテナが立っているか確認できる(STATUSがUp)
Dockerはこんな感じで立ち上がる
※プロジェクト名は任意の
project_folder/ $ docker exec -it コンテナ名orコンテナID /bin/ash // 起動しているコンテナにログイン
コンテナの中でVueのプロジェクトを作成する/app # vue --version // バージョン確認でVueが入っていることを確認する
/app # vue create project_name

# Vueのプロジェクト作成にあたってオプションを選択していく(Ctrl + Cで中断できる)
# 主はRouterとVuexを使用したいので、Manually select featuresから進めて行きました
# 一応オプションについて残しておきます
 #上下キーで選択 、returnで決定
Vue CLI v3.7.0
? Please pick a preset:
 default (babel, eslint)
❯ Manually select features

# スペースキーでチェックボックスを選択する、キーが効かないときは英数入力にする
? Check the features needed for your project:
❯◉ Babel
◯ TypeScript
◯ Progressive Web App (PWA) Support
◉ Router
◉ Vuex
◯ CSS Pre-processors
◉ Linter / Formatter
◯ Unit Testing
◯ E2E Testing

# Vue Routerのヒストリーモードを使用するかどうかを選択する
? Use history mode for router? (Requires proper server setup for index fallback in production) Yes

# LinterとFormatterの設定を選択する(エラー防止のみのESLint with error prevention onlyを選択した)
? Pick a linter / formatter config:
❯ ESLint with error prevention only
 ESLint + Airbnb config
 ESLint + Standard config
 ESLint + Prettier

# 追加のLint機能を選択する(Lintを保存時に実行)
? Pick additional lint features: (Press <space> to select, <a> to toggle all, <i> to invert selection)
❯◉ Lint on save
◯ Lint and fix on commit (requires Git)

# Babel、PostCSS、ESLint等の設定をどこで行うかを選択する(それぞれの設定ファイルで行う)
? Where do you prefer placing config for Babel, PostCSS, ESLint, etc.? (Use arrow keys)
❯ In dedicated config files
 In package.json

# 次回からもこの設定を使うために、設定を保存するかどうかを選択する
? Save this as a preset for future projects? Yes

# どこに保存するかを入力する
? Save preset as: ./setting

# パッケージ管理は何でするか(yarnの方が高速で知られているがnpmを性能がよくなってきているので慣れてるnpmにした)
? Pick the package manager to use when installing dependencies:
 Use Yarn
❯ Use NPM

Vue CLI v3.7.0
✨  Creating project in /app/project_name.
⚙  Installing CLI plugins. This might take a while...


> yorkie@2.0.0 install /app/project_name/node_modules/yorkie
> node bin/install.js

setting up Git hooks
can't find .git directory, skipping Git hooks installation
added 1158 packages from 913 contributors and audited 23624 packages in 166.581s
found 0 vulnerabilities

🚀  Invoking generators...
📦  Installing additional dependencies...

added 38 packages from 27 contributors, updated 2 packages, moved 9 packages and audited 23915 packages in 72.268s
found 0 vulnerabilities

⚓  Running completion hooks...

📄  Generating README.md...

🎉  Successfully created project project_name.
👉  Get started with the following commands:

$ cd project_name
$ npm run serve
サーバーを立てて初期画面を確認する
# インストールしたディレクトリに移動(package.jsonがある)
/app # cd project_name
# ローカルにVueのアプリサーバー起動、ビルドに時間が30秒くらいかかる localhost:8080にアクセス、止めるときは[Ctrl+c]
/app/project_name # npm run serve
> project_name@0.1.0 serve /app/project_name
> vue-cli-service serve
INFO Starting development server...
98% after emitting CopyPlugin
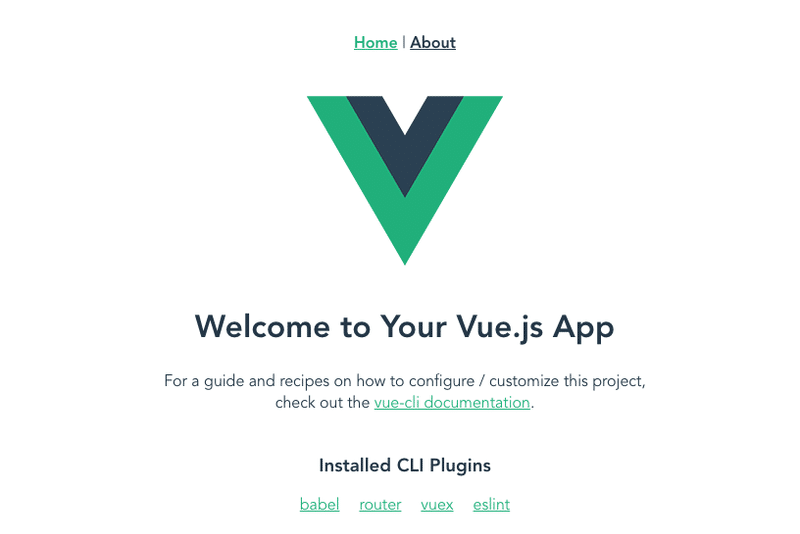
DONE Compiled successfully in 39236ms 10:06:01
App running at:
- Local: http://localhost:8080/
It seems you are running Vue CLI inside a container.
Access the dev server via http://localhost:<your container's external mapped port>/
Note that the development build is not optimized.
To create a production build, run npm run build.確認(http://localhost:8080/)
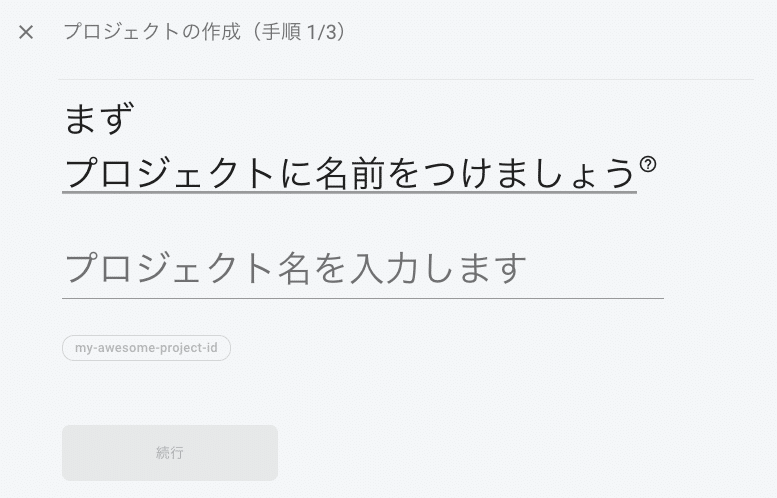
Firebaseでプロジェクトを作りCLIと連携する
firebaseにアクセスして、プロジェクトを作成する
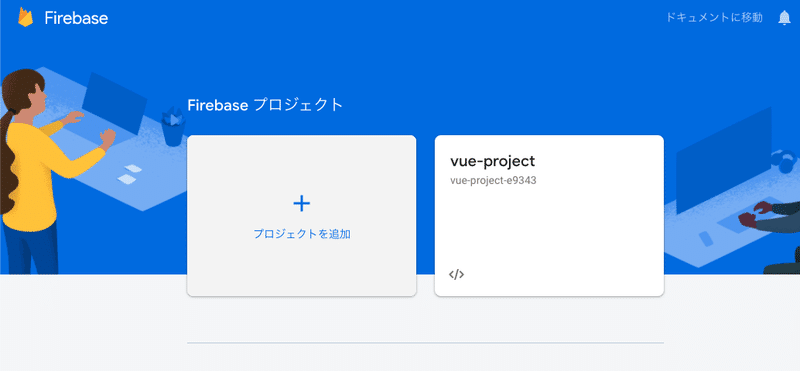

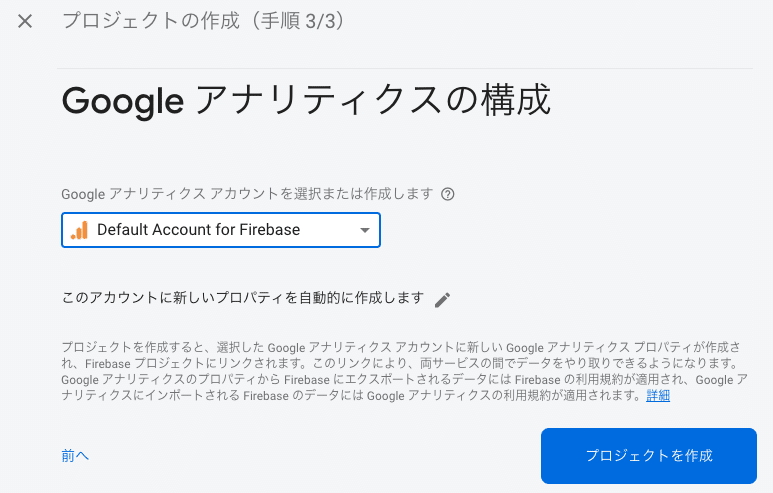
プロジェクトのコンソールからscriptタグを生成してコピーする
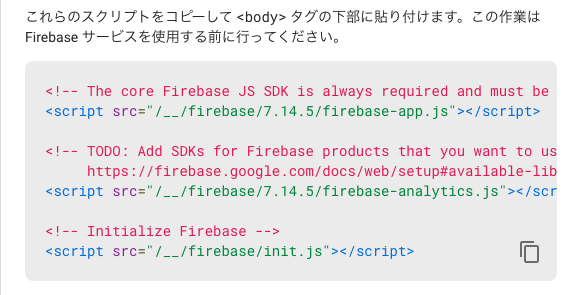
Firebaseを利用するためにindex.htmlを書き換える
project_folder/app/project_name/public/index.html
<!DOCTYPE html>
<html lang="en">
 <head>
   <meta charset="utf-8">
   <meta http-equiv="X-UA-Compatible" content="IE=edge">
   <meta name="viewport" content="width=device-width,initial-scale=1.0">
   <link rel="icon" href="<%= BASE_URL %>favicon.ico">
   <title>project_name</title>
 </head>

 <body>
   <noscript>
     <strong>We're sorry but project_name doesn't work properly without JavaScript enabled. Please enable it to continue.</strong>
   </noscript>
   <div id="app"></div>
   <!-- built files will be auto injected -->

   <!-- The core Firebase JS SDK is always required and must be listed first -->
   <script src="/__/firebase/7.14.5/firebase-app.js"></script>

   <!-- TODO: Add SDKs for Firebase products that you want to use
    https://firebase.google.com/docs/web/setup#available-libraries -->
   <script src="/__/firebase/7.14.5/firebase-analytics.js"></script>

   <!-- Initialize Firebase -->
   <script src="/__/firebase/init.js"></script>
 </body>
</html>
Firebaseにログインするコマンドを実行(ローカルで仮想環境を使用するので、オプション の--no-localhostが非常に重要)
/app/project_name # firebase login --no-localhost

# 使用状況の情報に関する協力の同意を求められるのでY(es)で進める
? Allow Firebase to collect anonymous CLI usage and error reporting information? (Y/n) Yes

# 「Visit this URL on any device to log in:」の下にトークンつきのURLが発行されるので、ブラウザにコピペして、ログインしたいGoogleのアカウントを選択する
# ブラウザ側でGoogleからコードが発行されるので、コピーして「? Paste authorization code here」にペーストして実行
# 「Success! Logged in as hoge@gmail.com」と自分が選択したアカウントのgmailアドレスが表示されていたら認証成功
Vueのソースをビルドしてみる
firebaseを依存モジュールとして入れる(package.jsonのdependenciesにfirebaseが加わる)
/app/project_name # npm install --save firebase
Vueプロジェクトのビルド
# Vueのプロジェクトをビルドする(projectt_name配下にdistというフォルダができるのがポイント)
# 作成後このdistフォルダをfirebaseにデプロイしていく
/app/project_name # npm run build

> project_name@0.1.0 build /app/project_name
> vue-cli-service build

⠧  Building for production...
(省略)
Entrypoints:
 app (1000 KiB)
     js/chunk-vendors.562a481f.js
     css/app.3c0b035c.css
     js/app.e21a0fda.js

 File                                 Size               Gzipped

 dist/js/chunk-vendors.562a481f.js    993.33 KiB         263.16 KiB
 dist/js/app.e21a0fda.js              6.28 KiB           2.42 KiB
 dist/js/about.edea997e.js            0.44 KiB           0.31 KiB
 dist/css/app.3c0b035c.css            0.42 KiB           0.26 KiB
 Images and other types of assets omitted.

DONE  Build complete. The dist directory is ready to be deployed.
INFO  Check out deployment instructions at https://cli.vuejs.org/guide/deployment.html
FirebaseCLIの設定
デプロイ対象となるディレクトリを選択するオプションで上記でnpm run buildで作られた「dist」ディレクトリを指定するのがポイント
直下にdistディレクトリがあることをわかった上で作業を進める(ここでは、/app/project_name/dist)
Firebase初期化
/app/project_name # firebase init

    ######## #### ########  ######## ########     ###     ######  ########
    ##        ##  ##     ## ##       ##     ##  ##   ##  ##       ##
    ######    ##  ########  ######   ########  #########  ######  ######
    ##        ##  ##    ##  ##       ##     ## ##     ##       ## ##
    ##       #### ##     ## ######## ########  ##     ##  ######  ########

You're about to initialize a Firebase project in this directory:

 /app/project_name

Before we get started, keep in mind:
 * You are currently outside your home directory
# 使いたい機能をお好みで選ぶ
? Which Firebase CLI features do you want to set up for this folder? Press Space to select features, then Enter to confirm your choices.
◉ Database: Deploy Firebase Realtime Database Rules
◯ Firestore: Deploy rules and create indexes for Firestore
◯ Functions: Configure and deploy Cloud Functions
◉ Hosting: Configure and deploy Firebase Hosting sites
❯◯ Storage: Deploy Cloud Storage security rules

=== Project Setup

First, let's associate this project directory with a Firebase project.
You can create multiple project aliases by running firebase use --add,
but for now we'll just set up a default project.

# 作ったFirebaseプロジェクトを選択する
? Select a default Firebase project for this directory:
 [don't setup a default project]
 hoge-fuga-xxxxx (hoge-fuga)
❯ project_name-xxxxx (project_name)
 [create a new project]

=== Database Setup

Firebase Realtime Database Rules allow you to define how your data should be
structured and when your data can be read from and written to.
? What file should be used for Database Rules? (database.rules.json)

=== Hosting Setup

# ここではデフォルトがpublicとなっているが、「dist」とするのがポイント
# ビルド対象となるディレクトリの選択をここでしているので
# 先程ビルドしたVueのプロジェクトが入っているdistを選択する
Your public directory is the folder (relative to your project directory) that
will contain Hosting assets to be uploaded with firebase deploy. If you
have a build process for your assets, use your build's output directory.

? What do you want to use as your public directory? (public) dist

# SPAにするかどうかの質問ではN(o)とした
? Configure as a single-page app (rewrite all urls to /index.html)? (y/N) N
? File dist/index.html already exists. Overwrite? Yes
✔  Wrote dist/index.html

i  Writing configuration info to firebase.json...
i  Writing project information to .firebaserc...

✔  Firebase initialization complete!
firebaseにデプロイしてホスティングする
# 先程と同じディレクトリでコマンドを実行する
/app/project_name # firebase deploy

=== Deploying to 'project_name-xxxxx'...
i  deploying database, storage, hosting
i  database: checking rules syntax...
✔  database: rules syntax for database project_name-xxxxx is valid
i  storage: checking storage.rules for compilation errors...
✔  storage: rules file storage.rules compiled successfully
i  storage: uploading rules storage.rules...
i  hosting[project_name-xxxxx]: beginning deploy...
i  hosting[project_name-xxxxx]: found 10 files in dist
✔  hosting[project_name-xxxxx]: file upload complete
i  database: releasing rules...
✔  database: rules for database project_name-xxxxx released successfully
✔  storage: released rules storage.rules to firebase.storage/project_name-xxxxx.appspot.com
i  hosting[project_name-xxxxx]: finalizing version...
✔  hosting[project_name-xxxxx]: version finalized
i  hosting[project_name-xxxxx]: releasing new version...
✔  hosting[project_name-xxxxx]: release complete

✔  Deploy complete!

Project Console: https://console.firebase.google.com/project/project_name-xxxxx/overview
Hosting URL: https://project_name-xxxxx.firebaseapp.com
Hosting URLにブラウザでアクセスして、ホスティングが正常に行われているか確認する
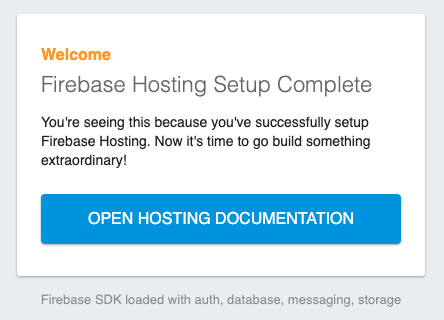
今回の開発環境構築は以上です。20200525
githubを使ってバージョン管理するための設定を追加
sshキーの作成
※特別設定の必要がなければ3回Enterを押して完了
# cd /root
# ssh-keygen -t rsa
ファイルが存在することを確認
# ls -a /root/.ssh/
.  ..  id_rsa  id_rsa.pub  known_hosts
表示されるキーをコピーしてGitHubに登録
# cat /root/.ssh/id_rsa.pub接続確認
# ssh -T git@github.com githubにpush
# cd /app/project_name
echo "# project_name" >> README.md
git init
git add -A
git commit -m "first commit"

*** Please tell me who you are.

Run
 git config --global user.email "you@example.com"
 git config --global user.name "Your Name"

to set your account's default identity.
Omit --global to set the identity only in this repository.

↑これが出たのでアドレスと名前をコマンドで入力

git remote add origin git@github.com:自分のプロジェクト名~
git push -u origin master
完了
この記事が気に入ったらサポートをしてみませんか?