
【徒然iOS】気ままにUIKit23〜TableViewCellのStyle設定〜

概要
このマガジンは四十を過ぎたおっさんが、
を参考にStoryboardでiOSアプリを完全に趣味で楽しんでいるだけな記事を気ままに上げてます。
今回
を前回に引き続き、Style以降をやる〜〜〜〜!
前準備
念の為、バックアップ
新しいクラス
ビューコントローラの追加
イニシャルビューの変更
をいつも通りやってから本題へ💃

本題の前に、、、
Styleのコード
//
//  テーブルビューにタイトルと詳細を表示する。
//

import UIKit

class ViewController: UIViewController,UITableViewDataSource {

    @IBOutlet weak var testTableView: UITableView!

    //データ
    var dataList = ["青山,一塁手","阿部,捕手","加藤,二塁手","神田,三塁手","佐藤,遊撃手","坂田,外野手"]

    //データを返すメソッド
    func tableView(tableView:UITableView, cellForRowAtIndexPath indexPath:NSIndexPath) -> UITableViewCell {

        //セルを取得する。
        let cell = tableView.dequeueReusableCellWithIdentifier("TestCell", forIndexPath:indexPath) as UITableViewCell

        //データをカンマで分割する。
        let arr = dataList[indexPath.row].componentsSeparatedByString(",")

        cell.textLabel?.text = arr[0] //タイトル
        cell.detailTextLabel?.text = arr[1]  //詳細文
        return cell
    }

    //データの個数を返すメソッド
    func tableView(tableView:UITableView, numberOfRowsInSection section:Int) -> Int {
        return dataList.count
    }

    //最初からあるメソッド
    override func viewDidLoad() {
        super.viewDidLoad()
    }

}
のコードを今回は追加するんだけど、その一個前のコード全文だと、、、、
一個前のコード
//
//  セルの背景を縞模様にしながらテーブルビューにデータを表示
//

import UIKit

class ViewController: UIViewController,UITableViewDataSource {

    @IBOutlet weak var testTableView: UITableView!

    //データ
    var dataList = ["青山","阿部","加藤","川島","神田","佐藤","坂田","田中"]


    //データを返す
    func tableView(tableView:UITableView, cellForRowAtIndexPath indexPath:NSIndexPath) -> UITableViewCell {

        let cellName:String

        //偶数行と奇数行で原型セルを変更する。
        if (indexPath.row % 2 == 0) {
            cellName = "TestCell1"
        } else {
            cellName = "TestCell2"
        }

        let cell = tableView.dequeueReusableCellWithIdentifier(cellName, forIndexPath:indexPath) as UITableViewCell
        cell.textLabel?.text = dataList[indexPath.row]
        return cell
    }

    //データの個数を返す
    func tableView(tableView:UITableView, numberOfRowsInSection section:Int) -> Int {
        return dataList.count
    }

    //最初からあるメソッド
    override func viewDidLoad() {
        super.viewDidLoad()
    }

}
セル自体が、
let cell = tableView.dequeueReusableCellWithIdentifier("TestCell", forIndexPath:indexPath) as UITableViewCell
で
CellNameがTestCellに急に変わってる👀
このTestCellはどこから来たのかが不明💦
👉慎重に、バックアップを取って、ビューを追加して、前回、前々回までにやったTableView→dataSourceに連携→TableCellViewを追加しての手順までをやってから、やった方がいいと判断した次第。
では早速
⒈TableView→dataSourceに連携→TableCellViewを追加

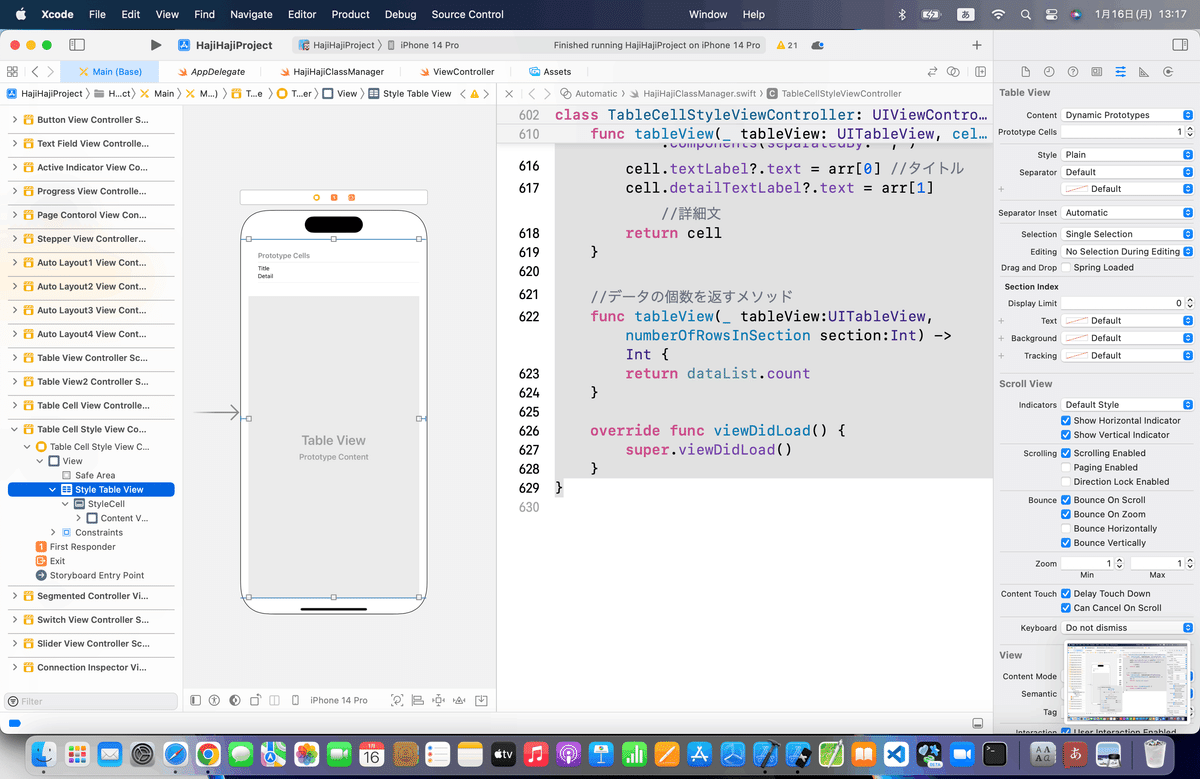
⒉StyleをRight Detailに設定
なんか、それっぽくなってきたね👀

⒊コードを追加する前にコードを見ると、、、
//
//  テーブルビューにタイトルと詳細を表示する。
//

import UIKit

class ViewController: UIViewController,UITableViewDataSource {

    @IBOutlet weak var testTableView: UITableView!

    //データ
    var dataList = ["青山,一塁手","阿部,捕手","加藤,二塁手","神田,三塁手","佐藤,遊撃手","坂田,外野手"]

    //データを返すメソッド
    func tableView(tableView:UITableView, cellForRowAtIndexPath indexPath:NSIndexPath) -> UITableViewCell {

        //セルを取得する。
        let cell = tableView.dequeueReusableCellWithIdentifier("TestCell", forIndexPath:indexPath) as UITableViewCell

        //データをカンマで分割する。
        let arr = dataList[indexPath.row].componentsSeparatedByString(",")

        cell.textLabel?.text = arr[0] //タイトル
        cell.detailTextLabel?.text = arr[1]  //詳細文
        return cell
    }

    //データの個数を返すメソッド
    func tableView(tableView:UITableView, numberOfRowsInSection section:Int) -> Int {
        return dataList.count
    }

    //最初からあるメソッド
    override func viewDidLoad() {
        super.viewDidLoad()
    }

}
上から6行目あたりにテーブルビューをアウトレット接続してることがわかる👀
なので、アウトレット接続をしておく

⒋コードを追加
先に、UITableViewDataSourceプロトコルを追加
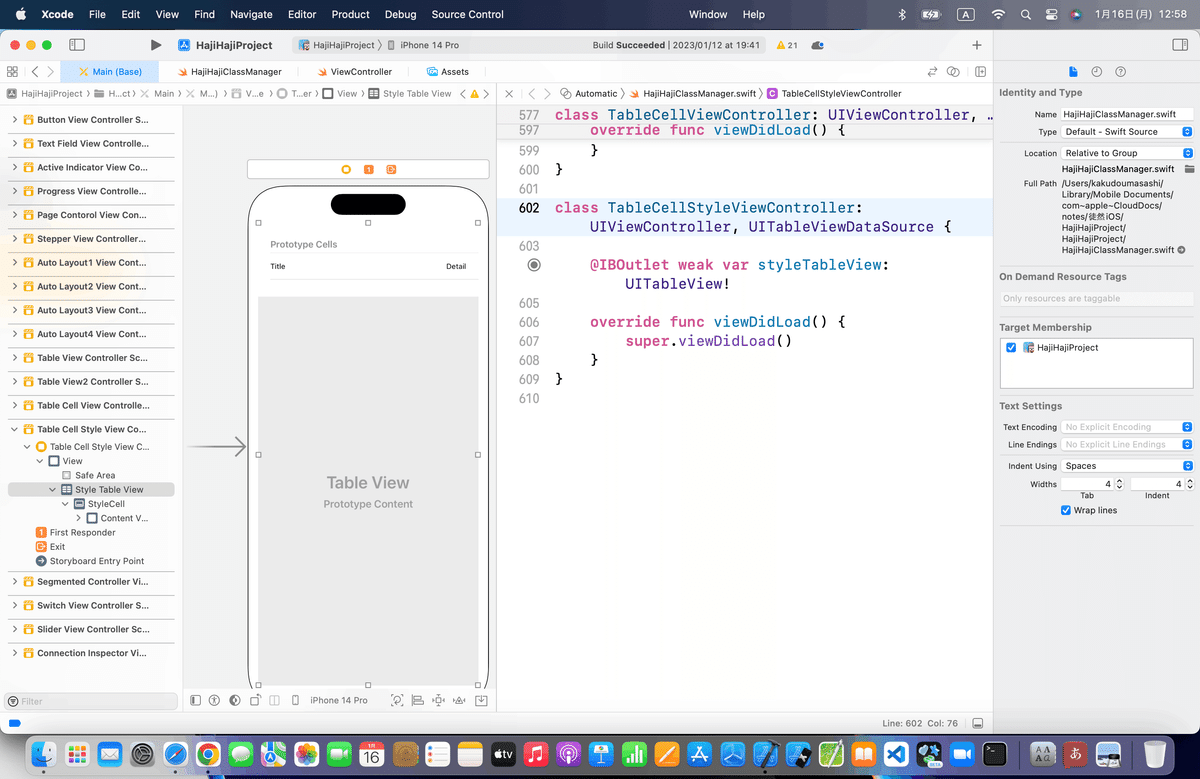
ここで追加するコード
//データ
    var dataList = ["青山,一塁手","阿部,捕手","加藤,二塁手","神田,三塁手","佐藤,遊撃手","坂田,外野手"]

    //データを返すメソッド
    func tableView(tableView:UITableView, cellForRowAtIndexPath indexPath:NSIndexPath) -> UITableViewCell {

        //セルを取得する。
        let cell = tableView.dequeueReusableCellWithIdentifier("TestCell", forIndexPath:indexPath) as UITableViewCell

        //データをカンマで分割する。
        let arr = dataList[indexPath.row].componentsSeparatedByString(",")

        cell.textLabel?.text = arr[0] //タイトル
        cell.detailTextLabel?.text = arr[1]  //詳細文
        return cell
    }

    //データの個数を返すメソッド
    func tableView(tableView:UITableView, numberOfRowsInSection section:Int) -> Int {
        return dataList.count
    }
ベタで貼ると、こんな感じでエラー発生

上のエラーをFIXする
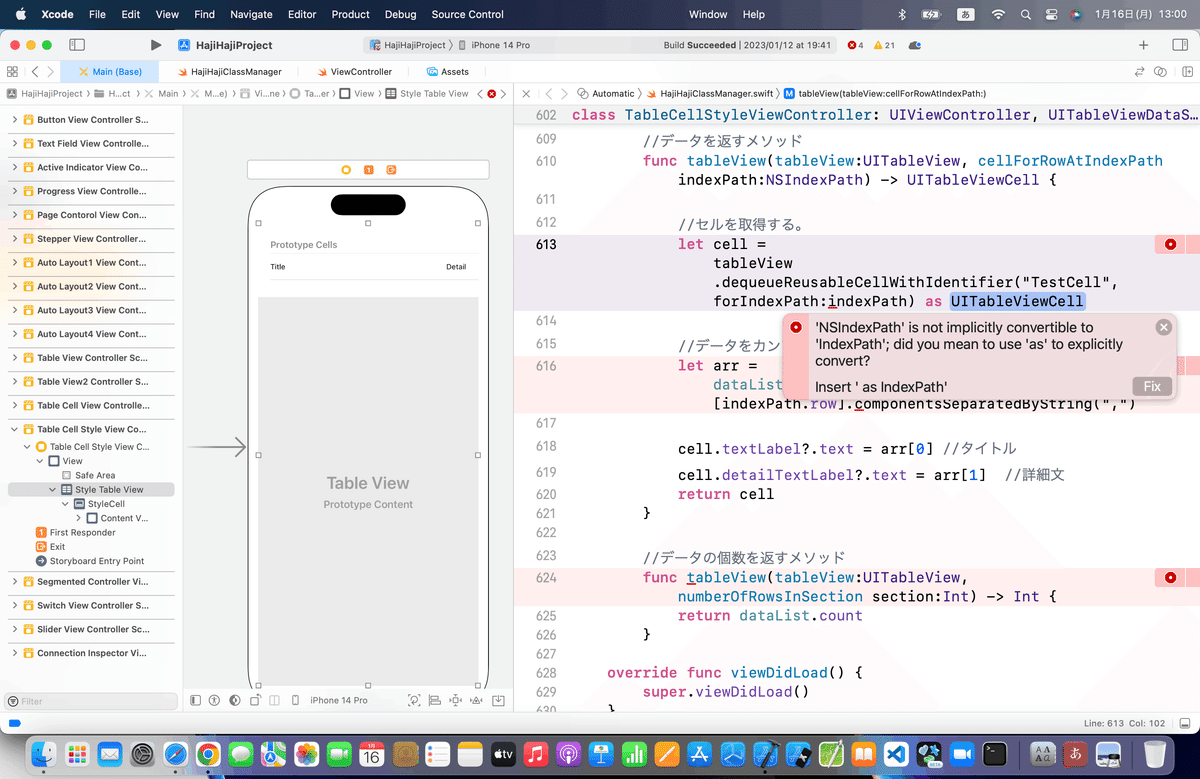
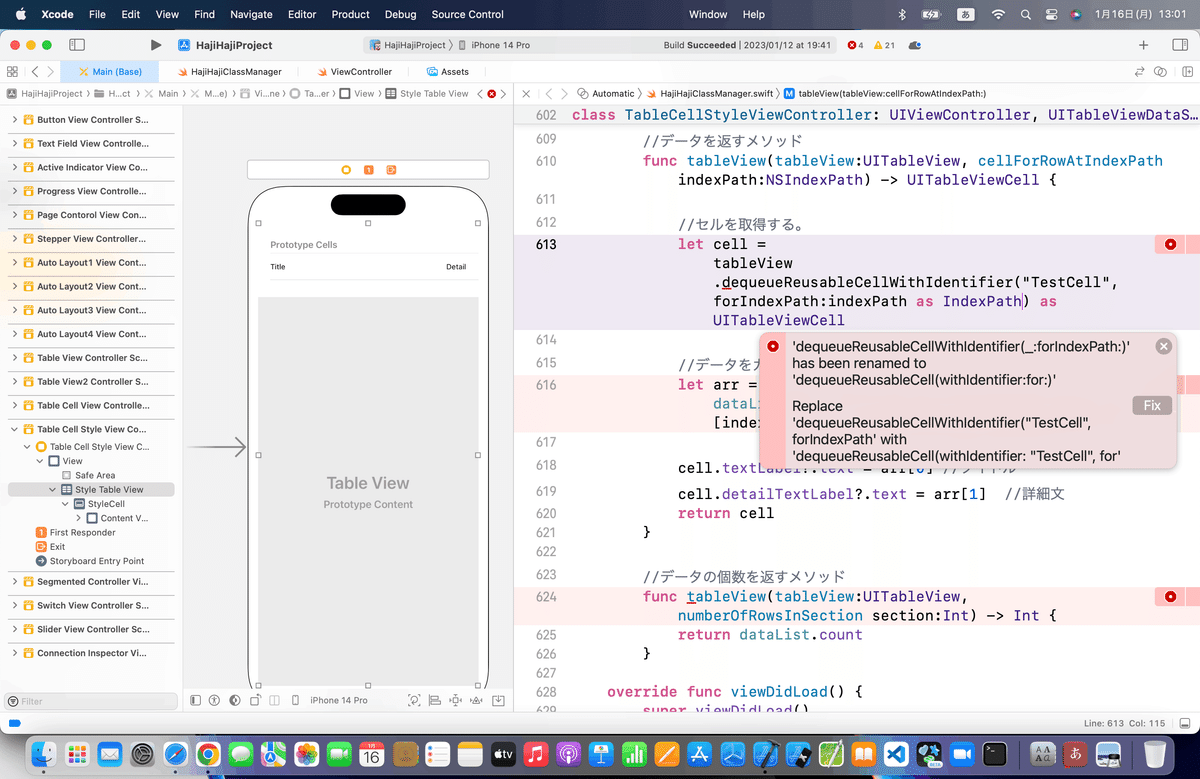

中のエラーを直す
こちらはFIXなしエラーなので、おそらく完全に書き方が違うはず。
こういう時は、
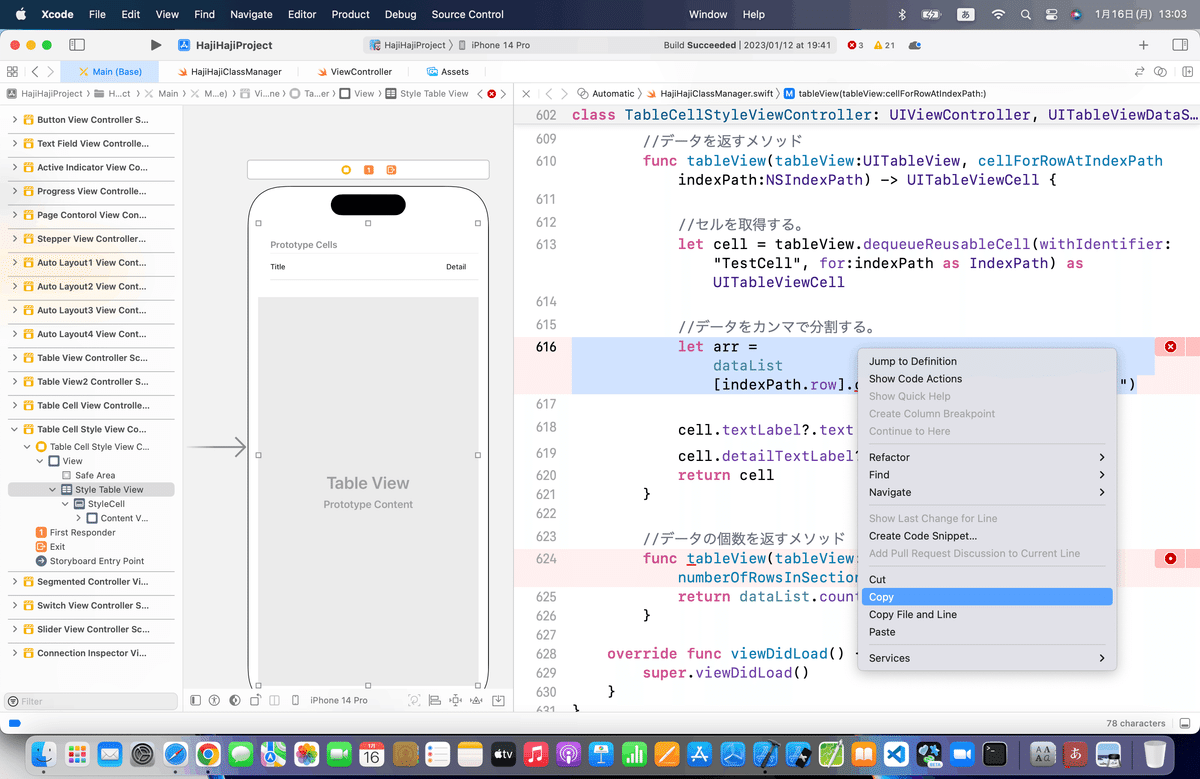

コピーした行を貼り付けて、.以降を一旦消して〜〜
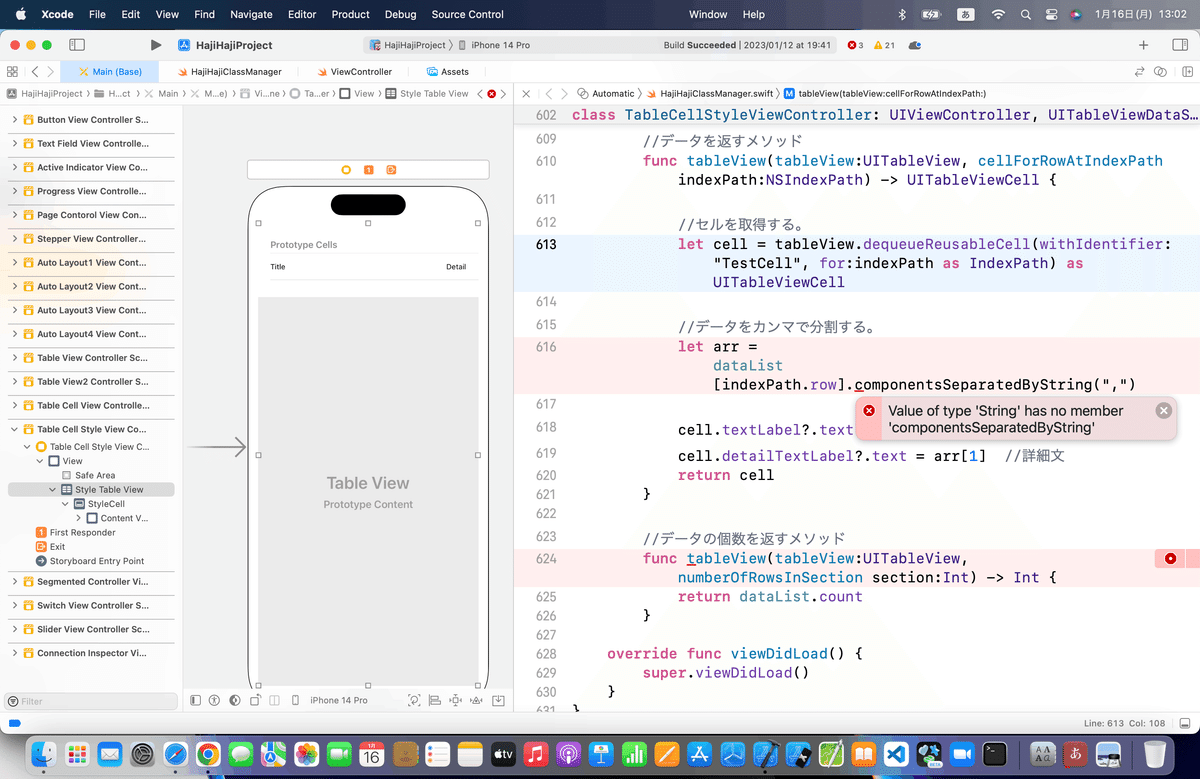
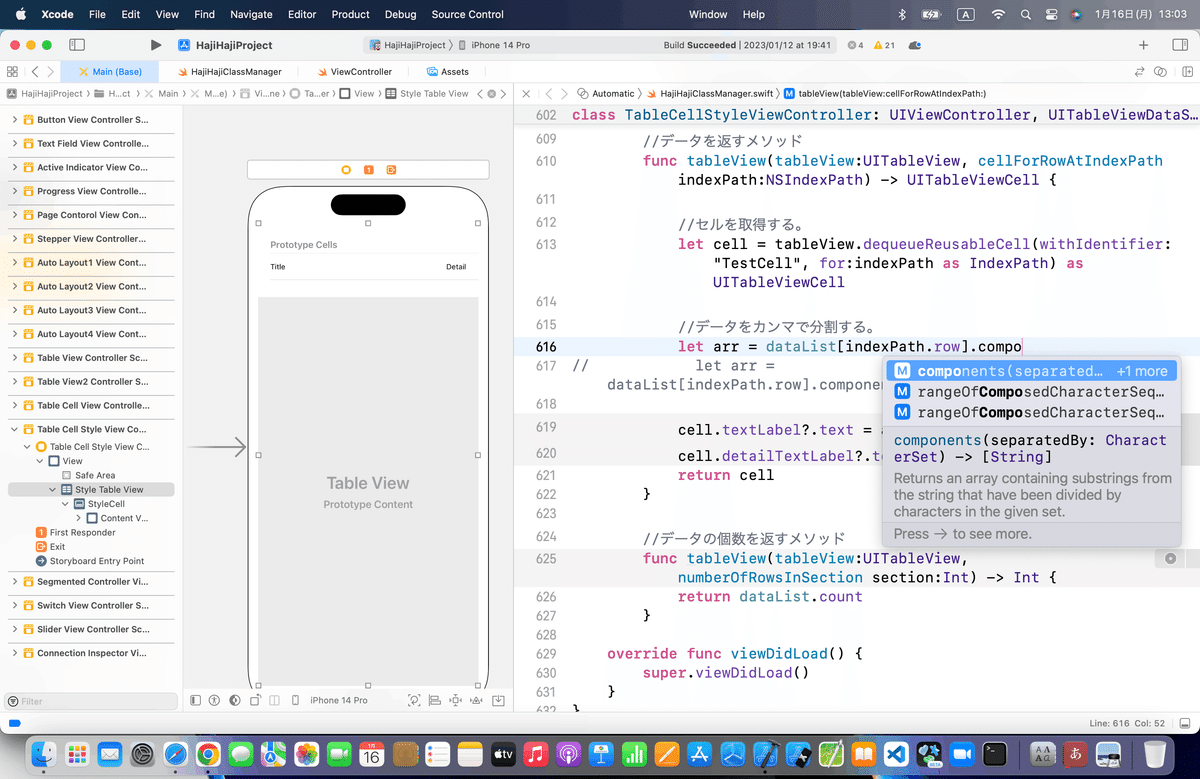
.compを入力して出てくる候補からcomponent(separatedBy:)を選択して、
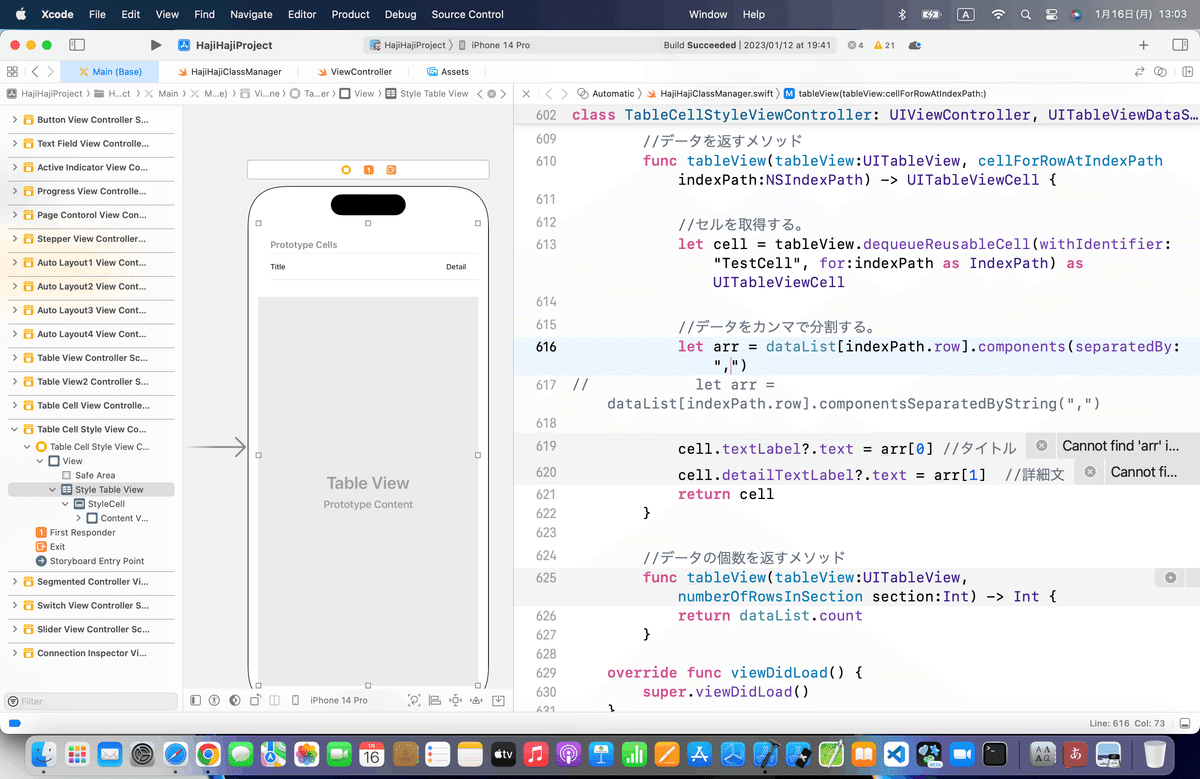
あとは、一番下のエラーを修正
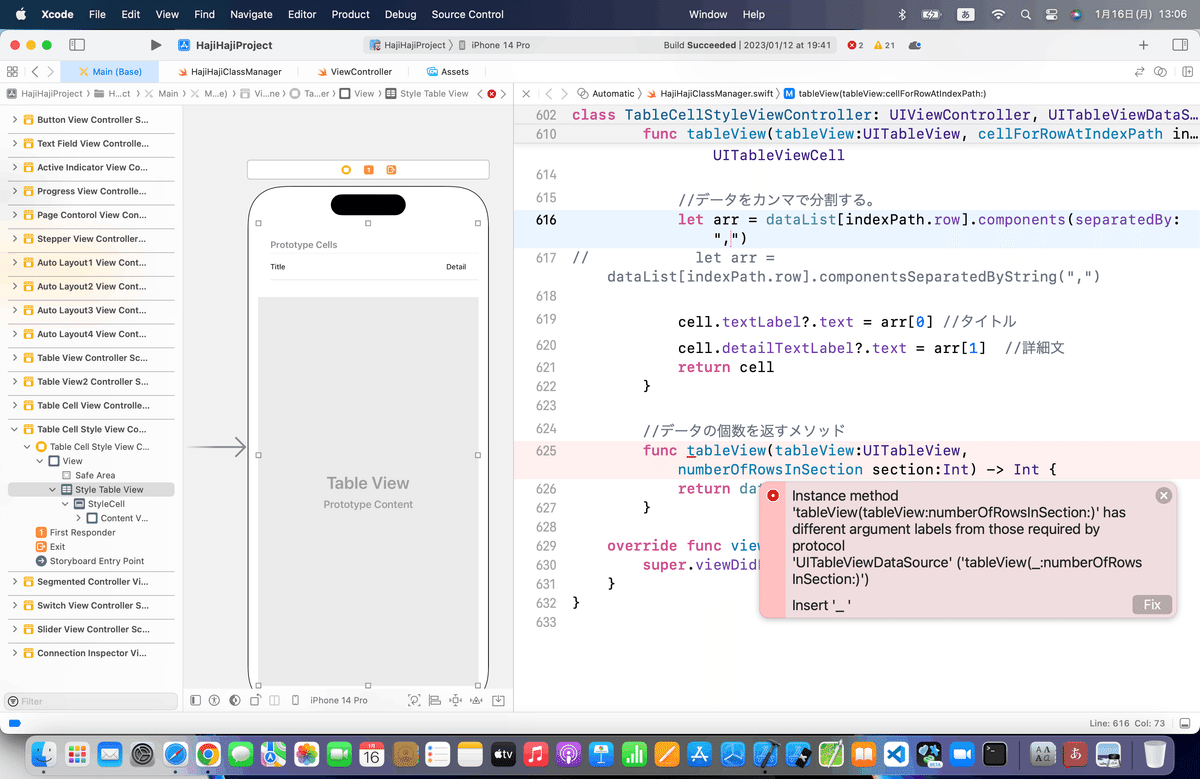
まだstubsのエラーが出てるから、前回までと同様に直していく
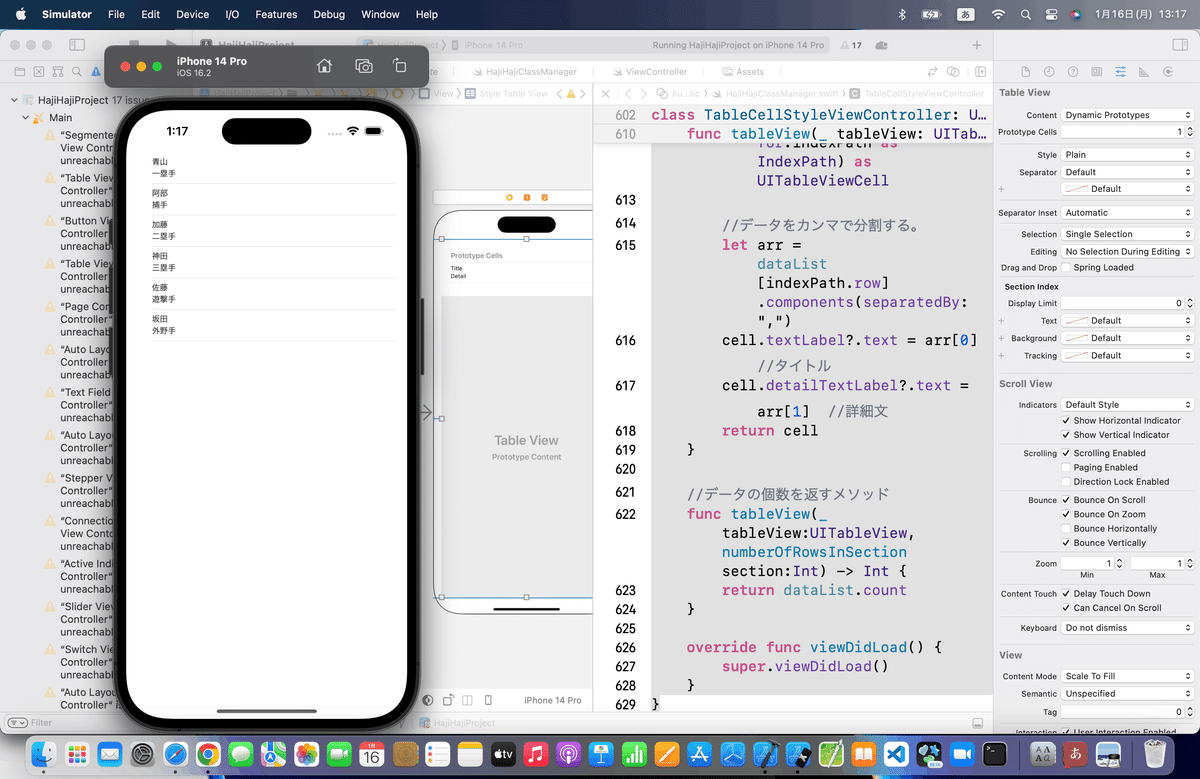
⒌シミュレータ実行

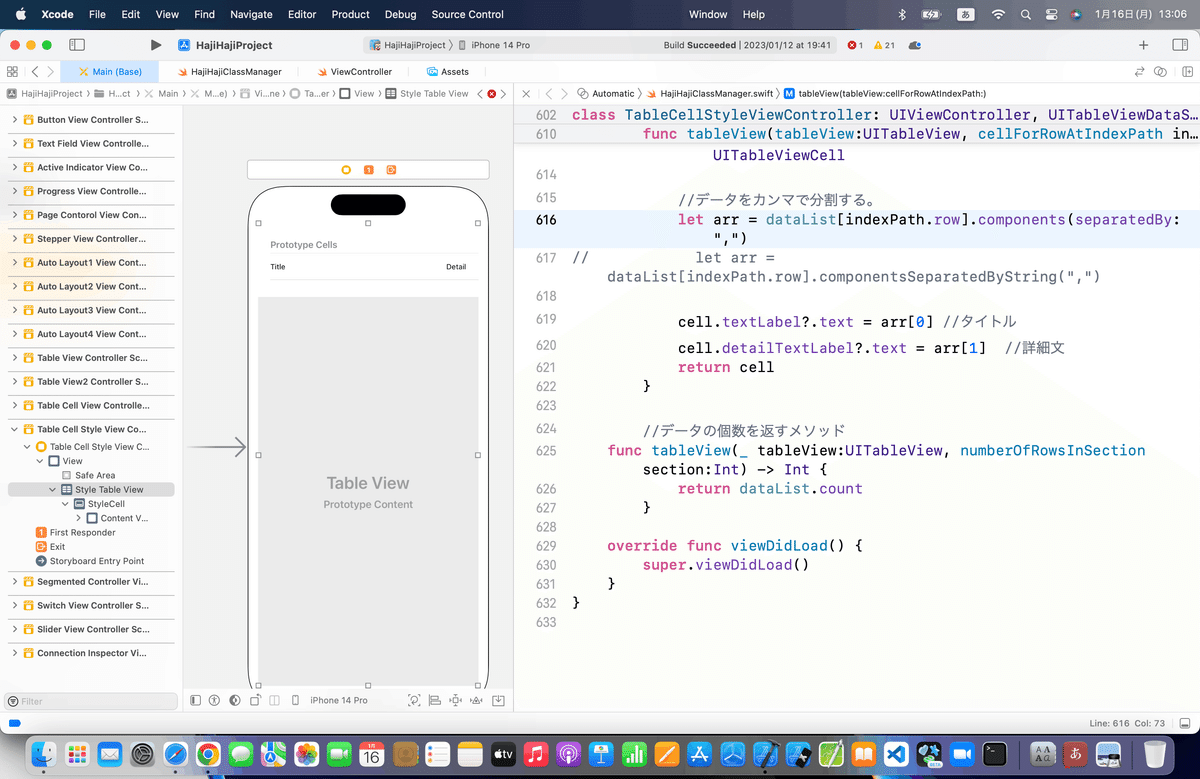
ここまでのコード
class TableCellStyleViewController: UIViewController, UITableViewDataSource {

    @IBOutlet weak var styleTableView: UITableView!

    //データ
    var dataList = ["青山,一塁手","阿部,捕手","加藤,二塁手","神田,三塁手","佐藤,遊撃手","坂田,外野手"]

    //データを返すメソッド
    func tableView(_ tableView: UITableView, cellForRowAt indexPath: IndexPath) -> UITableViewCell {
        //セルを取得する。
        let cell = tableView.dequeueReusableCell(withIdentifier: "StyleCell", for:indexPath as IndexPath) as UITableViewCell

        //データをカンマで分割する。
        let arr = dataList[indexPath.row].components(separatedBy: ",")
        cell.textLabel?.text = arr[0] //タイトル
        cell.detailTextLabel?.text = arr[1]  //詳細文
        return cell
    }

    //データの個数を返すメソッド
    func tableView(_ tableView:UITableView, numberOfRowsInSection section:Int) -> Int {
        return dataList.count
    }

    override func viewDidLoad() {
        super.viewDidLoad()
    }
}
バックアップを取って、設定をいじってみよう


カスタムはまたちょっと毛色が違うようなので、
一旦ここまでで
⒍ブラッシュアップ
今回はTableViewをAutoLayout制約をつけるくらいでいいかな

まとめ
今回は、ここまで。
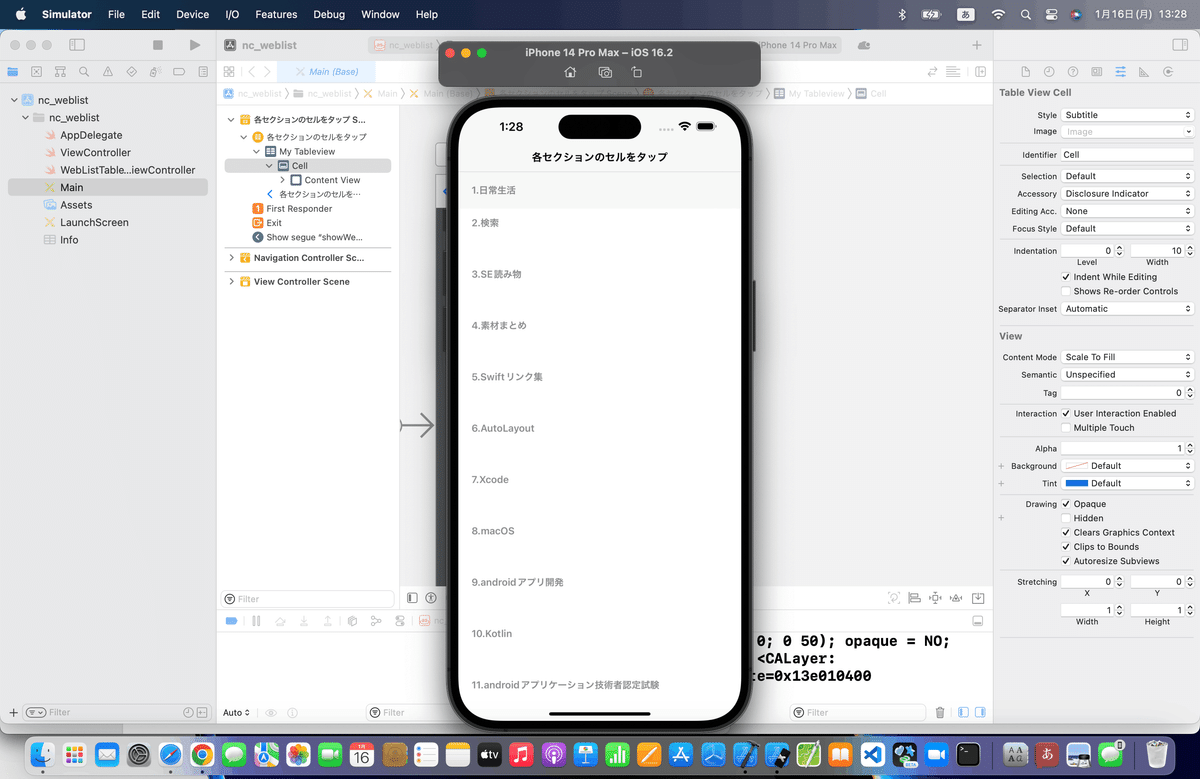
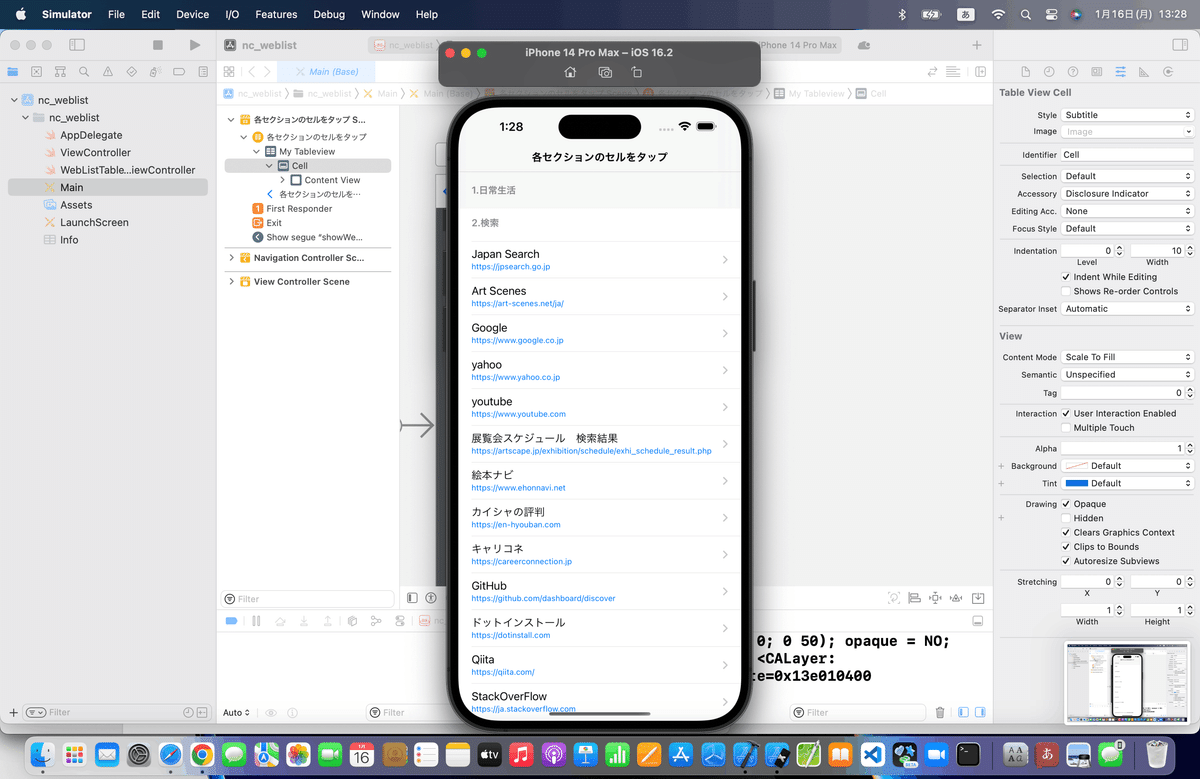
WEBリストで使うなあと
と思うってもらう程度いいかな🕺
昔、作って、今でも自分のスマホで愛用してるWEBリスト集

まあ、これは他にも色々と設定が必要だから、
はじはじの制作体験記で必要なところを全部回せて機会があればやろうかな。
Apple公式
さてと、次回は
カスタムの続きからやる〜〜〜!