
【ChatGPT】にJavascriptで「フォトギャラリー」を作ってもらった

今日は、膨大になった画像を一覧にして楽しく見るための「Photo Gallery」を、ChatGPTと相談しながらHTML/CSS/Javascriptで作成しました。
そのそものきっかけ
画像生成を続けるうちに膨大になった画像たち。
通常だとWindowsのフォルダで一覧表示させたり、フォトのアプリでスライドショーみたいに表示させたりしていたのですが、どうも使い勝手がよくないんですね。

ただ、そのためにわざわざアプリを買うのもどうかというレベルのことなので、ここはChatGPTに相談して、簡単にそういうプログラムが作れないかと、それがきっかけでした。
やりたいこと
やりたかったことは以下の作業が手軽にできる簡単アプリの開発です。
<必要な機能>
1.好きなフォルダを選んで、中にある画像を一覧表示する。
2.各画像にマウスを乗せると画像が拡大し、離すと元のサイズに戻る
3.各画像をクリックするとフル画面表示する
4.そのまま矢印キー(右向き)を押すと次の画像がフル画面表示され、矢印キー(左向き)で前の画像がフル画面表示する。写真以外の場所をクリックすると元のサムネイルに戻る
5.サムネイル表示デザインを楽しくする
(1)サムネイル画像の縦のサイズは、150pxから600pxの間でランダムに設定され、大きさの違うサムネイル画像が表示される
(2)サムネイル画像の全体の30%は傾いた画像とする。ただし、傾きの角度は最大で30%とし、左右どちらでも構わないが、反転はしない。
(3)傾いたサムネイルにマウスを乗せると傾いたまま拡大し、マウスを離すと傾いたまま戻る
だいたい、こんな感じの全体像を描いて、ChatGPTとプログラム作成開始しました。
完成ページ
プログラム作成作業の詳細の前に、完成したページがどんな風に表示されるか、画面キャプチャーしましたので見てください。
1.フォルダを選択
フォルダを選択すると、その中にある画像ファイルが一気に読み込まれます。このフォルダには50枚も入っています。
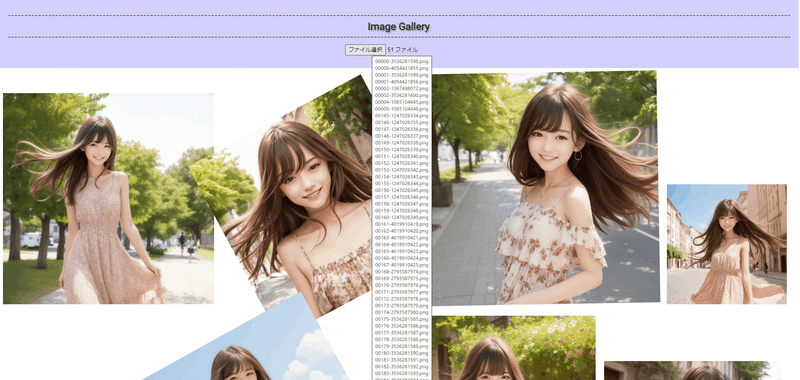
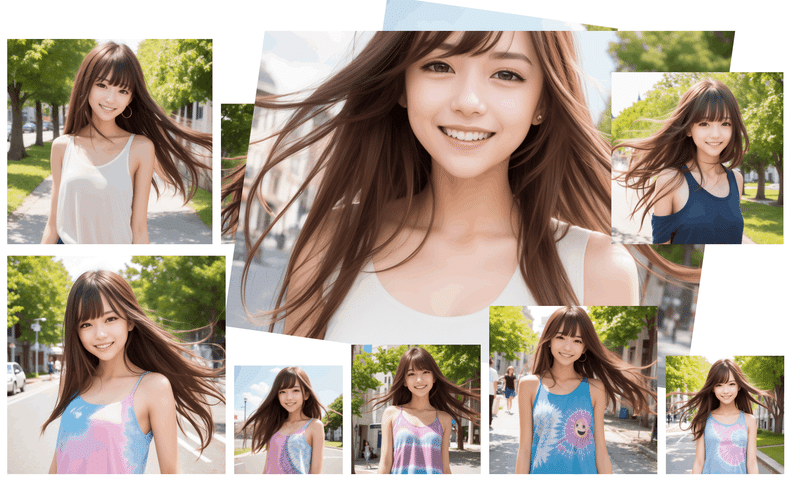
2.ランダムにサイズと傾きが設定された楽しいサムネイル表示
整然ときれいに一覧表示するのとは違って、変化があって楽しいです。

3.マウスオーバーすると画像が拡大
マウスを乗せるとこんな風に画像が拡大します。マウスを離すと一瞬で元のサイズに戻るので、クリックする必要がないため画像確認が凄く楽で楽しいです。
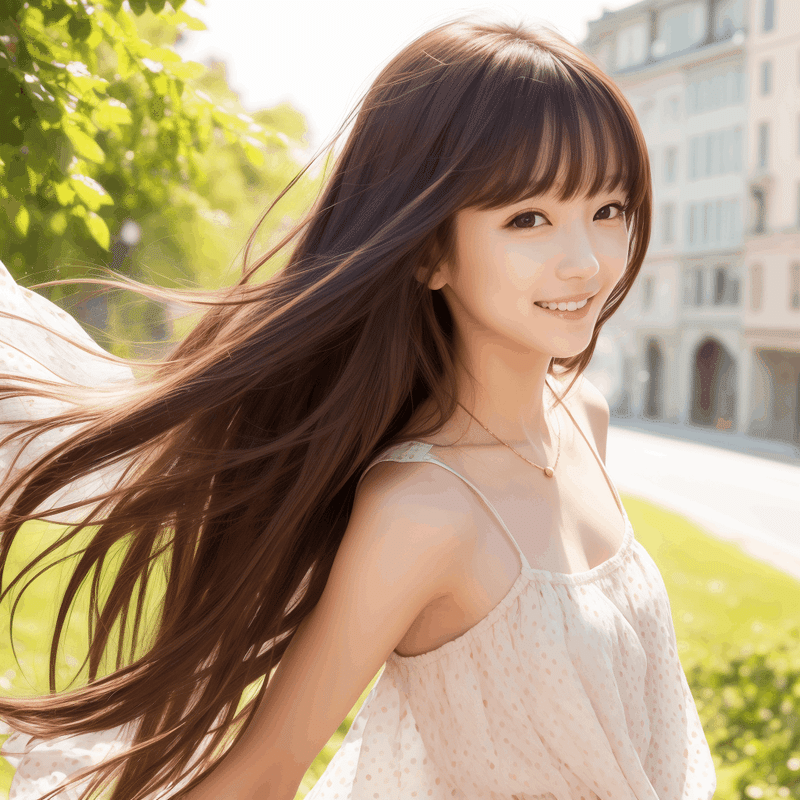
4.サムネイルクリックでフル画面表示
画像の縦のサイズはウインドウの縦サイズに100%設定になっていて、横サイズは、元画像の比率に応じてAuto設定。
矢印キーで画像送りのスライドショー表示もできます。

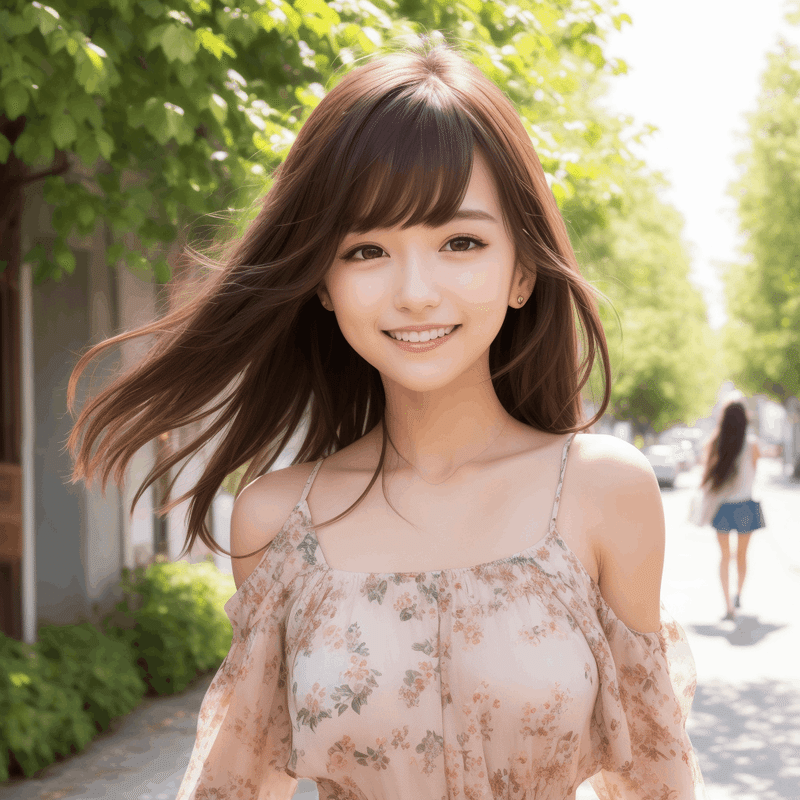
5.ドラッグ&ドロップでコピーも簡単
サムネイル表示の画像をドラッグ&ドロップで簡単にコピーできます

ChatGPTとのやり取り
ChatGPTとのプログラム開発で気をつけなければいけないのは、欲張ってすべての機能を全部羅列して、「さあ、これをつくってくれ!」とお願いすると、失敗します。
最初からすべての機能を埋め込もうとしてプログラムを書くと、何度か修正しているうちに、何が何だか分からなくなって、不具合のもぐらたたき状態になります。
順を追ってひとつずつ完成させていく
今回のケースだと、まずは、フォルダを指定してサムネイル画像表示させるプログラムから開始しました。
それが出来たら、次はマウスオーバーすると画像が拡大する機能を追加します。
次に、クリックするとフル画面表示する機能の追加。
そして、矢印キーでスライドショー表示する。
こんな感じでひとつずつ完成していくとうまくいきます。
現在の設定内容と修正したい内容の明示
今のプログラムの設定状態と修正したい内容を明確にして示すとスムーズに意図が伝わります。
<お願いの内容>
以下のjavascriptとCSSを修正してください。
<現在の設定>サムネイル画像サイズはheight: 200px, width: auto
<修正内容>
(1)サムネイルの画像のheightの値を画像ごとにランダムに変えて並べる。
(2)heightの変更可能範囲:150pxから600px
ChatGPTが書いたコード
それでは、興味がある方は、コードをコピーして、3つのファイルを同じフォルダに入れてブラウザで開いてみてください。
フォルダを指定すると下記のメッセージが出ますが、ファイルがどこかにアップロードされるわけではないので安心してください。

HTML
下記のコードをメモ帳にコピペして、txtではなくhtml拡張子をつけて保存します。
<!DOCTYPE html>
<html>
<head>
  <link rel="stylesheet" type="text/css" href="styles.css">
</head>
<body>
  <div id="file-input-area">
    <h1 class="title">Image Gallery</h1>

    <input type="file" id="file-input" multiple webkitdirectory directory />
  </div>
  <div id="image-container"></div>
  <script src="script.js"></script>
</body>
</html>
CSS(styles.css)
上記と同様にCSSの拡張子をつけて保存します。
@import url('https://fonts.googleapis.com/css2?family=Roboto&display=swap');

.title {
  font-family: 'Roboto', sans-serif;
  font-size: 48px;
  color: #333;
  text-shadow: 2px 2px 4px rgba(0, 0, 0, 0.4);
}

.title::before,
.title::after {
  content: '';
  display: block;
  height: 2px;
  background-color: #555;
  background-image: repeating-linear-gradient(45deg, #ccc 0, #ccc 1px, transparent 0, transparent 50%), repeating-linear-gradient(135deg, #ccc 0, #ccc 1px, transparent 0, transparent 50%);
  background-size: 8px 8px;
}

.title::before {
  width: 100%;
  margin-bottom: 10px;
}

.title::after {
  width: 100%;
  margin-top: 10px;
}

#file-input-area label {
  font-size: 20px;
  color: #666;
}

img {
  margin: 10px;
  transform: scale(1.0);
  transition: 0.5s;
  cursor: pointer;
}

#file-input-area {
  background-color: rgba(0, 0, 255, 0.2);
  text-align: center;
  padding: 20px;
}

.title {
  font-family: "Roboto";
  font-size: 24px;
}

#file-input-area label,
#file-input-area input {
  display: block;
  margin: 10px auto;
}

.fullscreen {
  position: fixed;
  top: 0;
  left: 0;
  right: 0;
  bottom: 0;
  z-index: 9999;
  background-color: rgba(0, 0, 0, 0.8);
  display: flex;
  align-items: center;
  justify-content: center;
}

.fullscreen img {
  max-height: 100%;
  max-width: 100%;
  object-fit: contain;
}
JavaScript(script.js)
上記と同様にjsの拡張子をつけて保存します。
※jpg画像にも対応しました(6/4)
var fileInput = document.getElementById("file-input");
var imageContainer = document.getElementById("image-container");
var fullscreenContainer = document.createElement("div");
fullscreenContainer.className = "fullscreen";
var fullscreenImage = document.createElement("img");
fullscreenContainer.appendChild(fullscreenImage);

var currentImageIndex = 0;

document.addEventListener("keydown", function(event) {
  if (event.key === "ArrowRight") {
    currentImageIndex++;
    if (currentImageIndex >= imageContainer.children.length) {
      currentImageIndex = 0;
    }
    showFullscreenImage(currentImageIndex);
  } else if (event.key === "ArrowLeft") {
    currentImageIndex--;
    if (currentImageIndex < 0) {
      currentImageIndex = imageContainer.children.length - 1;
    }
    showFullscreenImage(currentImageIndex);
  }
});

function showFullscreenImage(index) {
  var image = imageContainer.children[index];
  fullscreenImage.src = image.src;
  adjustImageSize();
}

function adjustImageSize() {
  var screenWidth = window.innerWidth;
  var screenHeight = window.innerHeight;
  var imageWidth = fullscreenImage.naturalWidth;
  var imageHeight = fullscreenImage.naturalHeight;

  var widthRatio = screenWidth / imageWidth;
  var heightRatio = screenHeight / imageHeight;
  var scaleRatio = Math.min(widthRatio, heightRatio);

  fullscreenImage.style.width = imageWidth * scaleRatio + "px";
  fullscreenImage.style.height = imageHeight * scaleRatio + "px";
}

fileInput.addEventListener("change", function() {
  var files = fileInput.files;
  imageContainer.innerHTML = "";

  var totalImages = files.length;
  var tiltedImages = Math.floor(totalImages * 0.3); // 傾き画像の数を計算

  for (var i = 0; i < files.length; i++) {
    var fileName = files[i].name;

    if (fileName.toLowerCase().endsWith(".png") || fileName.toLowerCase().endsWith(".jpg")) {
      var img = document.createElement("img");
      img.src = URL.createObjectURL(files[i]);
      img.title = fileName;

      // Random height between 150px and 600px
      var randomHeight = Math.floor(Math.random() * (600 - 150 + 1)) + 150;
      img.style.height = randomHeight + "px";
      img.style.width = "auto";

      img.style.margin = "10px";
      img.style.transform = "scale(1.0)";
      img.style.transition = "0.5s";

      // Check if the image should be tilted
      var isTilted = tiltedImages > 0 && Math.random() <= 0.3; // 30%の確率で傾き画像を生成
      if (isTilted) {
        tiltedImages--;
        var randomRotation = Math.floor(Math.random() * 61) - 30;
        img.style.transform += " rotate(" + randomRotation + "deg)";
        img.dataset.rotation = randomRotation; // データ属性に回転角度を保存
      }

      img.addEventListener("mouseover", function() {
        this.style.transform = "scale(2) rotate(0deg)";
      });

      img.addEventListener("mouseout", function() {
        if (this.dataset.rotation) {
          this.style.transform = "rotate(" + this.dataset.rotation + "deg)";
        } else {
          this.style.transform = "none";
        }
      });

      img.addEventListener("click", function() {
        currentImageIndex = Array.prototype.indexOf.call(
          imageContainer.children,
          this
        );
        showFullscreenImage(currentImageIndex);
        document.body.appendChild(fullscreenContainer);
      });

      imageContainer.appendChild(img);
    }
  }
});


fullscreenContainer.addEventListener("click", function() {
  document.body.removeChild(fullscreenContainer);
});
これをベースにChatGPTに相談して、自分の好きな機能を追加してもらうのも楽しいかもしれません。
モデル:chilloutmix_NiPrunedFp32Fix


この記事が気に入ったらサポートをしてみませんか?