
Pythonライブラリ(AI generated Art):stable diffusion

1.概要
AIを用いてテキストから画像を生成するAI Generated Artのstable diffusionを紹介します。AI Generated Artに関しては下記記事をご確認ください。
2.stable diffusionとは
2-1.stable diffusionでできること
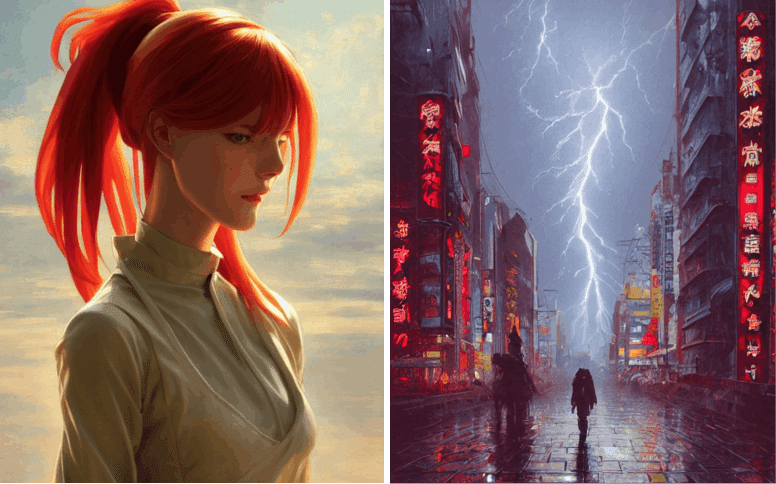
stable diffusionは「テキスト(Prompt)から画像を作成する」AIです。Promptに合わせて画像を生成することが出来ます。
2-2.stable diffusionの特徴/凄さ
”Stable Diffusion”の特徴一覧は下記に記載しました。総論として何がすごいかというと「最新の最高性能を持つAIをベースとして開発が加速する」ことにあると思います。
【stable diffusionの特徴】
●OSS( open source software)
●ライセンスを明記することで営利・非営利問わずに使用可能
●個人では実施できないレベルのAI学習量
→大量の学習データ×長時間の学習
->Fine tuningにより個人でも良い性能モデルが作成できる
●コードも公開しているため個人でFine tuningが可能
Delighted to announce the public open source release of #StableDiffusion!
— Emad (@EMostaque) August 22, 2022
Please see our release post and retweet! https://t.co/dEsBX7cRHw
Proud of everyone involved in releasing this tech that is the first of a series of models to activate the creative potential of humanity
これはStable diffusionのモデルデータを作るのにかかったコンピューティングコスト。AWSのA100 PCIe-40GBというのはたぶんp4d.24xlargeのことなんだけど、これを15万時間ぶんまわして作っている。米国スポットインスタンスの最低価格だったとしても約2億円。 pic.twitter.com/1yceZwEYOK
— 伊藤 祐策(パソコンの大先生) (@ito_yusaku) August 25, 2022
3.環境構築
stable diffusionを使用するために環境構築をします。私のPCではローカル環境でのGPUメモリが不足するためGoogle Colabを使用しました。
3-1.Hugging face社のアカウント作成
ACCESS TOKENを発行するためHugging face社のアカウントを作成します。
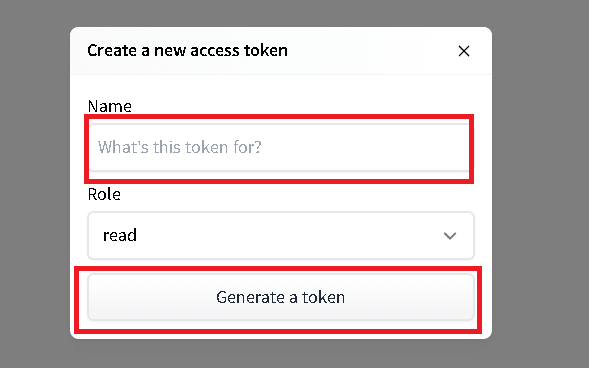
3-2.ACCESS TOKENSの発行
まず下記サイトにアクセスします。
"Access Tokens"を選択して「New Token」を押すとポップアップが表示されます。Roleはデフォルト(read)にしてNameを適当に記載して「Generate a token」を押すとAccess tokenが発行されます。

3-3.Access Repositoryの承認
下記サイトから「I have read the License and agree with its terms」にチェックをいれて「Access repository」を押します。

これをしないとコード実行時に下記エラーが発生します。
[IN]
コードを実行

[OUT]
HTTPError: 403 Client Error: Forbidden for url: https://huggingface.co/api/models/CompVis/stable-diffusion-v1-4/revision/main (Request ID: il_a4MvsQphOsHCVRj0Gx)
3-4.開発者モードに変更:Windows×ローカルPC開発の方のみ
WindowsのPCを使用してローカル環境で環境構築される方は事前に開発者モードに切り替えが必要です(Google Colabの場合は不要)。
手順は下記記事で確認可能です。

4.コード実装:シンプル
コードを実装していきます。ベースは下記を参照しました。なおColab使用時はGPU設定をONにしておきます。
4-1.ライブラリのインストール
必要なライブラリをインストールします。Google Colab環境を考慮してpipの前に!をつけております。
[IN]
!pip install diffusers==0.2.4 transformers scipy ftfy
2022年12月28日追記:上記のまま実行すると下記エラーが発生しました。現状では下記のようにVersion修正してKeyを修正したら動きました。細かいところまではチェックできていないため、必要であれば追って修正予定
[修正前]
!pip install diffusers==0.2.4 transformers scipy ftfy
pipe(prompt, height=512, width=1024)['sample'][0]

[修正後]
!pip install diffusers==0.8.0 transformers scipy ftfy
pipe(prompt, height=512, width=1024)[0]
4-2.アクセストークンでモデルの重みを取得
アクセストークンを使用してモデルの重みをインストールします。コードはPipelin化して処理します。
なおGPUのメモリが乗らないエラーが発生した場合は"torch_dtypeをfloat16に変更"します。
[IN]
import torch
from diffusers import StableDiffusionPipeline
import matplotlib.pyplot as plt

#HuggingFaceのアクセストークン
ACCESS_TOKEN="<自分のトークンを記載してください>"

#https://huggingface.co/settings/tokens からWeightを取得する
pipe = StableDiffusionPipeline.from_pretrained("CompVis/stable-diffusion-v1-4", use_auth_token=ACCESS_TOKEN) #dafault:float32
# pipe = StableDiffusionPipeline.from_pretrained("CompVis/stable-diffusion-v1-4", revision="fp16", torch_dtype=torch.float16, use_auth_token=ACCESS_TOKEN) #GPUメモリ制限があり10GB以下のRAMしか使用できない場合はfloat16を指定

#GPUの使用が可能であればPipleineをGPU指定
if torch.cuda.is_available():
    print(torch.cuda.get_device_name(0)) #GPU名を表示
    pipe.to("cuda") #GPUが使用

[OUT]
Tesla T4

下記は重みのダウンロードの様子
4-3.Promptから画像を生成/画像を保存
prompt(テキスト)から画像を生成するには"pipe(prompt)["sample"][0]"を実行します。
出力される画像はPIL形式のためimage.save()で保存可能です。
[IN]
prompt = "a photograph of an astronaut riding a horse"
image = pipe(prompt)["sample"][0]

print(pipe(prompt))
print(type(image)) #<class 'PIL.Image.Image'>
plt.imshow(image) #画像を表示
plt.axis('off') #軸表示をoff
image.save(f'{prompt}.png') 画像を表示

[OUT]
{'sample': [<PIL.Image.Image image mode=RGB size=512x512 at 0x7FAE60719810>],
 'nsfw_content_detected': [False]}

<class 'PIL.Image.Image'>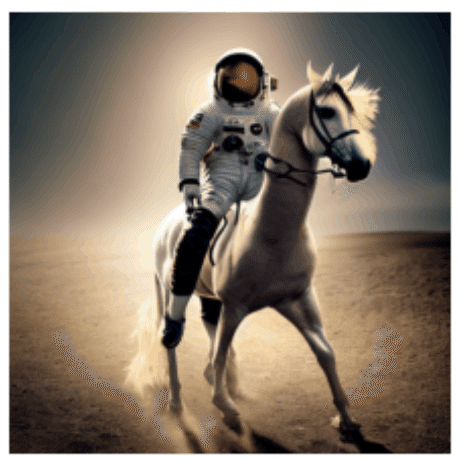
4-4.複数Promptの処理
複数のpromptを処理するにはList形式でpipeに渡します。pipe(prompts)['sample']はList形式で出力されるため、Listと同様に処理可能です。
[IN]
prompts = ['cat', 'dog', 'little otter']
images = pipe(prompts)

print(images)

#画像を出力
plt.figure(figsize=(16,6))
ax1, ax2, ax3 = plt.subplot(1,3,1), plt.subplot(1,3,2),plt.subplot(1,3,3)
ax1.imshow(images['sample'][0])
ax2.imshow(images['sample'][1])
ax3.imshow(images['sample'][2])
ax1.axis('off'); ax2.axis('off'); ax3.axis('off')

[OUT]
{'sample': [<PIL.Image.Image image mode=RGB size=512x512 at 0x7F3BDB4F0F90>,
  <PIL.Image.Image image mode=RGB size=512x512 at 0x7F3BDB4F0590>,
  <PIL.Image.Image image mode=RGB size=512x512 at 0x7F3BDB4F0DD0>],
 'nsfw_content_detected': [False, False, False]}
4-5.コードまとめ:シンプルVer.
最もシンプルに使えるコードを下記にまとめました。
[IN]
!pip install diffusers==0.2.4 transformers scipy ftfy

import torch
from diffusers import StableDiffusionPipeline
import matplotlib.pyplot as plt

#HuggingFaceのアクセストークン
ACCESS_TOKEN="<自分のトークンを記載してください>"

#https://huggingface.co/settings/tokens からWeightを取得する
pipe = StableDiffusionPipeline.from_pretrained("CompVis/stable-diffusion-v1-4", use_auth_token=ACCESS_TOKEN) #dafault:float32

#GPUの使用が可能であればPipleineをGPU指定
if torch.cuda.is_available():
    pipe.to("cuda") #GPUが使用

prompt = "a photograph of an astronaut riding a horse"
image = pipe(prompt)["sample"][0]
image

[OUT]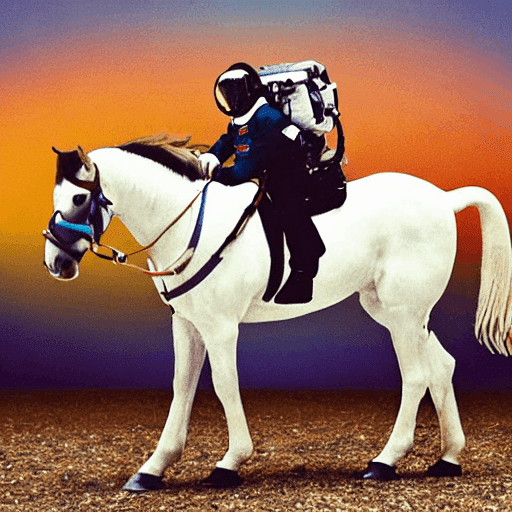
5.コード実装:応用編(ハイパラ調整)
次に応用としてstable diffusionを使いこなせるコードを実装します。なお本章の説明はほぼすべて下記記事を参照しました。
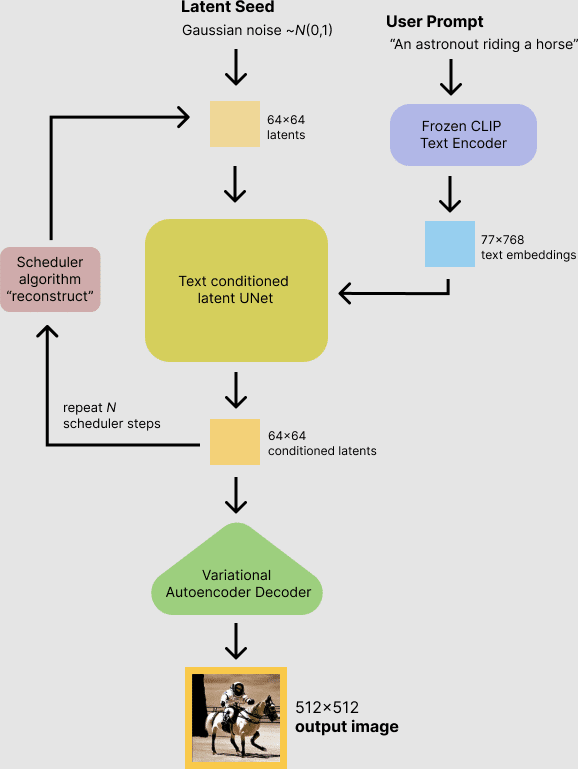
stable diffusionのポイントとして入力値は"User Prompt" と "Latent Seed"が入力値になっているためここを制御すると出力を制御できます。
まず(私が記事で紹介しやすいため)PIL画像を縦横に並べて表示できる関数image_grid()を作成しておきます。
[IN]
from PIL import Image

def image_grid(imgs, rows, cols):
    assert len(imgs) == rows*cols #画像の枚数がrows*colsと一致するか確認

    w, h = imgs[0].size #画像のサイズを取得
    grid = Image.new('RGB', size=(cols*w, rows*h)) #新しい画像を作成
    grid_w, grid_h = grid.size #新しい画像のサイズを取得

    for i, img in enumerate(imgs):
        grid.paste(img, box=(i%cols*w, i//cols*h)) #画像を貼り付ける
    return grid
5-1.乱数値の固定:generator
出力画像は実行毎に変化しますがgenerator引数にPytorchのseedを渡すと乱数値が固定されます。下記コードを実行すると同じ画像が取得できます。
[IN]
import torch

prompt = "a photograph of an astronaut riding a horse"
generator = torch.Generator("cuda").manual_seed(1024) #乱数値を固定

image = pipe(prompt, guidance_scale=7.5, generator=generator)['sample'][0]

print(generator)
image

[OUT]
<torch._C.Generator object at 0x7f3bdb725ab0>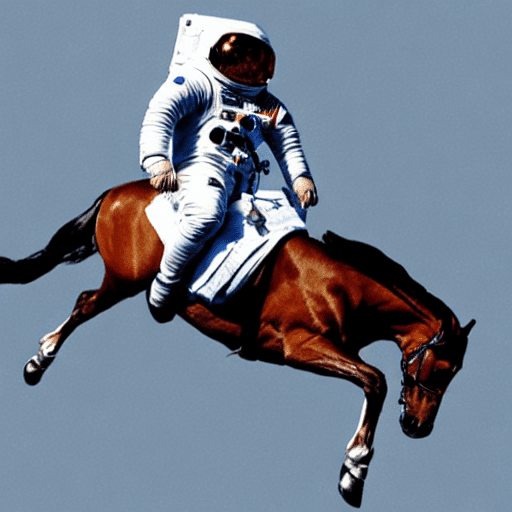
5-2.推論回数の設定:num_inference_steps
推論回数(inference steps)が多いほどより良い?画像が生成できます。デフォルトは50ですがnum_inference_stepsで変更可能です。
【結果の考察】
●num_inference_stepsが低いと低質な画像が生成される。大きいほどきれいだが、今回の100stepsの結果は不自然な画像になった。
【コードの注意点】
●乱数値は各画像で追加しないと想定とは異なる結果になるため各行で記載
●別のpromptではnum_inference_steps=5だとエラーが発生しました
[IN]
import torch

prompt = "a photograph of an astronaut riding a horse"

generator = torch.Generator("cuda").manual_seed(1024) #乱数値を固定
img1 = pipe(prompt, guidance_scale=7.5, num_inference_steps=15, generator=generator)['sample'][0]
generator = torch.Generator("cuda").manual_seed(1024) #乱数値を固定
img2 = pipe(prompt, guidance_scale=7.5, num_inference_steps=15, generator=generator)['sample'][0]
generator = torch.Generator("cuda").manual_seed(1024) #乱数値を固定
img3 = pipe(prompt, guidance_scale=7.5, num_inference_steps=25, generator=generator)['sample'][0]
generator = torch.Generator("cuda").manual_seed(1024) #乱数値を固定
img4 = pipe(prompt, guidance_scale=7.5, num_inference_steps=50, generator=generator)['sample'][0]
generator = torch.Generator("cuda").manual_seed(1024) #乱数値を固定
img5 = pipe(prompt, guidance_scale=7.5, num_inference_steps=75, generator=generator)['sample'][0]
generator = torch.Generator("cuda").manual_seed(1024) #乱数値を固定
img6 = pipe(prompt, guidance_scale=7.5, num_inference_steps=100, generator=generator)['sample'][0]

imgs = [img1, img2, img3, img4, img5, img6] #PIL形式画像をリスト化
grid = image_grid(imgs, rows=3, cols=2)
grid

[OUT]
5-3.Promptの意味を理解:guidance_scale
Promptの意味に近い画像(類似度)を調整してくれるパラメータとしてguidance_scale(デフォルト=7.5)があります。
※何かに記事でguidance_scale=0は学習時に絵になるみたいなやつ見た気がしたけど出典忘れた・・・
[IN]
prompt = "a photograph of an astronaut riding a horse"

generator = torch.Generator("cuda").manual_seed(1024)
img1 = pipe(prompt, guidance_scale=0, num_inference_steps=50, generator=generator)['sample'][0]
generator = torch.Generator("cuda").manual_seed(1024)
img2 = pipe(prompt, guidance_scale=2.5, num_inference_steps=50, generator=generator)['sample'][0]
generator = torch.Generator("cuda").manual_seed(1024)
img3 = pipe(prompt, guidance_scale=5.5, num_inference_steps=50, generator=generator)['sample'][0]
generator = torch.Generator("cuda").manual_seed(1024)
img4 = pipe(prompt, guidance_scale=7.5, num_inference_steps=50, generator=generator)['sample'][0]
generator = torch.Generator("cuda").manual_seed(1024)
img5 = pipe(prompt, guidance_scale=10, num_inference_steps=50, generator=generator)['sample'][0]
generator = torch.Generator("cuda").manual_seed(1024)
img6 = pipe(prompt, guidance_scale=20, num_inference_steps=50, generator=generator)['sample'][0]

imgs = [img1, img2, img3, img4, img5, img6] #PIL形式画像をリスト化
grid = image_grid(imgs, rows=3, cols=2)
grid

[OUT]
【参考資料】
5-4.画像サイズの変更:width, height
デフォルトだと出力される画像のサイズは512×512です。このサイズを変更する場合はpipeにwidth, height引数を渡します。
【画像サイズ変更における注意点】
●widthとheightの値は「必ず8で割り切れる数値」にすること
●512以下の数値にすると低品質な画像が生成させる可能性がある
●widthとheightの両方を512以上にすると"画像領域を繰り返す"(global coherence が消失する)
●正方形でない画像を生成する場合は片方を512に設定するのが最適
[IN]
prompt = "a photograph of an astronaut riding a horse"
image = pipe(prompt, height=512, width=768)['sample'][0]
image

[OUT]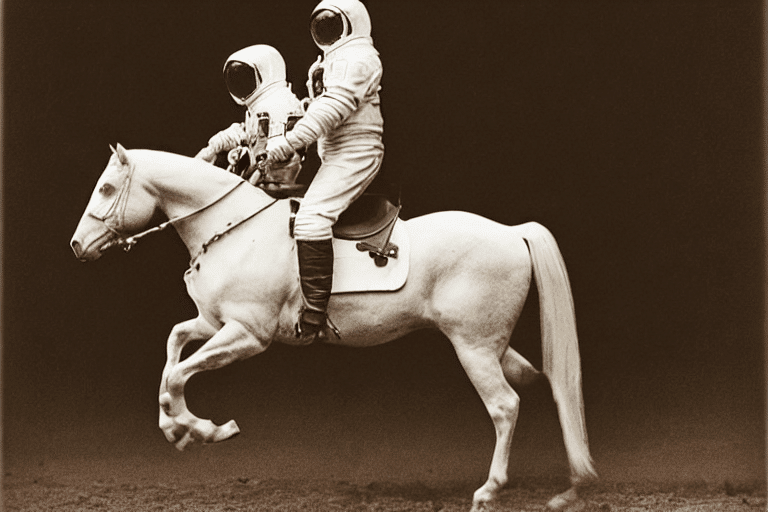
なおwidthとheightもノイズ側に影響すると思われるため、乱数値を固定しても元の幅(512×512)から変更すると画像の変わります。
[IN]
prompt = "a photograph of an astronaut riding a horse"

generator = torch.Generator("cuda").manual_seed(1024)
img1 = pipe(prompt, height=512, width=512, generator=generator)['sample'][0]
generator = torch.Generator("cuda").manual_seed(1024)
img2 = pipe(prompt, height=512, width=576, generator=generator)['sample'][0]
generator = torch.Generator("cuda").manual_seed(1024)
img3 = pipe(prompt, height=512, width=640, generator=generator)['sample'][0]
generator = torch.Generator("cuda").manual_seed(1024)
img4 = pipe(prompt, height=512, width=704, generator=generator)['sample'][0]
generator = torch.Generator("cuda").manual_seed(1024)
img5 = pipe(prompt, height=512, width=768, generator=generator)['sample'][0]
generator = torch.Generator("cuda").manual_seed(1024)
img6 = pipe(prompt, height=512, width=832, generator=generator)['sample'][0]

imgs = [img6, img5, img4, img3, img2, img1] #PIL形式画像をリスト化※1個目の画像サイズに合わせてグリッドを作るため一番大きい画像を最初に設置
grid = image_grid(imgs, rows=6, cols=1) #
grid

[OUT]
一番上が832×512, 一番下が512×512
6.コードまとめ
追って修正予定(使えますが最適はまだ)
6-1.自分用コード:Google Colab/Drive保存
Stable diffusionとは関係ないですが自分用で下記関数を実装しました。
【欲しい機能】
Google Driveの指定パスに画像を保存できるようにする。
保存時に画像が連番になるようにする(上書きされなければよし)
複数枚数を一度の処理で回せるようにしたい。
日本語のpromptで複数回してもしっかり保存できるようにしたい。
作成した画像をW×Hの枚数で並べて見れるようにしたい。
事前にGoogle Driveのマイドライブフォルダに"AI_Art"というフォルダを作成して下記を実行すると指定した枚数の画像がフォルダに保存されます。
[IN]
#Google Driveに画像保存用
import os
import re
import glob
from typing import List
import unicodedata
from PIL import Image
import matplotlib.pyplot as plt

#テキストの後ろの数値を1増やす
def increment_Num(text):
    num = re.findall(r"\d+", text)[-1] #文字列から数値を抽出:一番後ろの数値を取得
    num2 = int(num) + 1 #取得した数値+1
    return re.sub(num, str(num2), text) #1増やした数値に置換

#promptのファイルを指定フォルダに保存:同じ名前の場合は連番作成
def save_image(image, prompt:str, dirname:str):
    path_drive = f'/content/drive/MyDrive/{dirname}'
    filename = os.path.join(path_drive, prompt+'(1).png')

    if not os.path.exists(filename):
        image.save(filename)
    else:
        fname = prompt + '*.png' #globで検索するための文字列作成
        try:
            fname = unicodedata.normalize('NFC', fname)
            file_late = glob.glob(os.path.join(path_drive,fname))[-1] #昇順で一番最後のファイル
        except IndexError:
            fname = unicodedata.normalize('NFD', fname)
            file_late = glob.glob(os.path.join(path_drive,fname))[-1] #昇順で一番最後のファイル

        filepath = increment_Num(file_late)
        image.save(filepath)
    return filename

def generate_multiarts(prompts:str, nums:int):
    for prompt in prompts:
        for i in range(nums):
            image = pipe(prompt)["sample"][0] #画像生成
            _ = save_image(image, prompt, dirname='AI_Art') #画像を指定フォルダに保存
            # print(f'{os.path.basename(_)}を保存しました。') #出力したファイル名を表示したい場合
            plt.imshow(image)

def show_images(images, w, h):
    fignums = w*h #表示する画像の枚数
    fig = plt.figure(figsize=(6*w, 6*h)) #表示する画像の枚数を指定
    for i, img in enumerate(images):
        ax = fig.add_subplot(w, h, i+1) #表示する画像の枚数を指定
        ax.imshow(img) #画像を表示
        ax.axis('off') #axisを消す


#Google Driveをマウント
from google.colab import drive
drive.mount('/content/drive')


[OUT]
6-2.コードまとめ
コードまとめは以下の通りです。セルブロックごとに分けております。
!pip install diffusers==0.2.4 transformers scipy ftfyimport torch
from diffusers import StableDiffusionPipeline
import matplotlib.pyplot as plt
#HuggingFaceのアクセストークン
ACCESS_TOKEN="<my access token>"
#https://huggingface.co/settings/tokens からWeightを取得する
pipe = StableDiffusionPipeline.from_pretrained("CompVis/stable-diffusion-v1-4", use_auth_token=ACCESS_TOKEN) #dafault:float32
# pipe = StableDiffusionPipeline.from_pretrained("CompVis/stable-diffusion-v1-4", revision="fp16", torch_dtype=torch.float16, use_auth_token=ACCESS_TOKEN) #GPUメモリ制限があり10GB以下のRAMしか使用できない場合はfloat16を指定
#GPUの使用が可能であればPipleineをGPU指定
if torch.cuda.is_available():
print(torch.cuda.get_device_name(0)) #GPU名を表示
pipe.to("cuda") #GPUが使用#Google Driveに画像保存用
import os
import re
import glob
from typing import List
import unicodedata
from PIL import Image
import matplotlib.pyplot as plt
#テキストの後ろの数値を1増やす
def increment_Num(text):
num = re.findall(r"\d+", text)[-1] #文字列から数値を抽出:一番後ろの数値を取得
num2 = int(num) + 1 #取得した数値+1
return re.sub(num, str(num2), text) #1増やした数値に置換
#promptのファイルを指定フォルダに保存:同じ名前の場合は連番作成
def save_image(image, prompt:str, dirname:str):
path_drive = f'/content/drive/MyDrive/{dirname}'
filename = os.path.join(path_drive, prompt+'(1).png')
if not os.path.exists(filename):
image.save(filename)
else:
fname = prompt + '*.png' #globで検索するための文字列作成
try:
fname = unicodedata.normalize('NFC', fname)
file_late = glob.glob(os.path.join(path_drive,fname))[-1] #昇順で一番最後のファイル
except IndexError:
fname = unicodedata.normalize('NFD', fname)
file_late = glob.glob(os.path.join(path_drive,fname))[-1] #昇順で一番最後のファイル
filepath = increment_Num(file_late)
image.save(filepath)
return filename
def generate_multiarts(prompts:str, nums:int):
for prompt in prompts:
for i in range(nums):
image = pipe(prompt)["sample"][0] #画像生成
_ = save_image(image, prompt, dirname='AI_Art') #画像を指定フォルダに保存
# print(f'{os.path.basename(_)}を保存しました。') #出力したファイル名を表示したい場合
plt.imshow(image)
def show_images(images, w, h):
fignums = w*h #表示する画像の枚数
fig = plt.figure(figsize=(6*w, 6*h)) #表示する画像の枚数を指定
for i, img in enumerate(images):
ax = fig.add_subplot(w, h, i+1) #表示する画像の枚数を指定
ax.imshow(img) #画像を表示
ax.axis('off') #axisを消す
#Google Driveをマウント
from google.colab import drive
drive.mount('/content/drive')from PIL import Image
prompts = ['Portrait of a Woman with a Man at a Casement']
generate_multiarts(prompts, nums=4)
mainpath = '/content/drive/MyDrive/AI_Art'
filepaths = glob.glob(mainpath + f'/{prompts[0]}*.png')
print(len(filepaths), [os.path.basename(p) for p in filepaths])
imgs = [Image.open(f) for f in filepaths]
show_images(imgs, 2, 2)7.出力結果(観賞用)
出力結果および入力テキストは下記の通りです。別記事でもPromptと結果の関係をとっておりますのでご参考までに。
new world after any human has been gone
Blue world without any creatures
7-1.Prompt1:new world after any human has been gone

7-2.Prompt2:Blue world without any creatures

別添1.Stable diffusionのPoCサービス一覧
2022年8月23日にリリースしてから8月28日現在でいくつかのPoCがアナウンスされているため参考までに記載しておきます。一部のツイートは紹介のみであり実装コードは確認できませんでした。
なお下記は公式からの紹介です(2022年10月14日)。
Over the 7 weeks since Stable Diffusion's release, we've seen many amazing open-source contributions from the community. A lot of them have come in the form of awesome Google Colab notebooks! 🔥
— Stable Diffusion 🎨 - News, Art, Updates (@StableDiffusion) October 14, 2022
Here is a thread of 14 awesome notebooks we've seen from the community ↓
別添1ー1.img2img
画像から画像生成系のサービス
やばいやばいやばい#stablediffusion を導入したFigmaプラグイン登場した。パスとプロンプトを入力したらそれに合わせた画像を生成する。素晴らしすぎる。こういう革命が色んなデザインツールで起こりそうだな..
— やまかず (@Yamkaz) August 24, 2022
pic.twitter.com/Ni6MhfoqZE
Image2Image in a gradio demo using #stablediffusion with @huggingface 🧨diffusers
— Gradio (@Gradio) August 23, 2022
Try it out in colab👇https://t.co/0yme1iqp5H pic.twitter.com/hcfB92g7o1
How do you draw an owl:
— Mishig Davaadorj (@mishig25) August 26, 2022
1. draw some circles
2. click "Diffuse the rest"
We have made the greatest thing since MS Paint (using #stablediffusion):https://t.co/iYyC7rmGXn
Looking forward to seeing what you'll generate with it 😊 pic.twitter.com/0cYM2HZxIk
別添1ー2.Promptを作成
AIに渡すためのPromptを生成してくれるサービスです。
img2prompt from @AIMindFlow can help you think up new prompts for Stable Diffusion. Just feed in an image, and you’ll get back a prompt!
— Replicate (@replicatehq) August 26, 2022
Run it on Replicate: https://t.co/hBPRMleyqM
参考資料
参考1:実装
参考2:Prompt関係
参考3:技術関係
この記事もう何回も見返してるんだけど、これ以上にDiffusion Modelを分かりやすく数式付きで解説してる記事ってないなhttps://t.co/tNjPshF5tz
— なんか (@_determina_) November 5, 2022
あとがき
結構な値段したPC使ってるんだけどこれでも全然メモリのらないのか。確かに10GBないな(出典:GeForce RTX 2060 SUPERの性能スペック&ベンチマーク紹介【2022年】)。

ちなみにGoogle Colabで使用したときは「NVIDIA Tesla T4」でしたがやはりハイスペックですね(価格がGPUだけで自分のPCより高い・・・)。

そろそろさらにいいPC買わないといけないか・・・・・
この記事が気に入ったらサポートをしてみませんか?