SwiftUIでいこう! - Stopwatchを作る。2
StopWatchManeger.swiftファイルを編集していきます。
class StopWatchManeger:ObservableObject{}に
"enum"でstart,stop,pauseの設定を作ります。
enum stopWatchMode{
       case start
       case stop
       case pause
}
次に今作った"stopWatchMode"を使えるように変数に入れ、初期値を"stop"にしておきます。
@Published var mode:stopWatchMode = .stopあとは、"mode"を"start","stop","pause"それぞれの関数に設定していきます。func start()はすでにあるので、" mode = .start"を付け加えるだけです。
 func start(){
       mode = .start
       timer = Timer.scheduledTimer(withTimeInterval: 0.1, repeats: true){ timer in
           self.secondsElapsed += 0.1
       }
   }
timer を止めるのは、"timer.invalidate()"なので
func stop(){
       timer.invalidate()
       secondsElapsed = 0
       mode = .stop
   }
pauseは
    func pause(){
        timer.invalidate()
       mode = .pause
    }
ContentViewに戻って、
Button(action: {self.stopWatchManeger.start()}){
ExtractedView(label: "Start", buttonColor: .yellow, textColor: .black)
}
を編集していきます。これはボタンを押した場合にタイマーをスタートする命令です。
この部分を条件によって変化させるようにして、スタート、ストップ、ポーズと操作出来るようにします。
条件分岐"if"を使います。
まずは起動時ですが、"mode"は"stop"となっています。
@Published var mode:stopWatchMode = .stop
最初の画面としては、
if stopWatchManeger.mode == .stop{
          Button(action: {self.stopWatchManeger.start()}){
                            ExtractedView(label: "Start", buttonColor: .yellow, textColor: .black)
          }
 }
とします。modeが.stopの時にボタンを押すと、"action:"が実行されます。
stopWatchManeger.start()
が呼び出されストップウオッチはスタートされ数字が進んでいきます。
ボタンの表示は
ExtractedView(label: "Start", buttonColor: .yellow, textColor: .black)
となり"Start"となります。
その他、stop,pauseも同じように実装していきます。
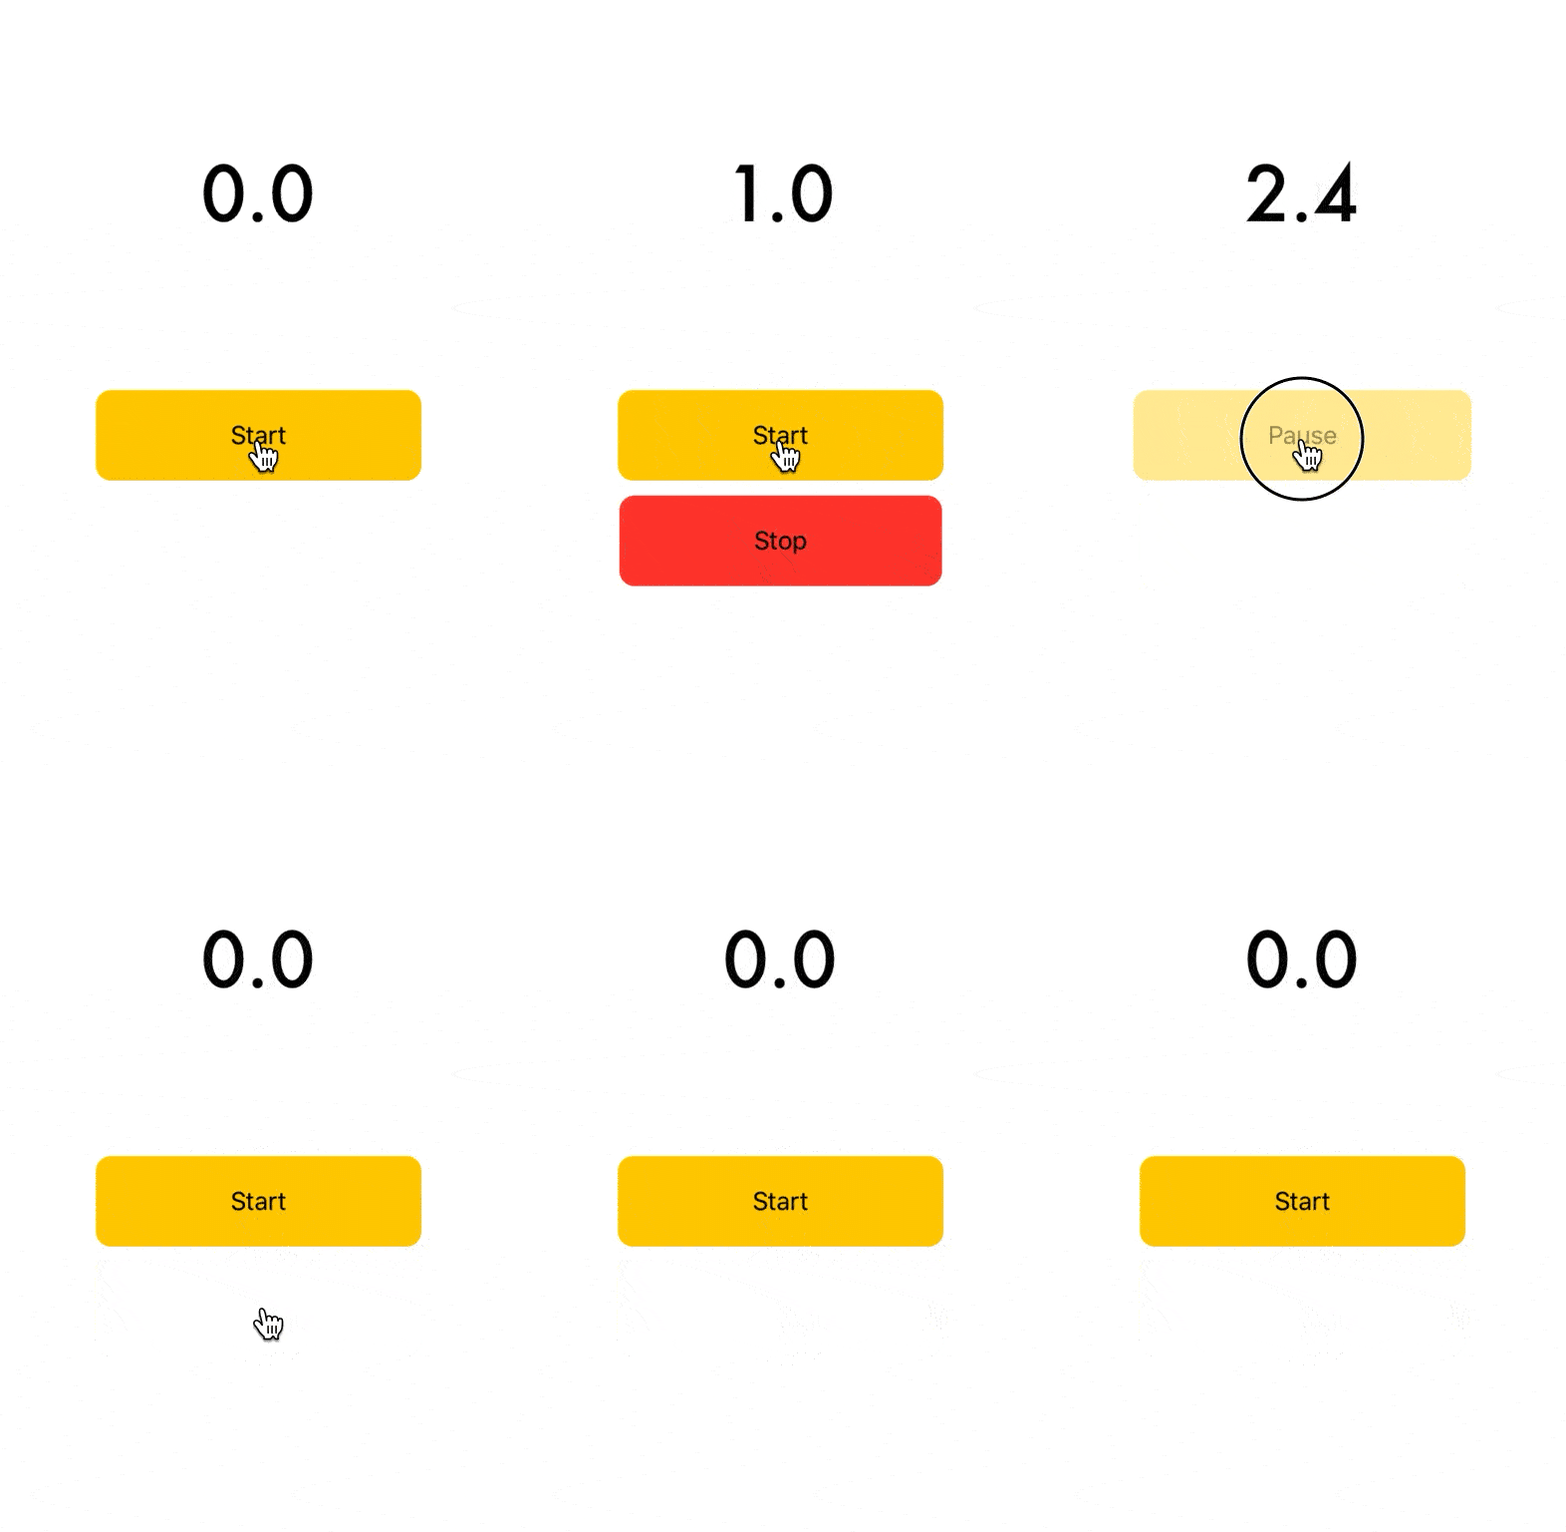
"start()"が実行されれば"mode"は"start"となりますので以下が実行されボタンの表示は"Pause"となります。
 if stopWatchManeger.mode == .start{
               Button(action: {self.stopWatchManeger.pause()}){
               ExtractedView(label: "Pause", buttonColor: .yellow, textColor: .black)
               }

  }
"Pause"ボタンを押すと、
stopWatchManeger.pase()が実行され、一時停止となります。"mode"は".pause"に変わります。
".pause"になったことで以下のようにボタンの表示が変わり"Start","Stop"が選択できるボタンが表示されます。そのボタンにはそれぞれ、
stopWatchManeger.start()
stopWatchManeger.stop()
が実行できるようになります。
   if stopWatchManeger.mode == .pause{
               Button(action: {self.stopWatchManeger.start()}){
               ExtractedView(label: "Start", buttonColor: .yellow, textColor: .black)
                      }
               Button(action: {self.stopWatchManeger.stop()}){
               ExtractedView(label: "Stop", buttonColor: .red, textColor: .black)
                      }
               .padding(.top,10)
    }
.padding(.top,10)
としてボタンの間隔をあけています。

最終的なコードです。
この記事が気に入ったらサポートをしてみませんか?
