プログラミングを始める。 - "もの"を表現する(class)2。

クラスが設計図と言ってもわかりにくいので実際にどう使われているかをみてみましょう。まず参考になるサイトです。
iPhoneなどのアプリはSwiftで書かれていますが、実際はのフレームワークUIKitで組み上げられている形です。その中のクラスをみていきます。
まず、このページに
class UISlider : UIControl
と書かれています。これはクラスとしてUISliderが定義されているということが示されてます。(":UIControl"にんついては継承元を示しています。ここではちょっと置いておきます。)
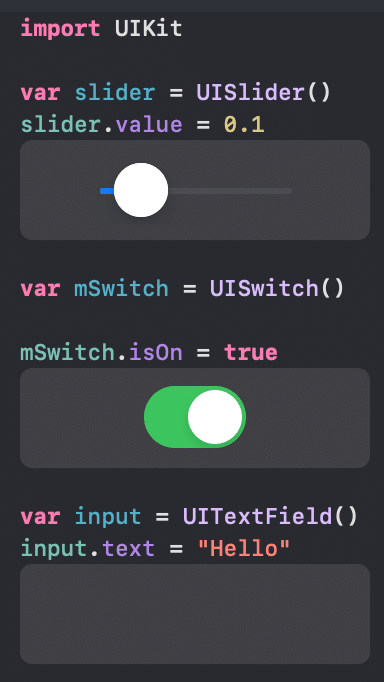
Playgroundを使って表示させてみます。変数sliderにクラスUISlider()を代入します。
これで変数sliderが実際使える状態となりました。UISlider()を参考にしてスライダーに必要な情報が変数sliderへ伝えられています。
インスタンス、実体化(スライダーが表示されています)を伴っているのがわかりやすいと思います。
以下UISliderの実際のコードからちょっと調べてみましょう。
Xcodeで該当コードの上で、⌘クリック
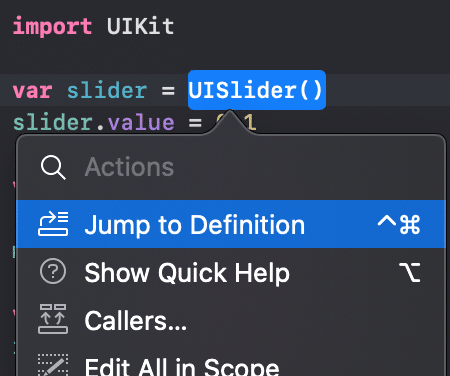
して、"Jump to Definition"をクリックすると以下のコードが出てきます。
@available(iOS 2.0, *)
open class UISlider : UIControl, NSCoding {

   open var value: Float // default 0.0. this value will be pinned to min/max
   open var minimumValue: Float // default 0.0. the current value may change if outside new min value
   open var maximumValue: Float // default 1.0. the current value may change if outside new max value

   open var minimumValueImage: UIImage? // default is nil. image that appears to left of control (e.g. speaker off)
   open var maximumValueImage: UIImage? // default is nil. image that appears to right of control (e.g. speaker max)

   open var isContinuous: Bool // if set, value change events are generated any time the value changes due to dragging. default = YES

   @available(iOS 5.0, *)
   open var minimumTrackTintColor: UIColor?
   @available(iOS 5.0, *)
   open var maximumTrackTintColor: UIColor?
   @available(iOS 5.0, *)
   open var thumbTintColor: UIColor?

   open func setValue(_ value: Float, animated: Bool) // move slider at fixed velocity (i.e. duration depends on distance). does not send action

   // set the images for the slider. there are 3, the thumb which is centered by default and the track. You can specify different left and right track
   // e.g blue on the left as you increase and white to the right of the thumb. The track images should be 3 part resizable (via UIImage's resizableImage methods) along the direction that is longer

   open func setThumbImage(_ image: UIImage?, for state: UIControl.State)
   open func setMinimumTrackImage(_ image: UIImage?, for state: UIControl.State)
   open func setMaximumTrackImage(_ image: UIImage?, for state: UIControl.State)

   open func thumbImage(for state: UIControl.State) -> UIImage?
   open func minimumTrackImage(for state: UIControl.State) -> UIImage?
   open func maximumTrackImage(for state: UIControl.State) -> UIImage?

   open var currentThumbImage: UIImage? { get }
   open var currentMinimumTrackImage: UIImage? { get }
   open var currentMaximumTrackImage: UIImage? { get }

   // lets a subclass lay out the track and thumb as needed
   open func minimumValueImageRect(forBounds bounds: CGRect) -> CGRect
   open func maximumValueImageRect(forBounds bounds: CGRect) -> CGRect
   open func trackRect(forBounds bounds: CGRect) -> CGRect
   open func thumbRect(forBounds bounds: CGRect, trackRect rect: CGRect, value: Float) -> CGRect
}
UISlider がclassとして定義されています。
こんな感じでclassを色々と事前に作って置いてこのクラスを組み合わせてプログラムを完成させていくということです。
そのフレームワークの名前iOSではがUIKit、macOSではcocoaといことになります。アプリはブロックを組み立てるようにいろんなクラスを使いながらつくていきます。
ということでクラスを理解してうまく使えればアプリ作りも比較的簡単に実装できます。クラスとはコードをうまく使えるように、ひとまとめとして使います。簡単に言ってしますと部品です。部品を集めて完成させていきます。
この記事が気に入ったらサポートをしてみませんか?