
作品の「のっぺり」を改善:GenerateMe さんの Smooth rendering

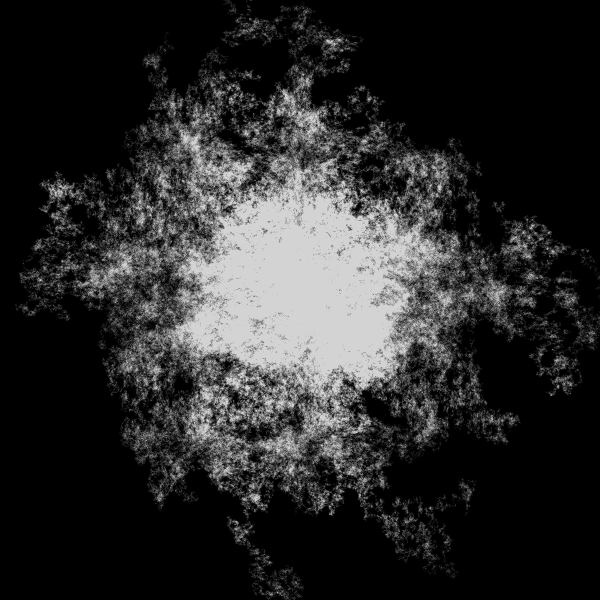
小さな点を多数重ねてこんなのを描画することがあります。

でも、なんか真ん中が白飛びしちゃってたり、細かい濃淡がうまく出てない気がするんです。
こっちはもっと極端で、濃淡も何も無くのっぺりしちゃってます。

なんとかならないかなぁ〜。
と、そんな悩みに効くと評判の GenerateMe さんの Smooth rendering を試してみました。
この記事は全文無料でお読みいただけます。もしお気に召しましたら投げ銭お願いしますね。😉✨
![]()
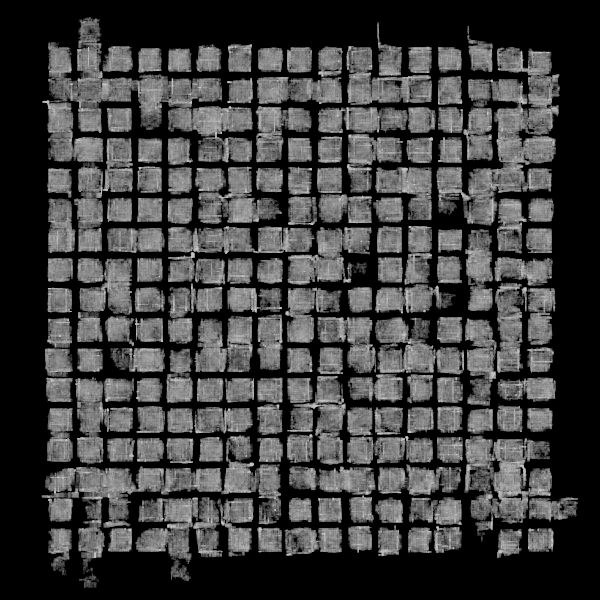
blendMode(SCREEN) の悩み
blendMode(SCREEN) にして暗めの point() で点を打っていくと、点が重なったところは重なっていないところより明るくなります。

こんなイメージ
沢山重ねればそれだけ明るさが加算される感じになり、それによって濃淡を付けられるわけです。
でも、明るいところは極端に明るくなって、暗いところは微妙な違いがよくわからない感じになりがちなんですよね。
で、こんなんなっちゃう。
![]()
Smooth rendering のコンセプト
GenerateMe さんの Smooth rendering はこの悩みを解消すべく考えられたもので、
1.直接 point() で描画するんじゃなく、点が打たれた回数をカウントしていく。
2.カウント数の比率で明るさを決める。
3.その比率に log() を使う。
というものです。
実際にさっきのでやってみたら、
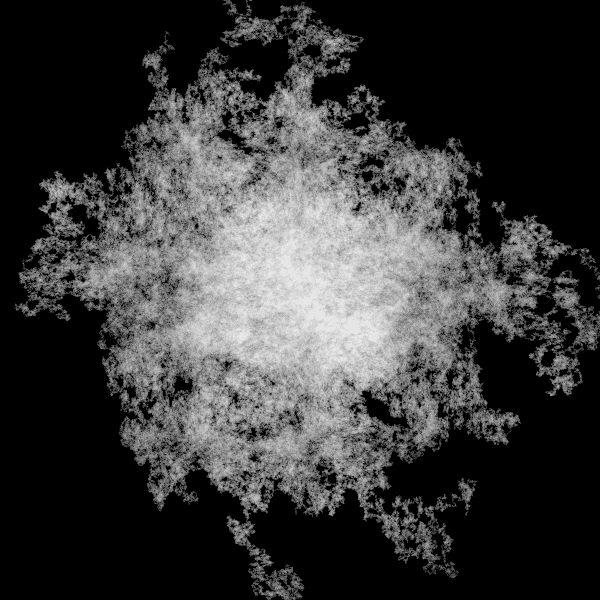
こんな感じです。
濃淡の微妙な違いが出てますね。
こちらもやはり濃淡の違いがよくわかるようになり、のっぺりして面白くなかったものが俄然面白くなりました。
![]()
使い方
使い方は
1.Log Renderer クラスを作る
2.point() を Log Renderer クラスのカウンターに変更
3.image() で結果を描画
と、これだけです。 簡単!
早速やってみましょう。
「point() で描画している既存のソースを Smooth rendering 方式に変更する」というシナリオでいきます。
まずは GenerateMe さんの Log Renderer クラスのソースをコピーして、変更したいソースコードがある同じディレクトリ中に renderer.pde という名前で置いてください。
これが変更前のソースコード。
// 作品の「のっぺり」を改善:GenerateMe さんの Smooth rendering
// 普通の描画
// @author @deconbatch
// @version 0.1
// Processing 3.2.1
// 2019.01.31

void setup() {

  size(600, 600);
  colorMode(HSB, 360, 100, 100, 100);
  blendMode(SCREEN);
  smooth();
  noLoop();

}

void draw() {

  int   doCntMax = 1000;
  float doScale  = 0.0001;

  background(0.0, 0.0, 0.0, 100);
  strokeWeight(1.0);
  stroke(0.0, 0.0, 1.5, 100.0);

  for (float xInit = 0.2; xInit <= 0.8; xInit += 0.005) {
    for (float yInit = 0.2; yInit <= 0.8; yInit += 0.005) {
      float xPoint = xInit + random(0.0025);
      float yPoint = yInit + random(0.0025);
      for (int doCnt = 0; doCnt < doCntMax; ++doCnt) {

        xPoint += doScale * cos(TWO_PI * noise(xPoint, yPoint) * 5.0);
        yPoint += doScale * sin(TWO_PI * noise(yPoint, xPoint) * 5.0);

        point(xPoint * width, yPoint * height);

      }
    }
  }

}

/*
Copyright (C) 2019- deconbatch

This program is free software: you can redistribute it and/or modify
it under the terms of the GNU General Public License as published by
the Free Software Foundation; either version 3 of the License, or
(at your option) any later version.

This program is distributed in the hope that it will be useful,
but WITHOUT ANY WARRANTY; without even the implied warranty of
MERCHANTABILITY or FITNESS FOR A PARTICULAR PURPOSE.  See the
GNU General Public License for more details.

You should have received a copy of the GNU General Public License
along with this program.  If not, see <http://www.gnu.org/licenses/>
*/
Log Renderer クラスを使う用意として、以下の4行を draw() の中に追加しましょう。
bgColor, fgColor はバックグラウンド色と描画色の指定です。
gammma は明るさの調整で、小さいほど全体が明るくなります。
LogRenderer lr = new LogRenderer(width, height);
color bgColor  = color(0.0, 0.0, 0.0, 100);
color fgColor  = color(0.0, 0.0, 100.0, 100);
float gammma   = 2.0;
point() を Log Renderer クラスのカウンターに変更して
//        point(xPoint * width, yPoint * height);
lr.add(xPoint * width, yPoint * height);
結果を image() で描画
 }
 image(lr.render(bgColor, fgColor, gammma), 0, 0);
}

/*
Copyright (C) 2019- deconbatch
ここは point() を使わないから要らなくなりますね。
 strokeWeight(1.0);
 stroke(0.0, 0.0, 1.5, 100.0);
最終的にはこうなりました。
// 作品の「のっぺり」を改善:GenerateMe さんの Smooth rendering
// Smooth rendering での描画
// @author @deconbatch
// @version 0.1
// Processing 3.2.1
// 2019.01.31
void setup() {
size(600, 600);
colorMode(HSB, 360, 100, 100, 100);
blendMode(SCREEN);
smooth();
noLoop();
}
void draw() {
int doCntMax = 1000;
float doScale = 0.0001;
LogRenderer lr = new LogRenderer(width, height);
color bgColor = color(0.0, 0.0, 0.0, 100);
color fgColor = color(0.0, 0.0, 100.0, 100);
float gammma = 2.0;
background(0.0, 0.0, 0.0, 100);
for (float xInit = 0.2; xInit <= 0.8; xInit += 0.005) {
for (float yInit = 0.2; yInit <= 0.8; yInit += 0.005) {
float xPoint = xInit + random(0.0025);
float yPoint = yInit + random(0.0025);
for (int doCnt = 0; doCnt < doCntMax; ++doCnt) {
xPoint += doScale * cos(TWO_PI * noise(xPoint, yPoint) * 5.0);
yPoint += doScale * sin(TWO_PI * noise(yPoint, xPoint) * 5.0);
lr.add(xPoint * width, yPoint * height);
}
}
}
image(lr.render(bgColor, fgColor, gammma), 0, 0);
}
/*
Copyright (C) 2019- deconbatch
This program is free software: you can redistribute it and/or modify
it under the terms of the GNU General Public License as published by
the Free Software Foundation; either version 3 of the License, or
(at your option) any later version.
This program is distributed in the hope that it will be useful,
but WITHOUT ANY WARRANTY; without even the implied warranty of
MERCHANTABILITY or FITNESS FOR A PARTICULAR PURPOSE. See the
GNU General Public License for more details.
You should have received a copy of the GNU General Public License
along with this program. If not, see <http://www.gnu.org/licenses/>
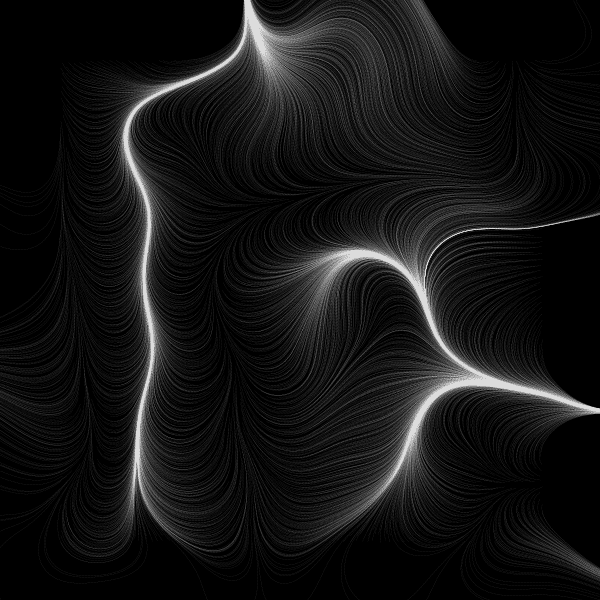
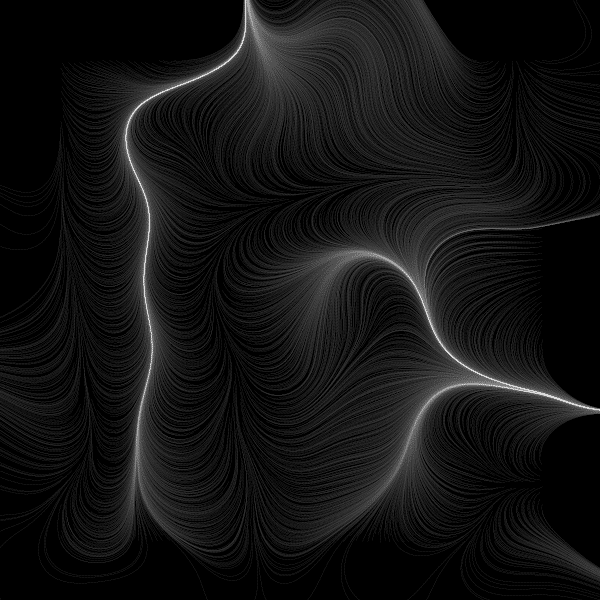
*/変更前後の結果はこうです!

変更前
変更後
![]()
簡単に使えます。ただし条件あり
このように point() を置き換えるだけで簡単に使えます。
描画の時間もこちらの方が速いですね。
キャンバス上の座標一つ一つで点を打っていった回数をカウントする方式なので、ellipse() や rect() 等で描画しているものには適用は難しいです。
point() でも strokeWeight() で 2以上の大きさを指定していたり、stroke() で明るさを変化させている場合は一工夫必要になるでしょう。
さらに、何でも Smooth rendering 方式なら良い作品になるかというとそういうわけでもなさそうです。
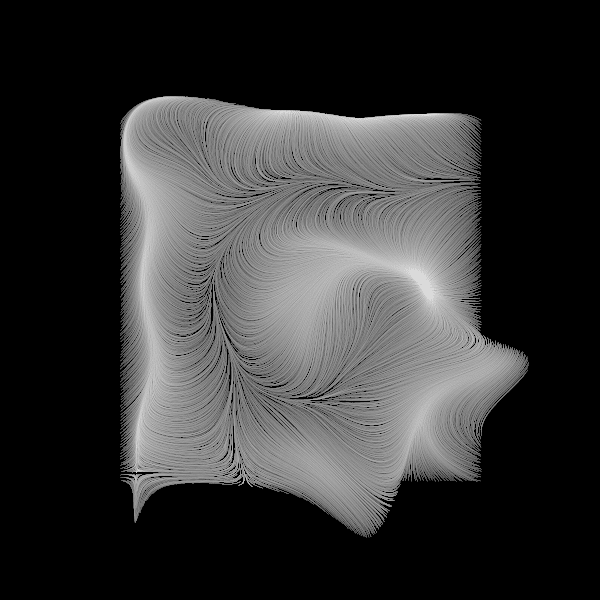
例えばこれだとどっちが良いと思います?
普通の描画
Smooth rendering 方式
この場合だと普通の描画の方が私は好きです。
細かい濃淡が出たほうが良いもの、そうじゃないものがあるようですね。
![]()
色は?
今回は単色(グレスケール)でのお試しで、GenerateMe さんのブログ記事の STEP2 までをやりました。
その後のステップには多色の場合の方法も記載がありますので、ぜひ参照してみてください。
同じく GenerateMe さんのベクター・フィールドを試してみた記事もありますよ。
ここでこの記事はおしまいです。もしこの記事がお気に召しましたら投げ銭お願いします。😉✨
ここから先は
¥ 100
この記事が面白かったらサポートしていただけませんか? ぜんざい好きな私に、ぜんざいをお腹いっぱい食べさせてほしい。あなたのことを想いながら食べるから、ぜんざいサポートお願いね 💕