
Javaで掲示板を作ろう#5

こんにちは!すずきです。
掲示板を引き続き進めていきましょう!
残りのタスク
データベースに保存されたものを画面に表示する
削除ボタンと更新ボタンをつける
投稿が増えたらページを2ページ等にしていく
画面に投稿した内容を表示する
今回は画面に表示できるようにしていきましょう。
UserMapper.java
package com.example.demo.repository;

import java.util.List;

import org.apache.ibatis.annotations.Mapper;

import com.example.demo.domain.user.model.MUser;

@Mapper
public interface UserMapper {

	/**投稿*/
	int insertOne(MUser user);

	/**投稿取得*/
	public List<MUser> findMany();

}
投稿した内容をlistで取得するために追加しました!
UserService.java
package com.example.demo.domain.user.service;

import java.util.List;

import com.example.demo.domain.user.model.MUser;

public interface UserService {

	/**投稿登録*/
	public void submitPost(MUser user);

	/**投稿取得*/
	public List<MUser> getUsers();
}
ここでも同じく取得するコードを記載しました!
UserServiceImpl.java
package com.example.demo.domain.user.service.impl;

import java.util.List;

import org.springframework.beans.factory.annotation.Autowired;
import org.springframework.stereotype.Service;

import com.example.demo.domain.user.model.MUser;
import com.example.demo.domain.user.service.UserService;
import com.example.demo.repository.UserMapper;

@Service
public class UserServiceImpl implements UserService {

    @Autowired
    private UserMapper mapper;

    /**投稿登録*/
    @Override
    public void submitPost(MUser user) {
        mapper.insertOne(user);
    }

    /**投稿取得*/
    @Override
    public List<MUser> getUsers(){
    	return mapper.findMany();
    }
}
ここでも同じです!
UserListController.java
package com.example.demo.controller;

import java.util.List;

import org.springframework.beans.factory.annotation.Autowired;
import org.springframework.stereotype.Controller;
import org.springframework.ui.Model;
import org.springframework.web.bind.annotation.GetMapping;
import org.springframework.web.bind.annotation.RequestMapping;

import com.example.demo.domain.user.model.MUser;
import com.example.demo.domain.user.service.UserService;

@Controller
@RequestMapping("/user")
public class UserListController {

	@Autowired
	private UserService userService;

	/**ユーザー一覧画面を表示*/
	@GetMapping("/list")
	public String getUserList(Model model) {

		//ユーザー一覧取得
		List<MUser> userList = userService.getUsers();

		//Modelに登録
		model.addAttribute("userList", userList);
		//ユーザー一覧画面を表示
		return "user/list";
	}

}
ここでは、一覧で取得してModelに登録するコードを記載しました。
list.html
<!DOCTYPE html>
<html xmlns:th="http://www.thymeleaf.org" xmlns:layout="http://www.ultraq.net.nz/thymeleaf/layout" layout:decorate="~{layout/layout}">
<head>
    <title>投稿一覧</title>
    <!--個別CSS読込-->
    <link rel="stylesheet" th:href="@{/css/user/list.css}">
</head>
<body>
    <div layout:fragment="content">
        <div class="header border-bottom">
            <h1 class="h2">投稿一覧</h1>
        </div>
        <!--投稿一覧表示-->
        <div>
			<table class="table table-striped table-bordered table-hover">
				<thead class="thead-light">
					<tr>
						<th class="th-width">名前</th>
						<th class="th-width">タイトル</th>
						<th class="th-width">内容</th>
					</tr>
				</thead>
				<tbody>
					<tr th:each="item: ${userList}">
						<td th:text="${item.name}"></td>
						<td th:text="${item.title}"></td>
						<td th:text="${item.content}"></td>
					</tr>
				</tbody>
			</table>
		</div>
        <!-- 投稿フォーム -->
        <form method="post" action="/bulletinboard">
            <div>
                <label for="name">名前:</label>
                <input type="text" id="name" name="name"/>
            </div>
            <div>
				<label for="title">タイトル:</label>
				<input type="text" name="title"/>
			</div>
            <div>
                <label for="content">内容:</label>
                <textarea id="content" name="content" class="content"></textarea>
            </div>
            <div>
                <input type="submit" value="送信"/>
            </div>
        </form>
    </div>
</body>
</html>
投稿フォームの上に表示させたいので、投稿フォームの上にリストで表示されるように配置しました。
実行
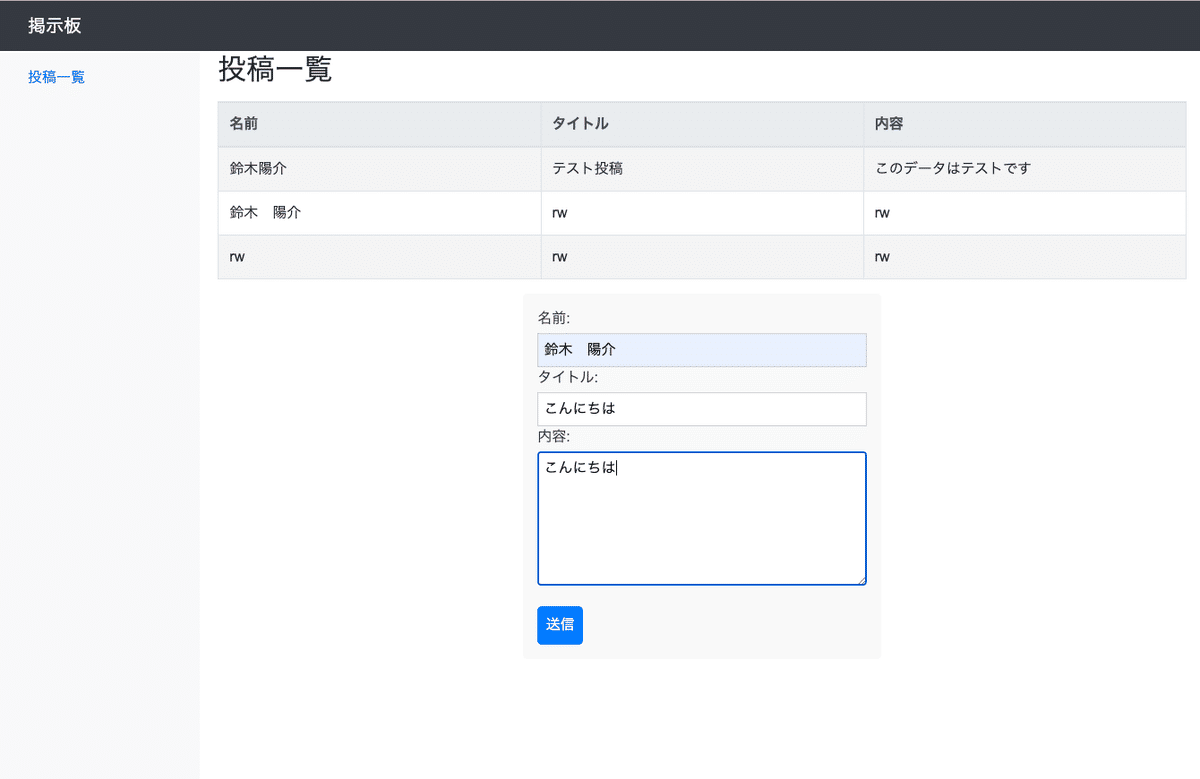
こういった形で、フォームに入力し、送信をおすと
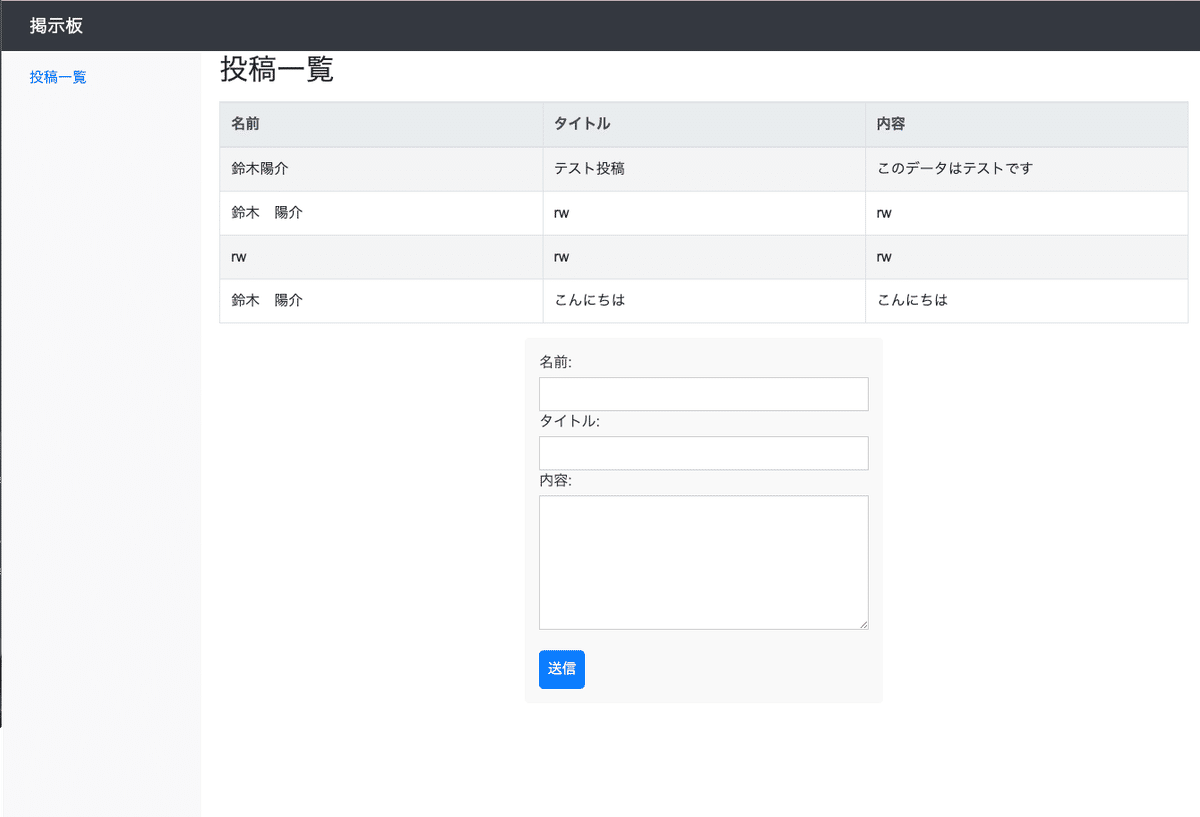
画面にどんどん表示されていくような簡易掲示板が完成しました!!
あと作って思ったのが、今localhostで表示しているのをどうやってサイトに表示するのかだったり、画面のレイアウトどう変えるかだったりは、やっていかなきゃなと思います。
正直完成像がないまま進んでしまったので、
一旦編集ボタンと削除ボタンをつけて消したり修正したりできるようにしたいと思います!!
よし、あとは、夜やります!
この記事が気に入ったらサポートをしてみませんか?