Stable Diffusionのパラメーターをランダムに設定して画像生成する

こちらの記事を投稿してから約1年経って、紹介しているプログラムも動かなくなっていました。そこで2023/7/8に全面的に書き直しました。
Stable Diffusionをしばらく使っていますが、「生成したい画像のプロンプトが思いつかない」、「生成された画像が思い描いていたものと違うとき設定の微調整に時間がかかる」という2点をどうにかしたいと感じてきました。そこで今回はこれらを解消したいと思います。
1. 生成したい画像のプロンプトが思いつかない
最初のうちは思いついたキーワードを適当に入力してプロンプトを作るだけで十分に楽しいのですが、慣れてきますと徐々に生成したい画像のハードルが上がっていきます。しかしその辺りで個人で思いつくプロンプトに限界を感じてきました。
Lexicaではプロンプトの記載があるため同じ画像を再現することも可能です。ただし使っている学習モデルによって生成される画像は相当に変わります。
現在使っているBracingEvoMix_v1はあまり多くのプロンプトを指定しますと逆にらしさが薄れる感じがしますので、こちらでキーワードを調べると良いかもしれません。
2. 生成された画像が思い描いていたものと違うとき設定の微調整に時間がかかる
お気に入りのSeedを見つけたら、Scale(プロンプトと出力画像の類似度)やSteps(画像生成に費やすステップ数)を微調整して生成画像を仕上げていました。しかし何度も画像生成するのが手間に感じてきましたので、Seed / Guidance scale / Inference stepsをランダムで組み合わせて100枚程度画像を生成すれば、数枚は自分のイメージに合った画像が生成されるのではないかと考えました。
またプロンプトを変更するたびにコードを書き替えるのも手間ですので簡単なGUIをCustomTkinterで作成しました。GUIにはプロンプト、ネガティブプロンプトと生成する画像の枚数を指定できるようにしています。また初回の1枚目だけランダムにしてあとはパラメータを固定できるようにしています。

今のところ、Seed / Guidance scale / Inference stepsはコード内でランダムで取得する値の範囲を設定しています。
Seedは32bitの範囲、Guidance scaleは20~60の範囲、Inference stepsは6~18の範囲としています。これらの値もGUIから指定できるようにしようか迷いましたが、あまり値を極端にしても良い結果にならないような気がしているため、現時点ではこのように対応しました。
これをまとめたPythonコードは以下のとおりです。CustomTkinterを使用していますのでpipでPython環境に導入してください。
pip install customtkinterPythonコードはGUIに関する内容が多いですが処理自体は対して多くありません。
import customtkinter
import random
import math
import datetime
import torch
from torch import autocast
from diffusers import StableDiffusionPipeline, EulerAncestralDiscreteScheduler

def btn_click():
    model_id = "BracingEvoMix_v1.safetensors"
    pipe = StableDiffusionPipeline.from_ckpt(model_id,load_safety_checker = False,extract_ema = True,torch_dtype = torch.float16)
    pipe.scheduler = EulerAncestralDiscreteScheduler.from_config(pipe.scheduler.config)
    pipe.load_textual_inversion("sayakpaul/EasyNegative-test",weight_name="EasyNegative.safetensors", token="EasyNegative")

    pipe.to("cuda")

    prompt = prompt_data.get()
    negative_prompt = negative_prompt_data.get()
    if prompt == "":
        prompt = "((masterpiece:1.4, best quality)), ((masterpiece, best quality)),  (photo realistic:1.4), woman, female, Beautiful face, bright eyes,"
    if negative_prompt == "":
        negative_prompt = "Easy Negative (worst quality:2) (low quality:2) (normal quality:2) lowers normal quality ((monochrome)) ((grayscale)),nsfw, flat color, flat shading,retro style, poor quality, bad face, bad fingers, bad anatomy, missing fingers, low res, cropped, signature, watermark, username, artist name, text"


    generate = generate_data.get()
    if generate == "":
        generate = 10
    else:
        generate = int(generate)

    for i in range(generate):
        if (i == 0):
            seed = random.randrange(0, 4294967295, 1)
            scale = math.floor((random.uniform(6, 18))*100)/100
            steps = random.randrange(20, 60, 1)
        else:
            if (checkbox_seed.get() != 1):
                seed = random.randrange(0, 4294967295, 1)

            if (checkbox_scale.get() != 1):
                scale = math.floor((random.uniform(6, 18))*100)/100

            if (checkbox_steps.get() != 1):
                steps = random.randrange(20, 60, 1)

        with autocast("cuda"):
            generator = torch.Generator("cuda").manual_seed(seed)
            image = pipe(
                prompt = prompt,
                negative_prompt = negative_prompt,
                generator = generator,
                num_inference_steps = steps,
                guidance_scale = scale,
                width = 768,height = 768,).images[0]

        # タイムスタンプ
        t_delta = datetime.timedelta(hours=9)
        JST = datetime.timezone(t_delta, 'JST')
        now = datetime.datetime.now(JST)

        pict_name = f"{now.strftime('%Y%m%d%H%M%S')}_{scale}_{steps}_{seed}.png"
        image.save(pict_name)

customtkinter.set_appearance_mode("System")  # Modes: system (default), light, dark
customtkinter.set_default_color_theme("blue")  # Themes: blue (default), dark-blue, green

root = customtkinter.CTk()
root.geometry("550x400")
root.title("StableDiffusion GUI")

# プロンプト・ラベル
prompt_lbl = customtkinter.CTkLabel(root, text="プロンプト:(未入力時はデフォルト値で作成します)", width=60, justify="left", anchor="w")
prompt_lbl.place(relx=0.1, rely=0.05, relheight=0.1, relwidth=0.8)

# プロンプト入力テキスト
prompt_data = customtkinter.CTkEntry(root,placeholder_text="", width=20, height=25, border_width=2, corner_radius=6)
prompt_data.place(relx=0.1, rely=0.15, relheight=0.05, relwidth=0.8)

# ネガティブプロンプト・ラベル
negative_prompt_lbl = customtkinter.CTkLabel(root, text='ネガティブプロンプト:(未入力時はデフォルト値で作成します)', width=60, justify="left", anchor="w")
negative_prompt_lbl.place(relx=0.1, rely=0.25, relheight=0.1, relwidth=0.8)

# ネガティブ・プロンプト入力テキスト
negative_prompt_data = customtkinter.CTkEntry(root,placeholder_text="", width=25, height=25, border_width=2, corner_radius=6)
negative_prompt_data.place(relx=0.1, rely=0.35, relheight=0.05, relwidth=0.8)

# ラベル
generate_lbl = customtkinter.CTkLabel(root, text='生成枚数:(未入力時は10枚作成します)', width=60, justify="left", anchor="w")
generate_lbl.place(relx=0.1, rely=0.45, relheight=0.1, relwidth=0.8)

# 生成枚数入力テキスト
generate_data = customtkinter.CTkEntry(root,placeholder_text="", width=25, height=25, border_width=2, corner_radius=6)
generate_data.place(relx=0.1, rely=0.55, relheight=0.05, relwidth=0.3)

# seed値を初回のランダム以降は固定するチェックボックス
checkbox_seed = customtkinter.CTkCheckBox(root, text="Seedを固定する")
checkbox_seed.place(relx=0.1, rely=0.68, relheight=0.1, relwidth=0.3)

# scale値を初回のランダム以降は固定するチェックボックス
checkbox_scale = customtkinter.CTkCheckBox(root, text="Scaleを固定する")
checkbox_scale.place(relx=0.5, rely=0.68, relheight=0.1, relwidth=0.3)

# steps値を初回のランダム以降は固定するチェックボックス
checkbox_steps = customtkinter.CTkCheckBox(root, text="Stepを固定する")
checkbox_steps.place(relx=0.1, rely=0.78, relheight=0.1, relwidth=0.3)

# ボタン
btn = customtkinter.CTkButton(root, text='画像生成', command=btn_click)
btn.place(relx=0.7, rely=0.85, relheight=0.10, relwidth=0.20)

root.mainloop()
生成した画像ファイル(pngファイル)には作成日時とInference steps / Guidance scale / Seedが入ります。
今後拡張するとしたら一度生成した画像を選択するとプロンプト / Inference steps / Guidance scale / SeedをGUIに反映し、少し調整した後に画像生成すると変更前、変更後の画像が並んで表示されるなどの機能を追加すると、より便利になるかもしれません。
3. 作ったコードを動かす
Google ColaboratoryはGUI表示のTkinterが使用できないため、今回は以前の記事で紹介させていただいた「パソコンを利用する」で作成した環境を使います。
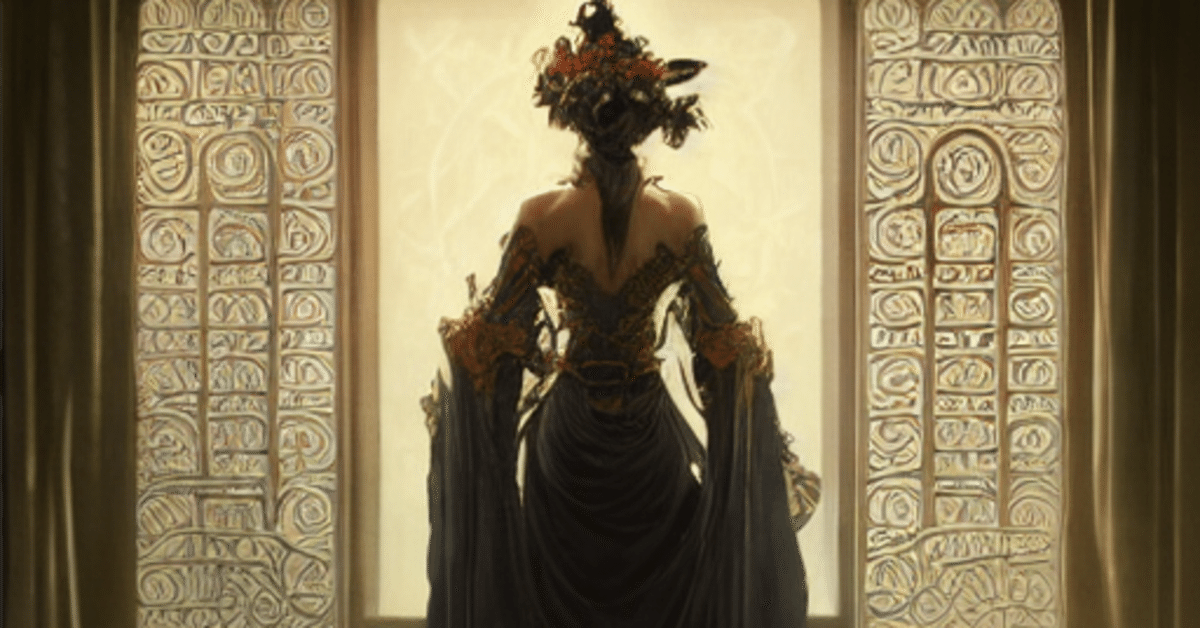
4. 1年前と同じプロンプトで画像生成する
以前にLexicaで見つけた以下のプロンプトを1年ぶりにBracingEvoMixで画像生成しました。
a photorealistic dramatic fantasy render of a beautiful woman wearing a beautiful intricately detailed magical mask and clasical japanese kimono by wlop, artgerm, greg rutkowski, alphonse mucha, beautiful dynamic dramatic dark moody lighting, shadows, cinematic atmosphere, artstation, concept design art, octane render, 8 k
1年前はInference steps / Guidance scale / Seedをランダムに与えて、100枚程度生成した中から自分のイメージに合っているものを選びました。
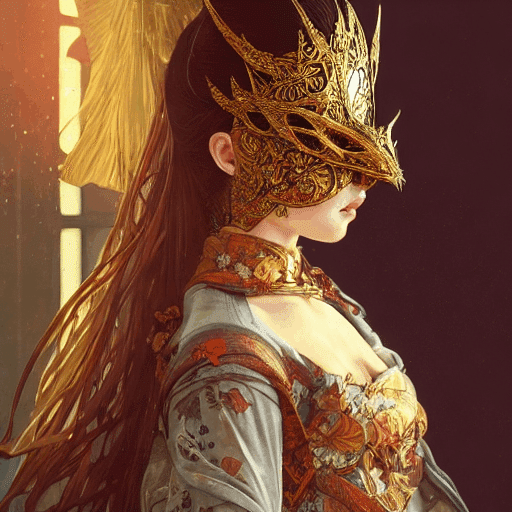
BracingEvoMixで作成するとこのようになりました。こちらは20枚生成した中から選んでいます。
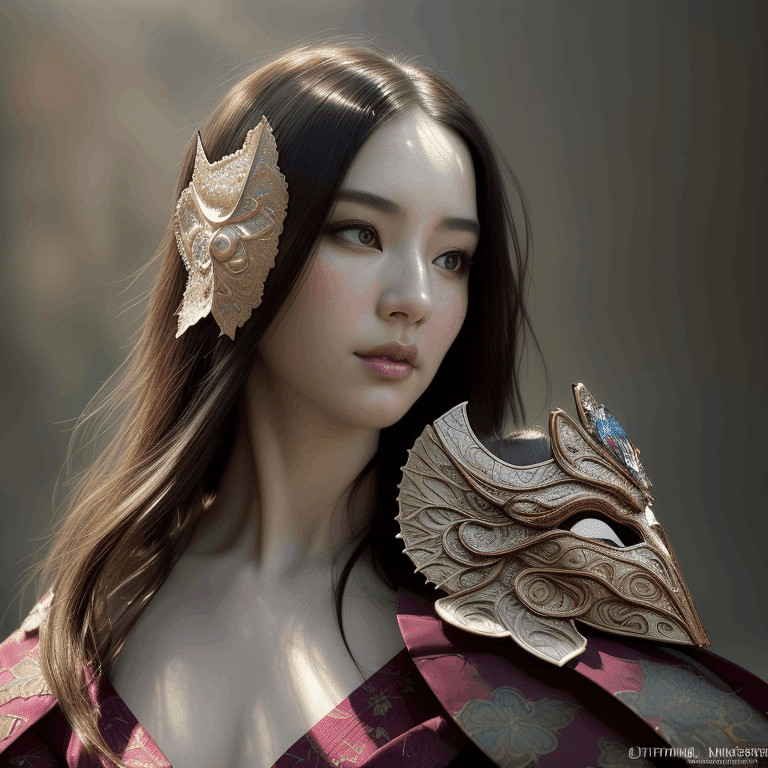
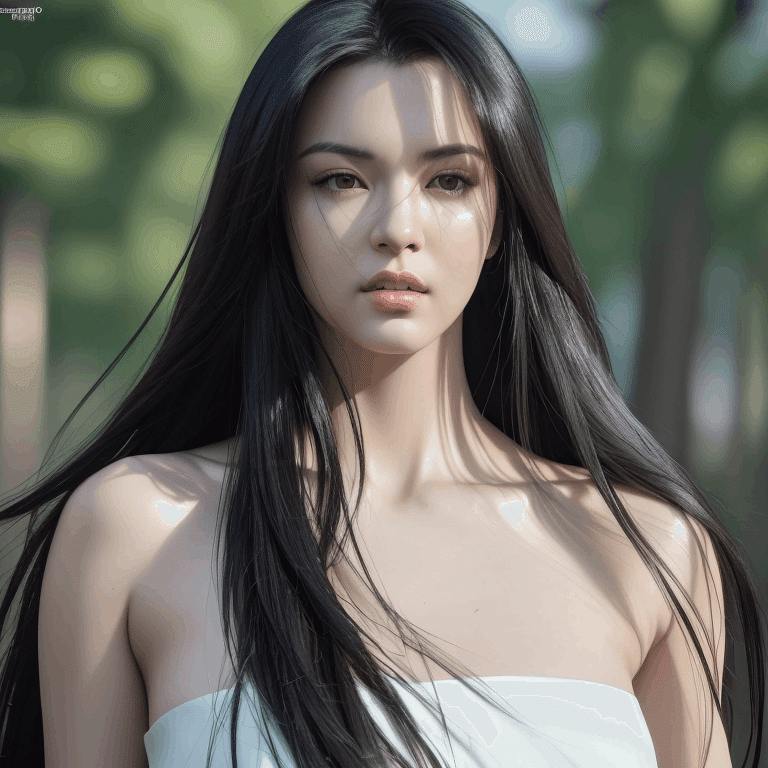
もう一枚やってみます。こちらも以前にランダムで100枚くらい出力した画像から選びました。
photo of a gorgeous female with long black hair in the style of stefan kostic, realistic, half body shot, sharp focus, 8 k high definition, insanely detailed, intricate, elegant, art by stanley lau and artgerm, cherry blossoms
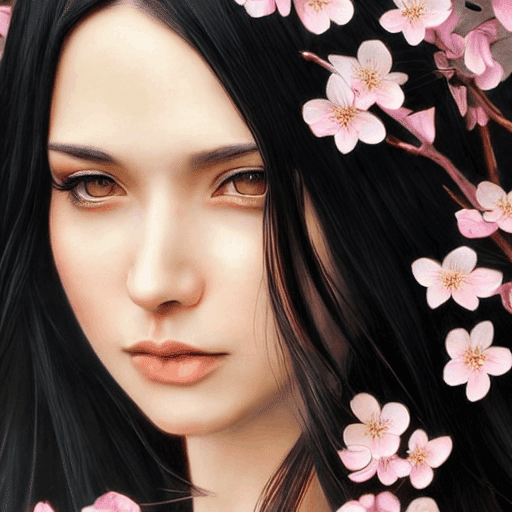
BracingEvoMixで作成するとこのようになりました。こちらは20枚生成した中から選んでいます。
また来年になりましたら、こちらに同じプロンプトで画像を追加したいと思います。
この記事が参加している募集
この記事が気に入ったらサポートをしてみませんか?