
【 WEBデザイン 】 コードハッピーセット 「タブメニュー」FIREへの旅路 ♯492

WEBサイトのデザイン、コーディングで頻出の機能のコードを、
HTML、CSS(SCSS) 、JavaScriptをセットでまとめていきます。
今回は、「タブメニュー」です。
【 タブメニュー 】

<HTML>
<!DOCTYPE html>
<html lang="ja">

<head>
    <meta charset="UTF-8">
    <meta http-equiv="X-UA-Compatible" content="IE=edge">
    <meta name="viewport" content="width=device-width, initial-scale=1.0">
    <title>タブメニュ</title>

    <!-- reset.css destyle -->
    <link rel="stylesheet" href="https://cdn.jsdelivr.net/npm/destyle.css@1.0.15/destyle.css" />

    <!-- css -->
    <link rel="stylesheet" href="/css/style.css">

    <!-- jQuery -->
    <script src="https://code.jquery.com/jquery-3.6.0.slim.js"
        integrity="sha256-HwWONEZrpuoh951cQD1ov2HUK5zA5DwJ1DNUXaM6FsY=" crossorigin="anonymous"></script>

</head>

<body>

    <div class="tab-container">
        <ul class="tab">
            <li class="tab1 open">tab1</li>
            <li class="tab2">tab2</li>
            <li class="tab3">tab3</li>
        </ul>


        <div class="tab1-inner open">
            タブ1
        </div>

        <div class="tab2-inner">
            タブ2
        </div>

        <div class="tab3-inner">
            タブ3
        </div>

    </div>


</body>
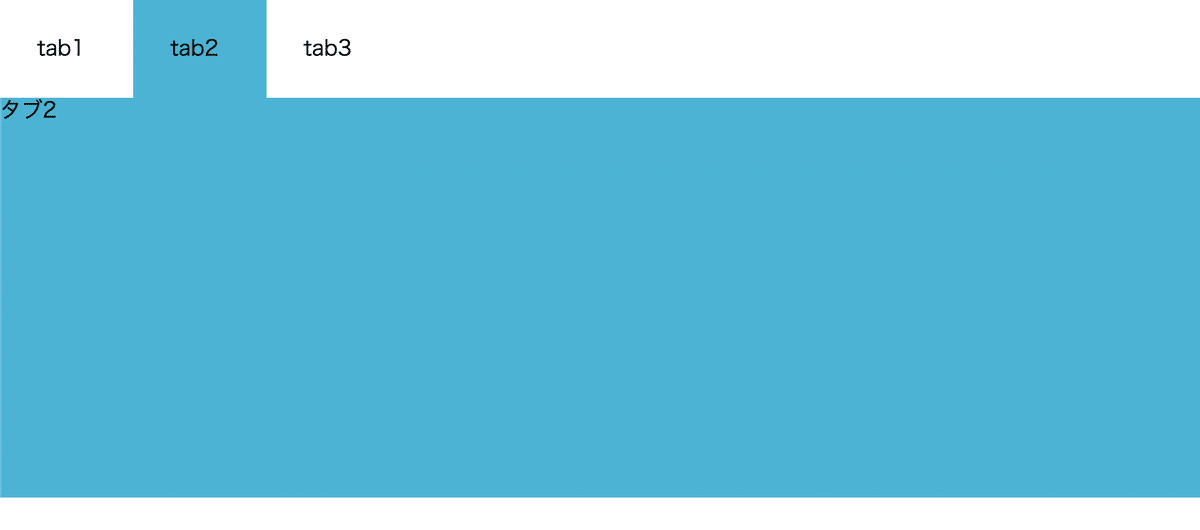
</html>tab1は、はじめから開いている状態にしていますので、
openクラスがついています。
.tab1-innerがタブの中身です。
<SCSS>
.tab-container{
    width: 100% ;


    ul.tab{
        display: flex;

        li{
            width: 100px;
            padding: 2%;
        }
    }

    .tab1-inner,.tab2-inner,.tab3-inner{
        display: none;
    }

    .tab1-inner.open{
        display: block;
        width: 100%;
        height: 300px;
        background-color: rgb(211, 77, 77);

    }

    .tab1.open{
        background-color: rgb(211, 77, 77);
    }

    .tab2-inner.open{
        display: block;
        width: 100%;
        height: 300px;
        background-color: rgb(77, 177, 211);
    }

    .tab2.open{
        background-color: rgb(77, 177, 211);
    }

    .tab3-inner.open{
        display: block;
        width: 100%;
        height: 300px;
        background-color: rgb(77, 211, 115);
    }

    .tab3.open{
        background-color: rgb(77, 211, 115);
    }

}.tab1-inner,.tab2-inner,.tab3-innerに、display:none;を指定し、通常時は表示しません。
表示される条件は、openクラスが付与された時です。
これをjQueryで制御します。
<コンパイル後CSS>
.tab-container {
  width: 100%;
}

.tab-container ul.tab {
  display: -webkit-box;
  display: -ms-flexbox;
  display: flex;
}

.tab-container ul.tab li {
  width: 100px;
  padding: 2%;
}

.tab-container .tab1-inner, .tab-container .tab2-inner, .tab-container .tab3-inner {
  display: none;
}

.tab-container .tab1-inner.open {
  display: block;
  width: 100%;
  height: 300px;
  background-color: #d34d4d;
}

.tab-container .tab1.open {
  background-color: #d34d4d;
}

.tab-container .tab2-inner.open {
  display: block;
  width: 100%;
  height: 300px;
  background-color: #4db1d3;
}

.tab-container .tab2.open {
  background-color: #4db1d3;
}

.tab-container .tab3-inner.open {
  display: block;
  width: 100%;
  height: 300px;
  background-color: #4dd373;
}

.tab-container .tab3.open {
  background-color: #4dd373;
}
/*# sourceMappingURL=style.css.map */
<JavaScript( jQuery )>
    <script>

        $(".tab1").click(function () {
            $(this).addClass('open');
            $(".tab1-inner").addClass('open');
            $('.tab2-inner,.tab3-inner,.tab2,.tab3').removeClass('open');
        });

        $(".tab2").click(function () {
            $(this).addClass('open');
            $(".tab2-inner").addClass('open');
            $('.tab1-inner,.tab3-inner,.tab1,.tab3').removeClass('open');
        });

        $(".tab3").click(function () {
            $(this).addClass('open');
            $(".tab3-inner").addClass('open');
            $('.tab2-inner,.tab1-inner,.tab2,.tab1').removeClass('open');
        });

    </script>
.tab1 がクリックされた時、クラスを追加( addclass )する。
class名は、open です。
.tab1-inner にも、openクラスを追加する。
この時に、.tab2,.tab3,.tab2-inner,.tab3-innerのopenクラスは
外す( remove )
これで、タブメニュの内部はひとつ開いたら、他は閉じます。
【 まとめ 】
タブメニュのコードセットでした。
シンプルな構成ですので、おしゃれにカスタマイズしましょう。
この記事が気に入ったらサポートをしてみませんか?