
OpenCV for Unity入門 (3) - 図形の描画

「OpenCV for Unity」での図形の描画方法をまとめました。
前回
1. テクスチャの準備
(1) 「Assets/Resources/Textures/」に256x256の白い画像「Image.png」を追加。
(2) 「Image.png」を選択し、「Read/Write Enabled」をチェック。
2. ラインの描画
(1) HierarchyウィンドウでCanvasとRawImageを追加。

(2) RawImageにスクリプト「Sample.cs」を追加。
using UnityEngine;
using UnityEngine.UI;
using OpenCVForUnity.CoreModule;
using OpenCVForUnity.UnityUtils;
using OpenCVForUnity.ImgprocModule;

public class Sample : MonoBehaviour
{
    RawImage rawImage;
    WebCamTexture webCamTexture;

    void Start()
    {
        // Texture2Dの読み込み
        Texture2D texture = (Texture2D)Resources.Load("Textures/Image") as Texture2D;

        // Texture2D → Mat
        Mat img = texture2DToMat(texture);

        // ラインの描画
        Imgproc.line(img, new Point(0,0), new Point(255, 255),
            new Scalar(255, 0, 0), 5);

        // Mat → Texture2D
        GetComponent<RawImage>().texture = matToTexture2D(img);
    }

    // Texture2D → Mat
    Mat texture2DToMat(Texture2D texture) {
        Mat mat = new Mat(texture.height, texture.width, CvType.CV_8UC3);
        Utils.texture2DToMat(texture, mat);
        return mat;
    }

    // Mat → Texture2D
    Texture2D matToTexture2D(Mat mat) {
        Texture2D texture = new Texture2D(mat.cols(), mat.rows(), TextureFormat.RGBA32, false);
        Utils.matToTexture2D(mat, texture);
        return texture;
    }
}
(3) Playボタンで実行。
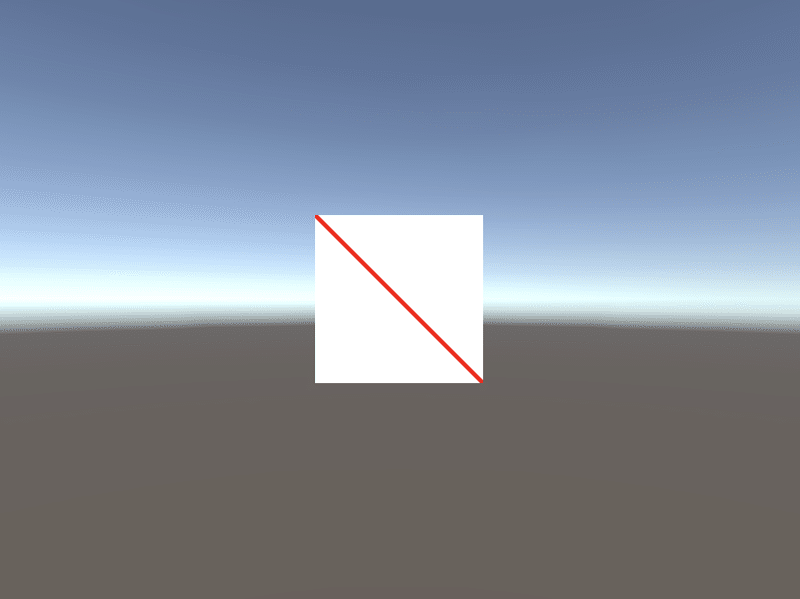
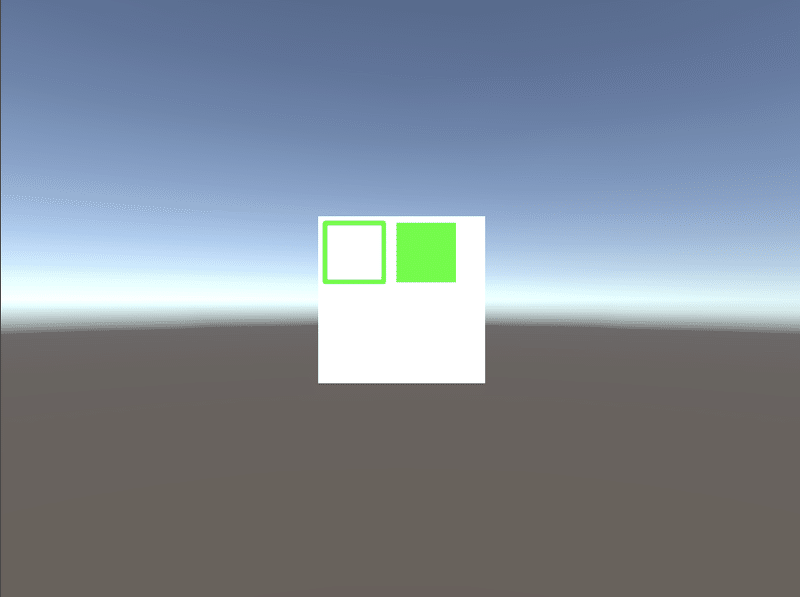
3. 矩形の描画
(1) 以下のように変更。
// 矩形の描画
Imgproc.rectangle(img, new Point(10, 10), new Point(100, 100),
    new Scalar(0, 255, 0, 255), 5);

// 塗り潰し矩形の描画
Imgproc.rectangle(img, new Point(120, 10), new Point(210, 100),
    new Scalar(0, 255, 0, 255), -1);
(2) Playボタンで実行。
4. 円の描画
(1) 以下のように変更。
// 円の描画
Imgproc.circle(img, new Point(40, 40), 30,
    new Scalar(255, 0, 0), 5);

// 塗り潰し円の描画
Imgproc.circle(img, new Point(150, 40), 30,
    new Scalar(255, 0, 0), -1);
(2) Playボタンで実行。

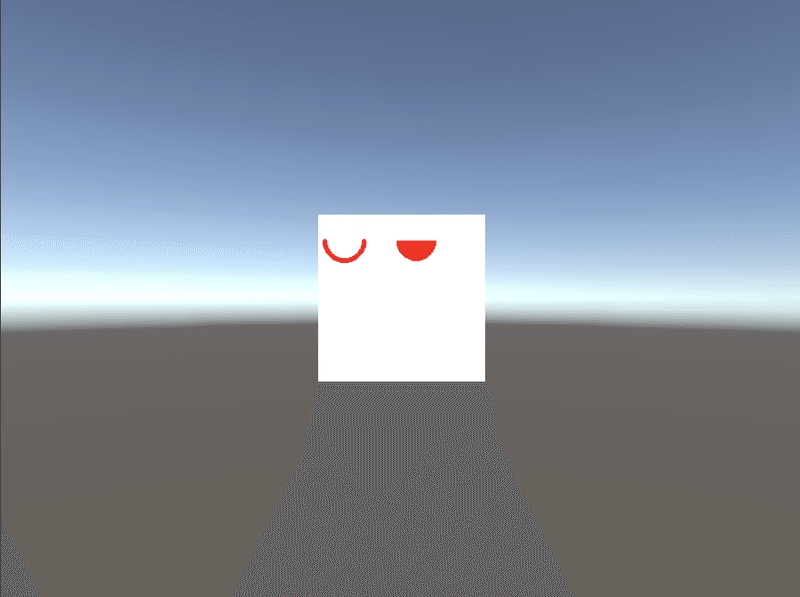
5. 楕円の描画
(1) 以下のように変更。
// 楕円の描画
Imgproc.ellipse(img, new Point(40, 40), new Size(30, 30), 0, 0, 180,
    new Scalar(255, 0, 0), 5);

// 塗り潰し楕円の描画
Imgproc.ellipse(img, new Point(150, 40), new Size(30, 30), 0, 0, 180,
    new Scalar(255, 0, 0), -1);
(2) Playボタンで実行。
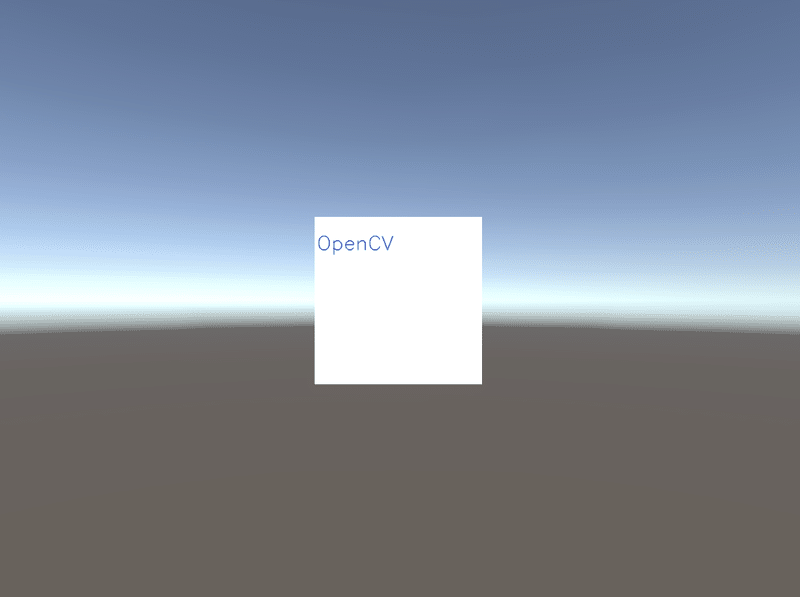
6. テキストの描画
(1) 以下のように変更。
// テキストの描画
Imgproc.putText(img, "OpenCV", new Point(3, 50),
    Imgproc.FONT_HERSHEY_SIMPLEX, 1.0,
    new Scalar(0, 0, 255), 1, Imgproc.LINE_AA, false);
(2) Playボタンで実行。
この記事が気に入ったらサポートをしてみませんか?