
OpenCV plus Unity 入門 (1) - 事始め
「OpenCV plus Unity」の使い方をまとめました。
・Unity 2019.4
1. OpenCV plus Unity
「OpenCV plus Unity」は、無料で利用できるUnity用の「OpenCV」アセットです。
OpenCVのC#版である「OpenCVSharp」をベースにしています。
APIリファレンスは以下で参照できます。
2. インストール
(1) AssetStoreで「OpenCV plus Unity」のダウンロードとインストール。

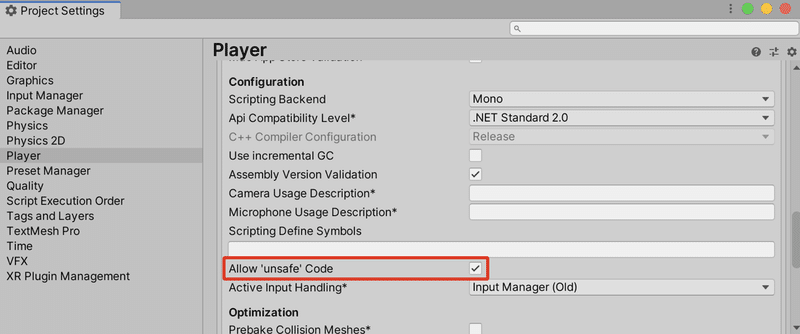
(2) メニュー「Edit → Project Settings → Player → Other → Other Settings → Configuration」の「Allow 'unsafe' Code」をチェック。
3. グレースケールへの変換
◎ テクスチャの準備
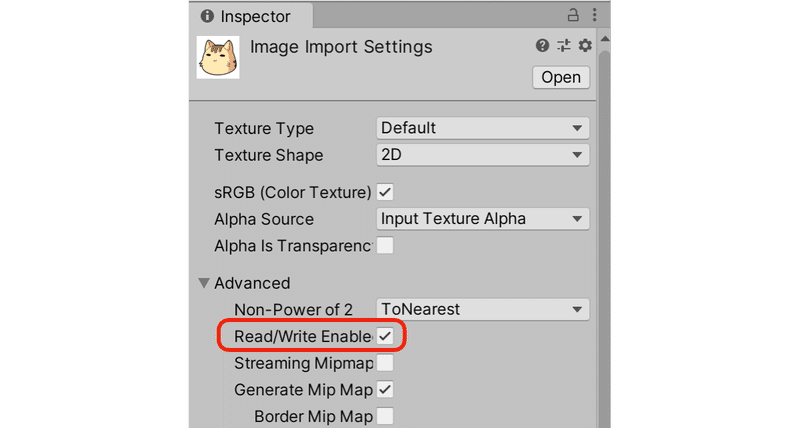
(1) 「Assets/Resources/Textures/」に「Image.png」を追加。

(2) 「Image.png」を選択し、「Read/Write Enabled」をチェック。
◎ コードの準備
(1) HierarchyウィンドウでCanvasとRawImageを追加。

(2) RawImageにスクリプト「Sample.cs」を追加。
using UnityEngine;
using UnityEngine.UI;
using OpenCvSharp;

public class Sample : MonoBehaviour
{
    // 初期化
    void Start()
    {
        // Texture2Dの読み込み
        Texture2D srcTexture = (Texture2D)Resources.Load("Textures/Image") as Texture2D;

        // Texture2D → Mat
        Mat srcMat = OpenCvSharp.Unity.TextureToMat(srcTexture);

        // グレースケールへの変換
        Mat grayMat = new Mat();
        Cv2.CvtColor(srcMat, grayMat, ColorConversionCodes.RGBA2GRAY);

        // Mat → Texture2D
        Texture2D dstTexture = OpenCvSharp.Unity.MatToTexture(grayMat);

        // 表示
        GetComponent<RawImage>().texture = dstTexture;
    }
}
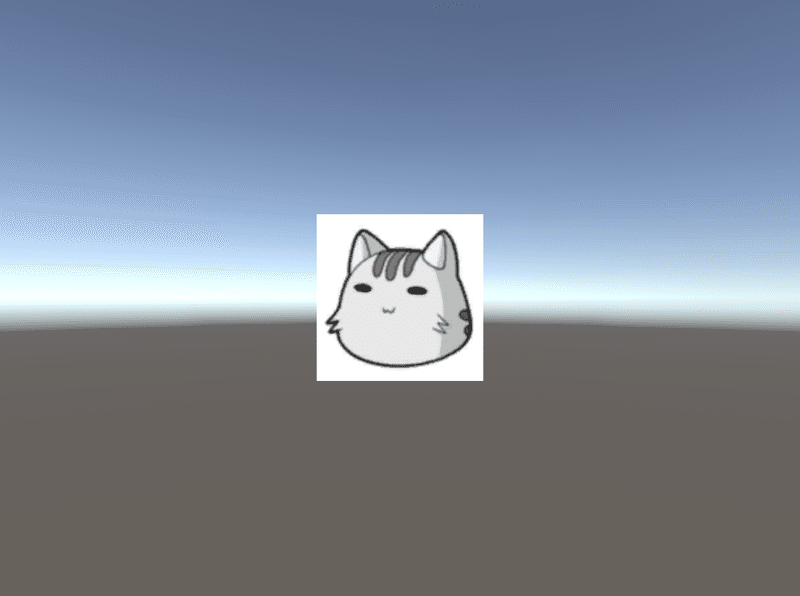
(3) Playボタンで実行。
4. Webカメラのグレースケールへの変換
(1) RawImageのスクリプト「Sample.cs」を以下のように変更。
using UnityEngine;
using UnityEngine.UI;
using OpenCvSharp;

public class Sample : MonoBehaviour
{
    WebCamTexture webCamTexture;
    Texture2D dstTexture;

    // 初期化
    void Start()
    {
        // Webカメラの開始
        this.webCamTexture = new WebCamTexture(256, 256, 30);
        this.webCamTexture.Play();
    }

    // フレーム毎に呼ばれる
    void Update()
    {
        // Webカメラ準備前は無処理
        if (this.webCamTexture ==null ||
            this.webCamTexture.width <= 16 || this.webCamTexture.height <= 16) return;

        // WebCamTexture → Mat
        Mat srcMat = OpenCvSharp.Unity.TextureToMat(this.webCamTexture);

        // グレースケールへの変換
        Mat grayMat = new Mat();
        Cv2.CvtColor(srcMat, grayMat, ColorConversionCodes.RGBA2GRAY);

        // Mat → Texture2D
        if (this.dstTexture == null)
        {
            this.dstTexture = new Texture2D(grayMat.Width, grayMat.Height, TextureFormat.RGBA32, false);
        }
        OpenCvSharp.Unity.MatToTexture(grayMat, this.dstTexture);

        // 表示
        GetComponent<RawImage>().texture = this.dstTexture;
    }
}
【注意】 Textureは明示的なメモリ開放が必要なため、不必要になったら破棄が必要。
・Texture2D.Destroy(texture)
・WebCamTexture.Destroy(webCamTexture)
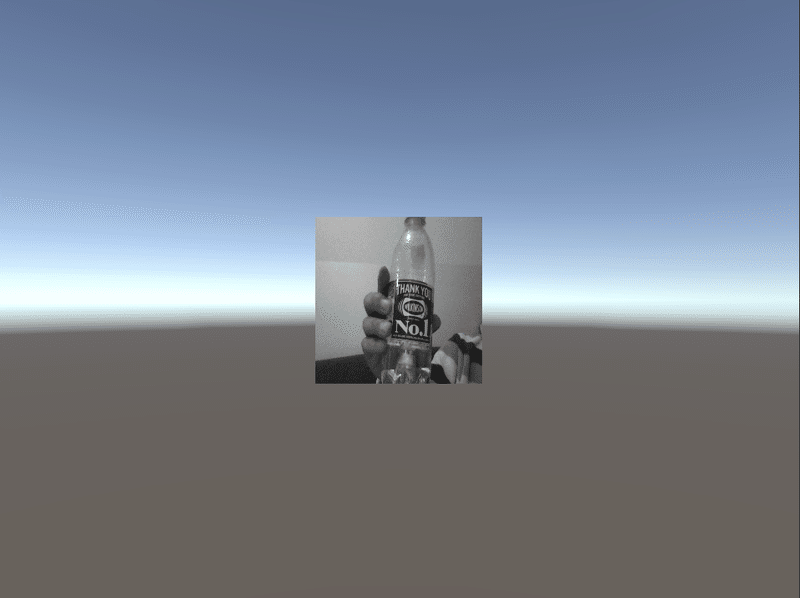
(2) Playボタンで実行。
5. iOSカメラのグレースケールへの変換
(1) メニュー「File → Build Settings」でiOSにスイッチ。
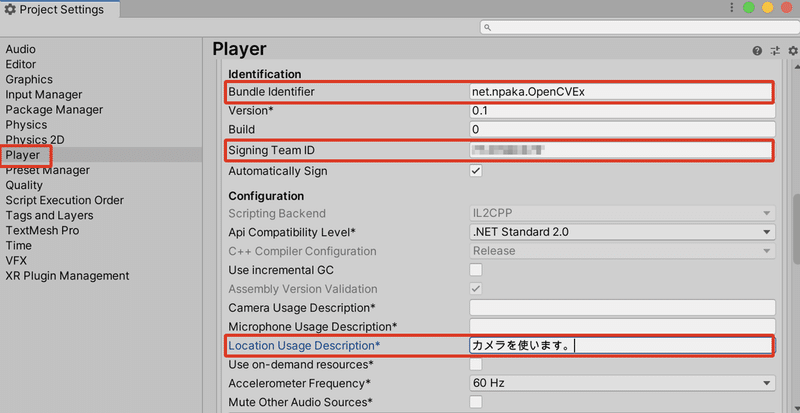
(2) メニュー「Edit → Project Settings → Player → Other Settings」で以下を設定。
・Bundle Identifier : iOSアプリのバンドルID
・Signing Team ID : 開発者アカウントのチームID
・Location Usable Description : カメラ用途の説明文。
チームIDは以下の「Membership → Team ID」で確認します。https://developer.apple.com/account/#/membership/
(3) カメラ利用の許可をユーザーに求める処理を追加。
using UnityEngine;
using UnityEngine.UI;
using System.Collections;
using System.Collections.Generic;
using OpenCvSharp;

public class Sample : MonoBehaviour
{
    WebCamTexture webCamTexture;
    Texture2D dstTexture;

    // 初期化
    private IEnumerator Start()
    {
        // カメラ利用の許可をユーザーに求める
        yield return Application.RequestUserAuthorization(UserAuthorization.WebCam);

        // ユーザー許可の確認
        if (!Application.HasUserAuthorization(UserAuthorization.WebCam))
        {
            yield break;
        }

        // カメラデバイス数の確認
        if (WebCamTexture.devices.Length == 0)
        {
            yield break;
        }

        // Webカメラの開始
        WebCamDevice userCameraDevice = WebCamTexture.devices[0];
        this.webCamTexture = new WebCamTexture(userCameraDevice.name, 256, 256, 30);
        this.webCamTexture.Play();
    }

    // フレーム毎に呼ばれる
    void Update()
    {
        // Webカメラ準備前は無処理
        if (this.webCamTexture ==null ||
            this.webCamTexture.width <= 16 || this.webCamTexture.height <= 16) return;

        // WebCamTexture → Mat
        Mat srcMat = OpenCvSharp.Unity.TextureToMat(this.webCamTexture);

        // グレースケールへの変換
        Mat grayMat = new Mat();
        Cv2.CvtColor(srcMat, grayMat, ColorConversionCodes.RGBA2GRAY);

        // Mat → Texture2D
        if (this.dstTexture == null)
        {
            this.dstTexture = new Texture2D(grayMat.Width, grayMat.Height, TextureFormat.RGBA32, false);
        }
        OpenCvSharp.Unity.MatToTexture(grayMat, this.dstTexture);

        // 表示
        GetComponent<RawImage>().texture = this.dstTexture;
    }
}
6. 参考
次回
この記事が気に入ったらサポートをしてみませんか?
