
TensorFlow.js 入門 / 画像分類

「TensorFlow.js」を使って、ブラウザで「画像分類」を行います。Chromeで動作確認しています。
1. 画像分類
「TensorFlow.js」による画像分類のコードは、次のとおり。
<!-- TensorFlow.jsの読み込み -->
<script src="https://cdn.jsdelivr.net/npm/@tensorflow/tfjs@1.0.1"> </script>
<!-- MobileNetモデルの読み込み -->
<script src="https://cdn.jsdelivr.net/npm/@tensorflow-models/mobilenet@1.0.0"> </script>
<!-- テストに使用する画像 -->
<img id="img" src="cat.jpg"></img>
<script>
// 画像の取得
const img = document.getElementById('img')
// モデルの読み込み
mobilenet.load().then(model => {
// 画像分類
model.classify(img).then(predictions => {
console.log('Predictions: ', predictions)
})
})
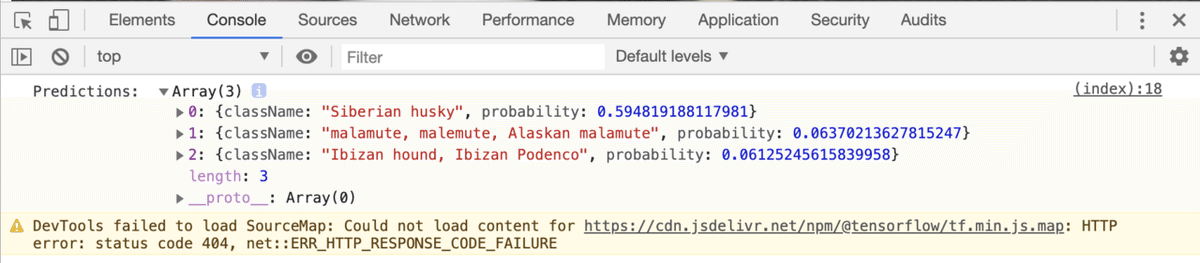
</script>用意した画像(cat.jpg)に応じて、JavaScriptコンソールに次のような結果が出力されます。
2. パッケージのインポート
<script>でパッケージをインポートします。
<!-- TensorFlow.jsの読み込み -->
<script src="https://cdn.jsdelivr.net/npm/@tensorflow/tfjs@1.0.1"> </script>

<!-- MobileNetモデルの読み込み -->
<script src="https://cdn.jsdelivr.net/npm/@tensorflow-models/mobilenet@1.0.0"> </script>
3. 画像分類モデルの読み込み
画像分類モデル(MobileNet)の読み込みを行うには、mobilenet.load()を使います。
mobilenet.load({
    version: 1,
    alpha?: 0.25 | .50 | .75 | 1.0,
    modelUrl?: string
    inputRange?: [number, number]
  }
)・version : MobileNetのバージョンを指定。 (1 / 2, デフォルト:1)
・alpha : ネットワーク幅を指定。小さくすると精度が低下し、パフォーマンスが向上する。0.25はV1でのみ使用できる。デフォルトは1.0。
・modelUrl : モデルのカスタムURLを指定。
・inputRange : modelUrlでホストされる訓練済みモデルが予期するピクセル値の範囲を指定。[0, 1]または[-1, 1]。
4. 画像分類の実行
画像分類を実行するには、model.classify()を使います。
model.classify(
  img: tf.Tensor3D | ImageData | HTMLImageElement | HTMLCanvasElement | HTMLVideoElement,
  topk?: number
)・img : 分類を行うテンソル、または画像要素。
・topk : 返す上位確率の数。デフォルトは3。
結果は次のように出力されます。
[{
  className: "Egyptian cat",
  probability: 0.8380282521247864
}, {
  className: "tabby, tabby cat",
  probability: 0.04644153267145157
}, {
  className: "Siamese cat, Siamese",
  probability: 0.024488523602485657
}]
5. 転移学習
画像を埋め込んで転移学習を行うこともできます。埋め込みのサイズは、モデルのalpha(幅)によって異なります。
model.infer(
  img: tf.Tensor3D | ImageData | HTMLImageElement | HTMLCanvasElement | HTMLVideoElement,
  embedding = false
)・img : 分類を行うテンソル、または画像要素。
・embedding : trueの場合、埋め込みを返す。それ以外の場合は、1000次元の非正規化ロジットを返す。
6. Webカメラを使った画像分類
Webカメラを使った画像分類の例は、次のとおり。
<html>
  <head>
    <!-- TensorFlow.jsの読み込み -->
    <script src="https://cdn.jsdelivr.net/npm/@tensorflow/tfjs@1.0.1"> </script>

    <!-- MobileNetモデルの読み込み -->
    <script src="https://cdn.jsdelivr.net/npm/@tensorflow-models/mobilenet@1.0.0"> </script>

    <script>
      // 画像分類の開始
      const startClassify = () => {
        mobilenet.load()
          .then(model => {
            const webcamElement = document.getElementById('webcam')
            window.requestAnimationFrame(onFrame.bind(null, model, webcamElement))
          })
      }

      // フレーム毎に呼ばれる
      const onFrame = async (model, webcamElement) => {
        // 画像分類
        const tensor = tf.browser.fromPixels(webcamElement)
        const predictions = await model.classify(tensor)
        console.log('Predictions: ', predictions)

        // 出力
        const labelElement = document.querySelector('#label')
        labelElement.innerHTML = `<p>${predictions[0].className}</p>`

        // 次フレーム
        setTimeout(() => {
          window.requestAnimationFrame(onFrame.bind(null, model, webcamElement))
        }, 100)
      }

      // Webカメラの開始
      const constraints = {
        audio: false,
        video: true
      }
      navigator.mediaDevices.getUserMedia(constraints)
        // 成功時に呼ばれる
        .then((stream) => {
            const video = document.querySelector('video')
            video.srcObject = stream

            // 画像分類の開始
            startClassify()
        })
        // エラー時に呼ばれる
        .catch((error) => {
            const errorMsg = document.querySelector('#errorMsg')
            errorMsg.innerHTML += `<p>${error.name}</p>`
        })
    </script>
  </head>
  <body>
    <video id="webcam" width="320" height="240" autoplay playsinline></video>
    <div id="label"></div>
    <div id="errorMsg"></div>
  </body>
</html>
7. Node.jsを使った画像分類
◎ プロジェクトの作成
$ mkdir classificationex
$ cd classificationex
$ npm init -y
◎ パッケージのインポート
$ npm install @tensorflow/tfjs-node
$ npm install @tensorflow-models/mobilenet
$ npm install jpeg-js
◎ コードの記述
(async () => {
  // パッケージのインポート
  require('@tensorflow/tfjs-node');
  const mobilenet = require('@tensorflow-models/mobilenet');
  const fs = require('fs');
  const jpeg = require('jpeg-js');

  // 画像の読み込み
  const readImage = path => {
    const buf = fs.readFileSync(path)
    const pixels = jpeg.decode(buf, true)
    return pixels
  }

  // 画像の読み込み
  const img = readImage('cat.jpg')

  // モデルの読み込み
  const model = await mobilenet.load();

  // 分類
  const predictions = await model.classify(img);

  // 出力
  console.log('Predictions:', predictions);
})().catch((err) => console.error(err));
◎ コードの実行
$ node index.js
この記事が気に入ったらサポートをしてみませんか?