myCobot 入門 (3) - Unityによる操作

「myCobot」のUnityによる操作方法をまとめました。 (2022年版)
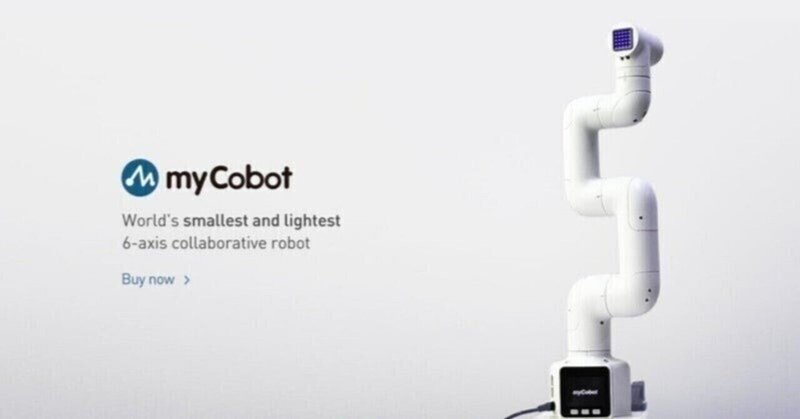
・myCobot-280
・Mycobot.csharp v1.2
前回
1. Mycobot.csharp
「myCobot」をUnityで操作するには、「Mycobot.csharp」を使います。
2. Unity側の準備
Unity側の準備の手順は、次のとおりです。
(1) Unityのプロジェクトを作成。
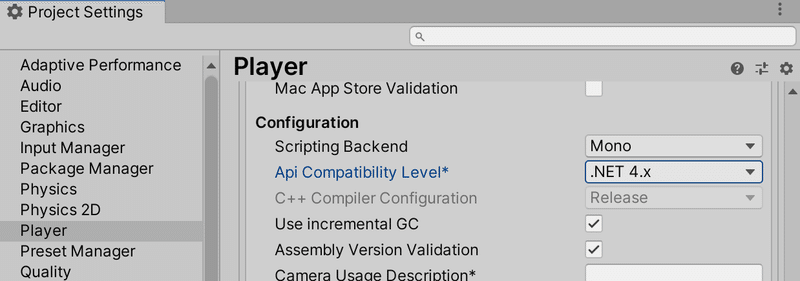
(2) Unityのメニュー「Edit → Project Settings → Player → Other Settings」の「API Compatibility Level」に「.Net 4.x」を指定。
(3) 以下からMyCobot.csを取得し、プロジェクトのAssetsに配置。
3. myCobot側の準備
(1) 「M5Stack Basic」とPCをUSBケーブルで繋ぐ。
(2) 「minirobot」で「Transponder」を選択して Transponderを開く。
4. 関節の角度の変更
関節の角度を変更するコードは、次のとおりです。
(1) Hierarchyウィンドウに空のGameObjectを追加し、新規スクリプト「Main.cs」を追加して編集。
using System.Collections;
using System.Collections.Generic;
using UnityEngine;
using System;
using System.Threading;
using Mycobot.csharp;

public class Main : MonoBehaviour
{
    void Start()
    {
        // myCobotとの接続
        MyCobot mc = new MyCobot("/dev/cu.SLAB_USBtoUART"); // 自身のUSBポートを指定
        mc.Open();
        Thread.Sleep(5000);

        // 関節の角度の変更
        mc.SendOneAngle(1, 10, 80);
        Thread.Sleep(100);

        // myCobotとの切断
        mc.Close();
    }
}
◎ myCobotとの接続
ポートは、前回のPythonコードのsetup()で調べることができます。
また、Open()後にWindowsのシリアルポート接続時にBASICが再起動するとのことで、5秒待待機しています。
関節の角度の変更は、send_angle(id, degree, speed)を使います。
SendOneAngle(id, degree, speed) : 関節の角度の変更
・id : 関節ID (int, 1〜6)
・degree : 関節の角度 (float, -170~170)
・speed : 速度 (int, 0~100)
5. 複数の関節の角度の変更
複数の関節の角度を変更するコードは、次のとおりです。
using System.Collections;
using System.Collections.Generic;
using UnityEngine;
using System;
using System.Threading;
using Mycobot.csharp;

public class Main : MonoBehaviour
{
    void Start()
    {
        // myCobotとの接続
        MyCobot mc = new MyCobot("/dev/cu.SLAB_USBtoUART"); // 自身のUSBポートを指定
        mc.Open();
        Thread.Sleep(5000);

        // 複数の関節の角度の変更
        int[] angles = new[] {0, 0, 0, 0, 0, 0};
        mc.SendAngles(angles, 50);
        Thread.Sleep(1000);

        // myCobotとの切断
        mc.Close();
    }
}複数の関節の角度の変更は、SendAngles(degrees, speed)を使います。
SendAngles(degrees, speed) : 複数の関節の角度の変更
・degree : 関節の角度のリスト ([float], -170~170, 長さ6)
・speed : 速度 (int, 0~100)
6. その他のAPI
「MyCobot.cs」のコードで確認できます。
MyCobot(port, baud) : コンストラクタ。
・port : ポート (str)
・baud : ボーレート (int, デフォルト115200)
IsOpen : myCobotと接続しているかどうか
・戻り値 : myCobotと接続しているかどうか (bool)
Open() : myCobotとの接続 (bool)
・戻り値 : myCobotと接続しているかどうか (bool)
Close() : myCobotとの接続
PowerOn() : 電源オン。
PowerOff() : 電源オフ。
SendOneAngle(id, degree,speed) : 関節の角度(度)の変更。
・id : 関節ID (int, 1〜6)
・degree : 関節の角度 (int, -180~180, 度)
・speed : 速度 (int, 0~100)
SendAngles(degrees, speed) : 複数関節の角度(度)の変更。
・degree : 関節の角度のリスト ([int], -180~180, 度, 長さ6)
・speed : 速度 (int, 0~100)
GetAngles() : 関節の角度のリストの取得。
・戻り値 : 関節の角度のリスト ([int], -180~180, 度, 長さ6)
SendOneCoord(coord, value, speed) : 座標の変更。
・coord : 座標ID (int)
・value : 座乗値 (int)
・speed : 速度 (int, 0~100)
SendCoords(coords, speed, mode) : 複数の座標の変更。
・coords : 座標のリスト ([int])
・speed : 速度 (int, 0~100)
・mode : モード (int)
・0 : angluar
・1 : linear
GetCoords() : 座標の取得
・戻り値 : 座標のリスト ([int], [x, y, z, rx, ry, rz])
SetBasicOut(pin_number, signal) : BASICのIO出力
・pin_number : ピンNo (byte)
・signal: ピンシグナル (byte, 0 / 1)
GetBasicIn(pin_number) : BASICのIO入力。
・pin_number : ピンNo (byte)
・戻り値 : ピンシグナル (int, 0 / 1)
SetDigitalOut(pin_no, pin_signal) : デジタル出力の指定
・pin_no : ピンNo (byte)
・pin_signal : ピンシグナル (byte, 0 / 1)
GetDigitalIn(pin_no) : デジタル入力の取得
・pin_no : ピンNo (byte)
・戻り値 : ピンシグナル (int, 0 / 1)
getGripperValue() : グリッパー値の取得
・戻り値 : グリッパー値 (int)
setGripperValue(value, speed) : グリッパー値の指定
・value : グリッパー値 (int, 0~4096)
・speed : 速度 (int, 0~100)
setEletricGripper(state) : グリッパー状態の指定
・state : グリッパー状態 (int, 0:open, 1:close)
次回
この記事が気に入ったらサポートをしてみませんか?