
オリジナルデータセットで Idefics2 のファインチューニングを試す

オリジナルデータセットで高性能なオープンVLM「Idefics2」のファインチューニングを試したので、まとめました。
【注意】Google Colab Pro/Pro+のV100で動作確認しています。
前回
1. Idefics2
「Idefics2」は、テキストと画像を入力し、テキストを出力するマルチモーダルモデルです。画像の質問応答、視覚的コンテンツの説明、複数画像をもとに物語作成、文書からの情報抽出などを実行できます。
前回は提供されているデータセットで学習しましたが、今回はオリジナルデータセットを作って学習させてみます。
2. データセットの作成
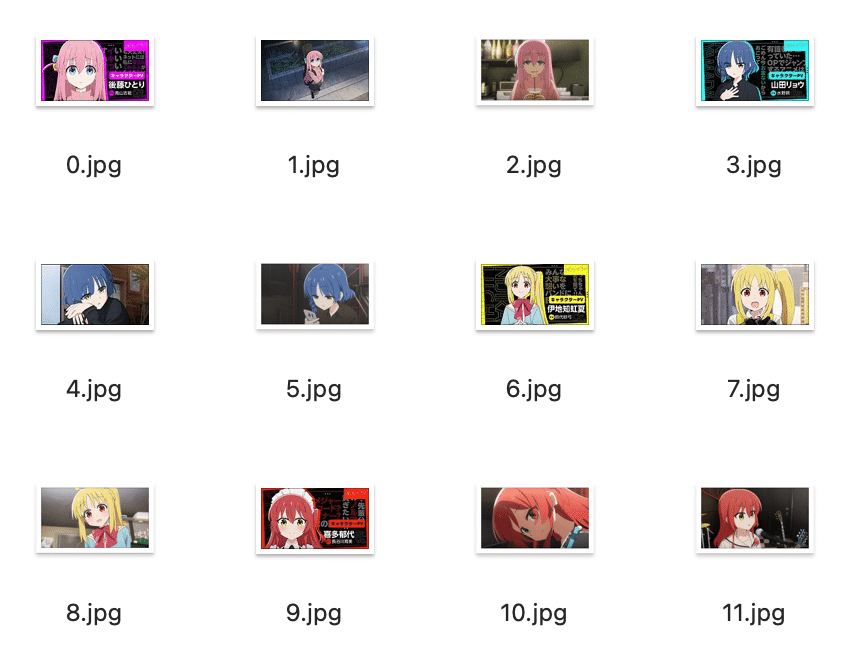
画像に写っているキャラクターの名前を学習するためのデータセットを作成します。
2-1. データの準備
今回は、結束バンドのメンバー4名の画像を学習用に3枚ずつ、評価用に1枚ずつあつめて、名前といっしょに学習させます。
画像サイズは 980x980px以下 にします。
・学習用データ
・評価用データ

2-2. データセットの作成
データセットの作成手順は、次のとおりです。
(1) Colabのノートブックを開き、メニュー「編集 → ノートブックの設定」で「GPU」の「V100」を選択。
(2) パッケージのインストール。
# パッケージのインストール
!pip install -q git+https://github.com/huggingface/transformers.git
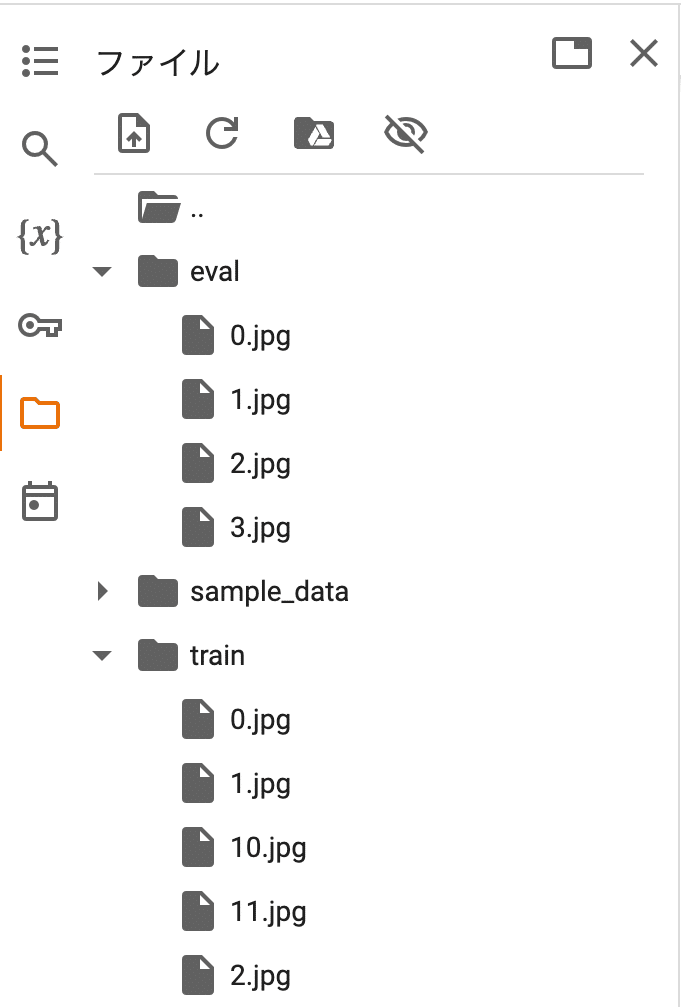
!pip install -q accelerate datasets peft bitsandbytes(3) 学習データをColabにアップロード。
左端のフォルダアイコンでファイル一覧を表示し、trainフォルダとevalフォルダを作成し、学習データと評価データをアップロードします。
(4) 学習データセットの作成。
imageにPIL画像、queryに質問、answerに応答を記述します。
from PIL import Image
from datasets import Dataset

# キャラクター名
names = [
    "後藤ひとり",
    "山田リョウ",
    "伊地知虹夏",
    "喜多郁代",
]

# 学習データの準備
image = []
query = []
answer = []
for i in range(12):
    image.append(Image.open("train/" + str(i) + ".jpg"))
    query.append("このキャラクターの名前は?")
    answer.append("このキャラクターの名前は" + names[int(i/3)] + "です。")

# 学習データセットの作成
train_dataset = Dataset.from_dict({
    "image": image,
    "query": query,
    "answer": answer
})
print(train_dataset)Dataset({
features: ['image', 'query', 'answer'],
num_rows: 12
})(5) 評価データセットの作成。
# 評価データの作成
image = []
query = []
answer = []
for i in range(4):
    image.append(Image.open("eval/" + str(i) + ".jpg"))
    query.append("このキャラクターの名前は?")
    answer.append("このキャラクターの名前は" + names[i] + "です。")

# 評価データセットの作成
eval_dataset = Dataset.from_dict({
    "image": image,
    "query": query,
    "answer": answer
})
print(eval_dataset)Dataset({
features: ['image', 'query', 'answer'],
num_rows: 4
})3. 学習
Colabでの学習手順は、次のとおりです。
(1) プロセッサーとモデルの準備。
import torch
from peft import LoraConfig
from transformers import AutoProcessor, BitsAndBytesConfig, Idefics2ForConditionalGeneration

# パラメータ
DEVICE = "cuda:0"
USE_LORA = False
USE_QLORA = True

# プロセッサーの準備
processor = AutoProcessor.from_pretrained(
    "HuggingFaceM4/idefics2-8b",
    do_image_splitting=False
)


# モデルの準備
if USE_QLORA or USE_LORA:
    lora_config = LoraConfig(
        r=8,
        lora_alpha=8,
        lora_dropout=0.1,
        target_modules='.*(text_model|modality_projection|perceiver_resampler).*(down_proj|gate_proj|up_proj|k_proj|q_proj|v_proj|o_proj).*$',
        use_dora=False if USE_QLORA else True,
        init_lora_weights="gaussian"
    )
    if USE_QLORA:
        bnb_config = BitsAndBytesConfig(
            load_in_4bit=True,
            bnb_4bit_quant_type="nf4",
            bnb_4bit_compute_dtype=torch.float16
        )
    model = Idefics2ForConditionalGeneration.from_pretrained(
        "HuggingFaceM4/idefics2-8b",
        torch_dtype=torch.float16,
        quantization_config=bnb_config if USE_QLORA else None,
    )
    model.add_adapter(lora_config)
    model.enable_adapters()
else:
    model = Idefics2ForConditionalGeneration.from_pretrained(
        "HuggingFaceM4/idefics2-8b",
        torch_dtype=torch.float16,
        _attn_implementation="flash_attention_2", # Only available on A100 or H100
    ).to(DEVICE)
(2) DataCollatorの準備。
import random

# DataCollatorの準備
class MyDataCollator:
    def __init__(self, processor):
        self.processor = processor
        self.image_token_id = processor.tokenizer.additional_special_tokens_ids[
            processor.tokenizer.additional_special_tokens.index("<image>")
        ]

    def __call__(self, examples):
        texts = []
        images = []
        for example in examples:
            # データ抽出
            image = example["image"]  # 画像
            question = example["query"]  # 質問
            answer = example["answer"]  # 応答

            # メッセージリストの作成
            messages = [
                {
                    "role": "user",
                    "content": [
                        {"type": "text", "text": "Answer briefly."},
                        {"type": "image"},
                        {"type": "text", "text": question}  # 質問
                    ]
                },
                {
                    "role": "assistant",
                    "content": [
                        {"type": "text", "text": answer}  # 応答
                    ]
                }
            ]

            # テキストの画像の追加
            text = processor.apply_chat_template(messages, add_generation_prompt=False)
            texts.append(text.strip())
            images.append([image])

        batch = processor(text=texts, images=images, return_tensors="pt", padding=True)

        labels = batch["input_ids"].clone()
        labels[labels == processor.tokenizer.pad_token_id] = self.image_token_id
        batch["labels"] = labels

        return batch

data_collator = MyDataCollator(processor)
(3) 学習パラメータとトレーナーの準備。
from transformers import TrainingArguments, Trainer

# 学習パラメータの準備
training_args = TrainingArguments(
    num_train_epochs=2,
    per_device_train_batch_size=2,
    per_device_eval_batch_size=8,
    gradient_accumulation_steps=8,
    warmup_steps=50,
    learning_rate=1e-4,
    weight_decay=0.01,
    logging_steps=10,
    max_steps=50,
    output_dir="./idefics2-bocchi-8b",
    save_strategy="steps",
    save_steps=10,
    save_total_limit=1,
    fp16=True,
    remove_unused_columns=False,
    report_to="none",
)

# トレーナーの準備
trainer = Trainer(
    model=model,
    args=training_args,
    data_collator=data_collator,
    train_dataset=train_dataset,
)
(4) 学習の開始。
V100で2分ほどかかりました。
# 学習の開始
trainer.train()
4. 評価
Colabでの学習手順は、次のとおりです。
(1) 評価データの準備。
# 評価データの準備
example = eval_dataset[0]
example{'image': <PIL.Image.Image image mode=RGB size=640x360>,
'query': 'このキャラクターの名前は?',
'answer': 'このキャラクターの名前は後藤ひとりです。'}(2) 評価画像の確認。
# 評価画像の確認
example["image"]
(3) 推論の実行。
model.eval()

image = example["image"]
query = example["query"]

# メッセージリストの準備
messages = [
    {
        "role": "user",
        "content": [
            {"type": "text", "text": "Answer briefly."},
            {"type": "image"},
            {"type": "text", "text": query}
        ]
    }
]

# 推論の実行
text = processor.apply_chat_template(messages, add_generation_prompt=True)
inputs = processor(text=[text.strip()], images=[image], return_tensors="pt", padding=True)
generated_ids = model.generate(**inputs, max_new_tokens=64)
generated_texts = processor.batch_decode(generated_ids[:, inputs["input_ids"].size(1):], skip_special_tokens=True)
print(query)
print(generated_texts)
このキャラクターの名前は?
['このキャラクターの名前は後藤ひとりです。']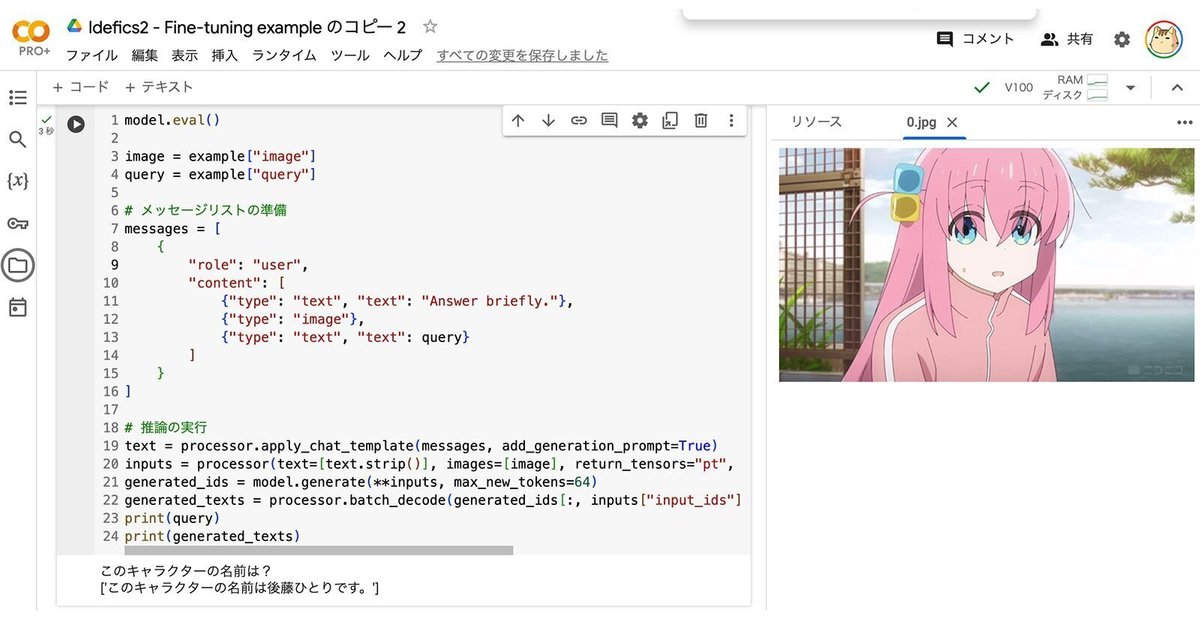
この記事が気に入ったらサポートをしてみませんか?