Point-E による画像やテキストからの3D生成を試す

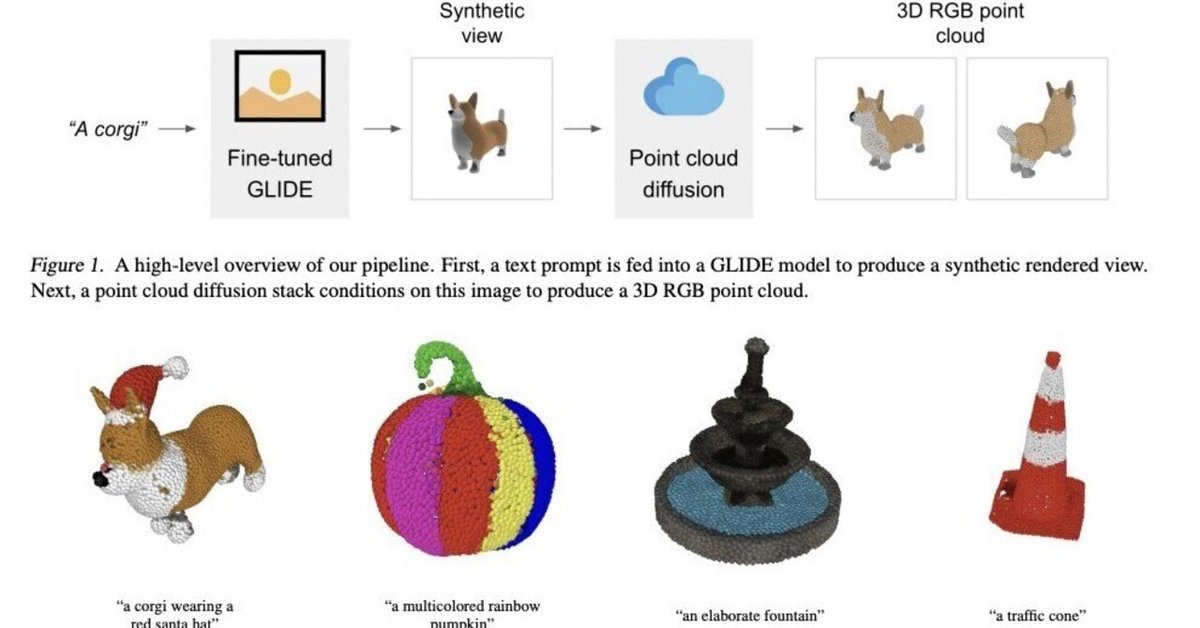
「Point-E」による画像やテキストからの3D生成を試したので、まとめました。
1. Point-E
「Point-E」は、画像やテキストから3Dポイントクラウドを生成するAIモデルです。他の3D生成AIと比べ、圧倒的に高速に3D生成できます。
2. インストール
Google Colabでのインストール手順は、次のとおりです。
(1) メニュー「編集→ノートブックの設定」で、「ハードウェアアクセラレータ」に「GPU」を選択。
(2) パッケージのインストール。
# パッケージのインストール
!git clone https://github.com/openai/point-e.git
%cd point-e
!pip install .
3. 画像からの3Dポイントクラウド生成
画像からの3Dポイントクラウド生成の手順は、次のとおりです。
(1) パッケージのインポート。
# パッケージのインポート
from PIL import Image
import torch
from tqdm.auto import tqdm
from point_e.diffusion.configs import DIFFUSION_CONFIGS, diffusion_from_config
from point_e.diffusion.sampler import PointCloudSampler
from point_e.models.download import load_checkpoint
from point_e.models.configs import MODEL_CONFIGS, model_from_config
from point_e.util.plotting import plot_point_cloud
(2) モデルの準備。
# モデルの準備
device = torch.device('cuda' if torch.cuda.is_available() else 'cpu')

print('creating base model...')
base_name = 'base40M' # use base300M or base1B for better results
base_model = model_from_config(MODEL_CONFIGS[base_name], device)
base_model.eval()
base_diffusion = diffusion_from_config(DIFFUSION_CONFIGS[base_name])

print('creating upsample model...')
upsampler_model = model_from_config(MODEL_CONFIGS['upsample'], device)
upsampler_model.eval()
upsampler_diffusion = diffusion_from_config(DIFFUSION_CONFIGS['upsample'])

print('downloading base checkpoint...')
base_model.load_state_dict(load_checkpoint(base_name, device))

print('downloading upsampler checkpoint...')
upsampler_model.load_state_dict(load_checkpoint('upsample', device))
(3) サンプラーの準備。
# サンプラーの準備
sampler = PointCloudSampler(
    device=device,
    models=[base_model, upsampler_model],
    diffusions=[base_diffusion, upsampler_diffusion],
    num_points=[1024, 4096 - 1024],
    aux_channels=['R', 'G', 'B'],
    guidance_scale=[3.0, 3.0],
)
(4) 推論の実行。
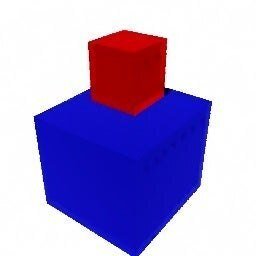
以下の画像を元に3Dポイントクラウドを生成します。
# 画像の準備
img = Image.open('point_e/examples/example_data/cube_stack.jpg')

# 推論の実行
samples = None
for x in tqdm(sampler.sample_batch_progressive(batch_size=1, model_kwargs=dict(images=[img]))):
    samples = x
(5) 3Dポイントクラウドの表示。
# ポイントクラウドの表示
pc = sampler.output_to_point_clouds(samples)[0]
fig = plot_point_cloud(pc, grid_size=3, fixed_bounds=((-0.75, -0.75, -0.75),(0.75, 0.75, 0.75)))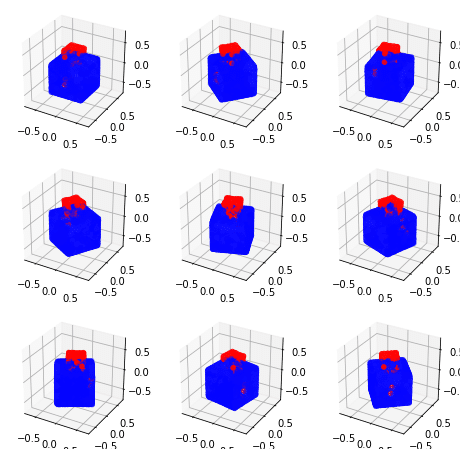
4. テキストからの3Dポイントクラウド生成
テキストからの3Dポイントクラウド生成の手順は、次のとおりです。
(1) パッケージのインポート。
# パッケージのインポート
import torch
from tqdm.auto import tqdm
from point_e.diffusion.configs import DIFFUSION_CONFIGS, diffusion_from_config
from point_e.diffusion.sampler import PointCloudSampler
from point_e.models.download import load_checkpoint
from point_e.models.configs import MODEL_CONFIGS, model_from_config
from point_e.util.plotting import plot_point_cloud
(2) モデルの準備。
# モデルの準備
device = torch.device('cuda' if torch.cuda.is_available() else 'cpu')

print('creating base model...')
base_name = 'base40M-textvec'
base_model = model_from_config(MODEL_CONFIGS[base_name], device)
base_model.eval()
base_diffusion = diffusion_from_config(DIFFUSION_CONFIGS[base_name])

print('creating upsample model...')
upsampler_model = model_from_config(MODEL_CONFIGS['upsample'], device)
upsampler_model.eval()
upsampler_diffusion = diffusion_from_config(DIFFUSION_CONFIGS['upsample'])

print('downloading base checkpoint...')
base_model.load_state_dict(load_checkpoint(base_name, device))

print('downloading upsampler checkpoint...')
upsampler_model.load_state_dict(load_checkpoint('upsample', device))
(3) サンプラーの準備
# サンプラーの準備
sampler = PointCloudSampler(
    device=device,
    models=[base_model, upsampler_model],
    diffusions=[base_diffusion, upsampler_diffusion],
    num_points=[1024, 4096 - 1024],
    aux_channels=['R', 'G', 'B'],
    guidance_scale=[3.0, 0.0],
    model_kwargs_key_filter=('texts', ''), # アップサンプラーをまったく調整しない
)
(4) 推論の実行。
「a red motorcycle」というテキストを元に、3Dポイントクラウドを生成します。
# テキストの準備
prompt = 'a red motorcycle'

# 推論の実行
samples = None
for x in tqdm(sampler.sample_batch_progressive(batch_size=1, model_kwargs=dict(texts=[prompt]))):
    samples = x
(5) 3Dポイントクラウドの表示。
# 3Dポイントクラウドの表示
pc = sampler.output_to_point_clouds(samples)[0]
fig = plot_point_cloud(pc, grid_size=3, fixed_bounds=((-0.75, -0.75, -0.75),(0.75, 0.75, 0.75)))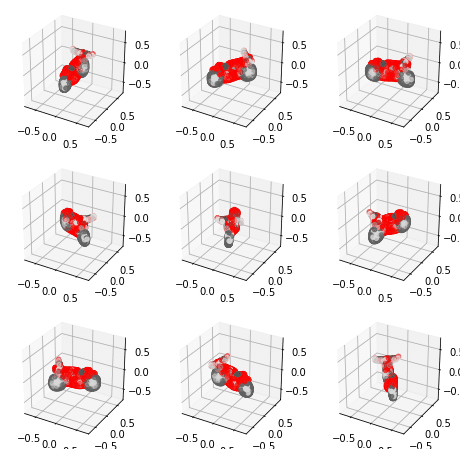
5. 3Dポイントクラウドからのメッシュ生成
3Dポイントクラウドからのメッシュ生成の手順は、次のとおりです。
(1) パッケージのインポート。
# パッケージのインポート
from PIL import Image
import torch
import matplotlib.pyplot as plt
from tqdm.auto import tqdm
from point_e.models.download import load_checkpoint
from point_e.models.configs import MODEL_CONFIGS, model_from_config
from point_e.util.pc_to_mesh import marching_cubes_mesh
from point_e.util.plotting import plot_point_cloud
from point_e.util.point_cloud import PointCloud
(2) モデルの準備。
# モデルの準備
device = torch.device('cuda' if torch.cuda.is_available() else 'cpu')

print('creating SDF model...')
name = 'sdf'
model = model_from_config(MODEL_CONFIGS[name], device)
model.eval()

print('loading SDF model...')
model.load_state_dict(load_checkpoint(name, device))
(3) 3Dポイントクラウドの読み込みと表示
# 3Dポイントクラウドの読み込みと表示
pc = PointCloud.load('point_e/examples/example_data/pc_corgi.npz')
fig = plot_point_cloud(pc, grid_size=2)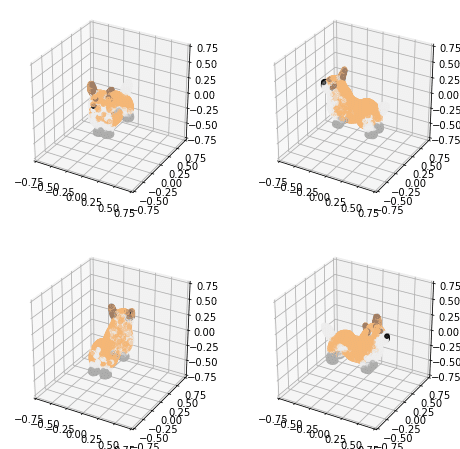
(4) メッシュの生成。
import skimage.measure
# メッシュの生成 (頂点カラーを使用)
mesh = marching_cubes_mesh(
pc=pc,
model=model,
batch_size=4096,
grid_size=32, # 評価で使用される解像度は 128 に増加
progress=True,
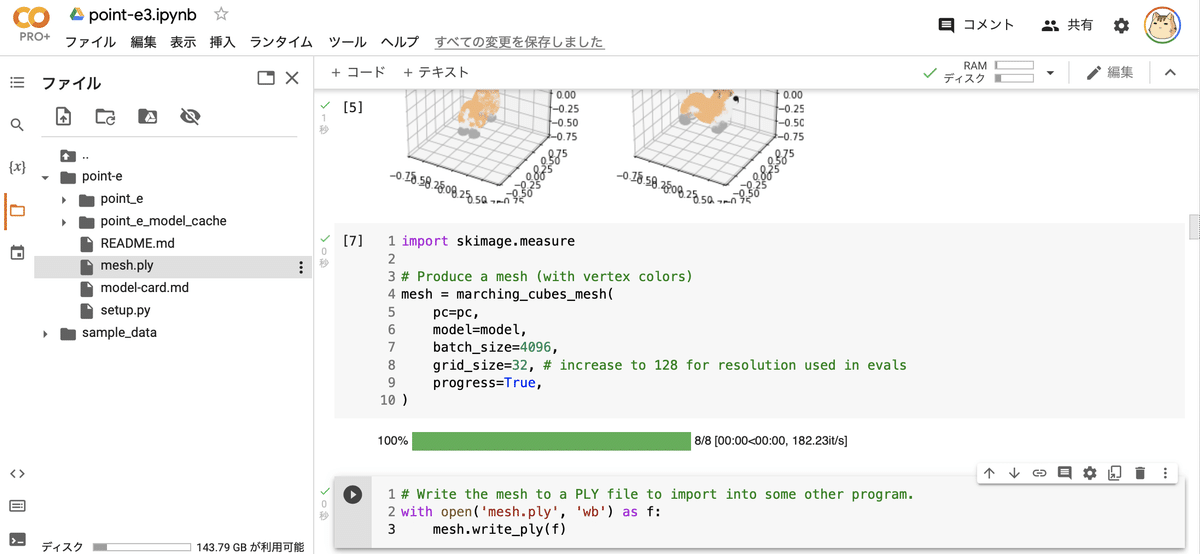
)(5) メッシュの出力。
point-e フォルダ直下に、mesh.ply が出力されています。
# メッシュの出力 (PLYファイル)
with open('mesh.ply', 'wb') as f:
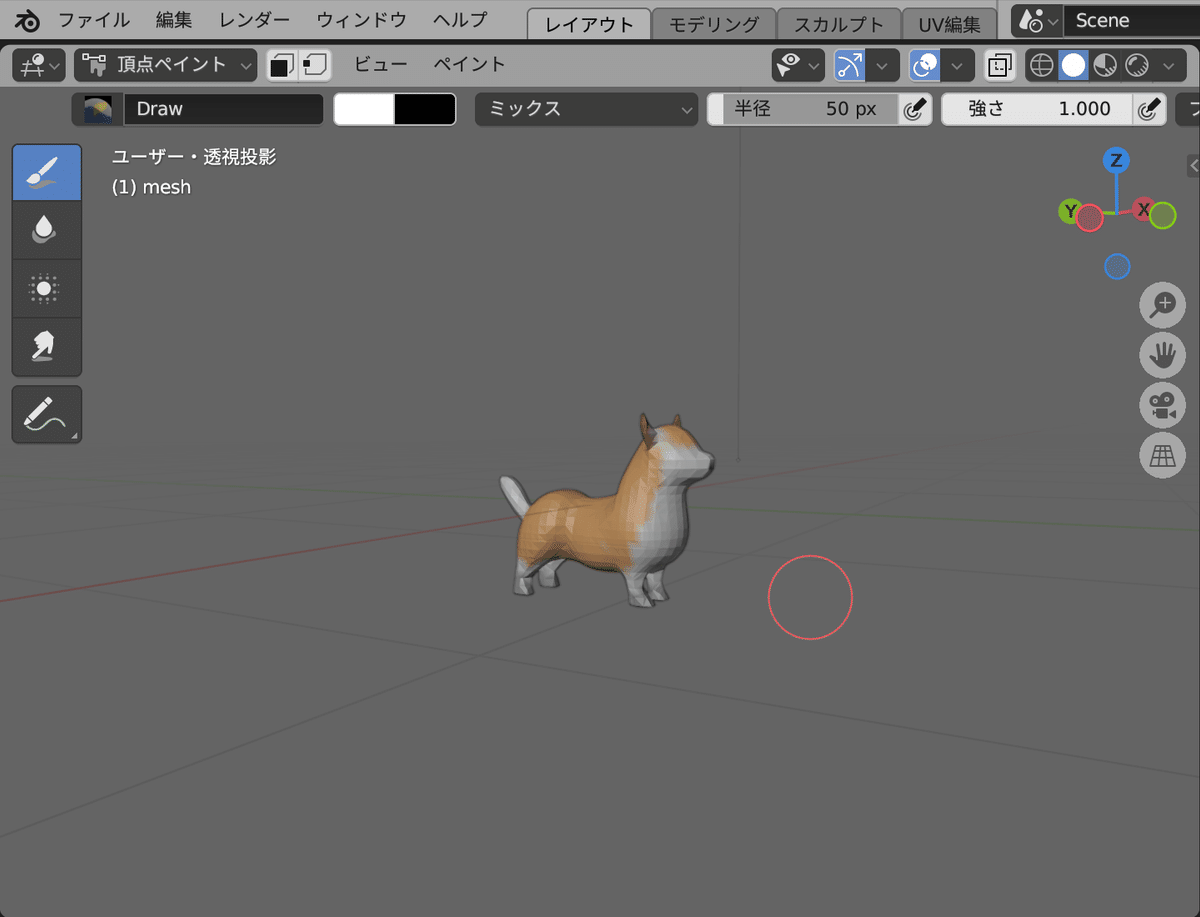
mesh.write_ply(f)画面左端のフォルダボタンでファイル一覧を表示することで、mesh.plyを確認できます。
BlenderなどでPlyファイルを確認できます。
関連
この記事が気に入ったらサポートをしてみませんか?