
Unity Robotics Hub 入門 (7) - Navigation 2 SLAM Example

「Unity Robotics Hub」の「Navigation 2 SLAM Example」を試してみます。
・Unity 2020.3
・Galactic
前回
1. Navigation 2 SLAM Example
Unityのシミュレーション環境の「Turtlebot3」を使用して、ROS2の「Navigation 2」と「slam_toolbox」を実行します。
2. インストール
インストール手順は、次のとおりです。
(1) 「Navigation 2 SLAM Example Demo」リポジトリをクローン。
$ git clone --recurse-submodule git@github.com:Unity-Technologies/Robotics-Nav2-SLAM-Example.git3. Unity側のセットアップ
Unity側のセットアップ手順は、次のとおりです。
(1) 「Unity 2020.2以降」でリポジトリ内のUnityプロジェクト「Nav2SLAMExampleProject」を開く。
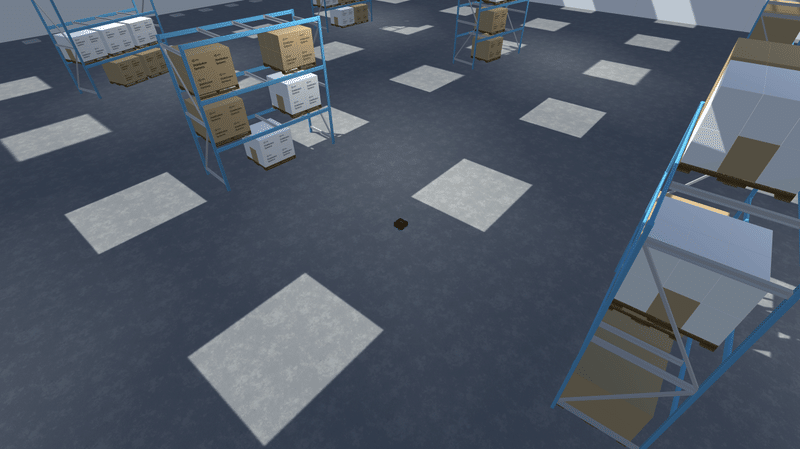
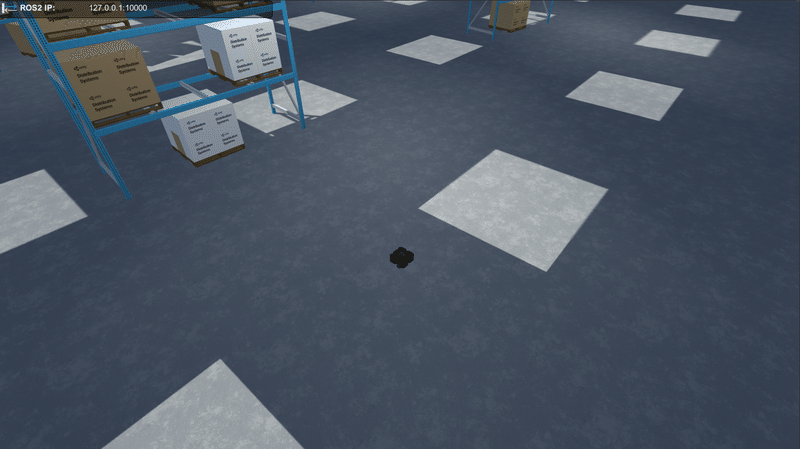
(2) シーン「Assets/Scenes/SimpleWarehouseScene」を開く。
(2) Unityのメニュー「Robotics → ROSSettings」を選択し、以下の設定を確認。
・Connect on Startup : チェック
・Protocol : ROS2
・ROS Port : 10000
・Show HUD : チェック

4. ROS2環境のセットアップ
ROS2環境のセットアップ手順は、次のとおりです。
(1) ROSイメージのビルド。
リポジトリの「ros2_docker」で以下のコマンドを実行します。
$ docker build -t unity-robotics:nav2-slam-example ./(2) Dockerコンテナの起動。
$ docker run -it --rm -p 6080:80 -p 10000:10000 --shm-size=1024m unity-robotics:nav2-slam-example(3) ブラウザで「http://127.0.0.1:6080」を開く。
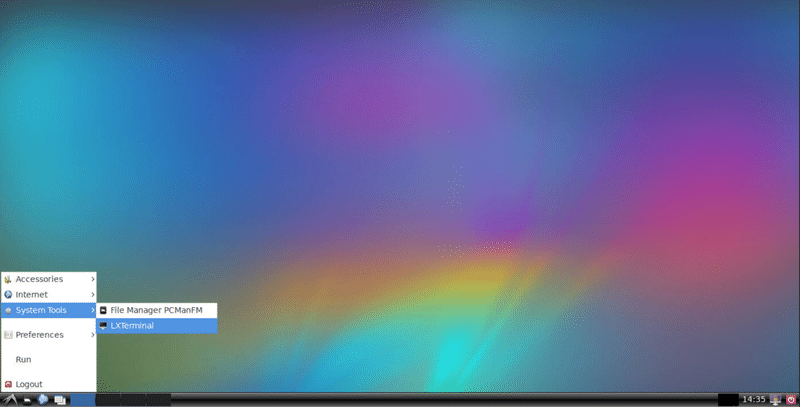
(4) 「System Tools → LXTerminal」を選択。
(5) launchファイルの起動。
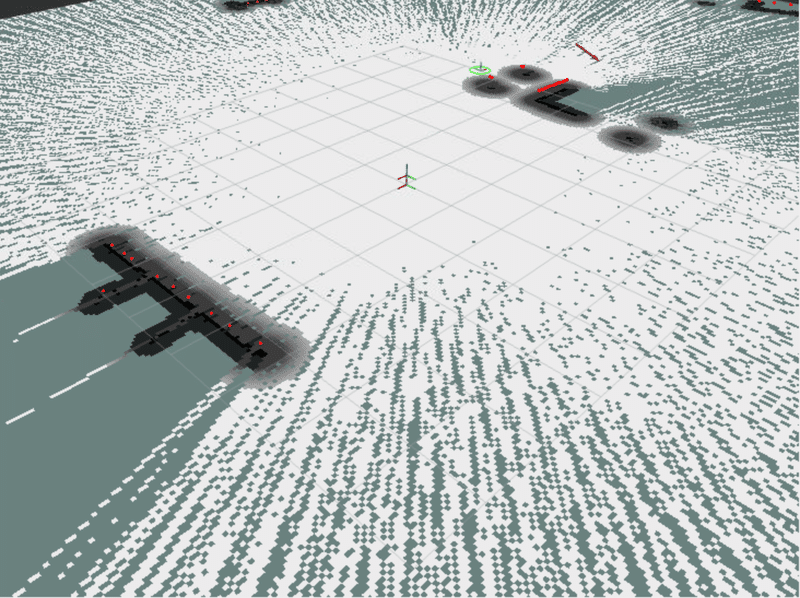
「rviz」が起動します。
$ ros2 launch unity_slam_example unity_slam_example.py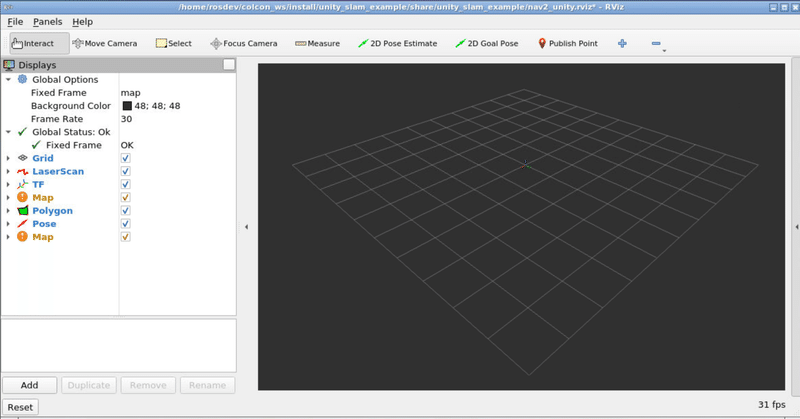
5. デモの実行
デモの実行手順は、次のとおりです。
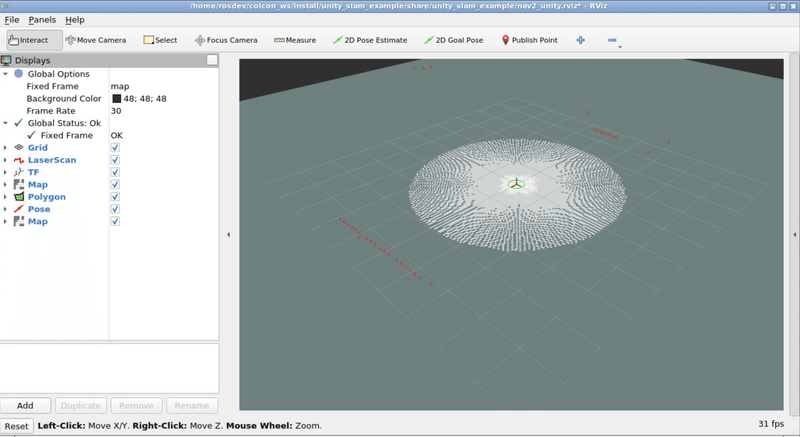
(1) UnityでPlayボタンを押す。
rvizに可視化情報が出力されます。TurtleBotは「ローカライズ」と「マッピング」を同時に行っています。
Unityシミュレーションでは、カメラをキーで移動できます。
・WS : 前後
・AD : 左右
・EQ : 上下
(2) rvizの「2D Goal Pose」クリックし、マップ内をドラッグしてゴールポーズを指定。
「ナビゲーション」が実行され、TurtleBotはゴールポーズまで移動します。
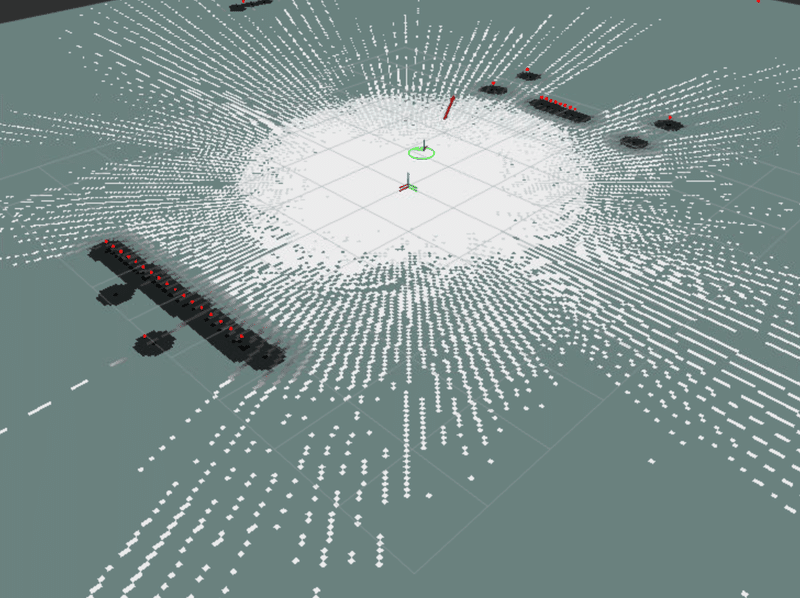
障害物の向こう側にゴールポーズを指定すると、障害物を避けて向かうことを確認できます。
【おまけ】 launchファイル
launchファイルの中身を確認してみます。
・unity_slam_example.py
import os
from launch import LaunchDescription
from launch.actions import IncludeLaunchDescription
from launch.launch_description_sources import PythonLaunchDescriptionSource
from ament_index_python.packages import get_package_share_directory
from launch_ros.actions import Node


def generate_launch_description():
    package_name = 'unity_slam_example'
    package_dir = get_package_share_directory(package_name)

    return LaunchDescription({
        # エンドポイントの起動
        IncludeLaunchDescription(
            PythonLaunchDescriptionSource(
                os.path.join(get_package_share_directory(
                    'ros_tcp_endpoint'), 'launch', 'endpoint.py')
            ),
        ),

        # rviz2の起動
        Node(
            package='rviz2',
            executable='rviz2',
            output='screen',
            arguments=['-d', os.path.join(package_dir, 'nav2_unity.rviz')],
            parameters=[{'use_sim_time': True}]
        ),

        # Nav2の起動
        IncludeLaunchDescription(
            PythonLaunchDescriptionSource(
                os.path.join(get_package_share_directory(
                    'nav2_bringup'), 'launch', 'navigation_launch.py')
            ),
            launch_arguments={
                'use_sim_time': 'true'
            }.items()
        ),

        # SLAM Toolboxの起動
        IncludeLaunchDescription(
            PythonLaunchDescriptionSource(
                os.path.join(get_package_share_directory(
                    'slam_toolbox'), 'launch', 'online_async_launch.py')
            ),
            launch_arguments={
                'use_sim_time': 'true'
            }.items()
        )
    })
次回
この記事が気に入ったらサポートをしてみませんか?