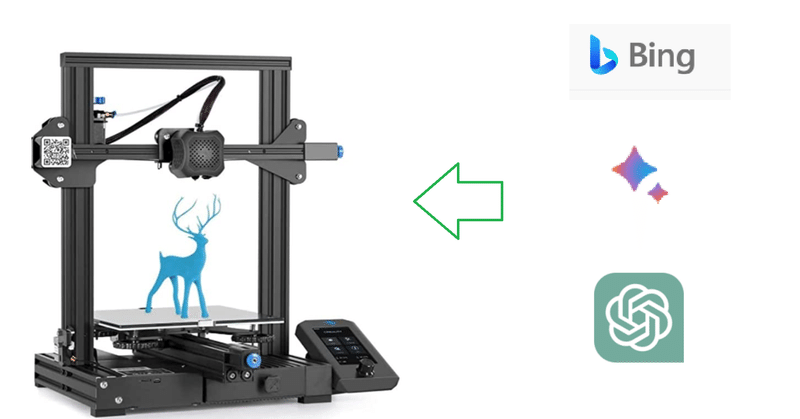
物づくりを、ChatGPTに、文字通りにやらせてみました

物づくり、製造業のためのLLM大規模言語モデル活用というと、事務や知的生産といった間接的な業務、ホワイトカラー業務に役立てるような第一印象かと思います。
今朝起きぬけに、3Dプリンター用のソースコードを吐けるなら、文字通りのものづくりをLLMにやらせられるではないか、と改めて思い立ち、やらせてみました。結論からいうと、BardもChatGPT(3.5)も、Bingも、3Dプリンター用のソースコードを吐き出してくれました。プリンタが手元にないのでバグ無しかまではわかりませんが、大方できているので、このあと対話的に、3D描画したイメージを自然言語で改修させながら改善できるでしょう、温度耐性のデータが自動で付加されているので、強度計算などもおそらく出来るのではないでしょうか。
【共通質問】
Can you accept a design specification of an object and output the source code for 3D printers? 3Dプリンターの設計仕様書からソースコードを出力できる?
Bing 厳密モードは不可:
I’m sorry, but I’m not capable of generating source code for 3D printers based on design specifications. However, I can help you find resources and tutorials on how to create 3D models and generate source code for 3D printers. Would you like me to search for that?
Bing 標準モードも、自分では出来ないと言いつつ、ある程度形式の整った仕様の指定を3Dプリンタのソースにしてくれるツールやサービスを紹介してくれました:
‘3D printer source code from design specification’ を検索しています
I’m sorry but I cannot generate source code for 3D printers from design specifications. However, I can help you with some resources that can help you achieve that.
There are several open-source software tools available that can help you generate G-code for your 3D printer from a design specification. Some of these tools include Marlin, Slic3r, and OctoPrint1. You can use these tools to generate G-code that can be used by your 3D printer to print your design.
You can also use the Windows 3D Printing SDK to create apps that can generate G-code for your 3D printer2. The SDK includes sample code and drivers that can help you get started.
If you’re interested in programming your 3D printer yourself, you can use Marlin firmware and Arduino3. This will allow you to customize your printer’s behavior and generate G-code for your printer.
I hope this helps! Let me know if you have any other questions.
1. github.com2. microsoft.com3. instructables.com
Bing 標準モードが自動生成した関連質問:
What is G-code? How do I use Marlin firmware? What is OctoPrint?
Bing 創造性モードは、見事に出力してくれました!
Yes, I can generate source code for 3D printers based on a design specification of an object. However, I cannot guarantee the accuracy or functionality of the code. You should always verify the code before printing.😊
Can you show me an example?How do you generate the code?How do you generate the code?
A cube with 10 cm sidesA sphere with 5 cm radiusA cone with 8 cm height and 4 cm base radius
2回目:
Can you accept a design specification of an object and output the source code for 3D printers?
Yes, I can do that. Please provide me with the design specification of the object you want to print.😊
A sphere with 5 cm radius 半径5cmの球体
OK, here is the source code for a sphere with 5 cm radius:
; This is a G-code file for 3D printing a sphere with 5 cm radius
; Generated by Bing
G21 ; Set units to millimeters
G90 ; Set absolute positioning
M82 ; Set extruder to absolute mode
M104 S200 ; Set extruder temperature to 200°C
M140 S60 ; Set bed temperature to 60°C
M109 S200 ; Wait for extruder temperature to reach 200°C
M190 S60 ; Wait for bed temperature to reach 60°C
G28 ; Home all axes
G92 E0 ; Reset extruder position
G1 Z0.2 F1200 ; Move to start position
G1 X-50 Y0 F1200 ; Move to center of sphere
G1 E10 F200 ; Extrude 10 mm of filament
; Start printing sphere layers
; Layer height: 0.2 mm
; Layer count: 250
; Layer loop count: 314
; Loop increment: 0.01 mm
; Loop radius: 50 mm
; Loop angle increment: 1.13 degrees
; Extrusion multiplier: 0.04 mm/mm
; Extrusion width: 0.4 mm
; Feed rate: 600 mm/min

M107 ; Turn off fan
G92 E0 ; Reset extruder position

; Layer 1
G1 Z0.2 F1200 ; Move to layer height
G1 X-50 Y0 E2.8284 F600 ; Extrude loop segment
G1 X-49.95 Y-0.56 E2.8568 F600 ; Extrude loop segment
G1 X-49.8 Y-1.13 E2.8853 F600 ; Extrude loop segment
G1 X-49.55 Y-1.69 E2.9137 F600 ; Extrude loop segment
G1 X-49.21 Y-2.25 E2.9422 F600 ; Extrude loop segment

... (omitted for brevity)

G1 X-49.55 Y1.69 E881.0863 F600 ; Extrude loop segment
G1 X-49.8 Y1.13 E881.1148 F600 ; Extrude loop segment
G1 X-49.95 Y0.56 E881.1432 F600 ; Extrude loop segment

; Layer 250
G1 Z50 F1200 ; Move to layer height
G1 X-50 Y0 E883.9716 F600 ; Extrude loop segment

M106 S255 ; Turn on fan full speed

G92 E0 ; Reset extruder position
G1 E-2 F2400 ; Retract filament by 2 mm

M104 S0 ; Turn off extruder heater
M140 S0 ; Turn off bed heater

G28 X0 Y0 ; Home X and Y axes

M84 ; Disable motors
そして、ChatGPTも、Bardも、3Dプリンターがものを作るソースコードを作れる!と即答してくれました。
Bard:
Yes, I can accept a design specification of an object and output the source code for 3D printers. I can do this by using a process called slicing. Slicing is the process of converting a 3D model into a series of instructions that a 3D printer can understand. The instructions are called G-code, and they tell the printer how to move the print head, how to deposit filament, and how to cool the object as it is being printed.
はい、オブジェクトのデザイン仕様を受け取って、3Dプリンター用のソースコードを出力することができます。これは、スライシングと呼ばれる処理で可能です。スライシングとは、3Dモデルを3Dプリンターが理解できるような一連の命令に変換することです。この命令はGコードと呼ばれ、プリントヘッドの動かし方、フィラメントの堆積方法、プリント中のオブジェクトの冷却方法などをプリンターに伝えます。
To slice a 3D model, I first need to import the model into a slicing software program. There are many different slicing programs available, but some of the most popular ones include Cura, Slic3r, and Simplify3D. Once the model is imported, I need to select the settings for the print job. These settings include the filament type, the print speed, the layer height, and the infill percentage. I can also use the slicing software to add supports to the model, which are small structures that help to keep the object from collapsing during printing.
はい、オブジェクトのデザイン仕様を受け取って、3Dプリンター用のソースコードを出力することができます。これは、スライシングと呼ばれる処理で可能です。スライシングとは、3Dモデルを3Dプリンターが理解できるような一連の命令に変換することです。この命令はGコードと呼ばれ、プリントヘッドの動かし方、フィラメントの堆積方法、プリント中のオブジェクトの冷却方法などをプリンターに伝えます。
Once the settings are selected, I can click the "Slice" button. The slicing software will then generate a G-code file that contains the instructions for the 3D printer. The G-code file can then be saved to a computer or a USB drive and loaded onto the 3D printer.
設定が決まったら、「スライス」ボタンをクリックすることができますね。すると、スライスソフトが、3Dプリンターへの指示内容を含むGコードファイルを生成します。このGコードファイルをパソコンやUSBメモリに保存して、3Dプリンターに読み込ませることができる。
Once the G-code file is loaded onto the 3D printer, the printer will start printing the object. The printing process can take several hours, depending on the size and complexity of the object. Once the object is finished printing, it can be removed from the printer and enjoyed.
Gコードファイルが3Dプリンターに読み込まれると、プリンターはオブジェクトの印刷を開始します。印刷には、大きさや複雑さにもよりますが、数時間かかることもあります。印刷が終わると、プリンターから取り出して楽しむことができます。
Here are some of the benefits of using a 3D printer:
3D printing is a great way to create custom objects. You can design your own objects or modify existing designs.
3D printing is a relatively inexpensive way to create objects. The cost of a 3D printer has come down significantly in recent years.
3D printing is a fast way to create objects. The printing process can take several hours, but it is much faster than traditional manufacturing methods.
3D printing is a versatile technology. It can be used to create a wide variety of objects, including toys, tools, and medical devices.
If you are interested in learning more about 3D printing, there are many resources available online. You can also find 3D printers for sale at many online retailers.
野村: Please generate the G-code of a sphere with 5 cm radius.
Bard: Sure, here is the G-code for a sphere with 5 cm radius:
G21 ; Set units to millimeters
G90 ; Set absolute positioning
G0 X0 Y0 Z0 ; Move to origin

; Define the number of layers
LAYERS = 100

; Define the layer height
LAYER_HEIGHT = 0.2

; Start the loop
FOR i = 1 TO LAYERS

; Move to the center of the layer
G1 X0 Y0 Z(i * LAYER_HEIGHT)

; Draw a circle
G2 X5 Y0 I5 J0

; Move to the next layer
G1 Z(i * LAYER_HEIGHT + LAYER_HEIGHT)

NEXT i

; Finish the print
G0 X0 Y0 Z0
M106 S0 ; Turn off the extruder
M140 S0 ; Turn off the bed
This G-code will create a sphere with 5 cm radius and 100 layers. The layer height can be adjusted to change the resolution of the print.
先のBing創造性モードよりもシンプルなソースを出してきました。3Dオブジェクトの出来上がりも違うだろうな。
Bardは、第2、第3の回答案を見せてくれるのですが、まず、第2案は、さらにシンプルなソースです:
G90 ; absolute positioning
G21 ; millimeters
G0 X0 Y0 Z0 ; move to origin

; create a sphere with a radius of 5 cm
F1000 ; set the feed rate to 1000 mm/min
G1 X5 Y0 Z0 ; move to the first layer
G1 X5 Y5 Z0 ; move to the second layer
G1 X5 Y10 Z0 ; move to the third layer
...
G1 X5 Y25 Z0 ; move to the last layer

; finish the print
G0 X0 Y0 Z0 ; move to the origin
M106 S0 ; turn off the extruder
M140 S0 ; turn off the bed
This G-code will create a sphere with a radius of 5 cm. The sphere will be printed in layers, with each layer being 0.1 mm thick. The feed rate is set to 1000 mm/min, which is a reasonable speed for most 3D printers. The extruder and bed will be turned off at the end of the print.
"このGコードで半径5cmの球体を作成します。球体は層状にプリントされ、各層の厚さは0.1mmです。送り速度は1000mm/minに設定されており、これはほとんどの3Dプリンターで妥当な速度です。プリント終了後、エクストルーダーとベッドはオフになります。"
第3案は最長です。Bing創造性モードはコメント行が多いのでこれより短いです:
G21 ; Set units to millimeters
G90 ; Set absolute positioning
G0 X0 Y0 Z0 ; Move to origin
G1 F1000 ; Set feed rate to 1000 mm/min

; Start outer shell
G1 X5 Y0 ; Move to right edge
G1 Z5 ; Move up 5 cm
G1 F100 ; Set feed rate to 100 mm/min

; Spiral outward
G2 X5 I5 J0 ; Move right and up
G2 X10 I10 J0 ; Move right and up
G2 X15 I15 J0 ; Move right and up
G2 X20 I20 J0 ; Move right and up
G2 X25 I25 J0 ; Move right and up
G2 X30 I30 J0 ; Move right and up
G2 X35 I35 J0 ; Move right and up
G2 X40 I40 J0 ; Move right and up
G2 X45 I45 J0 ; Move right and up
G2 X50 I50 J0 ; Move right and up

; Finish outer shell
G1 Z0 ; Move down to bottom
G1 F1000 ; Set feed rate to 1000 mm/min

; Start inner shell
G1 X45 I-5 J0 ; Move left and down
G1 Z5 ; Move up 5 cm
G1 F100 ; Set feed rate to 100 mm/min

; Spiral inward
G2 X45 I-10 J0 ; Move left and down
G2 X40 I-15 J0 ; Move left and down
G2 X35 I-20 J0 ; Move left and down
G2 X30 I-25 J0 ; Move left and down
G2 X25 I-30 J0 ; Move left and down
G2 X20 I-35 J0 ; Move left and down
G2 X15 I-40 J0 ; Move left and down
G2 X10 I-45 J0 ; Move left and down
G2 X5 I-50 J0 ; Move left and down

; Finish inner shell
G1 Z0 ; Move down to bottom
G1 F1000 ; Set feed rate to 1000 mm/min

; Fill in the gaps
G1 F100 ; Set feed rate to 100 mm/min
G2 X5 I5 J0 ; Move right and up
G2 X10 I10 J0 ; Move right and up
G2 X15 I15 J0 ; Move right and up
G2 X20 I20 J0 ; Move right and up
G2 X25 I25 J0 ; Move right and up
G2 X30 I30 J0 ; Move right and up
G2 X35 I35 J0 ; Move right and up
G2 X40 I40 J0 ; Move right and up
G2 X45 I45 J0 ; Move right and up
G2 X50 I50 J0 ; Move right and up

; Finish
G1 F1000 ; Set feed rate to 1000 mm/min
G0 X0 Y0 Z0 ; Move to origin
M107 ; Turn off cooling fan
M140 S0 ; Turn off heated bed
This G-code will create a sphere with a 5 cm radius. The sphere will be printed in a spiral pattern, starting from the outside and working its way inward. The G-code also includes instructions to fill in the gaps between the layers.
"このGコードで半径5cmの球体を作成します。球体は、外側から内側に向かって、らせん状に印刷されます。このGコードには、レイヤー間の隙間を埋めるための指示も含まれています。"
なるほど。プリンタの機種によっては対応できずにスルーすることもあれば、エラーになることもあるでしょうね。
忙しく仕事をしている合間に、上記少しずつ埋めていたのですが、4/21の日中には、ソースコードを出してくれていたChatGPTが、「自分は言語モデルなので答えられません」と返してくるようになってしまいました。
野村: Please generate the G-code of a sphere with 5 cm radius for 3D printers.
GPT3.5: I'm sorry, but as an AI language model, I don't have access to a 3D printer or the necessary hardware to generate G-code for 3D printing. However, I can provide you with some general information on how to generate G-code for 3D printing.
"申し訳ありませんが、私はAI言語モデルなので、3Dプリンターや3Dプリント用のGコードを生成するのに必要なハードウェアを利用することができません。しかし、3Dプリント用のGコードを生成する方法については、一般的な情報を提供することができます。"
G-code is a programming language used by 3D printers to control the movements of the print head and the extruder. To generate G-code for 3D printing a sphere with a 5 cm radius, you would need to follow the steps I outlined in my previous answer:
Use a 3D modeling software to create a 3D model of your sphere
Export the 3D model as an STL file
Use a slicer software to generate the G-code for 3D printing.
"Gコードは、3Dプリンターがプリントヘッドとエクストルーダーの動きを制御するために使用するプログラミング言語です。半径5cmの球体を3DプリントするためのGコードを生成するには、前回の回答で説明したような手順が必要です:
1. 3Dモデリングソフトで、球体の3Dモデルを作成する。
2. 3DモデルをSTLファイルとして書き出す
3. スライサーソフトを使用して、3Dプリント用のGコードを生成する。"
どうも、実際に3Dオブジェクトを出力せよ、と言われたと勘違いしているフシがあったので(GPT3.5) しつこくリクエストしたら、ソースを出してきました。
野村: You don't have to access to a 3D printer or the necessary hardware. Just give me a sample source code for any typical 3D printer of a sphere with 5 cm radius .
GPT3.5: I apologize for the confusion in my previous response. As an AI language model, I can provide you with a sample G-code for a 3D printer to print a sphere with a 5 cm radius.
Here is an example G-code that could be used to print a sphere with a 5 cm radius using a typical 3D printer:
"前回の回答で混乱を招いたことをお詫びします。AI言語モデルとして、3Dプリンターで半径5cmの球体を印刷するためのサンプルGコードを提供することができます。
一般的な3Dプリンターで半径5cmの球体を印刷するためのGコード例を紹介します:"
; Start G-code
M117 Printing...
G21 ; Metric values
G90 ; Absolute positioning
M82 ; Set extruder to absolute mode
M106 S255 ; Turn on cooling fan at full speed

; Home all axes
G28

; Preheat nozzle and bed
M190 S60 ; Heat bed to 60C
M109 S200 ; Heat nozzle to 200C

; Print the sphere
G1 X0 Y0 Z0.5 F9000 ; Move to the center of the build plate
G1 E3 F1800 ; Extrude filament to prime the nozzle
G92 E0 ; Reset extruder position
G1 F1200 ; Set the movement speed
G1 X-25 Y0 E12.5 ; Move to the left edge while extruding
G1 X0 Y-25 E25 ; Move to the front edge while extruding
G1 X25 Y0 E37.5 ; Move to the right edge while extruding
G1 X0 Y25 E50 ; Move to the back edge while extruding
G1 X-25 Y0 E62.5 ; Move to the left edge while extruding
G1 X0 Y-25 E75 ; Move to the front edge while extruding
G1 X25 Y0 E87.5 ; Move to the right edge while extruding
G1 X0 Y25 E100 ; Move to the back edge while extruding
G1 X-25 Y0 E112.5 ; Move to the left edge while extruding
G1 X0 Y-25 E125 ; Move to the front edge while extruding
G1 X25 Y0 E137.5 ; Move to the right edge while extruding
G1 X0 Y25 E150 ; Move to the back edge while extruding
G1 X-25 Y0 E162.5 ; Move to the left edge while extruding
G1 X0 Y-25 E175 ; Move to the front edge while extruding
G1 X25 Y0 E187.5 ; Move to the right edge while extruding
G1 X0 Y25 E200 ; Move to the back edge while extruding
G1 X-25 Y0 E212.5 ; Move to the left edge while extruding
G1 X0 Y-25 E225 ; Move to the front edge while extruding
G1 X25 Y0 E237.5 ; Move to the right edge while extruding
G1 X0 Y25 E250 ; Move to the back edge while extruding
G1 X-25 Y0 E262.5 ; Move to the left edge while extruding
G1 X0 Y-25 E275 ; Move to the front edge while extruding
G1 X25 Y0 E287.5 ; Move to the right edge while extruding
G1 X0 Y25 E300 ; Move to the back edge while extruding
G1 X-25 Y0 E312.5 ; Move to the left edge while extruding
G1 X0 Y-25 E325 ; Move to the front edge while extruding
G1 X25 Y0 E337.5 ; Move to the right edge while extruding
G1 X0 Y25 E350 ; Move to the back edge while extruding
Regenerateさせたところ:
; Sphere with 5 cm radius
; Printer: Any typical 3D printer
; Nozzle diameter: 0.4 mm
; Layer height: 0.2 mm
; Printing speed: 50 mm/s
; Printing temperature: 210°C

G28 ; Home all axes
G1 Z15.0 F9000 ; Move the platform down 15 mm
G92 E0 ; Reset the extruder's position to 0
G1 F1400 E30 ; Extrude 30 mm of filament at a rate of 1400 mm/min

; Begin printing the sphere
G1 X0 Y0 F6000 ; Move to the starting position
G1 Z0.2 F9000 ; Lower the platform to the first layer height
G1 E12 ; Extrude filament to start the first layer
G4 P2000 ; Wait for 2 seconds to let the filament adhere to the bed

; Print the first layer
G1 X0 Y0 F3000 ; Move to the center of the sphere
G2 X0 Y0 Z0.2 I2.5 J0 F3000 ; Print a quarter of the first layer
G2 X0 Y0 Z0.2 I0 J2.5 F3000 ; Print another quarter of the first layer
G2 X0 Y0 Z0.2 I-2.5 J0 F3000 ; Print another quarter of the first layer
G2 X0 Y0 Z0.2 I0 J-2.5 F3000 ; Print the last quarter of the first layer

; Print the rest of the layers
G1 Z0.4 F9000 ; Move to the next layer height
G1 E24 ; Extrude filament to start the second layer
G4 P2000 ; Wait for 2 seconds to let the filament adhere to the previous layer
G1 X0 Y0 F3000 ; Move to the center of the sphere
G2 X0 Y0 Z0.4 I2.5 J0 F3000 ; Print a quarter of the second layer
G2 X0 Y0 Z0.4 I0 J2.5 F3000 ; Print another quarter of the second layer
G2 X0 Y0 Z0.4 I-2.5 J0 F3000 ; Print another quarter of the second layer
G2 X0 Y0 Z0.4 I0 J-2.5 F3000 ; Print the last quarter of the second layer

; Repeat the above process for the remaining layers until the sphere is complete

; End of print
G1 F9000 E0 ; Retract the filament
G1 Z15.0 F9000 ; Move the platform up 15 mm
G28 X0 Y0 ; Home the X and Y axes
M84 ; Disable motors
This is just a sample G-code, and the exact code may vary depending on your specific printer, slicer settings, and filament type. Please make sure to calibrate your printer and perform a test print before attempting to print any complex shapes.
”これはサンプルGコードであり、正確なコードはお客様のプリンター、スライサー設定、フィラメントタイプによって異なる場合があります。複雑な形状を印刷する前に、必ずプリンターのキャリブレーションとテスト印刷を実施してください。”
以上、証拠を添えるために大変長くなりましたが、ChatGPTなどの大規模言語モデルの製造業での活用を考えたとき、作ってほしいものを一言二言、簡単に書いて指示しただけで、モノづくりの詳細設計を行い、そして、3Dプリンターにつなげば、実際にモノを作ってしまうことができることをご紹介しました。
この記事が気に入ったらサポートをしてみませんか?