
WSL2でBAGSを試してみる

「追加の2Dモデリング機能を導入し、画像上のぼやけにもかかわらず3D一貫性のある高品質のシーンを再構築できるように、具体的にはBlur Proposal Network(BPN) からピクセルごとのコンボリューションカーネルを推定することでblurをモデル化」したらしいBlur Agnostic Gaussian Splatting (BAGS)を試してみます。
使用するPCはドスパラさんの「GALLERIA UL9C-R49」。スペックは
・CPU: Intel® Core™ i9-13900HX Processor
・Mem: 64 GB
・GPU: NVIDIA® GeForce RTX™ 4090 Laptop GPU(16GB)
・OS: Ubuntu22.04 on WSL2(Windows 11)
です。
1. 準備
構築
python3 -m venv bags
cd $_
source bin/activate
リポジトリをクローン。
git clone https://github.com/snldmt/BAGS
cd BAGS/
パッケージのインストール。CUDA 11.3推奨なので環境変数PATHを変更します(弊環境は11.8がインストール)。そうしないと、diff-gaussian-rasterizationのビルドでエラーになります。
export PATH=/usr/local/cuda-11/bin:$PATH

pip install torch==1.12.1+cu113 torchvision==0.13.1+cu113 -f https://download.pytorch.org/whl/torch_stable.html
pip install -r requirements.txt
pip install submodules/diff-gaussian-rasterization
pip install submodules/simple-knn
データセット
READMEにある以下のデータセットをダウンロードして、展開します。
Deblur-NeRF real camera motion and defocus blur datasets: download here.
Mip-NeRF 360 Dataset: download here.
以下は、Deblur-NeRFから8つのファイルをまとめてダウンロードした後に、叩いたコマンドです。
mkdir datasets
cd datasets

# zipの格納場所とファイル名は適切に置き換えください。
unzip /path/to/drive-download-20240408T001904Z-001.zip
unzip /path/to/drive-download-20240408T001904Z-002.zip
展開されたファイルはこんな感じです。
$ ls -l datasets/
total 36
drwxr-xr-x  2 user user 4096 Apr  8 10:04 blend_files
drwxr-xr-x 17 user user 4096 Apr  8 10:04 pretrainweights
drwxr-xr-x 12 user user 4096 Apr  8 10:04 real_camera_motion_blur
drwxr-xr-x 13 user user 4096 Apr  8 10:04 real_defocus_blur
drwxr-xr-x  3 user user 4096 Apr  8 10:04 real_object_motion_blur
drwxr-xr-x  7 user user 4096 Apr  8 10:04 synthetic_camera_motion_blur
drwxr-xr-x  7 user user 4096 Apr  8 10:04 synthetic_defocus_blur
drwxr-xr-x  7 user user 4096 Apr  8 10:04 synthetic_gt
$
2. データセットを確認する
blurと言われてもどんだけblur?なのかをおさえておかないと、なんとも言えないので入力画像を確認しましょう。
Deblur-NeRFに含まれる real_defocus_blur ディレクトリの下を覗きます。
$ for d in datasets/real_defocus_blur/*/images/; do cnt=$(ls $d/*.jpg | wc -l); echo $d: $cnt; done
datasets/real_defocus_blur/defocusbush/images/: 50
datasets/real_defocus_blur/defocuscake/images/: 34
datasets/real_defocus_blur/defocuscaps/images/: 34
datasets/real_defocus_blur/defocuscisco/images/: 45
datasets/real_defocus_blur/defocuscoral/images/: 49
datasets/real_defocus_blur/defocuscupcake/images/: 44
datasets/real_defocus_blur/defocuscups/images/: 43
datasets/real_defocus_blur/defocusdaisy/images/: 52
datasets/real_defocus_blur/defocussausage/images/: 39
datasets/real_defocus_blur/defocusseal/images/: 39
datasets/real_defocus_blur/defocustools/images/: 41
$
画像の一部分がいわゆるピンボケしている画像ファイルが各サンプルに34~52枚ほどあります。たとえば、defocuscapsというディレクトリの下にある画像は以下のようなものです。
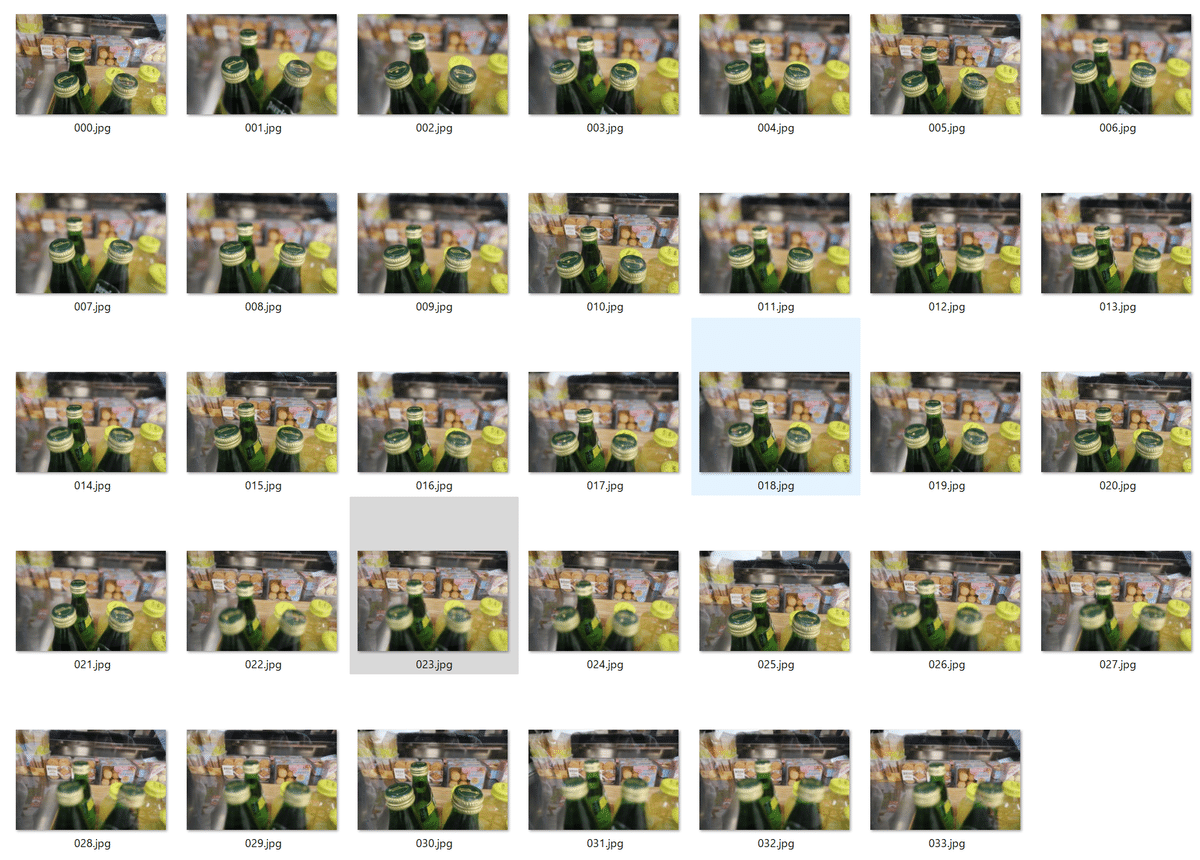
こんな感じの画像ファイルがそれぞれのディレクトリの下に含まれています。
3. 試してみる
Deblur-NeRFに含まれているdefocuscapsで試してみます。
(1) defocuscaps
READMEにあるトレーニングのサンプルコードのDATAPATHを適切に変更します。sceneで指定されているdefocuscapsがあるのは、real_defocus_blurディレクトリの下なので、ここではdatasets/real_defocus_blurとしています。
gpu=0
scene=defocuscaps
llffhold=5
OMP_NUM_THREADS=4 CUDA_VISIBLE_DEVICES=${gpu} python train.py \
    -s datasets/real_defocus_blur/${scene} \
    -m deblurdata/${scene} \
    --init_dgt 0.0006 --iterations 46000 --ms_steps 6000 --min_opacity 0.1 \
    --eval -r 4 --port $(expr 6009 + $gpu) --kernel_size 0.1 \
    --llffhold ${llffhold}
オプションの説明。
init_dgt: マルチスケール トレーニングとシングルスケール トレーニングに異なる密度勾配しきい値を使用します。 このパラメーターは、マルチスケール トレーニングの値を指定します。
ms_steps: マルチスケール トレーニングのステップ数を制御します。
min_opacity: このパラメータは、枝刈りの最小不透明度を指定します。
実行して1時間ほど経過・・・。
Training progress: 100%|█████████████████████████████████████████████████████████████████████████████████████████████████████████████| 46000/46000 [57:53<00:00, 13.24it/s, Loss=0.0144812]

[ITER 46000] Evaluating test: L1 0.04287462042910712 PSNR 23.489943368094305 [08/04 11:11:32]

[ITER 46000] Evaluating train: L1 0.03897300735116005 PSNR 23.874975967407227 [08/04 11:11:32]

[ITER 46000] Saving Gaussians [08/04 11:11:32]

Training complete. [08/04 11:11:32]
トレーニングが終わったので、出力先を確認します。
$ ls -al deblurdata/defocuscaps/
total 407868
drwxr-xr-x 4 user user 4096 Apr 8 11:13 .
drwxr-xr-x 3 user user 4096 Apr 8 10:47 ..
-rw-r--r-- 1 user user 13602 Apr 8 10:13 cameras.json
-rw-r--r-- 1 user user 443 Apr 8 10:13 cfg_args
-rw-r--r-- 1 user user 54360245 Apr 8 10:20 chkpnt10000.pth
-rw-r--r-- 1 user user 58387253 Apr 8 10:23 chkpnt12000.pth
-rw-r--r-- 1 user user 63254453 Apr 8 10:37 chkpnt22000.pth
-rw-r--r-- 1 user user 65425205 Apr 8 10:51 chkpnt32000.pth
-rw-r--r-- 1 user user 66921141 Apr 8 11:06 chkpnt42000.pth
-rw-r--r-- 1 user user 16143989 Apr 8 10:15 chkpnt6000.pth
-rw-r--r-- 1 user user 39412981 Apr 8 10:16 chkpnt7000.pth
-rw-r--r-- 1 user user 53490485 Apr 8 10:19 chkpnt9000.pth
-rw-r--r-- 1 user user 206215 Apr 8 10:13 input.ply
drwxr-xr-x 23 user user 4096 Apr 8 11:11 point_cloud
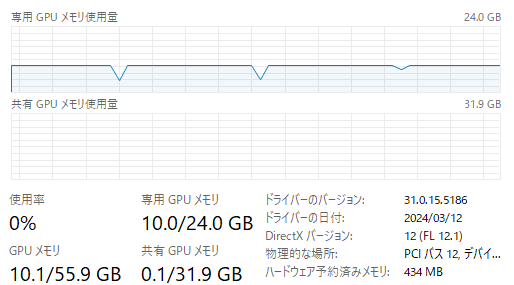
$VRAMは10GB前後の使用でした。
続いて、レンダリングです。
OMP_NUM_THREADS=4 CUDA_VISIBLE_DEVICES=${gpu} python render.py -m deblurdata/${scene} --data_device cpu --skip_train7枚画像が生成され、そのうちの一枚がこちら。

ピンボケしている箇所がほぼ無くなっており、画質が向上しているように見えます。文字も識別可。ただ、鏡面であるとか瓶ガラスへの映り込みの部分の補正がちょっと...な感じではあります。
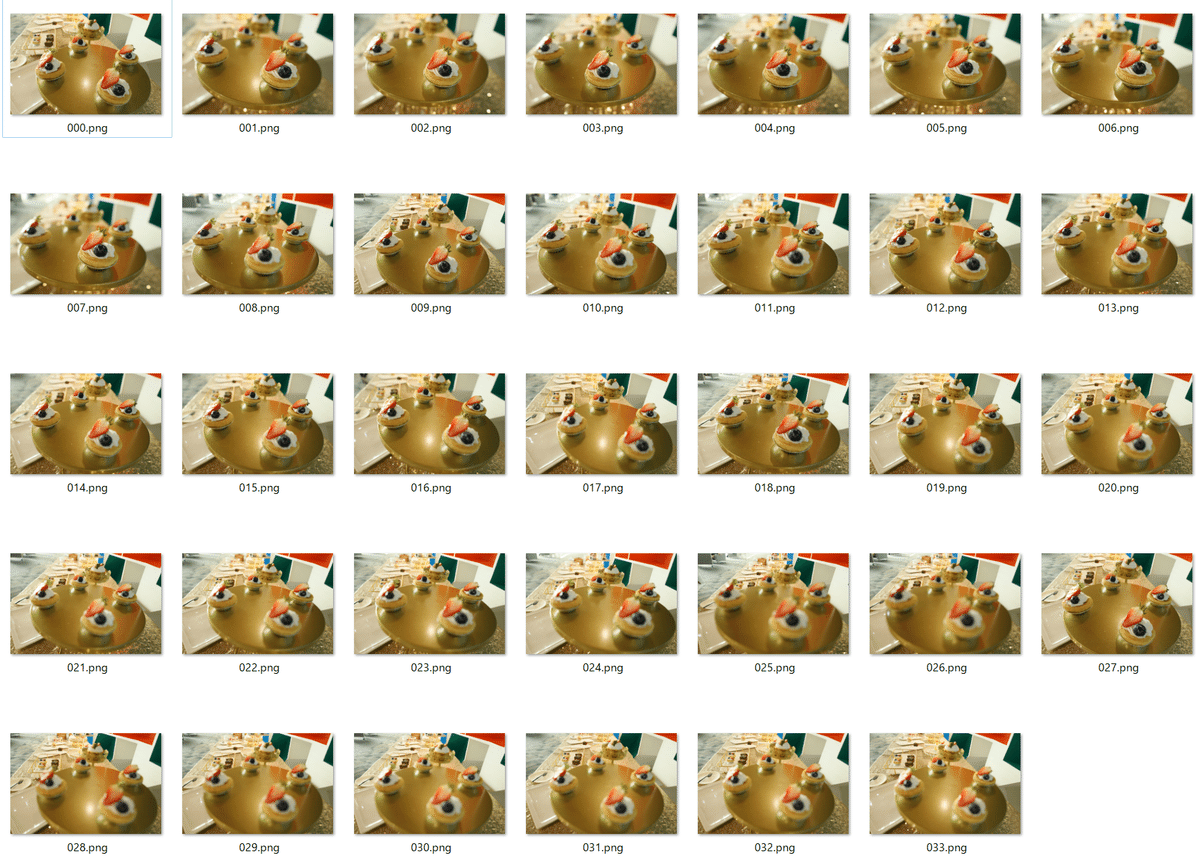
(2) defocuscake
ケーキです。美味しそうです。
学習。scene変数を変更します。
gpu=0
scene=defocuscake
llffhold=5

# 学習
OMP_NUM_THREADS=4 CUDA_VISIBLE_DEVICES=${gpu} python train.py \
    -s datasets/real_defocus_blur/${scene} \
    -m deblurdata/${scene} \
    --init_dgt 0.0006 --iterations 46000 --ms_steps 6000 --min_opacity 0.1 \
    --eval -r 4 --port $(expr 6009 + $gpu) --kernel_size 0.1 \
    --llffhold ${llffhold}
レンダリング。
# レンダリング
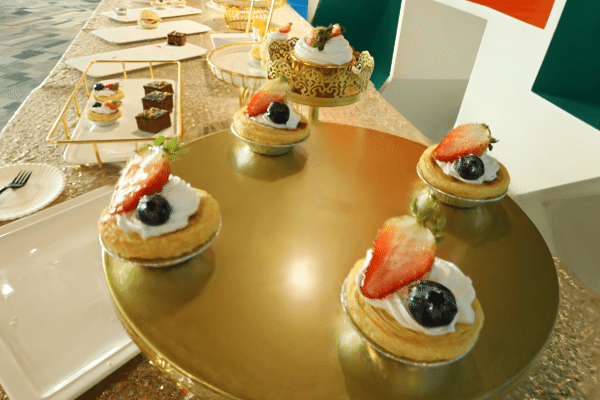
OMP_NUM_THREADS=4 CUDA_VISIBLE_DEVICES=${gpu} python render.py -m deblurdata/${scene} --data_device cpu --skip_train生成された画像がこちら。
(3) blurgirl
気になる?単語のディレクトリがあったので試します。scene変数と、-sオプションのパスを変更して学習させます。
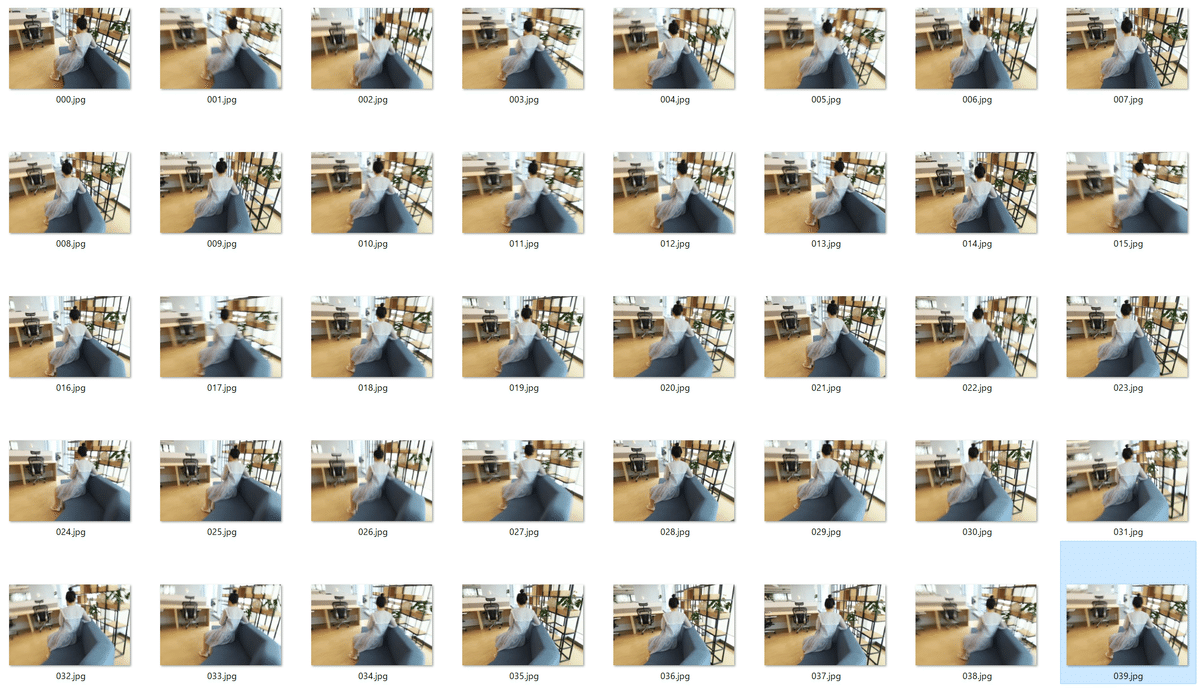
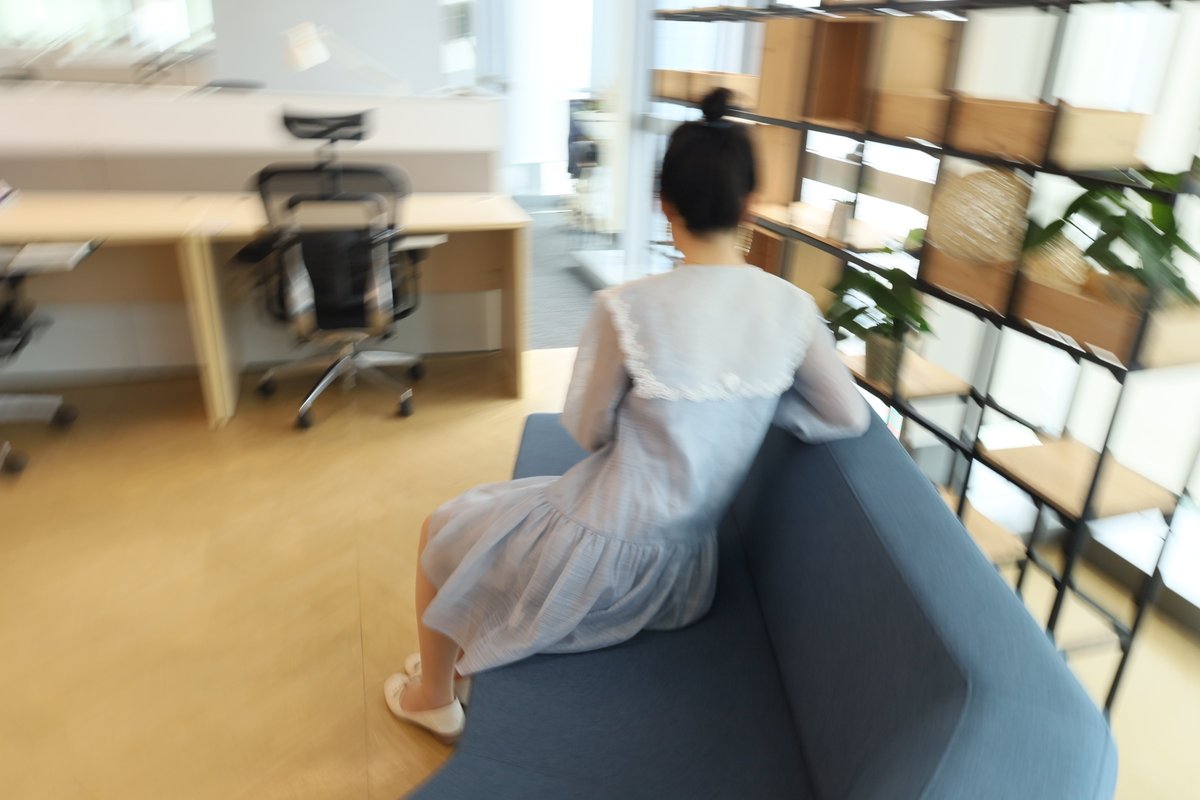
入力画像のうちの一枚がこちら。ブラーしています。
学習。scene変数と、-sオプションのパスを変更しています。
gpu=0
scene=blurgirl
llffhold=5
OMP_NUM_THREADS=4 CUDA_VISIBLE_DEVICES=${gpu} python train.py \
    -s datasets/real_camera_motion_blur/${scene} \
    -m deblurdata/${scene} \
    --init_dgt 0.0006 --iterations 46000 --ms_steps 6000 --min_opacity 0.1 \
    --eval -r 4 --port $(expr 6009 + $gpu) --kernel_size 0.1 \
    --llffhold ${llffhold}
そしてレンダリング。
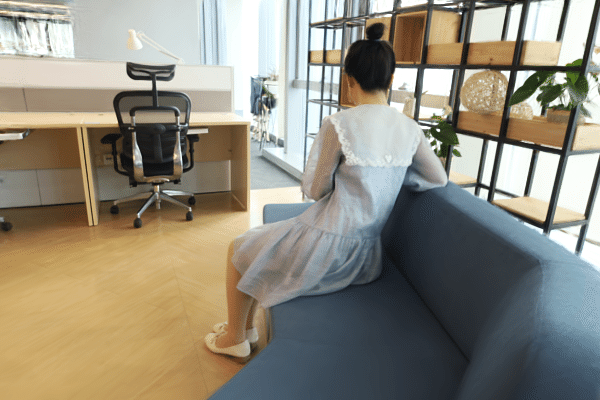
OMP_NUM_THREADS=4 CUDA_VISIBLE_DEVICES=${gpu} python render.py -m deblurdata/${scene} --data_device cpu --skip_train学習後、レンダリング生成した画像がこちら。画質は綺麗だし、ブラーもほぼなしです。
4. まとめ
使用したVRAMは、10GB程度でした。
学習にかかる時間はRTX 4090(24GB)で1時間、RTX 4090 Laptop GPU(16GB)で1時間20分ほどです。
画質は確かにサンプルでも示されていたようにとても良いですね。焦点の合った綺麗な写真ばかり撮影できないから、これはとても重宝しそう。
この記事が気に入ったらサポートをしてみませんか?