
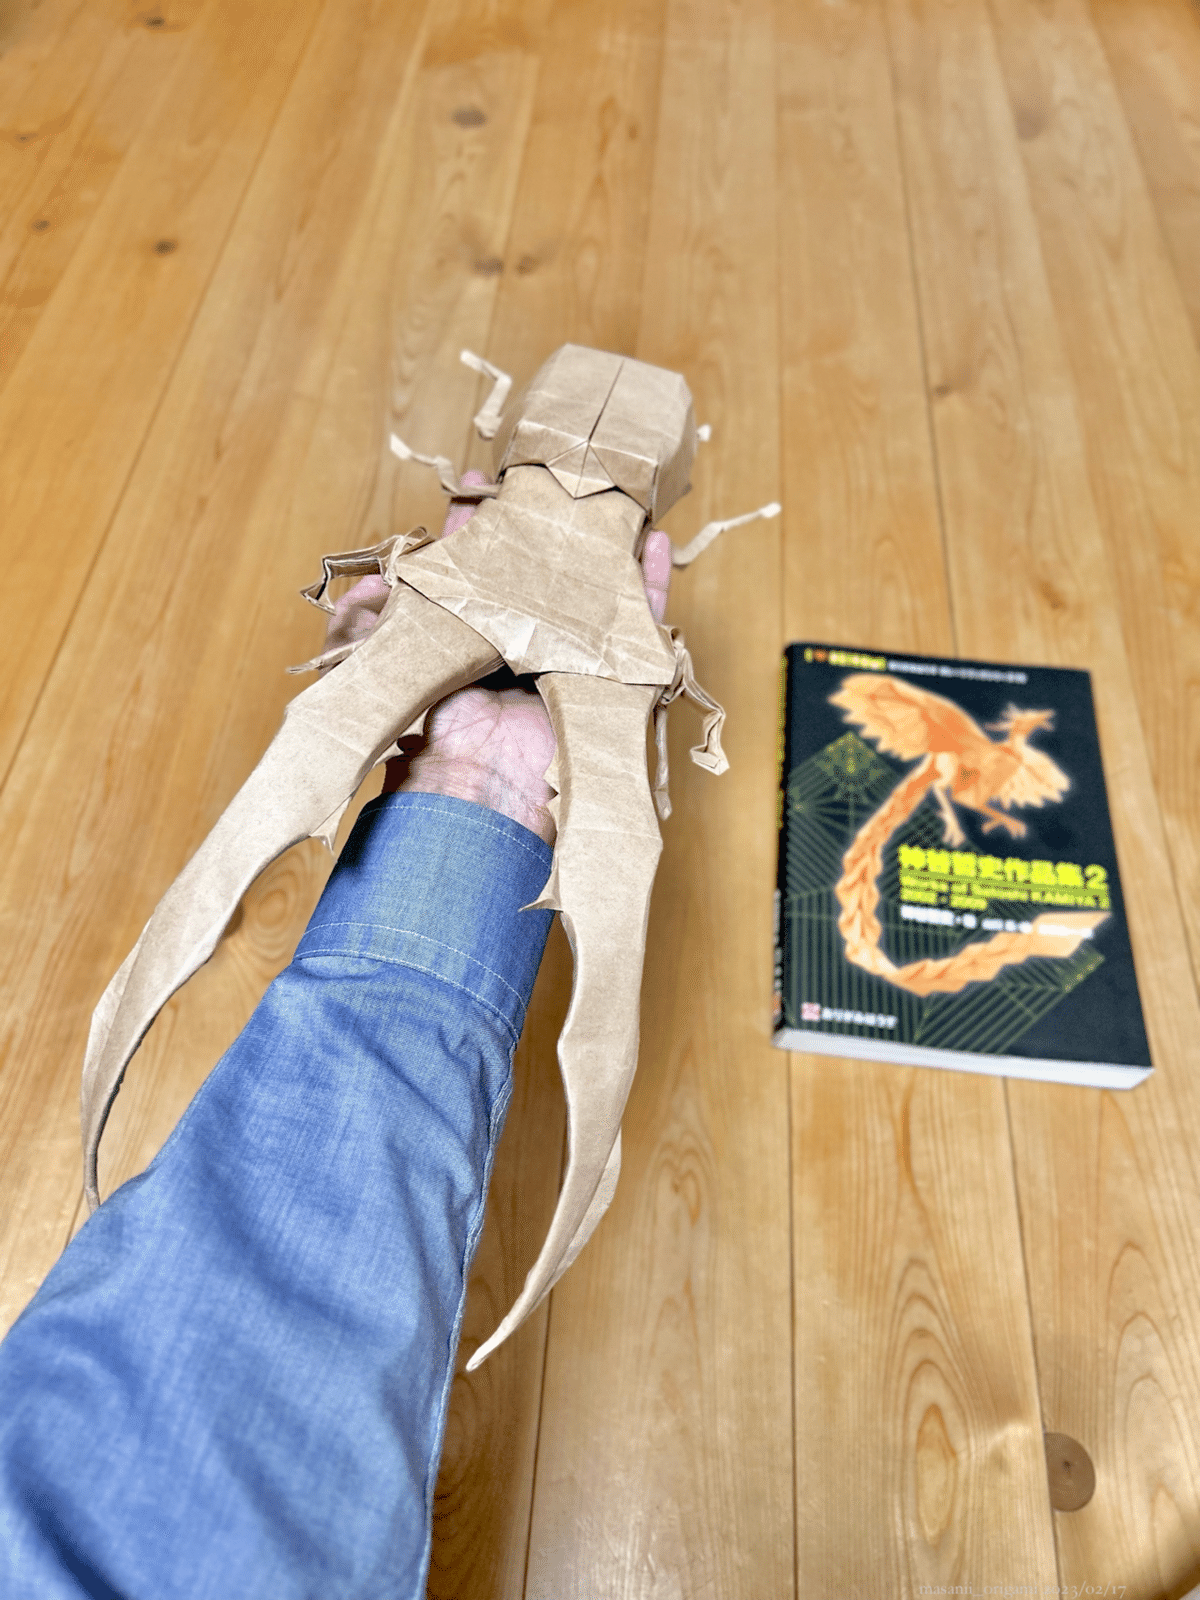
クラフト紙で巨大昆虫折り紙〜メタリフェルホソアカクワガタ〜/Cyclommatus metallifer designed by Satoshi Kamiya

アトリエまさにぃへ、ようこそ。
Welcome to Atelier masanii.
今日は、神谷哲史作品集2の「メタリフェルホソアカクワガタ」をご紹介。
身体の半分を占める巨大なアゴ、そそりますね〜!
内側にあるトゲトゲまで再現できるのは、複雑系ならではの芸当です。

This is "Cyclommatus metallifer" listed in "Works of Satoshi KAMIYA 2".
The huge mandibles occupies half of the the body, so exciting!
It's a feat unique to complex works, that can design even inner spines.
この作品は3年ぶり・2度目のチャレンジ。
初挑戦の前回は、ホイルの光沢をうまく活かすことができました。
今でもお気に入りの一品で、よくイベント会場の展示コーナーに「出勤」しています。
(2020/05/21)
I've played this model three years ago, this is the second challenge.
The last time I could express the metallic luster of foil paper well.
He's still my favorite and often comes the origami event with me, as an exhibit.
今回の素材は「クラフト紙」。
シモジマの90cm×20mロール、50g/㎡です。
もちろん長いままでは使えないので、正方形にカットします。
それにしても、まぁ〜デカい!!!

Today's material is "Craft paper" that is 90cm×20m and weights 50g/㎡, manufactured by Shimojima company.
Of course it can't be started as is, so I had to cut into square.
Anyway it's sooooo big!!!
テーブルに乗らないため床で折り始めたのですが、これがけっこう腰にくるのです。
数時間リビングを這いつくばって、やっと仕込みが終わりました。

I started to fold on the floor because the square can't be put on the table, so my back hurts!
Crawling for several hours, creases were prepared.
☘️☘️☘️
この作品の醍醐味は、基本構造を組み上げる際のダイナミックな工程です。
言われるがままに仕込んだ「謎の折り筋」が魔法のようにパタパタと畳まれていく様子は、時を忘れるほど気持ちのいいものです。

The highlight of this model is the dynamic process that the basic structure assembles.
"The enigmatic creases" that I made as the textbook told is fluttered and assembled magically. It's pectacular that I forget about the time!
ちなみに、このデカさになると真っすぐ折るのも大変。
端と端を押さえても、折り線がカーブしてしまう事がよくあります。
角度がズレて紙が浮いても、そのまま折れちゃうんですよね。
また、紙は意外とフチが伸びるので、構造そのものが歪む場合もあります。
「シュッ!」と勢いよく折ると、高確率でズレるのはこのためです。
こういう場合は、途中のポイントに何箇所か印をつけておき、最後に一気にそれらを結ぶイメージで。
それでも誤差が出やすいので、全体をフワフワ押さえてから、しっかり決まりそうな気配がした瞬間にプレス。ラインを確定させます。

At this size, It's hard to fold straight.
The line tends to be curved even if I hold both ends.
Even if the layers are peeled off and misaligned, paper can can be folded with force.
And the paper can be stretched unexpectedly, so the structure itself may be distorted.
That's why the creases are often misaligned when we fold blindly.
In that case, you should make some plots along the line in advance, then connect them at once finally.
You might make some deviations even with that method, so you should press firmly after holding the whole line softly in advance.
☘️☘️☘️
さて、ここでポイント解説です。
まずは工程130。
初見で「は???」と手が止まった方も多いのではないでしょうか。
魚の基本形ってなんやねん。

By the way, I'll explain about some steps.
First, step130.
Many people may stop their hands when encountering this point.
What's the "fish base"!?
上側にあるV字ラインと黒矢印は、とりあえず無視です。
まずは中心を左右に走る谷折り線と、その上下にある山折り線に注目しましょう。
まず谷折り線を折ってしまい、山折り線を根本に合わせて付けていきます。角度は22.5°です。
上下どちらを先にやってもOKですが、両方折れるとクチビルのような形になります。コレが「魚の基本形」を二つ折りした形なのでしょう。
で、あとは131のように下へ押し込むだけ。根本でボッキリ折ると、さっき無視した「Vライン」が自動的に付くわけです。

Anyway you can ignore V-shaped crease & black arrow on the upper side.
Look at a Valley fold crease across the center and two Mountain fold creases around them.
Fold the Valley in advance, and make Mountain along the bottom line. The angle between them is 22.5 degree.
You can start from either Valley or Mountain, in any case it'll become like lips. This is just a shape "fish base" folded in half.
After that push in like step131. If folding at the bottom, "V shaped line" that I just ignored will be drawn automatically.
つまり「折る順序」が大事なのですね。
折り線を一つ一つ分解して、やっと次の工程へ進むことができました。
写真は完成後に広げたもの。参考になれば幸いです。

Actually "Order to fold (or make creases)" is the most important factor.
Disassembling the creases one by one, I could pass to the next step at last.
The above is the picture that I unfold after assembling. Refer if needed.
☘️☘️☘️
次に工程137。
「適当につぶす」という、専門書らしからぬ大胆なキャプション。普通に戸惑います。
ここまで精密に作ったのに、本家がこんな表現を使うなんて…
まぁ、構造上やむを得ないのでしょう。

Next, step137.
I was confused by inaccurate information.
In spite of my efforts about proceeding elaborately so far, it's terrible that the official textbook says such an irresponsible explanation!
Anyway it may be structurally inevitable.
で、私なりに頑張りました。
思い切り開いたサイドを22.5°の菱形にしようと画策しましたが、どうしても上側が歪んでしまいます。
そこで、奥の層に沿わせるように段折りして、そのままパタンと閉じることに。
若干のシワは仕方ありません。目をつぶりましょう。封印です。

So I did my best.
I tried to make the opened layer into a rhombus with 22.5 degree, but the upper
side wrinkles no matter what.
So I made pleats along the inner layers, and closed.
Though it still wrinkles, fine!
複雑系は序盤こそ精密さが肝心ですが、だんだん紙の厚みや誤差の微調整が必要になってきます。
全てが教科書どおりにいかないのが、難しいところです。
ここまで来たら、あとはパワープレイで乗り切っちゃいましょう。

Precision is important especially in early steps, on the other hand we gradually need to adjust the misaligned layers caused by its thickness.
It's difficult that we can't expect to proceed along the textbook always. Go ahead by force!
☘️☘️☘️
おおよその形が見えてきたところで、さらにアレンジ要素が強くなってきます。
自分の美意識(という名の勘)に従って、理想的なフォルムに近づける作業です。
工程にないパーツの作り込みも、容赦なくバキバキやっちゃいます。

When the rough shape is getting appeared, I added further ingenuities.
It's a process to approach the ideal form based on my intuition.
I won't hesitate to build each part more elaborately even if it's an action not listed in the textbook.
まず6本の脚。
このままでは層が重なり過ぎて、とてもじゃないけど細くなりません。
そこで、スキマというスキマにスティックのりを塗りたくりました。
乾くと固まって折れなくなるので、生乾きの状態で手早く脚全体の形を決めてしまいます。
折り直しがきかないので、この時点で左右対称をキッチリ意識しました。
強度を増すため、タテ方向にカーブをつければ完成です。

First, six legs.
In unprocessed state, too much layers are piled up so I can't make the legs thin at all.
So I inserted glue into every gap thoroughly.
The parts can't be folded if the glue dries and solidifies, so it's necessary to fix the whole leg shape quickly when the glue keeps half-dried.
And I took care of keeping exact symmetry because I can't adjust after the glue dries.
Bending in parallel to increase durability, it's completed!
それから、メインの大顎。
前作(3年前)のように地面から浮くのが理想だったのですが、ここまでデカイと自重を支えきれません。
大きさが約3倍ということは、相対的に厚みが1/3になり、ヘタりやすくなるのです。
さらに、各層が剥離しないようノリを入れたため、ノリの重みもかなりのものです。
というわけで、いっそのこと「接地前提」で整形することにしました。

And mandibles, the climax.
I expected the body to off the ground like the previous (three years ago), but the huge body couldn't be supported with its own weight.
Three times bigger means one third thinner and easy to droop relatively.
In addition, I inserted glue not to peel the layers off. The glue's weight can't be ignored.
That's why I shaped on the premise of touching the ground.
根本は太く頑丈な「板」のように。先端は鋭利な「鎌」のように。
そこに「ねじり」を加えることで、立体的にデザインしました。

I made the root like a thick & solid "plate", and the tip like a sharp "sickle".
And I designed three-dimensionally adding "twist".
トゲは外側のフチを曲線的に折り、イバラのようなシルエットを意識しています。
さらに、トゲの根元付近から大顎のフレームを凹ませて、全体をナチュラルに繋げました。
トゲが大きく見えるので、一石二鳥です。

When shaping the inner spines, I was conscious of silhouette like "rose thorns" by folding the outline in a curve.
In addition, by denting from the root of inner spine to mandible's outline, I combined the whole naturally. Fortunately the spines look bigger.
眼と触覚も、アレンジのしがいがあります。
眼は2層になっているので、内側の1枚だけクルンと丸みをつけました。
影が輪郭を作ってくれて、立体感も演出できます。
触覚は無加工だとバサバサするので、入念にノリ入れしました。
先端のカドを折り込んで、内側を接着させると、偶然にも五角形が出現しました。
根本のさりげないカーブと併せて、ひそかなお気に入りポイントです。

Eyes and antennas are also worth shaping.
Eye's structure has two layers, so I curved the inner one. Then the silhouette are made by shadow and three-dimensional effect was appeared.
The antennas tend to be unfolded, so I glued thoroughly.
When putting the tip into the layer and glued, unexpectedly the "Pentagon" appeared.
This is my favorite structure as well as the natural curve of the entire antennas.
さぁ、いよいよ完成です。
それにしても…デカい!!!

Now, let's complete!
Anyway it's sooooooo big!!!
虫嫌いのコが卒倒しかねない、ものすんごい迫力。
というか、私もこんなヤツが実際に飛んできたら卒倒します。
何人かまとめて○ろせそうな大顎は、パニック映画のいいネタになるでしょう。
「オーマイガッ!あの野郎、銃が効かないぜ!」
「ヤツを街に行かせるなッ!」
「応援求むッ!繰り返す、応援求むッ!こちらアアアアァァーーーッ!!」
So powerful that the person who hates insects will be fainted.
I will also be fainted if such a monster actually fly by!
The heinous mandibles that can ×××× many people at once, will be useful subject in horror movie.
"Oh my god, the gun doesn't hit!"
"Stop it before reaching the city!"
"Reinforcements! We need reinforcements! This is noooooooooo!!!!!"
☘️☘️☘️
はい、すいません。
神谷本2の「メタリフェルホソアカクワガタ」をお送りいたしました。
大掛かりな制作はなかなかハードですか、完成後の達成感もひとしおです。

Anyway, I showed "Cyclommatus metallifer" designed by Satoshi Kamiya.
It was so hard but felt fulfilled.
この巨大なクワガタは、今月開催される公民館まつりに出品します。
うちのサークルごと参加するので、他のメンバーの作品たちとの共演が今から楽しみです!

This huge stag beetle will be exhibited at the local public hall.
Some of my origami class members join so I'm looking forward to gathering with them!
で、3日間の展示のあとは「とある場所」にお引越しする予定。
こちらは後日、公式にお知らせできると思います。ご期待ください。

After three days exhibition, it'll move to a certain space.
I'll inform you in the near future, stay tuned!
それでは、今日はここまで。
アトリエまさにぃで、またお会いしましょう。
That's all for today!
See you again in Atelier masanii:)
#アトリエまさにぃ
#ateliermasanii
#メタリフェルホソアカクワカ ゙タ
#クワカ ゙タ
#cyclommatusmetallifer
#cyclommatus #metallifer #stagbeetle
#神谷哲史 #神谷哲史作品集2
#cyclommatusmetallifer
#昆虫折り紙 #おりがみ #origami #paperwork #折り紙 #折り紙作品 #まさにぃ
この記事をご覧になって「ためになった!」「今後も応援したい」と思った方は、ぜひページ下部から記事をご購入ください。
※ 任意のカンパという位置付けですので、内容の続きではありません
ここから先は
¥ 300
この記事が気に入ったらサポートをしてみませんか?