Python基礎11:Zipファイル操作(zipfile)

1.概要
Pythonの標準ライブラリであるzipfileを使用してZIPファイル操作をします。
標準ライブラリのため環境構築などは不要です。
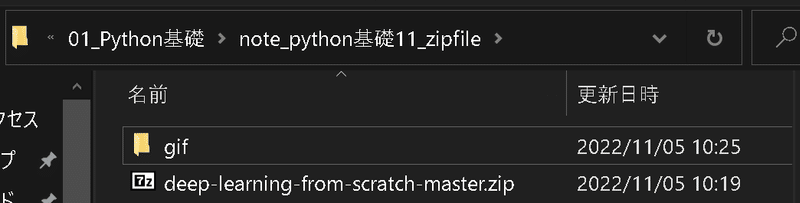
サンプル用のZipファイルは何でも問題ないですが本記事では下記Githubから”deep-learning-from-scratch-master.zip”を使用しました。
2.Zipファイルの確認
2-1.ファイルの一覧取得:ZipFIle.namelist()
zipfileモジュールではZipFIleオブジェクトを使用します。ZipFileでファイルを指定するとファイルが開いた状態になるためwith構文を使用していきます。
まずzipファイルの中身を確認するには①ファイルを開き(With構文)、②namelist()メソッドを使用します。
[IN]
from zipfile import ZipFile

path_zip = 'deep-learning-from-scratch-master.zip'

#ZipFileで開く場合はClose()が必要:with文で代用
with ZipFile(path_zip, 'r') as zipobj:
    print(zipobj.namelist())

[OUT]
['deep-learning-from-scratch-master/', 'deep-learning-from-scratch-master/.gitignore', 'deep-learning-from-scratch-master/LICENSE.md', 'deep-learning-from-scratch-master/README.md', 'deep-learning-from-scratch-master/ch01/', 'deep-learning-from-scratch-master/ch01/hungry.py', 'deep-learning-from-scratch-master/ch01/img_show.py', 'deep-learning-from-scratch-master/ch01/man.py', 'deep-learning-from-scratch-master/ch01/simple_graph.py', 'deep-learning-from-scratch-master/ch01/sin_cos_graph.py', 'deep-learning-from-scratch-master/ch01/sin_graph.py', 'deep-learning-from-scratch-master/ch02/', 'deep-learning-from-scratch-master/ch02/and_gate.py', 'deep-learning-from-scratch-master/ch02/nand_gate.py', 'deep-learning-from-scratch-master/ch02/or_gate.py', 'deep-learning-from-scratch-master/ch02/xor_gate.py', 'deep-learning-from-scratch-master/ch03/', 'deep-learning-from-scratch-master/ch03/mnist_show.py', 'deep-learning-from-scratch-master/ch03/neuralnet_mnist.py', 'deep-learning-from-scratch-master/ch03/neuralnet_mnist_batch.py', 'deep-learning-from-scratch-master/ch03/relu.py', 'deep-learning-from-scratch-master/ch03/sample_weight.pkl', 'deep-learning-from-scratch-master/ch03/sig_step_compare.py', 'deep-learning-from-scratch-master/ch03/sigmoid.py', 'deep-learning-from-scratch-master/ch03/step_function.py', 'deep-learning-from-scratch-master/ch04/', 'deep-learning-from-scratch-master/ch04/gradient_1d.py', 'deep-learning-from-scratch-master/ch04/gradient_2d.py', 'deep-learning-from-scratch-master/ch04/gradient_method.py', 'deep-learning-from-scratch-master/ch04/gradient_simplenet.py', 'deep-learning-from-scratch-master/ch04/train_neuralnet.py', 'deep-learning-from-scratch-master/ch04/two_layer_net.py', 'deep-learning-from-scratch-master/ch05/', 'deep-learning-from-scratch-master/ch05/buy_apple.py', 'deep-learning-from-scratch-master/ch05/buy_apple_orange.py', 'deep-learning-from-scratch-master/ch05/gradient_check.py', 'deep-learning-from-scratch-master/ch05/layer_naive.py', 'deep-learning-from-scratch-master/ch05/train_neuralnet.py', 'deep-learning-from-scratch-master/ch05/two_layer_net.py', 'deep-learning-from-scratch-master/ch06/', 'deep-learning-from-scratch-master/ch06/batch_norm_gradient_check.py', 'deep-learning-from-scratch-master/ch06/batch_norm_test.py', 'deep-learning-from-scratch-master/ch06/hyperparameter_optimization.py', 'deep-learning-from-scratch-master/ch06/optimizer_compare_mnist.py', 'deep-learning-from-scratch-master/ch06/optimizer_compare_naive.py', 'deep-learning-from-scratch-master/ch06/overfit_dropout.py', 'deep-learning-from-scratch-master/ch06/overfit_weight_decay.py', 'deep-learning-from-scratch-master/ch06/weight_init_activation_histogram.py', 'deep-learning-from-scratch-master/ch06/weight_init_compare.py', 'deep-learning-from-scratch-master/ch07/', 'deep-learning-from-scratch-master/ch07/apply_filter.py', 'deep-learning-from-scratch-master/ch07/gradient_check.py', 'deep-learning-from-scratch-master/ch07/params.pkl', 'deep-learning-from-scratch-master/ch07/simple_convnet.py', 'deep-learning-from-scratch-master/ch07/train_convnet.py', 'deep-learning-from-scratch-master/ch07/visualize_filter.py', 'deep-learning-from-scratch-master/ch08/', 'deep-learning-from-scratch-master/ch08/awesome_net.py', 'deep-learning-from-scratch-master/ch08/deep_convnet.py', 'deep-learning-from-scratch-master/ch08/deep_convnet_params.pkl', 'deep-learning-from-scratch-master/ch08/half_float_network.py', 'deep-learning-from-scratch-master/ch08/misclassified_mnist.py', 'deep-learning-from-scratch-master/ch08/train_deepnet.py', 'deep-learning-from-scratch-master/common/', 'deep-learning-from-scratch-master/common/__init__.py', 'deep-learning-from-scratch-master/common/functions.py', 'deep-learning-from-scratch-master/common/gradient.py', 'deep-learning-from-scratch-master/common/layers.py', 'deep-learning-from-scratch-master/common/multi_layer_net.py', 'deep-learning-from-scratch-master/common/multi_layer_net_extend.py', 'deep-learning-from-scratch-master/common/optimizer.py', 'deep-learning-from-scratch-master/common/trainer.py', 'deep-learning-from-scratch-master/common/util.py', 'deep-learning-from-scratch-master/dataset/', 'deep-learning-from-scratch-master/dataset/__init__.py', 'deep-learning-from-scratch-master/dataset/lena.png', 'deep-learning-from-scratch-master/dataset/lena_gray.png', 'deep-learning-from-scratch-master/dataset/mnist.py', 'deep-learning-from-scratch-master/environment.yml', 'deep-learning-from-scratch-master/notebooks/', 'deep-learning-from-scratch-master/notebooks/ch01.ipynb', 'deep-learning-from-scratch-master/notebooks/ch02.ipynb', 'deep-learning-from-scratch-master/notebooks/ch03.ipynb', 'deep-learning-from-scratch-master/notebooks/ch04.ipynb', 'deep-learning-from-scratch-master/notebooks/ch05.ipynb', 'deep-learning-from-scratch-master/notebooks/ch06.ipynb', 'deep-learning-from-scratch-master/notebooks/ch07.ipynb', 'deep-learning-from-scratch-master/notebooks/ch08.ipynb', 'deep-learning-from-scratch-master/notebooks/common.ipynb']
2-2.個別ファイルの中身を確認:ZipFIle.read(path)
個別ファイルの中身を確認する場合は①Zipfile()でオブジェクト化(zipobj)、②zipobj.read(<中身を確認したいfilepath>) で確認できます。
[IN]
with ZipFile(path_zip, 'r') as zipobj:
    file1 = zipobj.namelist()[6]
    print(file1)
    print(zipobj.read(file1))

[OUT]
deep-learning-from-scratch-master/ch01/img_show.py

b"# coding: utf-8\nimport matplotlib.pyplot as plt\nfrom matplotlib.image import imread\n\nimg = imread('../dataset/lena.png') # \xe7\x94\xbb\xe5\x83\x8f\xe3\x81\xae\xe8\xaa\xad\xe3\x81\xbf\xe8\xbe\xbc\xe3\x81\xbf\nplt.imshow(img)\n\nplt.show()"
3.Zipの解凍
3-1.全ファイル解凍:ZipFIle.extractall()
Zipファイルを作業ディレクトリ上に回答する場合はextractall()メソッドを使用します。
【引数】
●path:{default:None}:展開先のディレクトリを指定
●members:{default:None}:オプションでnamelist() で返されるリストの部分集合でなければなりません※意味が分からないので原文のまま
●pwd:{default:None}:暗号化ファイルに使われるパスワード
[IN]
from zipfile import ZipFile

path_zip = 'deep-learning-from-scratch-master.zip'

#ZipFileで開く場合はClose()が必要:with文で代用
with ZipFile(path_zip, 'r') as zipobj:
    zipobj.extractall()

[OUT]
3-2.個別ファイルの解凍:ZipFIle.extract()
Zipファイルの中身を指定すればextract(<filepath>)で個別での解凍も可能です。
[IN]
from zipfile import ZipFile

path_zip = 'deep-learning-from-scratch-master.zip'

#ZipFileで開く場合はClose()が必要:with文で代用
with ZipFile(path_zip, 'r') as zipobj:
    zipobj.extract('deep-learning-from-scratch-master/ch01/hungry.py')

[OUT]
4.Zipの圧縮(Zip作成):Zipfile.write()
Zipfileの圧縮(Zipの作成)はZipfleでオブジェクト化した後にwrite()メソッドでzipファイルに上書きすることで圧縮できます。
[samplecode]
ZipFile.write(filename, arcname=None, compress_type=None, compresslevel=None)
【引数】
●filename{default:-}:圧縮(Zipに入れたい)ファイルのパス
●arcname{default:None}:圧縮時にファイル名を変更したい場合は指定
ー>アーカイブ名はアーカイブルートに対する相対パスでなければなりません。アーカイブ名はパスセパレータで始まってはいけません。
ー>もし、arcname (arcname が与えられない場合は、filename) が null byte を含むなら、アーカイブ中のファイルのファイル名は、null byte までで切り詰められます。
●compress_type{default:None}:ー
●compresslevel{default:None}:ー
4-1.圧縮の基本操作(個別に圧縮):write('w')
個別に圧縮するケースは少ないですが基本操作を学びます。with ZipFile()でZipファイル名を指定してZipFile.write(<圧縮するfilepath>)で Zipファイルが作成可能です。
[IN]
from zipfile import ZipFile

img_path = 'sampledata/konan.jpg' #Zipに入れる画像ファイル

with ZipFile('sample.zip', 'w') as zf:
    zf.write(img_path) #Zipに画像ファイルを追加

[OUT]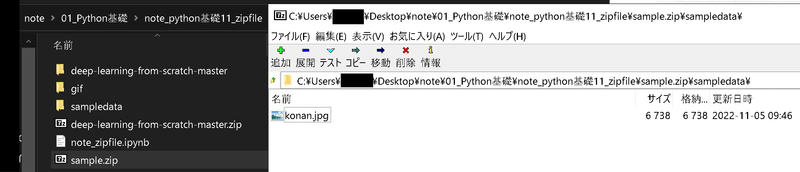
圧縮時のファイル名を変更したい場合はarcname引数をしてします。下図の通りオリジナルファイルはフォルダに入っていたためarcname無しだとフォルダごと圧縮されていますがarcname有りだと指定したファイル名になります。
[IN]
from zipfile import ZipFile

img_path = 'sampledata/konan.jpg' #Zipに入れる画像ファイル

with ZipFile('sample2.zip', 'w') as zf:
    zf.write(img_path, arcname='sample.jpg') #Zip追加時のファイル名を指定]

[OUT]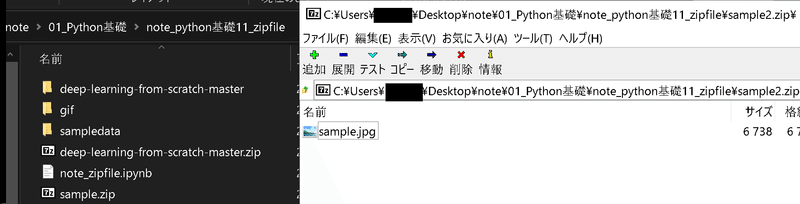
4-2.複数ファイルを圧縮(上書き):write('w')
複数のファイルを圧縮する場合はZifple.write()を連続して記載します。通常は手間のためFor文で処理します。
[IN]
import glob

filepaths = glob.glob('sampledata/*.png')+glob.glob('sampledata/*.jpg')
print(filepaths)

with ZipFile('sample_all.zip', 'w') as zf:
    for filepath in filepaths:
        zf.write(filepath) #Zipに画像ファイルを追加

[OUT]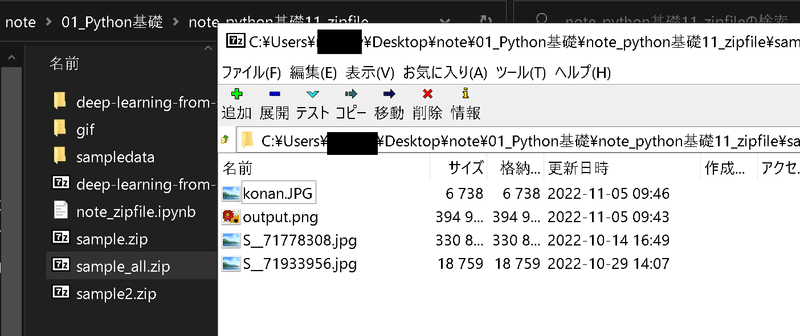
4-3.既存ZIPにファイルを追加:write('a')
既にあるZIPファイルの中にファイルを追加する場合はopen()の引数に'a'を指定します。
[IN]
import glob
from zipfile import ZipFile

filepaths = glob.glob('sampledata/*.png')+glob.glob('sampledata/*.jpg')
print(filepaths)

with ZipFile('sample.zip', 'a') as zf:
    for filepath in filepaths:
        zf.write(filepath) #Zipに画像ファイルを追加

[OUT]
-
参考記事
あとがき
今まで手でやってたのでさっさと覚えればよかった。
この記事が気に入ったらサポートをしてみませんか?