【日記】Gatsbyの勉強⑪

引き続きGatsbyのチュートリアルの続きからやっていきます。
Gatsby fundamentals(基礎)
0. Set up your development environment
1. Get to know Gatsby building blocks
2. Introduction to using CSS in Gatsby
3. Building nested layouts in Gatsby ← 今ここ
Intermediate tutorials(中級編)
4. Querying for data in a blog
5. Source plugins and rendering queried data
6. Transformer plugins
7. Programmatically create pages from data
8. Preparing a site to go live
Plugin & Theme tutorials(プラグインとテーマについて)
9. Creating a Source Plugin
10. Creating a Remark Transformer Plugin
11. Using a Theme
12. Using Multiple Themes Together
13. Building a Theme
Additional tutorials(付録的な感じ)
14. Using Gatsby Image with Your Site
15. Making a Site with User Authentication
16. Making an E-commerce Gatsby Site with Stripe
17. Building an E-commerce Site with Gatsby, DatoCMS, and Snipcart
18. Using the WordPress Source Plugin
19. Adding Images to a WordPress Site
20. Using Prismic with the GraphQL Source Plugin
21. Writing Documentation with Docz
22. Making a Blog with Netlify CMS
23. Search Engine Optimization (SEO) and Social Sharing Cards with Gatsby
チュートリアル3の続きから。
gatsby-plugin-typographyのインストールまではやったので、gatsby-config.jsの編集をしていきます。
gatsby-plugin-typography
Typography.js(文章のスタイルを設定するライブラリ)を使えるようにする
* Typography.jsはフォント、フォントサイズ、line-heigth等のパラメータを設定すると、それに従ってCSSを生成してくれるライブラリです。CSSよりも管理が楽になる上、様々なテーマが提供されているので、それを使って簡単にスタイルを設定できます。
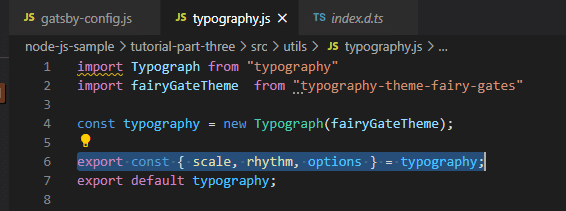
ES6以降の知識が足りなくて、上記の範囲選択した部分のコードの意味が分からなかった。なんとなくは分かるんだけど正確に理解できない。今度調べてみます。
続いてlayoutコンポーネントを作成して、全ページのjsに適用。
チュートリアル3のソースはこんな感じになりました。
import React from "react"
import PropTypes from "prop-types"
import { Link } from "gatsby"

import css from "./layout.module.css"

const ListLink = ({to, children}) => (
 <li className={css.listlink}>
   <Link to={to}>{children}</Link>
 </li>
)

ListLink.propTypes = {
 to: PropTypes.string.isRequired,
 children: PropTypes.func.isRequired,
}

const Layout = ({children}) => {
 return (
   <div className={css.base}>
     <header>
       <Link to="/" className={css.homelink}>
         <h3>MySweetSite</h3>
       </Link>
       <ul className={css.ul}>
         <ListLink to="/">Home</ListLink>
         <ListLink to="/about/">About</ListLink>
         <ListLink to="/contact/">Contact</ListLink>
       </ul>
     </header>
     {children}
   </div>
 )
}

Layout.propTypes = {
 children: PropTypes.func.isRequired,
}

export default Layout
.base {
margin: 3rem auto;
max-width: 650px;
padding: 0 1rem;
}
.homelink {
text-shadow: none;
background-image: none;
}
.ul {
list-style: none;
float: right;
}
.listlink {
display: inline-block;
margin-right: 1rem;
}
.header {
margin-bottom: 1.5rem;
}import React from "react"
import Layout from "../components/layout"
export default () => {
return (
<Layout>
<h1>Hi! I'm building a fake Gatsby site as part of a tutorial!</h1>
<p>
What do I like to do? Lots of course but definitely enjoy building
websites.
</p>
</Layout>
)
}import React from "react"
import Layout from "../components/layout"
export default () => {
return (
<Layout>
<h1>About me</h1>
<p>
I’m good enough, I’m smart enough, and gosh darn it, people like me!
</p>
</Layout>
)
}import React from "react"
import Layout from "../components/layout"
export default () => {
return (
<Layout>
<h1>I'd love to talk! Email me at the address below</h1>
<p>
<a href="mailto:me@example.com">me@example.com</a>
</p>
</Layout>
)
}チュートリアル2のCSSモジュールを使って書いてみたら少しハマりました。
この記事が気に入ったらサポートをしてみませんか?