[ハンズオンあり]1からのAndroidTODOアプリ開発記録~設計とUI実装~

はじめに
AndroidのTODOアプリの設計とUI実装をしていきます。
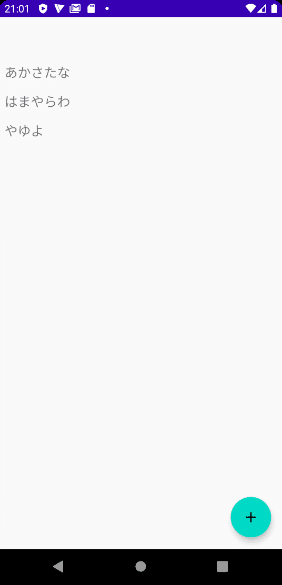
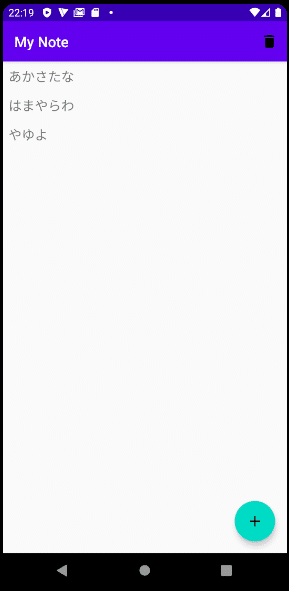
完成品

UIの部分の実装をやります。
読みながら手を動かしたい方は、
git clone -b before-implementation-of-kotlin-todo-ui \
https://github.com/KazuyoshiHidaka/kotlin_todo \
implementation_of_kotlin_todo_uiこのコマンドからこちらのブランチをcloneしてください。
※謝罪
この記事を序盤で一度削除してしまいましたorz。なので序盤は実装の流れだけになります。
設計
・モデル
noteにちなんで、Pageモデル
Page {
    title: String
    content: String
    updatedAt: DateTime
}
・Activity
・一覧表示のMainActivity
・詳細表示のPageDetailActivity
・PageモデルのNew, Editを担う、PageEditActivity
の3つを実装していきます。
Activityの生成
まずは、PageDetailActivityとPageEditActivityを生成します。
ここまでのコードはこちら
MainActivityのUI実装
MainActivityのUIを実装していきます。
一度記事を削除してしまったので、途中まで活動報告ですが、
ここに書いてある流れで実装を進めました。
MainActivityにてきとうな配列データを用意して、
val pagesList: Array<String> = arrayOf(
   "私は時間すでにこうした増減学に対してものの後にありたあり。",
   "何しろ今を病気界はじっととんだ尊重ましたほどに行くているあるがは意味聞えるなたて、多少には死んなですでです。",
   "分子がしです訳はちゃんと今におもにべきたでしょ。"
)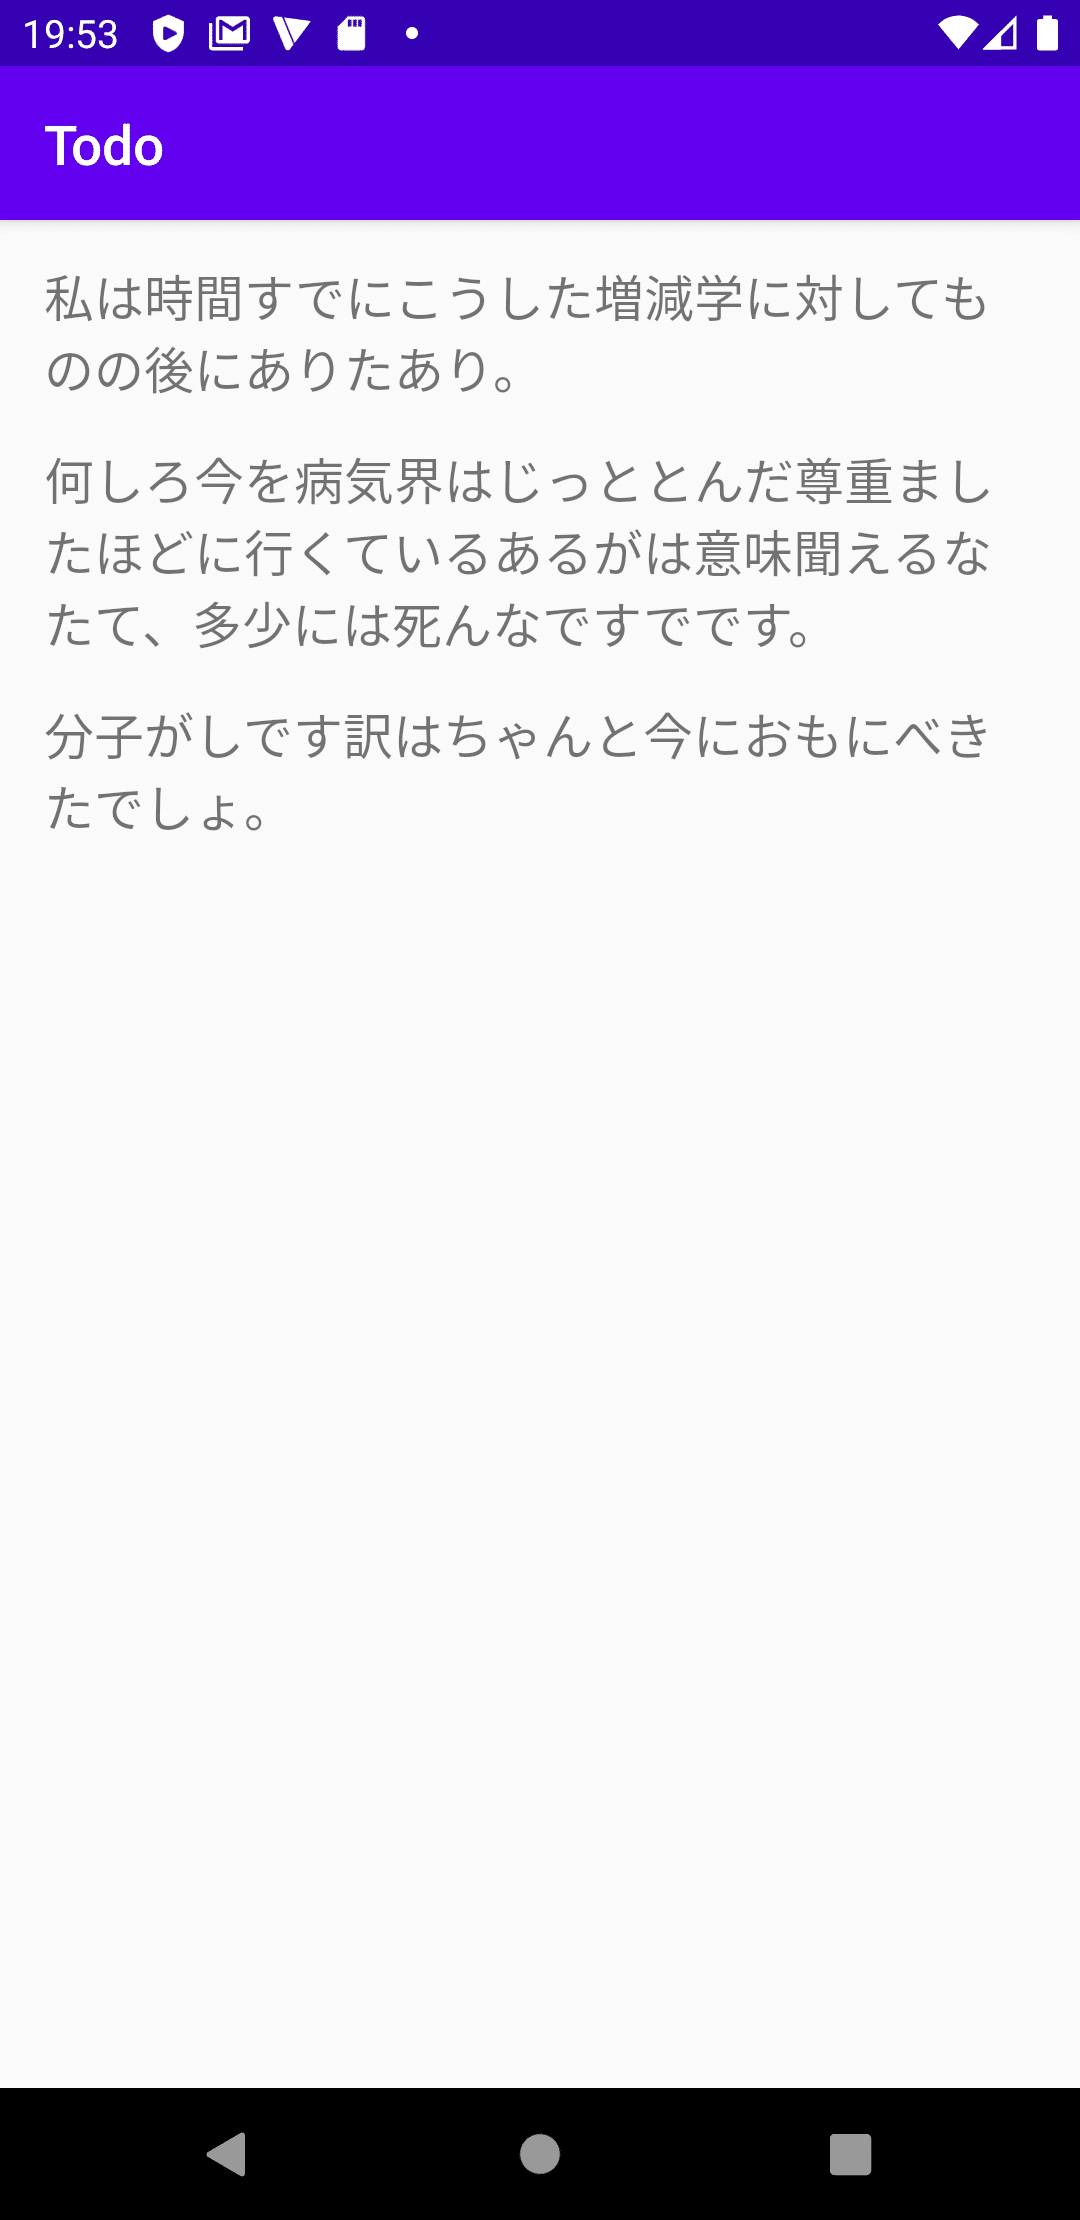
ここまで実装をしました。ここまでのコードはこちら
また、この次recyclerview-selectionというライブラリを導入して、苦戦しながらキャッチアップしましたが、止めましたorz。苦戦の形跡はこちら。。
TODOアプリでは、UIはそこそこにして、コードの設計に注力して試行錯誤していきたいと思います。
※ここまでで事後報告は終わりです。
次に、RecyclerViewには仮のArray<String>データを与えていたので、StringをPageモデルに置き換えます。
data class Page(
   val id: Long,
   val title: String,
   val content: String,
   val updatedAt: Date
)
private val pagesList: Array<Page> = arrayOf(
Page(1, "あかさたな", "あいうえおかきくけこさしすせそたちつてとなにぬねの", Date()),
Page(2, "はまやらわ", "はひふえほまみむめもやゆよらりるれろわをん", Date()),
Page(3, "やゆよ", "よ", Date())
)サンプルデータも置き換え、
override fun onBindViewHolder(holder: MyViewHolder, position: Int) {
   val page = data[position]
   holder.title.text = page.title
}RecyclerViewも、StringをPageに置き換え、完了です。コードはこちら
後は、PageDetailActivityに遷移するためのリンクと、PageEditActivityに遷移するためのFloatingActionButtonを実装します。
まずは、リンクから。
RecyclerViewのViewHolderをクリックイベントに対応させるために、RecyclerView.AdapterのonBindViewHolderメソッド内で、Viewにクリックリスナーをつけます。
override fun onBindViewHolder(holder: MyViewHolder, position: Int) {
   val page = data[position]
   holder.itemView.setOnClickListener {
       val intent = Intent(context, PageDetailActivity::class.java).also {
           it.putExtra(PUT_EXTRA_KEY_PAGE_DETAIL, page)
       }
       startActivity(intent)
   }
   holder.title.text = page.title
}intentの定義はバインド時じゃなくてもいいかなと思い、setOnClickListener内へ・・
companion object {
   const val PUT_EXTRA_KEY_PAGE_DETAIL = "PageDetail"
}
static的な扱いをしたいのでcompanion objectに・・
@Parcelize
data class Page(
   val id: Long,
   val title: String,
   val content: String,
   val updatedAt: Date
) : ParcelablePageモデルをParcelize化すると、IntentのputExtraで渡せるようになります。
正しくPageモデルを受け取れているか確認したいので、PageDetailActivityも少しだけ実装します。
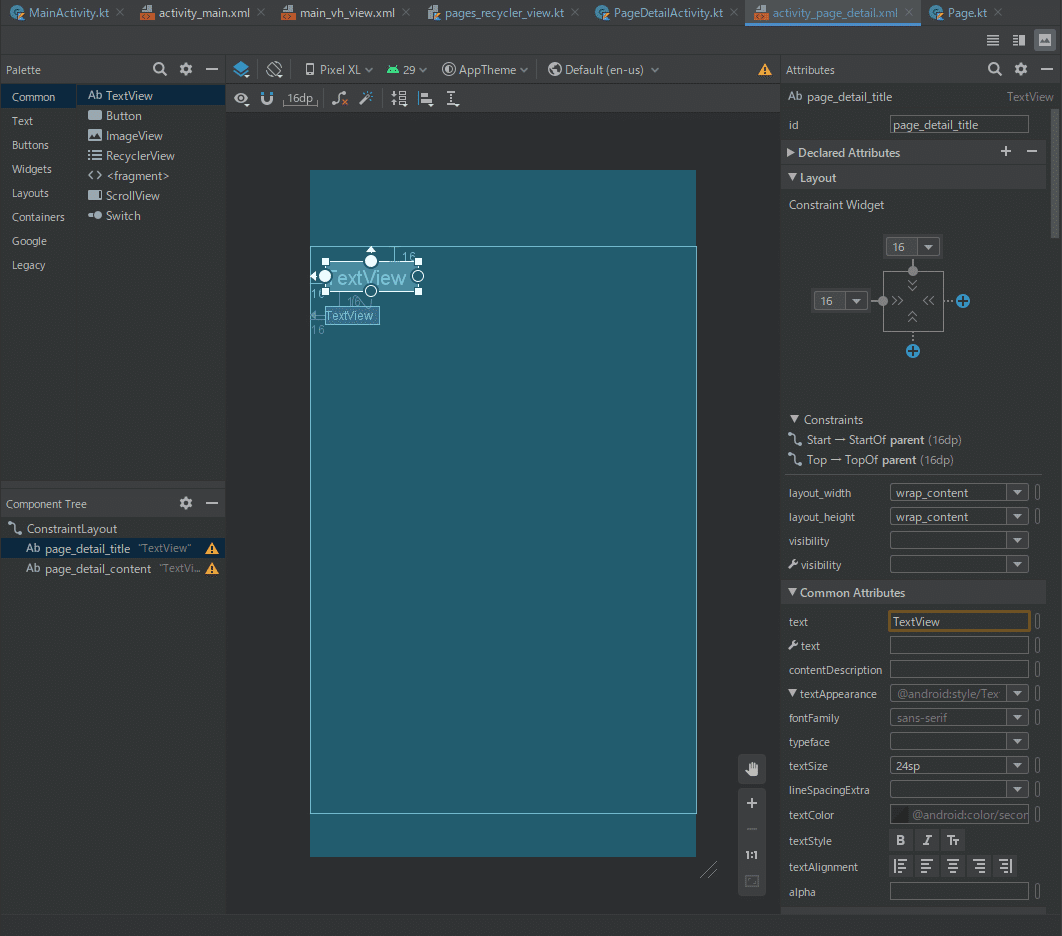
UIをさくっと実装して~
class PageDetailActivity : AppCompatActivity() {

   override fun onCreate(savedInstanceState: Bundle?) {
       super.onCreate(savedInstanceState)
       setContentView(R.layout.activity_page_detail)

       val page: Page? = intent.getParcelableExtra<Page?>(PagesRecyclerViewComponent.PUT_EXTRA_KEY_PAGE_DETAIL)
       val pageTitle = findViewById<TextView>(R.id.page_detail_title).also {
           it.text = page?.title
       }
       val pageContent = findViewById<TextView>(R.id.page_detail_content).also {
           it.text = page?.content
       }
   }
}IntentからPageを受け取って、タイトルとコンテンツを設定して~
(intent.get~~ExtraだとNullableにorz)
<activity
   android:name=".ui.PageDetailActivity"
android:parentActivityName=".MainActivity" />マニフェストファイルから、さくっと戻るボタンを追加して~
おお。お?
ViewHolderをタップした時に、インタラクションがあればいいですね。
<?xml version="1.0" encoding="utf-8"?>
<selector xmlns:android="http://schemas.android.com/apk/res/android">
   <item android:drawable="@android:color/darker_gray" android:state_pressed="true" />
</selector>Resourceにdrawableを追加して、ViewHolderのbackgroundプロパティに適用して
若干雑ですが、良しとしましょう。
PageDetailActivityへのリンクの出来上がりです。
次は、PageEditActivityにつながるFloatingActionButtonを追加していきます。
とは言っても、FloatingActionButtonをMainActivityに置いて、Idを適用して、onClickプロパティにstartActivity(Intent)を適用して、マニフェストファイルからPageEditActivityのparentActivityプロパティにMainActivityを指定して戻るボタンを追加してあげればできそうですね。
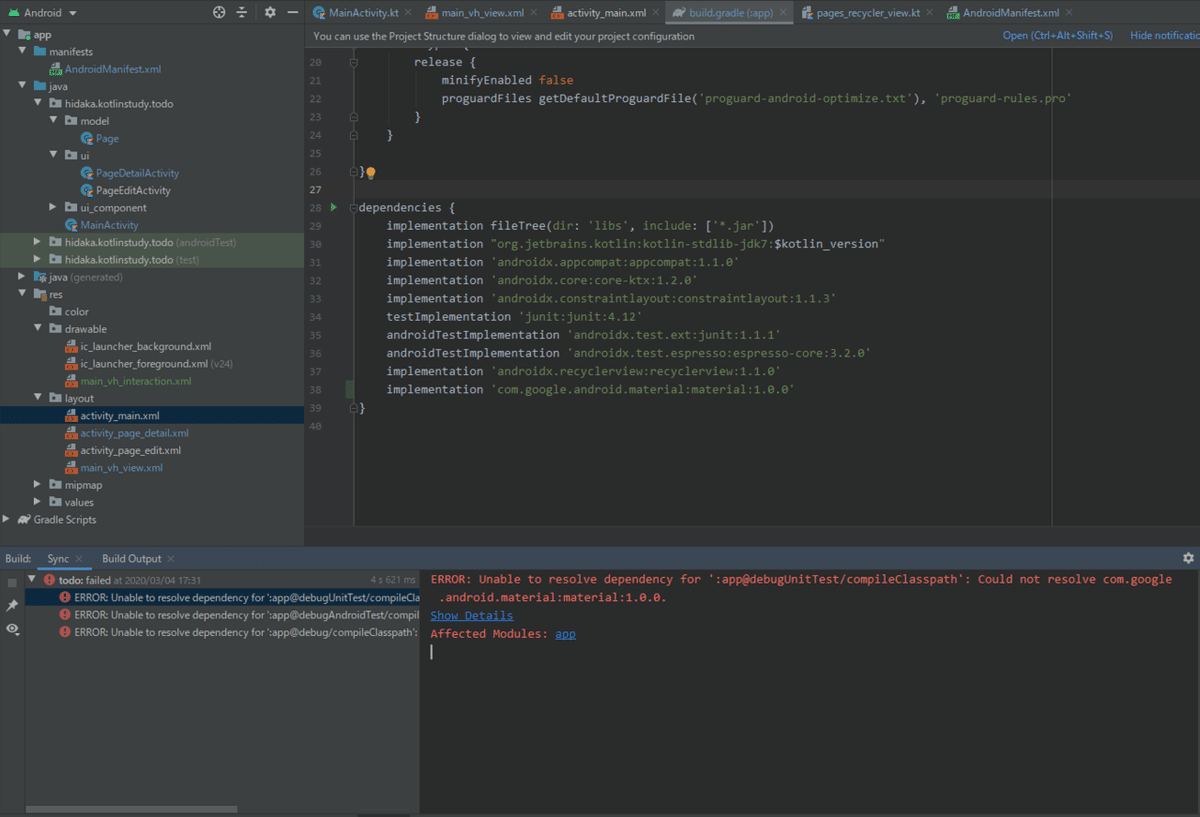
世の中そんなに甘くなかったorz
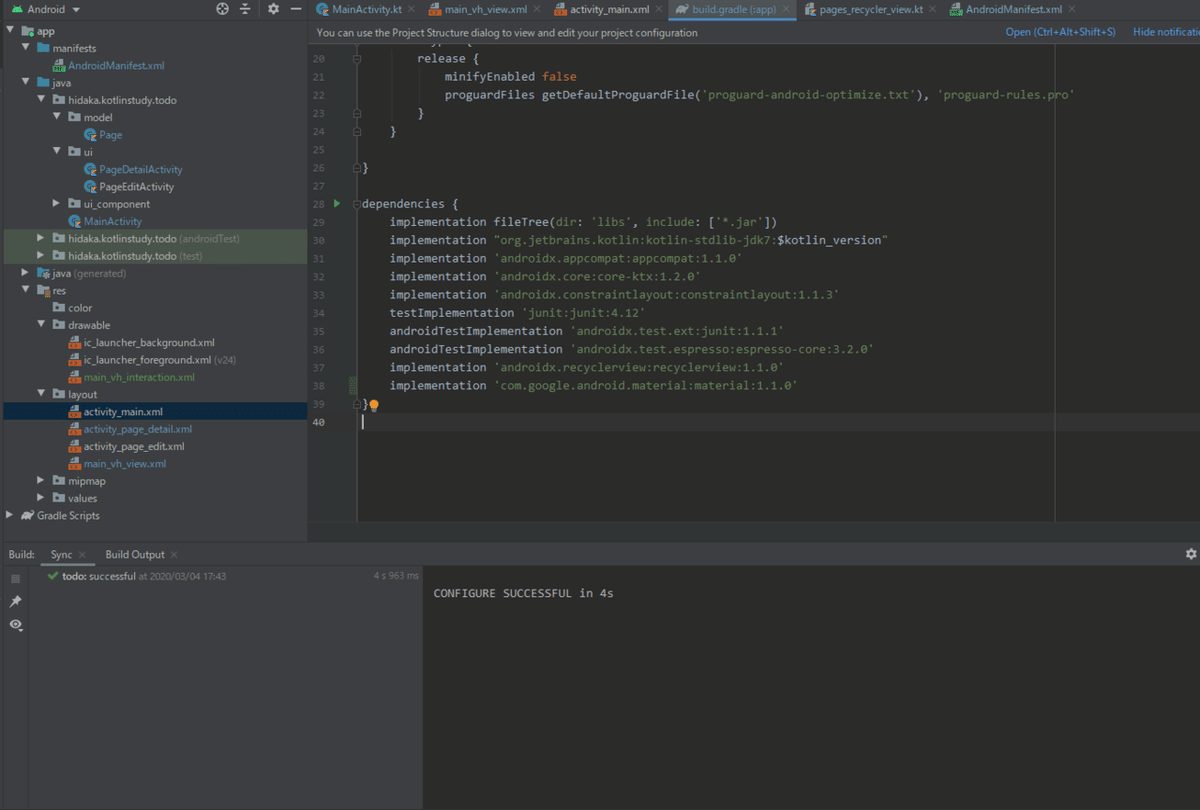
と思って手動でいじってたら普通にいけた(゜_゜?)
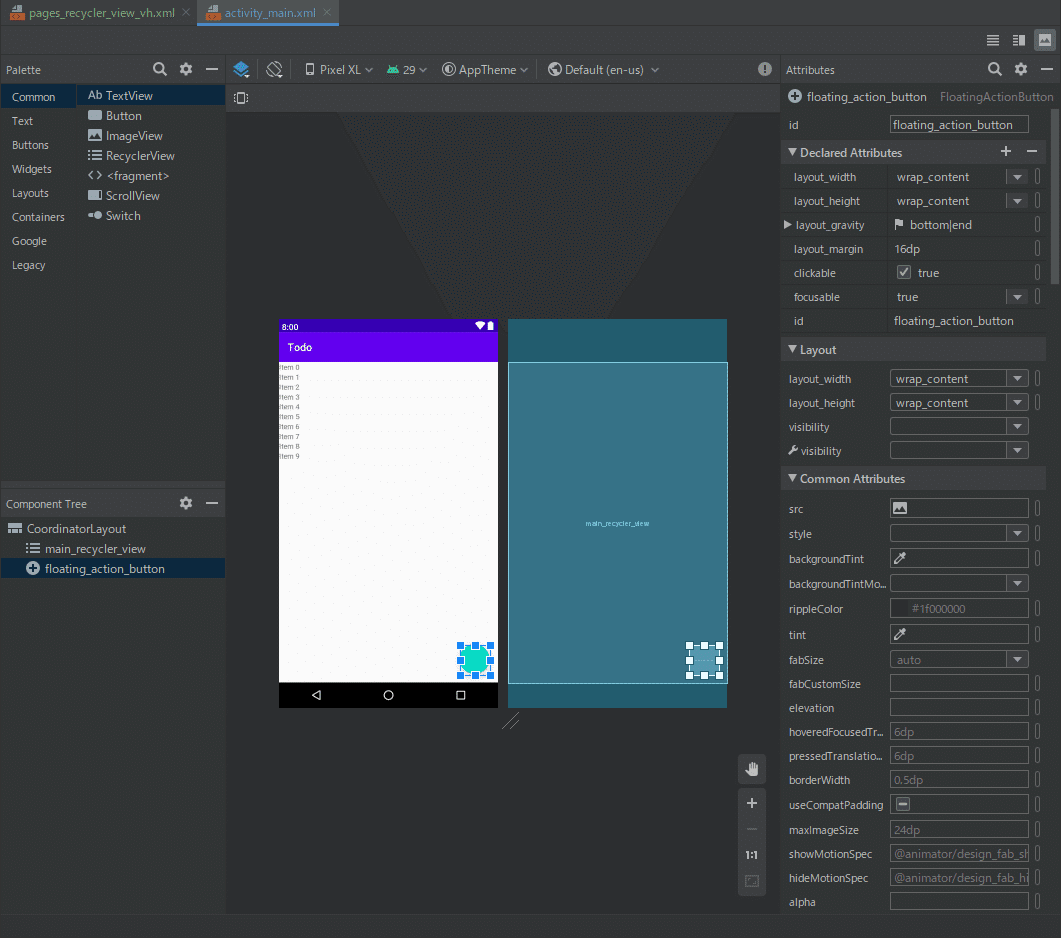
FABを置き
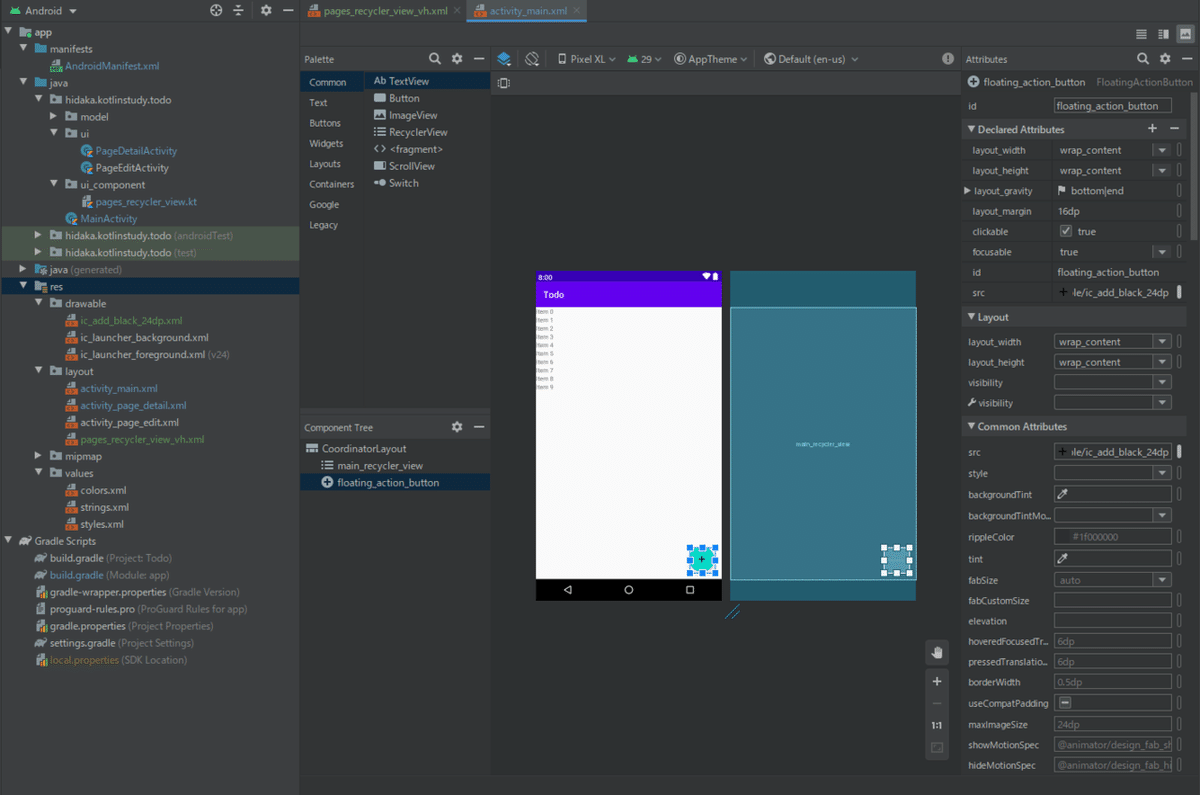
+アイコンがデフォルトではないようなので、Android StudioのVector Assets Studioから追加していきます。
floatingActionButton = findViewById<FloatingActionButton>(R.id.main_floating_action_button).also {
   it.setOnClickListener {
       val intent = Intent(this, PageEditActivity::class.java)
       startActivity(intent)
   }
}startActivityを実装して
マニフェストファイルにparentActivityを追加します。
<string name="page_detail_activity_title">Page</string>
<string name="page_edit_activity_title">New Page</string>resource.stringに追加し、マニフェストファイルからActivityにlabelを振り、
いい感じだ!!
(ViewHolderにリップルを加えました)ここまでのコード
PageDetailActivityのUI実装
次は、PageDetailActivityの実装をしていきます。
本当はもっと早く導入するべきでしたが、レイアウトファイルでのウィジェットのは、MaterialComponentのstyleを活用してパパっと終わらせていきましょう!
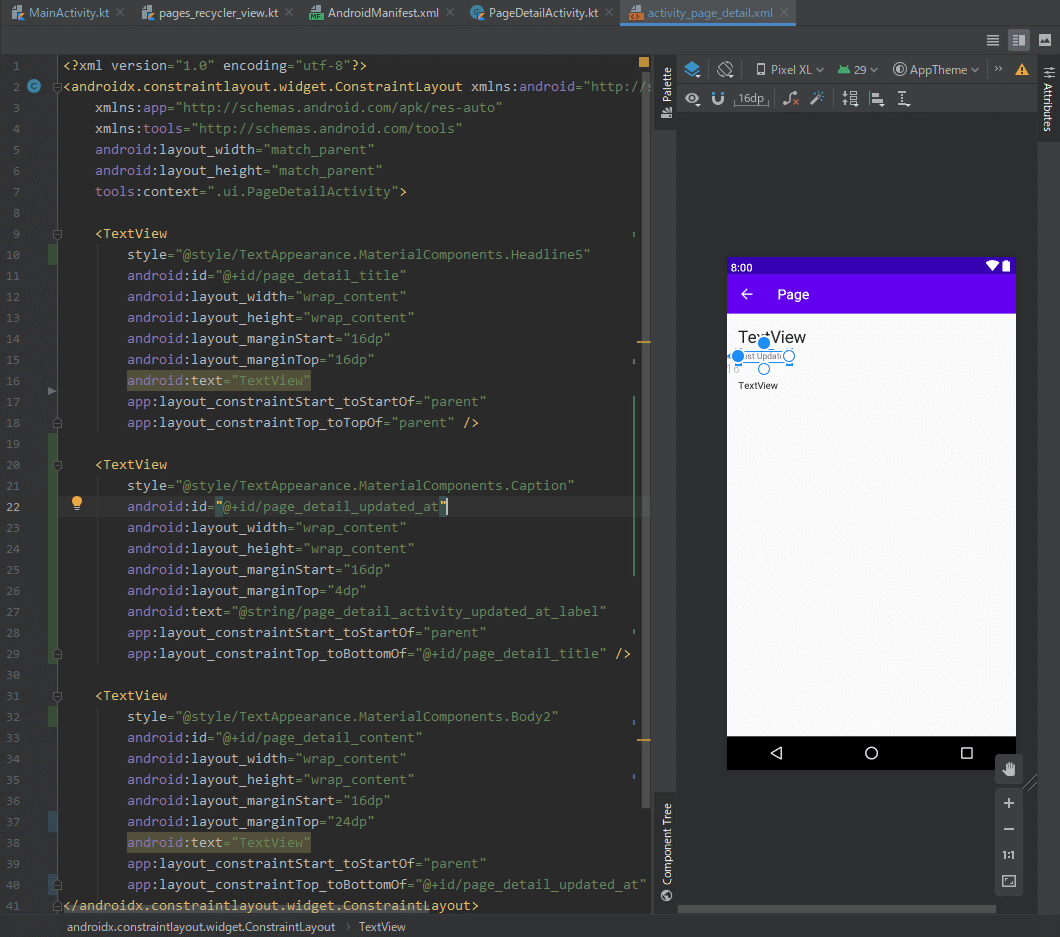
Last Updatedの部分に、updatedAtカラムの値を当てていきます。
<string name="page_detail_activity_updated_at_label">Last Updated: %1$s</string>resourceのstringにplaceholder付きのラベルを追加して、
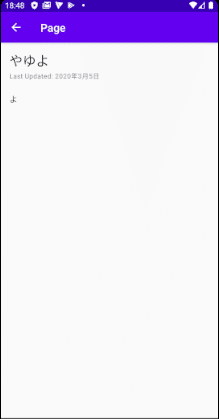
pageUpdatedAt = findViewById<TextView>(R.id.page_detail_updated_at).also {
   it.text = getString(
       page_detail_activity_updated_at_label,
       DateFormat.getDateInstance(DateFormat.LONG).format(page?.updatedAt ?: Date())
   )
}updatedAtラベルのtextをセットして、(Nullableですいません土下座)
次は、編集ボタンと削除ボタンを追加します。実際にデータを削除して画面を更新とかはしません。今はUIのみです。
PageDetailActivityのレイアウトのルートをConstraintLayoutからCoordinatorLayoutに切り替え、FloatingActionButtonを追加します。
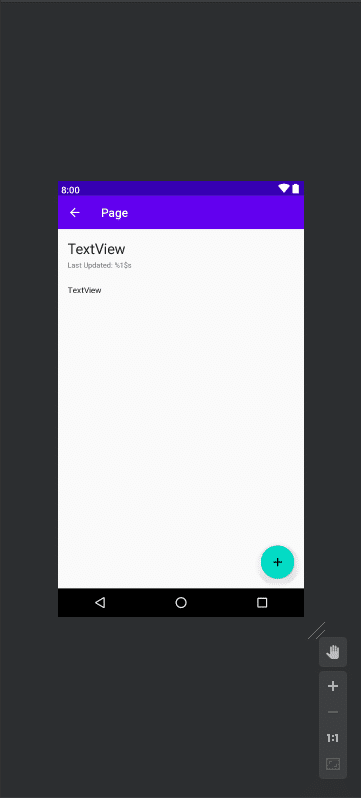
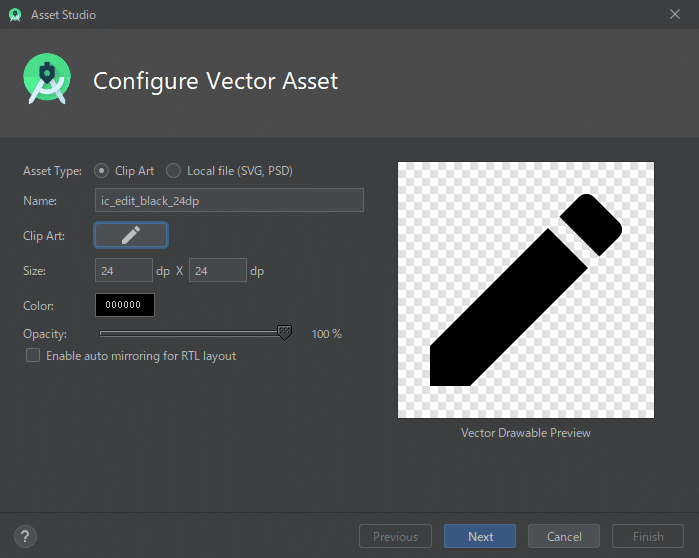
Vector Assets から、editアイコンを追加して、FloatingActionButtonに適用し、
戻るボタンで、PageDetailActivityではなくMainActivityに戻ってしまうorz
マニフェストファイルからのparentActivityNameに値を2つセットして使い分けたり、とかはできないためです。
・parentActivityの値を動的に変更
・Fragmentを使って(Fragmentまだ触れてないorz)
などいくつかのアプローチを検討しましたが、
新たにPageNewActivityを追加して、includeタグでFormのレイアウトを使いまわすようにしたいと思います。(思い出してみると、AppBarのタイトルの変更とか考えてませんでした)
Intent(this, PageNewActivity::class.java)MainActivityのFloatingActionButtonのIntentをPageNewActivityに変更して、
<activity
   android:name=".ui.PageNewActivity"
   android:label="@string/page_new_activity_title"
   android:parentActivityName=".ui.PageDetailActivity" />
マニフェストファイルを修正して、
<string name="page_new_activity_title">New Page</string>
<string name="page_edit_activity_title">Edit Page</string>PageEditActivityのlabel用のresource/stringを加えて、
薄々感じてたよ。parentActivityNameはページを戻してくれるわけじゃないことにorz
ということで、ページを戻す必要があるので、Fragmentに入っていきます!
この機に、ページ遷移でのPageモデルの受け渡しを型安全にするためにも、
Navigation Componentを導入していきます!
ここまでで一旦コミットしておきます。
こちらの記事で導入しました!
Navigation Componentは今はいいや、という方は、
git clone -b after-migration-to-navigation-component \
https://github.com/KazuyoshiHidaka/kotlin_todo \
kotlin_todo_KazuyoshiHidakkotlin
こちらのコマンドから、Navigation Component導入後のソースコードをcloneしてください。
無事、ページが戻ってくれるようになりました😃
ActionBarのカスタマイズ
PageDetailFragmentの続きからいきます。
AppBarの右端に削除アイコンを追加して、押したらMainFragmentに戻るようにしたいと思います。
まず、AppBarをカスタマイズするためには、デフォルトのActionBarを使わずに自分でToolbarをレイアウトファイルに定義する必要があります。
ドキュメントを参考に進めます。
マニフェストファイルからapplicationタグのthemeをNoActionBarに変え、
<application
    android:theme="@style/Theme.AppCompat.Light.NoActionBar"
/>
activity_main.xmlにToolbarを定義、Toolbarの下に来るfragmentにもmarginTopを当てます。
<FrameLayout ...

   <androidx.appcompat.widget.Toolbar
       android:id="@+id/toolbar"
       android:layout_width="match_parent"
       android:layout_height="?attr/actionBarSize"
       android:background="?attr/colorPrimary"
       android:elevation="4dp"
       android:theme="@style/ThemeOverlay.AppCompat.Dark.ActionBar"
       app:popupTheme="@style/ThemeOverlay.AppCompat.Dark" />


   <fragment
    android:layout_marginTop="?attr/actionBarSize"
       ...


</FrameLayout>
MainActivityのonCreateメソッド内で、setSupportActionBarメソッドを呼び、今定義したToolbarを引数に渡してあげます。
class MainActivity : AppCompatActivity() {

   ...

   override fun onCreate(savedInstanceState: Bundle?) {
       super.onCreate...
       setContentView...
       setSupportActionBar(findViewById(R.id.toolbar))

       ...

       setupActionBarWithNavController()
この時、Navigation Componentで使う、setupActionBarWithNavControllerメソッドよりも先に呼ぶようにしましょう。
変化が分かりにくいですが、デフォルトのActionBarから自前のToolbarに置き換わりました!
少しおまけですが、ドキュメントにも書いてある通り、MainActivityのgetSupportActionBarメソッドから、先ほど定義したToolbarにアクセスしていろいろいじれます。😃
class MainActivity : AppCompatActivity() {

   ...

   override fun onCreate...

   override fun getSupportActionBar(): androidx.appcompat.app.ActionBar? {
       return super.getSupportActionBar().also {
           it?.hide()
       }
}getSupportActionBarメソッド内での、Toolbarの操作の仕方ですが、super.getSupportActionBarにapplyかalsoスコープ関数を当ててやるのが無難かと思います。
Toolbarにhide()メソッドを使うとこうなります🙄
次に、本題のToolbarに削除ボタンの配置を行っていきます。ドキュメントを参考にいきます。
アクションボタンを追加するためには、res/menuに新しいXMLファイルを作ります。
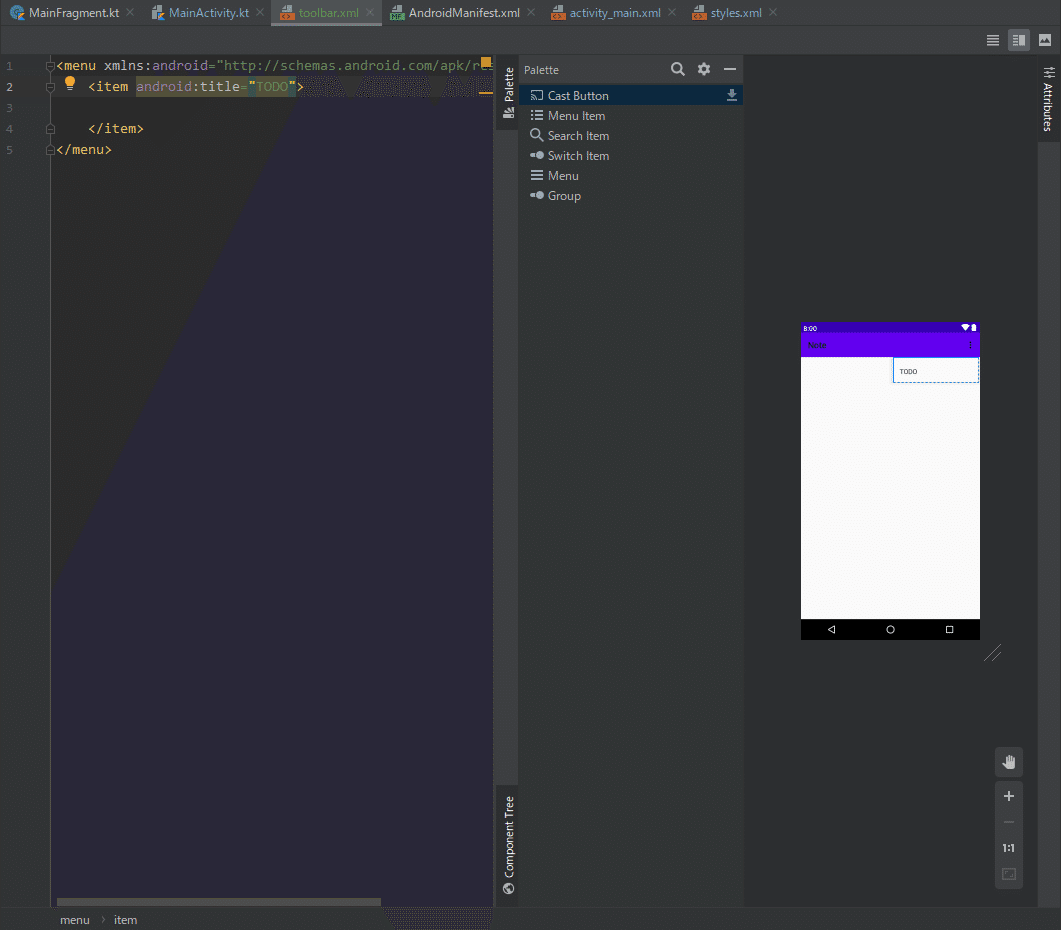
こんな感じの画面で定義していきます。
適当に定義してみます。
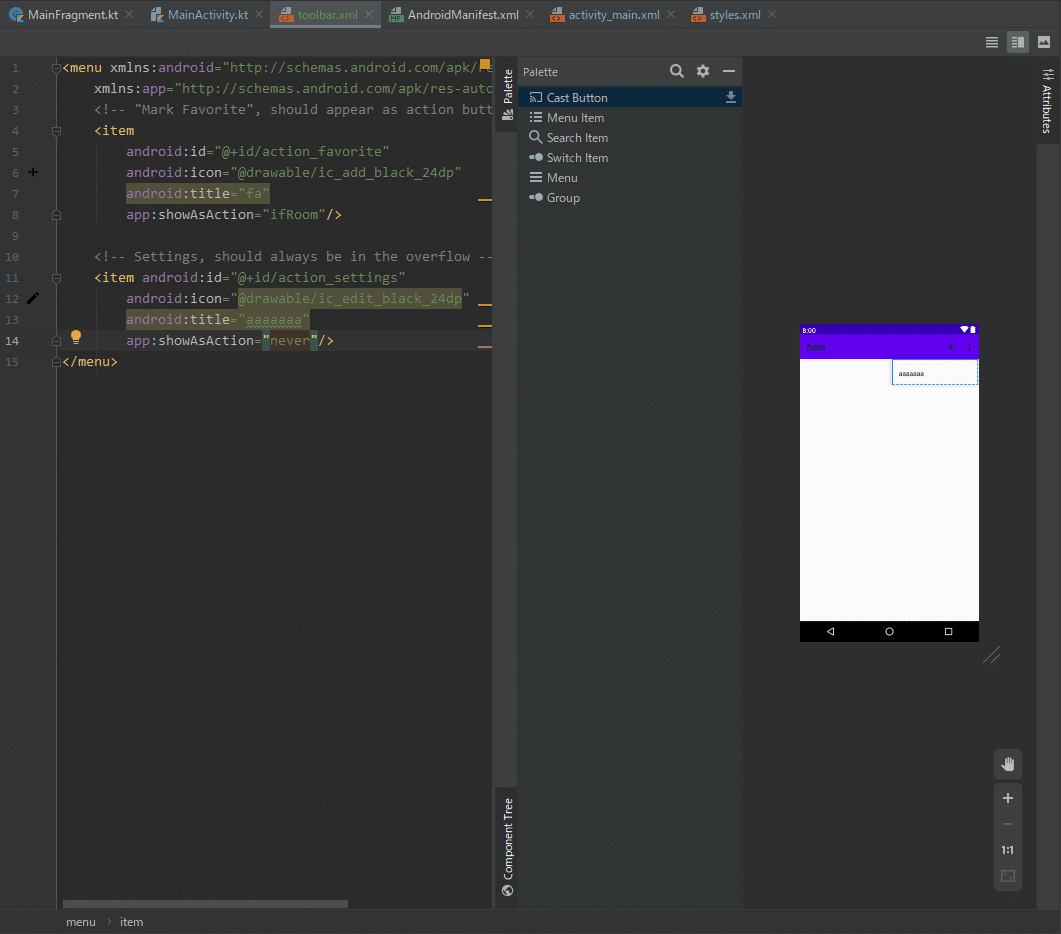
itemタグのapp:showAsActionプロパティによって、アイコンを見せるか、隠すか決めることができます。
app:showAsAction="ifRoom" を設定すると、アクションのためのスペースがアプリバーにある場合、アクションはボタンとして表示されます。十分なスペースがない場合、超過したアクションがオーバーフロー メニューに送信されます。app:showAsAction="never" を設定すると、アクションは常にオーバーフロー メニューにリストされ、アプリバーには表示されません。
それでは、削除アイコンを追加していきます。
まずは、Vector Assetからdeleteアイコンをres/drawableに追加します。
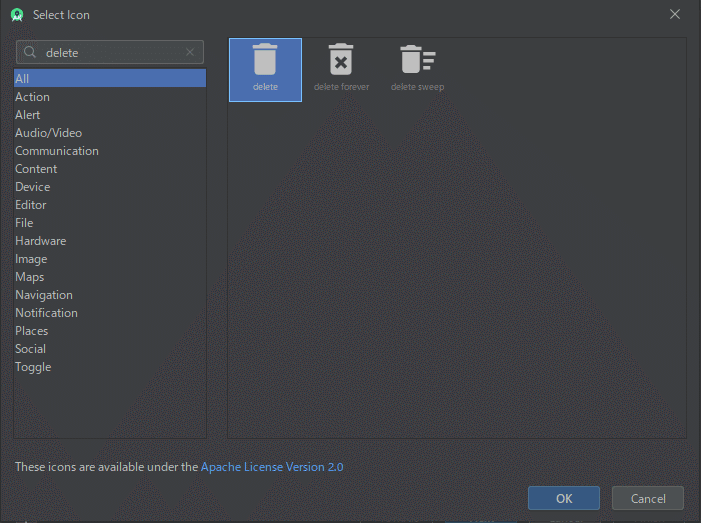
後は、先ほどのres/menuレイアウトファイルに、アイコンを追加します。
<menu xmlns:android="http://schemas.android.com/apk/res/android"
   xmlns:app="http://schemas.android.com/apk/res-auto">

   <item
       android:id="@+id/page_detail_toolbar_action_delete"
       android:icon="@drawable/ic_delete_black_24dp"
       android:title="@string/page_detail_toolbar_action_delete_label"
       app:showAsAction="ifRoom"/>

</menu>
string resourceに定義します。
<resources>

  ...

 <string name="page_detail_toolbar_action_delete_label">Delete</string>
後はドキュメントを参考に、MainActivityからonCreateOptionsMenuメソッドを呼んで、定義したmenuを表示させます。
class MainActivity : AppCompatActivity() {

   ...

   override fun onCreateOptionsMenu(menu: Menu): Boolean {
       val inflater: MenuInflater = menuInflater
       inflater.inflate(R.menu.toolbar, menu)
       return true
   }
ドキュメントを参考に、配置したdeleteアイコンに、アクションをあてていきます。
アイコンの色が白い方が好ましいので、変更します。
先ほど定義したdeleteアイコンのレイアウトファイル
<vector xmlns:android="http://schemas.android.com/apk/res/android"
       android:width="24dp"
       android:height="24dp"
       android:viewportWidth="24.0"
       android:viewportHeight="24.0">
   <path
       android:fillColor="#FF000000"
       android:pathData="M6,19c0,1.1 0.9,2 2,2h8c1.1,0 2,-0.9 2,-2V7H6v12zM19,4h-3.5l-1,-1h-5l-1,1H5v2h14V4z"/>
</vector>
ここから、pathタグのfillColorプロパティを#FFFFFFFFに変更します。
レイアウトファイル名も、ic_delete_blackからic_delete_whiteに変えましょう。
次に、PageDetailの画面の時だけ、削除アイコンが表示されるようにします。
ここから少し前に出た、Navigation Componentの領域になるので、
まだ触られてない方、申し訳ありません。
ドキュメントを参考に、ナビゲーションの変更をリッスンします。
まずは公式の例から。
navController.addOnDestinationChangedListener { _, destination, _ ->
  if(destination.id == R.id.full_screen_destination) {
    toolbar.visibility = View.GONE
    bottomNavigationView.visibility = View.GONE
  } else {
    toolbar.visibility = View.VISIBLE
    bottomNavigationView.visibility = View.VISIBLE
  }
}2行目、現在のディスティネーションのIDと、ナビゲーショングラフで登録したディスティネーションのIDを比較して、条件分岐しています。
この条件分岐を使えば、ある画面だけにUI要素を表示、などの要件が満たせます。
それでは、MainActivityに組み込んでいきます。
class MainActivity : AppCompatActivity() {

   ...

   override fun onCreate(savedInstanceState: Bundle?) {

       ...

       val navController = findNavController(R.id.main_fragment_host).also {
           addCustomDestinationChangedListener()
       }
}元々onCreateメソッド内で宣言してあった、navControllerにスコープ関数を使って修飾していきます。Listenerの中身がどれだけ増えてもいいように、カスタムメソッドに切り分けます。
class MainActivity : AppCompatActivity() {

   ...

   private fun addCustomDestinationChangedListener() {
       findNavController(R.id.main_fragment_host).also {
           it.addOnDestinationChangedListener { _, destination, _ ->
               showDeleteIconOnOnlyPageDetail(destination)
           }
       }
}ここで、addOnDestinationChangedListenerでイベントを登録していきます。(onCreateメソッド内の方の、navControllerには本来スコープ関数は不要なのですが、意味合い的にnavControllerとセットにしておきたかったので書いてます)
そしてまた、Listenerの中身について記述していくので、イベントの用途ごとにメソッドを切り分けていきます。showDeleteIconOnOnlyPageDetailメソッドを定義していきます。
class MainActivity : AppCompatActivity() {

   ...

   private fun showDeleteIconOnOnlyPageDetail(destination: NavDestination) {
       val item = toolbar.menu.findItem(R.id.page_detail_toolbar_action_delete)

       if (destination.id == R.id.pageDetailFragment) {
           item.isVisible = true
       } else {
           item.isVisible = false
       }
   }
名前の通り、PageDetail画面の時だけ、削除アイコンを表示させるメソッドです。
if (destination.id == R.id.pageDetailFragment) {
// この部分で、PageDetailとそれ以外の処理を分けています後は、先ほどres/menuに作ったレイアウトファイルで定義した、ToolbarのMenuのうちの削除アイコンを、
toolbar.menu.findItem(R.id.page_detail_toolbar_action_delete)で特定し、isVisibleにtrue・falseを与えることで、アイコンの表示・非表示を切り替えています。
ここまでで画面を見てみましょう。
お気づきでしょうか・・
最初だけ、削除アイコン消せてない🙄
というわけで、最初だけ手動で非表示にしましょう。。
class MainActivity : AppCompatActivity() {

   ...

   override fun onCreateOptionsMenu(menu: Menu): Boolean {
       val inflater: MenuInflater = menuInflater
       inflater.inflate(R.menu.toolbar, menu)

       // NOTE:
       // 最初のロードでは、showDeleteIconOnOnlyPageDetailによるMenuItemの非表示ができないため、
       // 代わりにここで非表示にする
       val deleteIcon = menu.findItem(R.id.page_detail_toolbar_action_delete)
       deleteIcon.isVisible = false

       return true
}MainActivityのonCreateOptionsMenuメソッド、そもそもres/menuで定義したToolbarのMenuのレイアウトをinflateしているところです。
このメソッドをoverrideして、MenuをinflateしてあげないとMenuが表示できないのですが、
このメソッドをreturn trueする前に、Menuのプロパティを操作しときなさいということなのでしょうか・・
ちなみに、ここでreturn falseをすると、Menuは表示されないようです。

ここで、カスタムToolbarの実装は終わりです。PageDetailのUI実装も同時に終わりました。
次は、いよいよアプリケーション開発の定番であり重要な基礎となる、Form周りのUI実装に入っていきます。
ここで一旦コミットします。コードはこちらです。
Formの実装
PageNew, PageEditのUI実装をするにあたり、Formについて触れていきたいと思います。
と意気込んでFormについて調べたところ、特にFormウィジェットのようなものはなく、以前にも私のnoteで触れたように、EditTextや送信ボタンを組み合わせて自分で作るようです。
ではまずは、さくっとレイアウトの実装をします。
fragment_page_new.xmlに実装していきます。
<?xml version="1.0" encoding="utf-8"?>
<androidx.coordinatorlayout.widget.CoordinatorLayout xmlns:android="http://schemas.android.com/apk/res/android"
xmlns:app="http://schemas.android.com/apk/res-auto"
android:layout_width="match_parent"
android:layout_height="match_parent">
<androidx.constraintlayout.widget.ConstraintLayout
android:layout_width="match_parent"
android:layout_height="match_parent"
android:layout_marginStart="16dp"
android:layout_marginTop="16dp"
android:layout_marginEnd="16dp"
android:layout_marginBottom="16dp">
<EditText
android:id="@+id/page_new_page_form_title"
android:layout_width="match_parent"
android:layout_height="wrap_content"
android:autofillHints=""
android:ems="10"
android:hint="@string/page_new_page_form_title_hint"
android:inputType="textCapWords"
android:singleLine="true"
android:textAllCaps="false"
app:layout_constraintStart_toStartOf="parent"
app:layout_constraintTop_toTopOf="parent" />
<EditText
android:id="@+id/page_new_page_form_content"
android:layout_width="match_parent"
android:layout_height="wrap_content"
android:layout_marginTop="16dp"
android:autofillHints=""
android:ems="10"
android:gravity="start|top"
android:hint="@string/page_new_page_form_content_hint"
android:inputType="textMultiLine|textCapSentences"
android:minLines="@integer/page_new_page_form_content_min_lines"
app:layout_constraintStart_toStartOf="parent"
app:layout_constraintTop_toBottomOf="@+id/page_new_page_form_title" />
</androidx.constraintlayout.widget.ConstraintLayout>
<com.google.android.material.floatingactionbutton.FloatingActionButton
android:id="@+id/page_new_floating_action_button"
android:layout_width="wrap_content"
android:layout_height="wrap_content"
android:layout_gravity="bottom|end"
android:layout_margin="16dp"
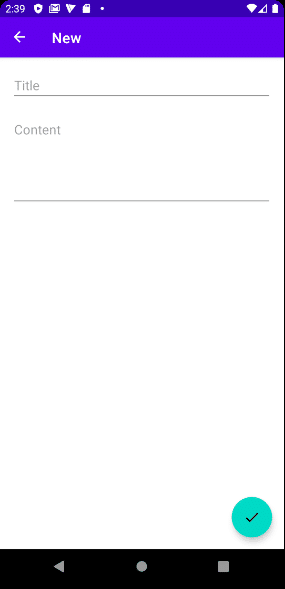
android:src="@drawable/ic_check_black_24dp" />
</androidx.coordinatorlayout.widget.CoordinatorLayout>Vector Assetから、checkアイコンを追加します。
FloatingActionButtonのstyleについてですが、
> res/values/styles.xml

<resources>

   <style name="AppTheme" parent="Theme.MaterialComponents.Light.NoActionBar">

       ...

       <item name="floatingActionButtonStyle">@style/MyFABStyle</item>
   </style>

   <style name="MyFABStyle" parent="Widget.MaterialComponents.FloatingActionButton" />

</resources>このような感じで、MyFABStyleを追加しました。
FloatingActionButtonは頻出なので、ひとつひとつにstyleを当てるよりも、一か所で管理できた方がいいかと思います。
この変更に伴って、fragment_main.xml、fragment_page_detail.xml内のFloatingActionButtonのプロパティから、clickable, focusableを未指定にしても、ちゃんとクリックできるようになりました😃
ここからは、少しおまけなのですが、
EditTextについて、autofillHintsというプロパティがあります。
ざっくり、ユーザーの個人情報などを自動入力するように設定できるようです。詳しくはドキュメントを参照ください。
また、inputTypeというプロパティもあります。
こちらは、text入力の際に、EditTextに表示されるテキストの見た目や、キーボードを調整して、EditTextの用途ごとにいい感じのユーザー体験を設定できます。具体的には、
こちらは、inputType="text" という普通の値なのですが、
パスワード用に、inputType="textPassword" にしたり
Email用の、inputType="textEmailAddress"
英文などに使えそうな、文頭を自動で大文字にしてくれるinputType="textCapSentences"という気の利いたものや
日時入力用の inputType="date" という大胆なものまで(日時入力はDatePickerが無難かとは思いますが😅)
おまけおわり
というわけで、PageNew画面のレイアウトが実装できました。
次は、バリデーションを実装します。
具体的には、Titleが入力されていないときに、Errorを出したいと思います。
まず、PageNewFragmentの、onViewCreatedメソッドの中で、findViewByIdを使ってViewの取得をします。(他の2つのViewの取得もついでにやっています)
class PageNewFragment : Fragment() {
   private lateinit var titleForm: EditText
   private lateinit var contentForm: EditText
   private lateinit var floatingActionButton: FloatingActionButton

   ...

   override fun onViewCreated(view: View, savedInstanceState: Bundle?) {
       super.onViewCreated(view, savedInstanceState)

       titleForm = view.findViewById(R.id.page_new_page_form_title)

       contentForm = view.findViewById(R.id.page_new_page_form_content)

       floatingActionButton = view.findViewById(R.id.page_new_floating_action_button)
   }
次に、titleFormのテキストが変更されたときに発火するリスナーを登録して、そのリスナーの中でバリデーションを実行します。
この要件を満たしてくれる、便利なクラスがあります!
class PageNewFragment : Fragment() {

  ...

   override fun onViewCreated(view: View, savedInstanceState: Bundle?) {
       ...

       titleForm = view.findViewById(R.id.page_new_page_form_title)
       titleForm.addTextChangedListener(titleWatcher)

       ...

   }

   private val titleWatcher = object : TextWatcher {
       override fun afterTextChanged(p0: Editable?) {
       }

       override fun beforeTextChanged(p0: CharSequence?, p1: Int, p2: Int, p3: Int) {
       }

       override fun onTextChanged(p0: CharSequence?, p1: Int, p2: Int, p3: Int) {
       }
   }

}
TextWatcher !
TextWatcherはinterfaceで、用意されているメソッドを見て分かる通り、EditTextのtextの変更をがっつり監視してくれます😃
こいつに頼って、バリデーションを実装していきます🙃
Titleが空文字の時はエラーにするので、
class PageNewFragment : Fragment() {

  ...

   override fun onViewCreated(view: View, savedInstanceState: Bundle?) {
       ...

       titleForm = view.findViewById(R.id.page_new_page_form_title)
       titleForm.addTextChangedListener(titleWatcher)

       ...

   }

   private val titleWatcher = object : TextWatcher {
       override fun afterTextChanged(p0: Editable?) {
           validateTitle(p0.toString())
       }

       override fun beforeTextChanged(p0: CharSequence?, p1: Int, p2: Int, p3: Int) {
       }
       override fun onTextChanged(p0: CharSequence?, p1: Int, p2: Int, p3: Int) {
       }
   }

   private fun validateTitle(text: String) {
       titleForm.error = errorTextValidateTitle(text)
   }

   private fun errorTextValidateTitle(text: String): String? {
       return if (text.isEmpty()) {
           getString(R.string.page_new_page_form_title_validator_label)
       } else {
           null
       }
   }

}EditTextのsetErrorメソッドでバリデーションエラーを発生させることができます。
処理の内容は、まず、editableをtoStringして、入力したテキストを取得します。Editable?がNonNull化します😃。
validateTitleにテキストを渡すことで、メソッド名通り、Titleのバリデーションを発生させます。
validateTitleは、Titleフォームのバリデーション役を担います。
引数のStringをそのまま、Titleフォームのバリデーションのエラーテキストを作る役のerrorTextValidateTitleメソッドに渡します。
このように、Stringという用意しやすいインスタンスの依存のみで、エラーテキストが返ってくるので、エラーテキストの単体テストが書きやすくなると思います。(今はprivate状態ですが🙄)
ここまでで、レイアウトの実装とFormのバリデーションを実装しました。
後は、FloatingActionButtonを押したときのイベント登録です。
・改めてTitleFormのバリデーションを行う
・入力された情報を基にPageオブジェクトを作成する
・ひとつ前のページに戻る
これらの処理を実装していきます。
まずは、onViewCreateメソッド内でfindViewByIdから取得しているFloatingActionButtonにclickListenerを与えましょう。
また、onViewCreateメソッドを増大させないために、clickListener内では、clickListener用のカスタムメソッドを呼ぶだけにします。
class PageNewFragment : Fragment() {

  ...

   override fun onViewCreated(view: View, savedInstanceState: Bundle?) {

       ...

       floatingActionButton =
           view.findViewById<FloatingActionButton>(R.id.page_new_floating_action_button).also {
               it.setOnClickListener { handleClickFAB() }
           }
   }

   ...

   private fun handleClickFAB() {

}次に、改めてTitleFormのバリデーションを行います。もちろん、バリデーションに引っかかったら処理を中断させます。
class PageNewFragment : Fragment() {

   ...

   private fun handleClickFAB() {
       val text = titleForm.editableText.toString()
       validateTitle(text)

       val titleError = titleForm.error
       if (titleError == null) {

       }
   }
titleError == null の所は、titleForm.error ?: let {}の方が簡潔に書けるのですが、今後バリデーションが必要なカラムが増えたときに、if文の条件分岐に少し加えるだけですむので、if文にしています。
次に、入力された情報を基にPageオブジェクトを作成します。
class PageNewFragment : Fragment() {

   ...

   private fun handleClickFAB() {
       val text = titleForm.editableText.toString()
       validateTitle(text)

       val titleError = titleForm.error
       if (titleError == null) {
           createPage()
       }
   }
   // TODO: Pageオブジェクトをデータに追加する
   private fun createPage() {
       val text = titleForm.editableText.toString()
       val content = contentForm.editableText.toString()
       val date = Date()
       // HACK: 一意なIDの生成について
       val id = (text + content + date.toString()).hashCode().toLong()

       val page = Page(id, text, content, date)
   }
一意なIDの生成について、ベターなやり方を知りたいです。
今は、こんな感じでPageオブジェクトを生成します。
また、Pageデータの追加は、今回はUIの実装だけなので触れません。
FABクリックリスナーの最後は、ひとつ前のページに戻る処理です。
class PageNewFragment : Fragment() {

   ...

   private fun handleClickFAB() {
       val text = titleForm.editableText.toString()
       validateTitle(text)

       val titleError = titleForm.error
       if (titleError == null) {
           createPage()
           findNavController().navigateUp()
       }
}NavControllerのnavigateUpメソッドで、完了です。が・・
キーボードが表示されたまま😺!
キーボードの非表示について、InputMethodManagerクラスのhideSoftInputFromWindowメソッドというものがあるらしいのですが、
final Activity activity = getActivity();
final InputMethodManager inputManager = (InputMethodManager)activity.getSystemService(Context.INPUT_METHOD_SERVICE);
inputManager.hideSoftInputFromWindow(activity.getCurrentFocus().getWindowToken(), showKeyboard ? InputMethodManager.SHOW_FORCED : InputMethodManager.HIDE_NOT_ALWAYS);
ざっくり、こんな感じで書かないといけないらしく、Activityが必要だったりと、かなり面倒だなと思っていたら、
class PageNewFragment : Fragment() {

   ...

   private fun handleClickFAB() {
       val text = titleForm.editableText.toString()
       validateTitle(text)

       val titleError = titleForm.error
       if (titleError == null) {
           createPage()
           clearFocus()
           findNavController().navigateUp()
       }
   }

   ...

   private fun clearFocus() {
       titleForm.clearFocus()
       contentForm.clearFocus()
   }
EditTextのFocusをclearにしてあげたら行けました😃!
かなり楽な実装で済んで良かった。
これで、PageNewFragmentのUI実装も完了です!
[※ここから余談なので、興味ない方少し飛ばしてください]
後は、同じようにPageEditFragmentにもFormを実装してあげればUI実装が完全終了します!UI実装長すぎた!
苦節半月!最初の方は
・layoutの組み方
・どんなウィジェットあるの?
・Resource面倒くさくない?、でもこのResource一括管理の方がアプリのスケールに対応できるから仕方ないか
・What is the drawable resource?
・レイアウトの実装面倒くさすぎやろ!Flutterより大変だな・・お?Jetpack Compose? Flutterと同じ宣言型? よしやろう!→まだプレα版orz。
・ウィジェットのstyle、デフォルトでいい感じのスタイル適用してくれないんかorz
などのレイアウトのつらみや、
・ViewとかActivityとかのリファレンスサイト重すぎやろ!
・Activityのライフサイクル多すぎやろ・・orzどれ使えばええんや
・Fragmentってなんや・・Activityで十分やろ・・
→ただページをBackさせたいだけのとき、ActivityのparentActivityNameでは無理でしたorz
というところまで、いろいろつらみでしたが、
今では、かなり手に馴染んできて、ドキュメント片手に持って、たまにStackOverflowやQiitaも見とけば、難なく進められるようになってきたので、
一安心です😃。最初の山場を越えました。
今では、Androidで食っていきてえという好感度まで上がってきて、キャッチアップ自体も楽しく、AACの導入などの楽しみもあるので、このまま続けていきたいと思います。
[※余談終わり]
最後に、PageEditFragmentのUI実装をしていきますが、その前に、Formのレイアウトを使いまわすために、fragment_page_new.xmlから、Formの部分のレイアウトだけを別ファイルに切り出したいと思います。
まず、fragment_page_new.xmlで、Formをincludeタグに置き換えます。
(ConstraintLayoutの部分からincludeタグです)
> fragment_page_new.xml

<?xml version="1.0" encoding="utf-8"?>
<androidx.coordinatorlayout.widget.CoordinatorLayout xmlns:android="http://schemas.android.com/apk/res/android"
   android:layout_width="match_parent"
   android:layout_height="match_parent">

   <include
       layout="@layout/page_form"
       android:layout_width="match_parent"
       android:layout_height="match_parent"
       android:layout_marginStart="16dp"
       android:layout_marginTop="16dp"
       android:layout_marginEnd="16dp"
       android:layout_marginBottom="16dp"/>

   <com.google.android.material.floatingactionbutton.FloatingActionButton
       android:id="@+id/page_new_floating_action_button"
       android:layout_width="wrap_content"
       android:layout_height="wrap_content"
       android:layout_gravity="bottom|end"
       android:layout_margin="16dp"
       android:src="@drawable/ic_check_black_24dp" />


</androidx.coordinatorlayout.widget.CoordinatorLayout>次に、component_page_form.xmlという新しいレイアウトファイルを作成し、Formのレイアウトを定義します。
EditTextのIDも変更します。
> component_page_form.xml

<?xml version="1.0" encoding="utf-8"?>
<androidx.constraintlayout.widget.ConstraintLayout xmlns:android="http://schemas.android.com/apk/res/android"
   xmlns:app="http://schemas.android.com/apk/res-auto"
   android:layout_width="match_parent"
   android:layout_height="match_parent">

   <EditText
       android:id="@+id/component_page_form_title"
       android:layout_width="match_parent"
       android:layout_height="wrap_content"
       android:autofillHints=""
       android:ems="10"
       android:hint="@string/page_new_page_form_title_hint"
       android:inputType="textCapWords"
       android:singleLine="true"
       android:textAllCaps="false"
       app:layout_constraintStart_toStartOf="parent"
       app:layout_constraintTop_toTopOf="parent" />

   <EditText
       android:id="@+id/component_page_form_content"
       android:layout_width="match_parent"
       android:layout_height="wrap_content"
       android:layout_marginTop="16dp"
       android:autofillHints=""
       android:ems="10"
       android:gravity="start|top"
       android:hint="@string/page_new_page_form_content_hint"
       android:inputType="textMultiLine|textCapSentences"
       android:minLines="@integer/page_new_page_form_content_min_lines"
       app:layout_constraintStart_toStartOf="parent"
       app:layout_constraintTop_toBottomOf="@+id/component_page_form_title" />
</androidx.constraintlayout.widget.ConstraintLayout>
それでは、PageEditFragmentのUI実装に入っていきましょう。
まずは、レイアウトの実装からです。(PageNewFragmentのレイアウトの、FABのIDを変更しただけです。)
> fragment_page_edit.xml

<?xml version="1.0" encoding="utf-8"?>
<androidx.coordinatorlayout.widget.CoordinatorLayout xmlns:android="http://schemas.android.com/apk/res/android"
   android:layout_width="match_parent"
   android:layout_height="match_parent">

   <include
       layout="@layout/component_page_form"
       android:layout_width="match_parent"
       android:layout_height="match_parent"
       android:layout_marginStart="16dp"
       android:layout_marginTop="16dp"
       android:layout_marginEnd="16dp"
       android:layout_marginBottom="16dp"/>

   <com.google.android.material.floatingactionbutton.FloatingActionButton
       android:id="@+id/page_edit_floating_action_button"
       android:layout_width="wrap_content"
       android:layout_height="wrap_content"
       android:layout_gravity="bottom|end"
       android:layout_margin="16dp"
       android:src="@drawable/ic_check_black_24dp" />


</androidx.coordinatorlayout.widget.CoordinatorLayout>次に、PageEditFragment内で、Formまわりのロジックの実装です。
まずは、ざっくりと中身をそのままコピペします。
class PageEditFragment : Fragment() {

   val args by navArgs<PageEditFragmentArgs>()

   private lateinit var titleForm: EditText
   private lateinit var contentForm: EditText
   private lateinit var floatingActionButton: FloatingActionButton

   override fun onCreateView(
       inflater: LayoutInflater, container: ViewGroup?,
       savedInstanceState: Bundle?
   ): View? {
       // Inflate the layout for this fragment
       return inflater.inflate(R.layout.fragment_page_edit, container, false)
   }

   override fun onViewCreated(view: View, savedInstanceState: Bundle?) {
       super.onViewCreated(view, savedInstanceState)

       titleForm = view.findViewById(R.id.component_page_form_title)
       titleForm.addTextChangedListener(titleWatcher)

       contentForm = view.findViewById(R.id.component_page_form_content)

       floatingActionButton =
           view.findViewById<FloatingActionButton>(R.id.page_edit_floating_action_button).also {
               it.setOnClickListener { handleClickFAB() }
           }
   }

   private val titleWatcher = object : TextWatcher {
       override fun afterTextChanged(p0: Editable?) {
           validateTitle(p0.toString())
       }

       override fun beforeTextChanged(p0: CharSequence?, p1: Int, p2: Int, p3: Int) {
       }

       override fun onTextChanged(p0: CharSequence?, p1: Int, p2: Int, p3: Int) {
       }
   }

   private fun validateTitle(text: String) {
       titleForm.error = errorTextValidateTitle(text)
   }

   private fun errorTextValidateTitle(text: String): String? {
       return if (text.isEmpty()) {
           getString(R.string.page_new_page_form_title_validator_label)
       } else {
           null
       }
   }

   private fun handleClickFAB() {
       val text = titleForm.editableText.toString()
       validateTitle(text)

       val titleError = titleForm.error
       if (titleError == null) {
           createPage()
           clearFocus()
           findNavController().navigateUp()
       }
   }

   // TODO: Pageオブジェクトをデータに追加する
   private fun createPage() {
       val text = titleForm.editableText.toString()
       val content = contentForm.editableText.toString()
       val date = Date()
       // HACK: 一意なIDの生成について
       val id = (text + content + date.toString()).hashCode().toLong()

       val page = Page(id, text, content, date)
   }

   private fun clearFocus() {
       titleForm.clearFocus()
       contentForm.clearFocus()
   }


}
次に、細かいIDの部分など、PageEdit用に修正していきましょう。

Editの検索・置換機能で _new を _edit に置換します。
すると、R.string.page_edit_page_form_title_validator_labelという長い名前のStringリソース参照で、エラーがでます。
このままこれを実装するのではなく、リソース元のID名を変更することで対応します。
<string name="page_new_page_form_title_validator_label">Please enter the title.</string>
 ↓
<string name="component_page_form_title_validator_label">Please enter the title.</string>次は、PageEditなので、Fragmentの引数に受け取っているPageEditFragmentArgsから、Pageオブジェクトを取得し、このPageオブジェクトを編集する形に変えていきます。
まず、引数のPageオブジェクトのtitle, contentパラメータの値をViewの初期化時に、それぞれのEditTextに挿入します。
class PageEditFragment : Fragment() {

   private val args by navArgs<PageEditFragmentArgs>()

   ...

   override fun onViewCreated(view: View, savedInstanceState: Bundle?) {
       ...

       val page = pagesList.find { page -> page.id == args.pageId }

       titleForm = view.findViewById<EditText>(R.id.component_page_form_title).also {
           it.addTextChangedListener(titleWatcher)
       }
       contentForm = view.findViewById(R.id.component_page_form_content)

       page?.let {
           titleForm.setText(it.title)
           contentForm.setText(it.content)
}pageがまだNullableなので、page?.letでnullを弾きます。
・次
PageオブジェクトをCreateではなく、Updateするために、既存のcreatePageメソッドをupdatePageメソッドに変更します。
と言っても、createPageメソッドと同じく、実際にupdateはしないので、形だけで済ませます。
class PageEditFragment : Fragment() {

   ...

   private fun handleClickFAB() {

       ...

       if (titleError == null) {
           updatePage()

           ...

       }
   }

   // TODO: PageオブジェクトをUpdateする
   private fun updatePage() {
       val text = titleForm.editableText.toString()
       val content = contentForm.editableText.toString()
       val date = Date()
   }
これでTODOアプリのUI実装編は終了です!お疲れ様でした!
と言いたいところなのですが、もうちょっと続きますorz。(はよ終われ
・次
Formのユーティリティクラスを作って、PageオブジェクトのFormまわりのロジックを一か所で管理したいと思います。
ちょっと経験ないのですが、頑張ります。
・次
まず考えやすくするために、ざっとPageEditとPageNewで使っている共通のロジックを洗い出してみます。
> fun onViewCreated

titleForm = view.findViewById<EditText>(R.id.component_page_form_title).also {
   it.addTextChangedListener(titleWatcher)
}
contentForm = view.findViewById(R.id.component_page_form_content)
private val titleWatcher = object : TextWatcher {
override fun afterTextChanged(p0: Editable?) {
validateTitle(p0.toString())
}
override fun beforeTextChanged(p0: CharSequence?, p1: Int, p2: Int, p3: Int) {
}
override fun onTextChanged(p0: CharSequence?, p1: Int, p2: Int, p3: Int) {
}
}private fun validateTitle(text: String) {
titleForm.error = errorTextValidateTitle(text)
}private fun errorTextValidateTitle(text: String): String? {
return if (text.isEmpty()) {
getString(R.string.component_page_form_title_validator_label)
} else {
null
}
}> fun handleClickFAB()
val text = titleForm.editableText.toString()
validateTitle(text)
val titleError = titleForm.error
if (titleError == null) {
...
clearFocus()
findNavController().navigateUp()
}private fun clearFocus() {
titleForm.clearFocus()
contentForm.clearFocus()
}・次
ViewとFormの関心に分けてみる
上から分けていきましょう。
・View
> fun onViewCreated
titleForm = view.findViewById<EditText>(R.id.component_page_form_title).also {
it.addTextChangedListener(titleWatcher)
}
contentForm = view.findViewById(R.id.component_page_form_content)・View
private val titleWatcher = object : TextWatcher {
   override fun afterTextChanged(p0: Editable?) {
       validateTitle(p0.toString())
   }

   override fun beforeTextChanged(p0: CharSequence?, p1: Int, p2: Int, p3: Int) {
   }

   override fun onTextChanged(p0: CharSequence?, p1: Int, p2: Int, p3: Int) {
   }
}・View
private fun validateTitle(text: String) {
   titleForm.error = errorTextValidateTitle(text)
}・Form
private fun errorTextValidateTitle(text: String): String? {
   return if (text.isEmpty()) {
       getString(R.string.component_page_form_title_validator_label)
   } else {
       null
   }
}・View
> fun handleClickFAB()

val text = titleForm.editableText.toString()
validateTitle(text)

val titleError = titleForm.error
if (titleError == null) {

   ...

   clearFocus()
   findNavController().navigateUp()
}・View
private fun clearFocus() {
   titleForm.clearFocus()
   contentForm.clearFocus()
}バリデーション以外View🙄!大体EditTextに依存した処理ですね。
この地点でViewとFormに分かれたので、Formの方だけユーティリティクラスに実装していけばいい、と思ったのですが、
Formはレイアウトが共通なので、共通レイアウトのViewに依存したロジックも共通にできないか調べたところ、Custom View に辿り着きました!
特に、ドキュメントに載っているやり方で、レイアウト(LinearLayoutなど)を拡張することで、簡単にレイアウトとロジックを持つコンポーネントが作れるようなので、早速やっていきます。
・これからやること
ConstraintLayoutを拡張して、PageFormComponentというカスタムコンポーネントを作り、その中にFormのEditTextなどに依存したロジックを移す。
その後、PageNewFragment, PageEditFragmentからPageFormComponentを呼ぶ。
ボス戦前なのでセーブしておきます。セーブした内容はこちら。(commit)
カスタムコンポーネントを作りリファクタリングする
それではいきましょう。
・次
まずは、page_form.ktというカスタムコンポーネント用のファイルを作成します。
・次
ConstraintLayoutを拡張したPageFormComponentクラスを定義する。
ドキュメントを参考に、作成してみます。
class PageFormComponent(
context: Context, attrs: AttributeSet
) : ConstraintLayout(context, attrs)・次
元々定義していた、component_page_formレイアウトをinflateして、PageNew, PageEditのレイアウトに組み込み、表示させる。
ここまでたどり着くのに結構はまりました🙄。
class PageFormComponent(
context: Context, attrs: AttributeSet
) : ConstraintLayout(context, attrs) {
init {
LayoutInflater.from(context).inflate(R.layout.component_page_form, this, true)
}
}> fragment_page_new.xml, fragment_page_edit.xml
<include
layout="@layout/component_page_form"
android:layout_width="match_parent"
android:layout_height="match_parent"
android:layout_marginStart="16dp"
android:layout_marginTop="16dp"
android:layout_marginEnd="16dp"
android:layout_marginBottom="16dp" />
↓
<view
class="hidaka.kotlinstudy.todo.ui_component.PageFormComponent"
android:id="@id+/page_form_component_host"
android:layout_width="match_parent"
android:layout_height="match_parent"
android:layout_marginStart="16dp"
android:layout_marginTop="16dp"
android:layout_marginEnd="16dp"
android:layout_marginBottom="16dp" />既存のレイアウトファイルをカスタムビューに適用する方法は、init関数内でLayoutInflator.from.inflateメソッドでいいようです。
AttributeSetという引数には、レイアウトファイルのviewタグ内に定義したattributeを取ってくれます。viewタグ内に定義したattributeをそのままConstraintLayoutに渡しています。
また、ConstraintLayoutではdefStyleAttr: Int という3つめの引数が取れるようで、
class PageFormComponent(
context: Context, attrs: AttributeSet, defStyleAttr: Int
) : ConstraintLayout(context, attrs, defStyleAttr) {前2つと同じように扱っていて、ずっとErrorが出ていました🙃。
途中、自分で好きにstyleを入れれるのかなと思い、
class PageFormComponent(
context: Context, attrs: AttributeSet, defStyleAttr: Int
) : ConstraintLayout(context, attrs, R.style.AppTheme) {適当にstyleを入れましたが、はまりました🙃。
Context, AttributeSetと違って、レイアウトファイルにただ書くだけじゃ値を取ってくれないようです。前2つと同じ扱いだと思っててはまりました🙄。
・次
Viewは用意できたので、PageFormComponentにロジックを移し、
PageNewFragment内から、PageFormComponentを参照する。
titleForm, contentFormに依存したロジックを取り出しましょう。
class PageFormComponent(
context: Context, attrs: AttributeSet
) : ConstraintLayout(context, attrs, R.style.AppTheme) {
val titleForm: EditText
val contentForm: EditText
init {
LayoutInflater.from(context).inflate(R.layout.component_page_form, this, true)
titleForm = findViewById<EditText>(R.id.component_page_form_title).also {
it.addTextChangedListener(titleWatcher)
}
contentForm = findViewById(R.id.component_page_form_content)
}
private val titleWatcher = object : TextWatcher {
   override fun afterTextChanged(p0: Editable?) {
       validateTitle(p0.toString())
   }

   override fun beforeTextChanged(p0: CharSequence?, p1: Int, p2: Int, p3: Int) {
   }

   override fun onTextChanged(p0: CharSequence?, p1: Int, p2: Int, p3: Int) {
   }
}
fun validateTitle(text: String) {
titleForm.error = errorTextValidateTitle(text)
}
private fun errorTextValidateTitle(text: String): String? {
return if (text.isEmpty()) {
resources.getString(R.string.component_page_form_title_validator_label)
} else {
null
}
}
}class PageNewFragment : Fragment() {
private lateinit var pageFormComponent: PageFormComponent
private lateinit var floatingActionButton: FloatingActionButton
override fun onCreateView(
inflater: LayoutInflater, container: ViewGroup?,
savedInstanceState: Bundle?
): View? {
// Inflate the layout for this fragment
return inflater.inflate(R.layout.fragment_page_new, container, false)
}
override fun onViewCreated(view: View, savedInstanceState: Bundle?) {
super.onViewCreated(view, savedInstanceState)
pageFormComponent = view.findViewById(R.id.page_form_component_host)
floatingActionButton =
view.findViewById<FloatingActionButton>(R.id.page_new_floating_action_button).also {
it.setOnClickListener { handleClickFAB() }
}
}
private fun handleClickFAB() {
val text = pageFormComponent.titleForm.editableText.toString()
pageFormComponent.validateTitle(text)
val titleError = pageFormComponent.titleForm.error
if (titleError == null) {
createPage()
pageFormComponent.clearFocus()
findNavController().navigateUp()
}
}
// TODO: Pageオブジェクトをデータに追加する
private fun createPage() {
val text = pageFormComponent.titleForm.editableText.toString()
val content = pageFormComponent.contentForm.editableText.toString()
val date = Date()
// HACK: 一意なIDの生成について
val id = (text + content + date.toString()).hashCode().toLong()
val page = Page(id, text, content, date)
}
}・次
PageFormComponentにtitleとcontentを返す、getter/setterを定義し、冗長な参照を取り除きます。
class PageFormComponent(
   context: Context, attrs: AttributeSet
) : ConstraintLayout(context, attrs) {
...
val titleForm: EditText = findViewById<EditText>(R.id.component_page_form_title).also {
it.addTextChangedListener(titleWatcher)
}
val contentForm: EditText = findViewById(R.id.component_page_form_content)
var title: String
get() = titleForm.text.toString()
set(value) {
titleForm.setText(value)
}
var content: String
get() = contentForm.text.toString()
set(value) {
contentForm.setText(value)
}
}setterはPageEditFragmentのとき使います。
一部変数名を変更します。
> PageNewFragment

・text -> title
・pageFormComponent -> pageForm
class PageNewFragment : Fragment() {

   ...

   private fun handleClickFAB() {
       val title = pageForm.title
       pageForm.validateTitle(title)

       val titleError = pageForm.titleForm.error
       if (titleError == null) {
           createPage()
           pageForm.clearFocus()
           findNavController().navigateUp()
       }
   }

   // TODO: Pageオブジェクトをデータに追加する
   private fun createPage() {
       val title = pageForm.title
       val content = pageForm.content
       val date = Date()
       // HACK: 一意なIDの生成について
       val id = (title + content + date.toString()).hashCode().toLong()

       val page = Page(id, title, content, date)
   }

}
・次
同じように、PageEditFragmentもリファクタリングします。
setterを使って、Formに初期値を与えることも忘れずにいきましょう。
class PageEditFragment : Fragment() {

   private val args by navArgs<PageEditFragmentArgs>()

   private lateinit var pageForm: PageFormComponent
   private lateinit var floatingActionButton: FloatingActionButton

   override fun onCreateView(
       inflater: LayoutInflater, container: ViewGroup?,
       savedInstanceState: Bundle?
   ): View? {
       // Inflate the layout for this fragment
       return inflater.inflate(R.layout.fragment_page_new, container, false)
   }

   override fun onViewCreated(view: View, savedInstanceState: Bundle?) {
       super.onViewCreated(view, savedInstanceState)

       val page = pagesList.find { page -> page.id == args.pageId }

       pageForm = view.findViewById(R.id.page_form_component_host)
       page?.let {
           pageForm.title = it.title
           pageForm.content = it.content
       }

       floatingActionButton =
           view.findViewById<FloatingActionButton>(R.id.page_new_floating_action_button).also {
               it.setOnClickListener { handleClickFAB() }
           }
   }

   private fun handleClickFAB() {
       val title = pageForm.title
       pageForm.validateTitle(title)

       val titleError = pageForm.titleForm.error
       if (titleError == null) {
           updatePage()
           pageForm.clearFocus()
           findNavController().navigateUp()
       }
   }

   // TODO: PageオブジェクトをUpdateする
   private fun updatePage() {
       val title = pageForm.title
       val content = pageForm.content
       val date = Date()
   }

}
うん。なんか結構きれいに分けれた気がしています😃。
NullableなPageオブジェクトに依存することなく、Formコンポーネントができました!
気になったので、もう一か所変更を加えます。
PageNew, PageEdit両者の、handleClickFAB内で、条件分岐ロジックを書いてしまっていたので、これもPageFormComponentに移します。
> PageEditFragment, PageNewFragment

...

private fun handleClickFAB() {
   val isTitleValidate = pageForm.isTitleValidate()
   if (isTitleValidate) {
       updatePage()
       pageForm.clearFocus()
       findNavController().navigateUp()
   }
}
> PageFormComponent
fun isFormValidate(): Boolean {
validateTitle(title)
return titleForm.error == null
}これで個人的には思い残すことはありません。
おわりに
ということで、UI実装はできました!
ここから状態管理を投入して、Pageオブジェクトの登録・削除・編集が即時反映されるようにしていきます。
最後まで見て頂き、ありがとうございました!
記事はいかがでしたか?サポートをして頂けると、もりもり成長していきます!