SpringbootでHello Worldを表示してみよう!

本記事は、MacOS上のSTS (Spring Tool Suite4)を使って、Springbootのプロジェクトを作成し、Hello Worldを表示するまでの流れを説明します。

0. 事前準備
・Javaのインストール
・STSのインストール
下記WebサイトからInstallしてください。
https://spring.io/tools
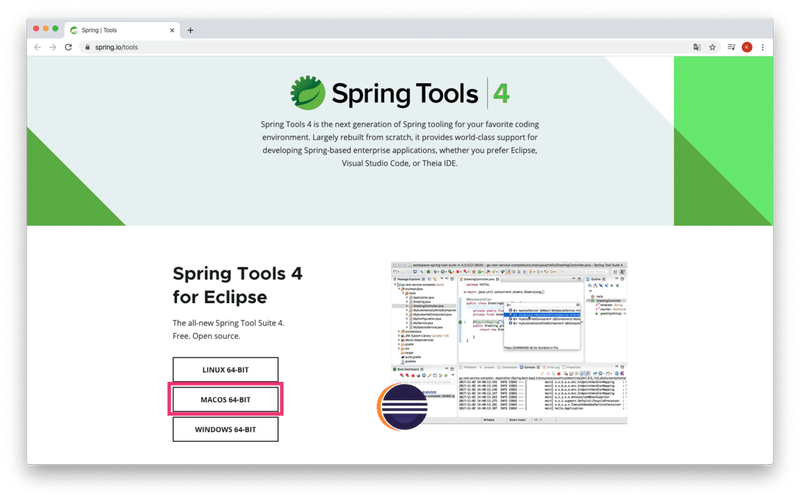
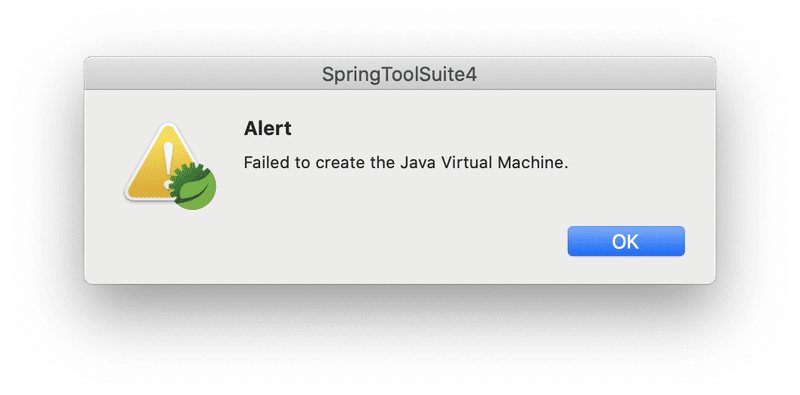
※下記のような画面が出たら、こちらを参考にしてください。
Hello Worldが表示されるまでの手順
1. プロジェクトの作成
2. index.htmlの作成
3. Controllerの作成
4. 起動
1.プロジェクトの作成
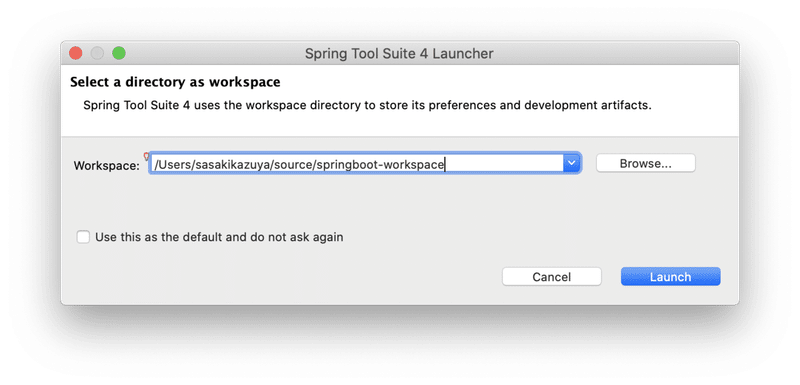
まずは、STSを立ち上げます。
SpringToolSuite4.appを起動しましょう。
立ち上がる際、ワークスペースを作成しますので、任意の場所にワークスペースを作成し、Launchを押しましょう。
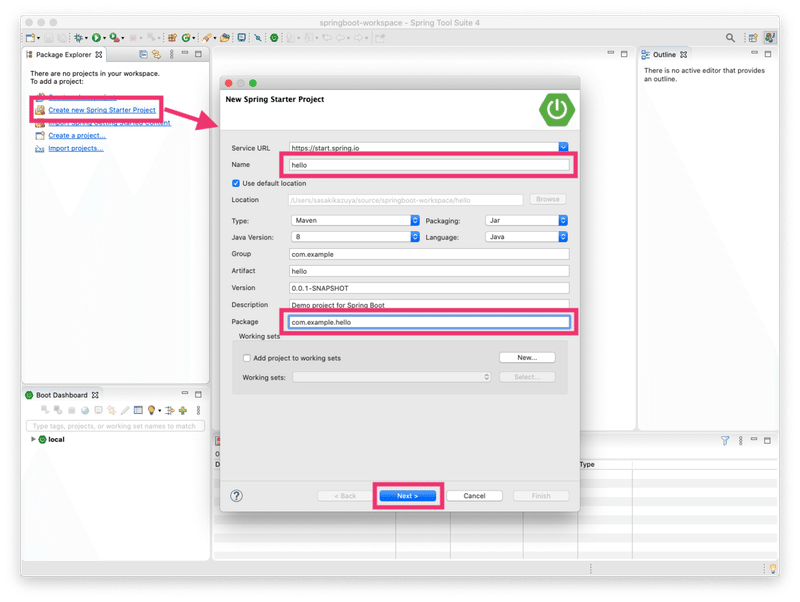
それでは、プロジェクトを作成しましょう。
Create new Spring Starter Projectを押し、プロジェクト情報を記載します。
今回は、helloというプロジェクト名で立ち上げます。
Packageをcom.example.helloにしました。
全て入力したら、Nextを押しましょう。
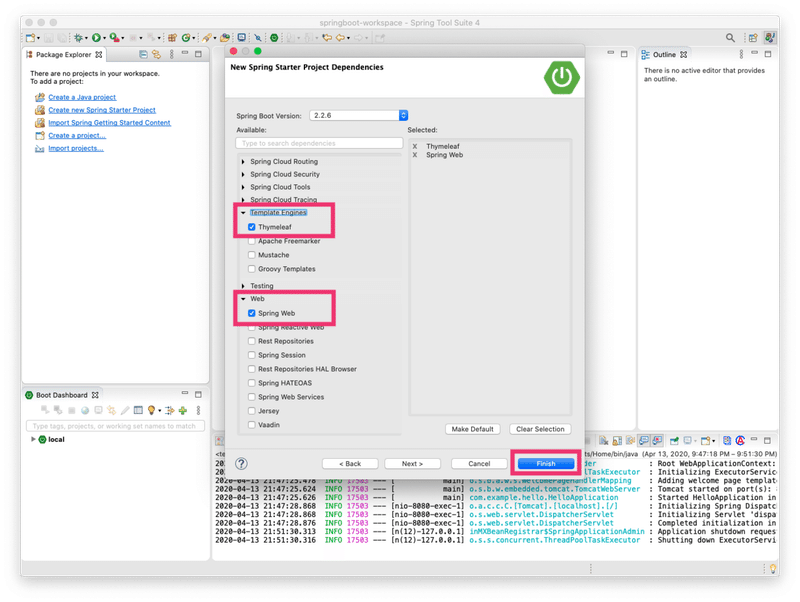
続いて、ライブラリの選択をします。
今回は、以下の2つにチェックを入れます。
☑︎Template Enginesの中にあるThymeleaf
☑︎Webの中にあるSpring Web
2.index.htmlの作成
プロジェクトが出来たら、index.htmlの作成をします。
templates > New > Other を押します。
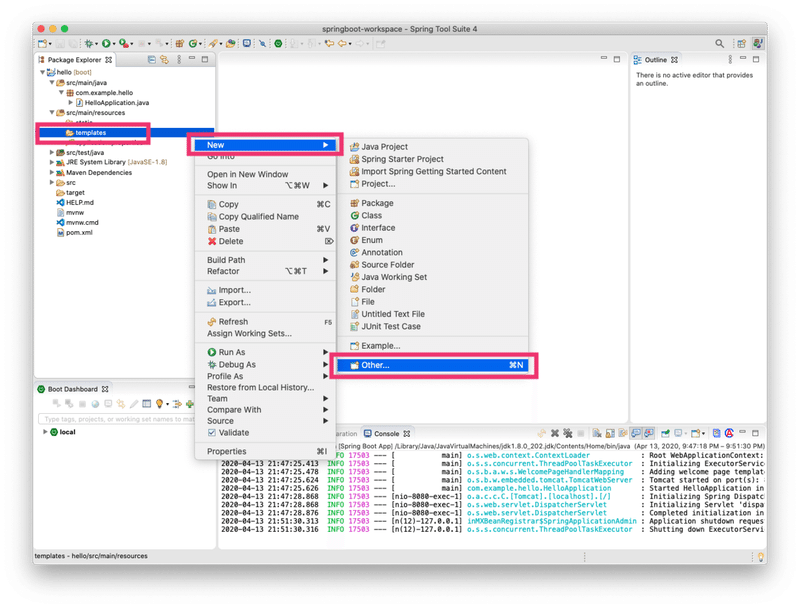
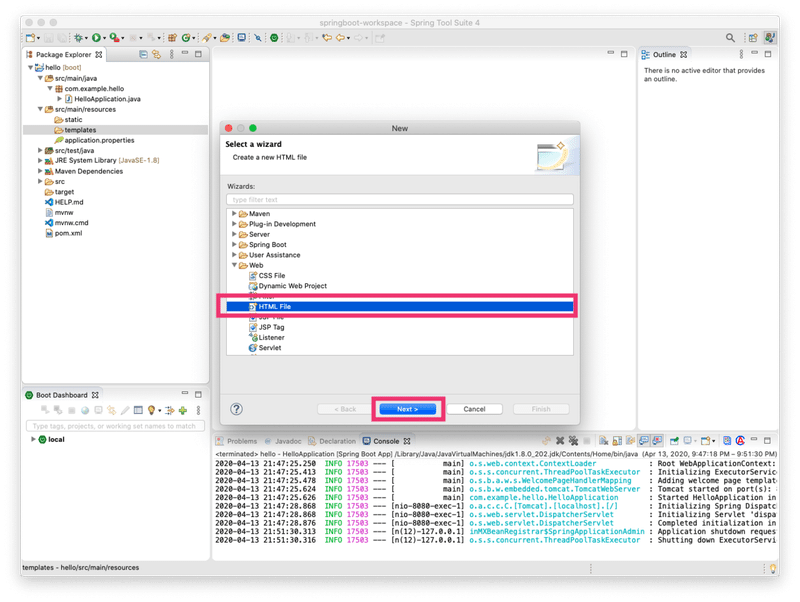
以下のようなWindowが出てくるので、
Web > HTML File を選択して、 Next を押します。
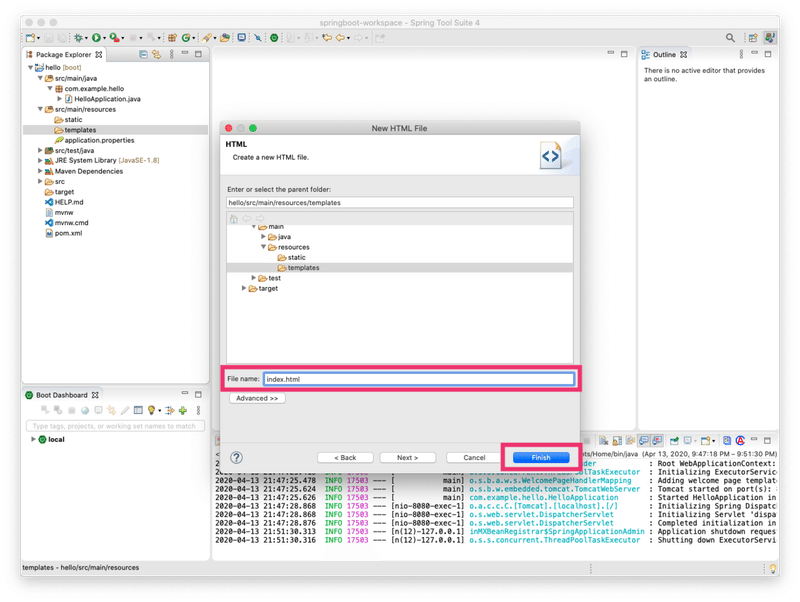
ファイル名をindex.htmlに設定し、Finishを押せば作成されます。
それでは、index.htmlを以下のように編集をしましょう。
<!DOCTYPE html>
<html xmlns="http://www.w3.org/1999/xhtml" xmlns:th="http://www.thymeleaf.org">
 <head>
   <title>Hello World</title>
   <meta charset="utf-8" />
 </head>
 <body>
   <h1>Hello Spring</h1>
   <p>
     <span th:text="${message}"></span>
   </p>
 </body>
</html>
以上で、index.htmlの作成が完了です。
3.Controllerの作成
続いて、Controllerの作成をします。
ControllerとはSpringbootを動かす時に、URLを受け取り、index.htmlを返す役割をするクラスです。
まずは、com.example.helloフォルダ上で、右クリック > New > Class を押します。
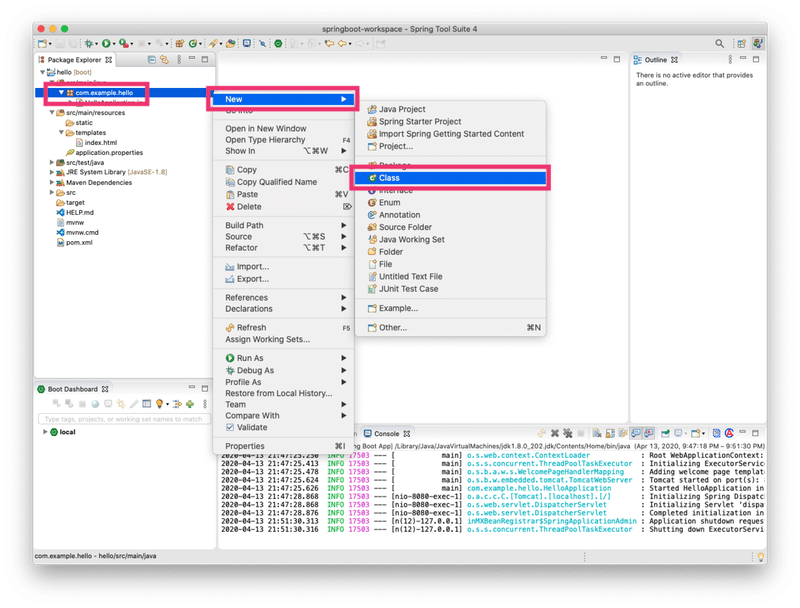
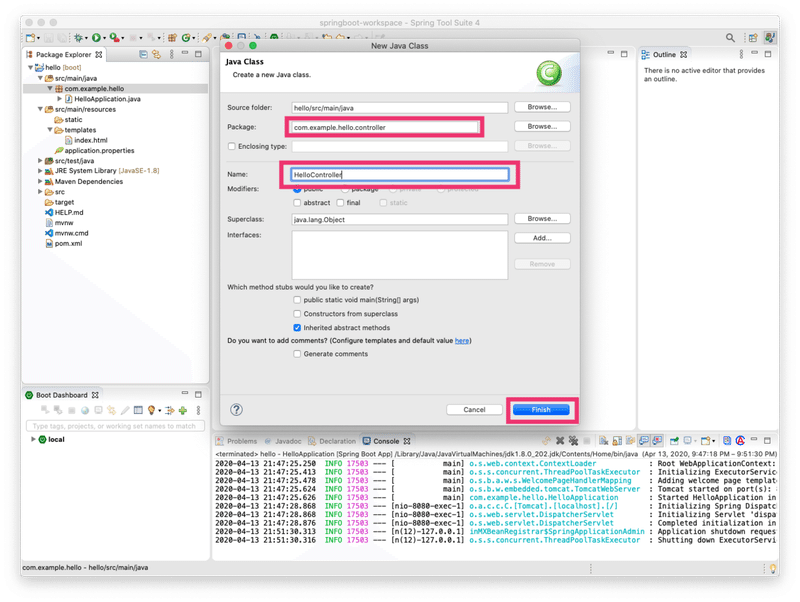
下記のWindowが出てきたら、以下の情報を入力し、Finishを押します。
Package: com.example.hello.controller
Name: HelloController
それでは、HelloControllerクラスを以下のように編集しましょう。
package com.example.hello.controller;

import org.springframework.stereotype.Controller;
import org.springframework.ui.Model;
import org.springframework.web.bind.annotation.RequestMapping;
import org.springframework.web.bind.annotation.RequestMethod;

@Controller
public class HelloController {

   @RequestMapping(value = "/", method = RequestMethod.GET)
   public String index(Model model) {
       model.addAttribute("message", "Hello World!!");
       return "index";
   }

}
これで、Controllerの作成は、完了です。
4. 起動と確認
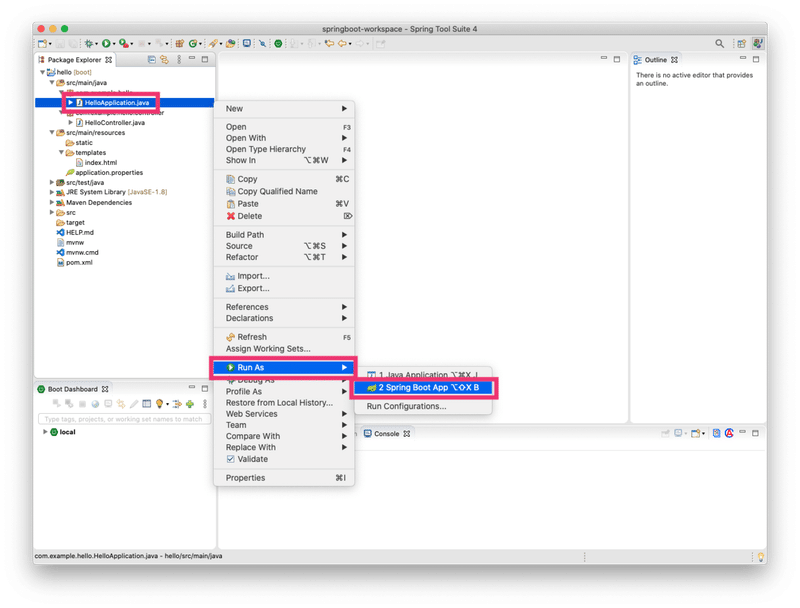
それでは、helloプロジェクトを起動してみましょう。
HelloAplication.java上で、右クリック > Run As > Spring Boot Appを選択します。
下記のように立ち上がります。
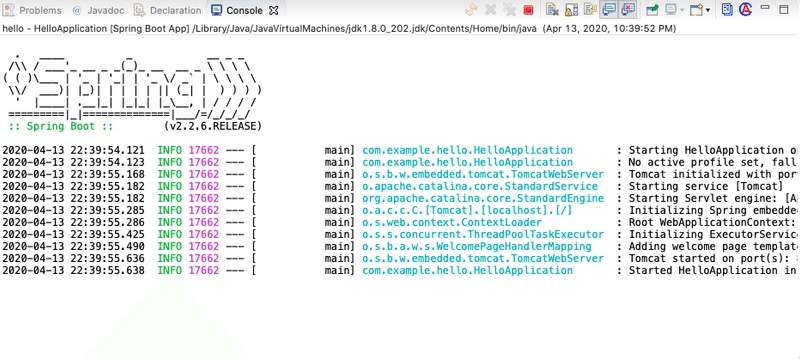
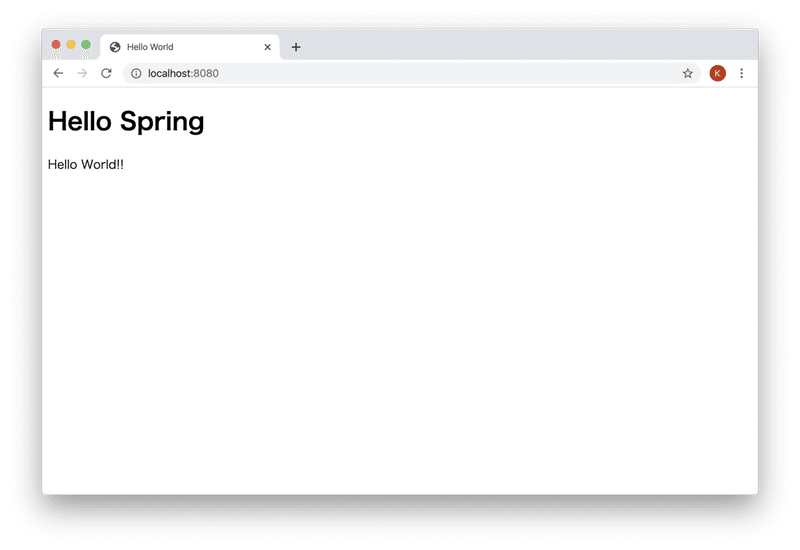
それでは、以下のURLにアクセスしてみましょう。
ちゃんと表示されていればOKです!
この記事が気に入ったらサポートをしてみませんか?