OpenCV4Python07:Flaskでカメラ映像を表示する(ブラウザに動画表示)

【0】はじめに
今回はブラウザ上でカメラ映像を表示する。フレームワークとして「Flask」を使ってMotionJPEGでカメラ映像をブラウザ上に表示する。
【1】MotionJPEG概要
簡単に言うと取得したカメラの1フレームをJPEG画像としてブラウザ上に表示する。そのブラウザ上の画像部分だけを任意のタイミングで更新して動画にしている。
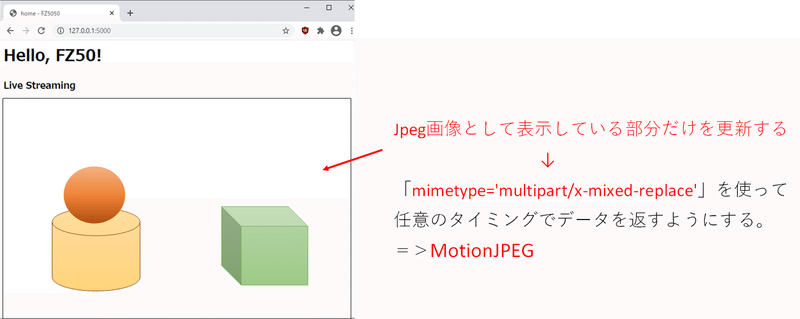
もう少し具体的なイメージは以下のような感じ。
【2】全体コード
検索するとほぼ定番の書き方みたいなものがでるので詳細は略。
Flaskで実現するには「yield式(ジェネレータ)とResponseオブジェクトを使えば部分的に更新する仕組みを実現できる」。それだけ。
■app.py
from flask import render_template, Flask, Response
import cv2 as cv
app = Flask(__name__)
camera = cv.VideoCapture(0)
def gen_frames():
while True:
success, frame = camera.read()
if not success:
break
else:
#フレームデータをjpgに圧縮
ret, buffer = cv.imencode('.jpg',frame)
# bytesデータ化
frame = buffer.tobytes()
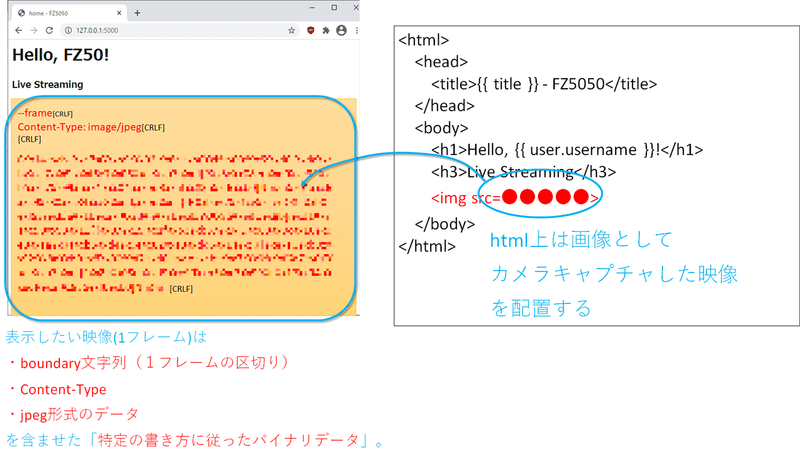
yield (b'--frame\r\n'
b'Content-Type: image/jpeg\r\n\r\n' + frame + b'\r\n')
@app.route('/video_feed')
def video_feed():
#imgタグに埋め込まれるResponseオブジェクトを返す
return Response(gen_frames(), mimetype='multipart/x-mixed-replace; boundary=frame')
@app.route('/')
@app.route('/index')
def index():
user = {'username': 'FZ50'}
return render_template('index.html', title='home', user=user)■templates/index.html
<html>
   <head>
       <title>{{ title }} - FZ5050</title>
   </head>
   <body>
       <h1>Hello, {{ user.username }}!</h1>
       <h3>Live Streaming</h3>
       <img src="{{ url_for('video_feed') }}">
   </body>
</html>
実行結果イメージ
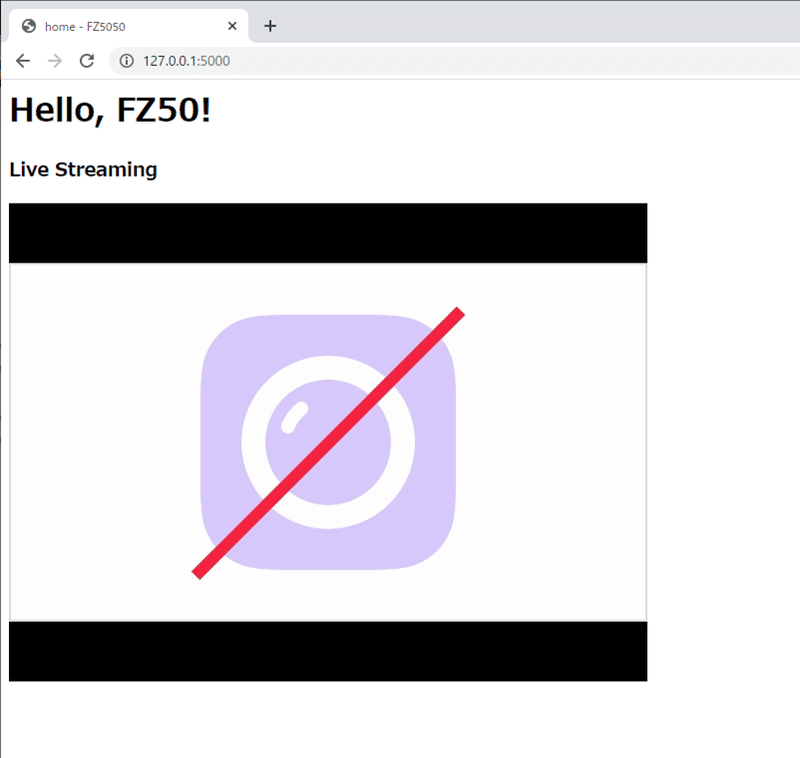
※カメラが接続されていると映像が流れる
もっと応援したいなと思っていただけた場合、よろしければサポートをおねがいします。いただいたサポートは活動費に使わせていただきます。