
SwiftUIで作成したCustom AlertをUIKitのViewControllerから呼び出す

これは何
需要がそもそもあるのか不明ですが、SwiftUIで作成したCustom AlertをUIKitのViewControllerから呼び出そうとして苦労したので、わかったことをまとめました。
できるにはできるんですが、結構力技だと感じています。
もっとスマートなやり方知ってるぞ!という方、ぜひ教えて下さい。
UIKitのViewControllerからSwiftUIを呼び出す方法やSwiftUI上でCustom Alertを表示する方法はググって見つかるのですが、タイトルのような方法がググっても見つかりませんでした。
そもそも呼び出し元もSwiftUIで作ればいいじゃん、既存のViewがViewControllerなら置き換えればいいじゃんって声も聞こえて来そうですが、
「新規画面を作る機会がなかなかないし、既存のViewControllerはFatで置き換えづらい、そんな中でCustom AlertからSwiftUIに置き換えて使っていきたいぞ!」
という人がいたら役に立つかも知れません。
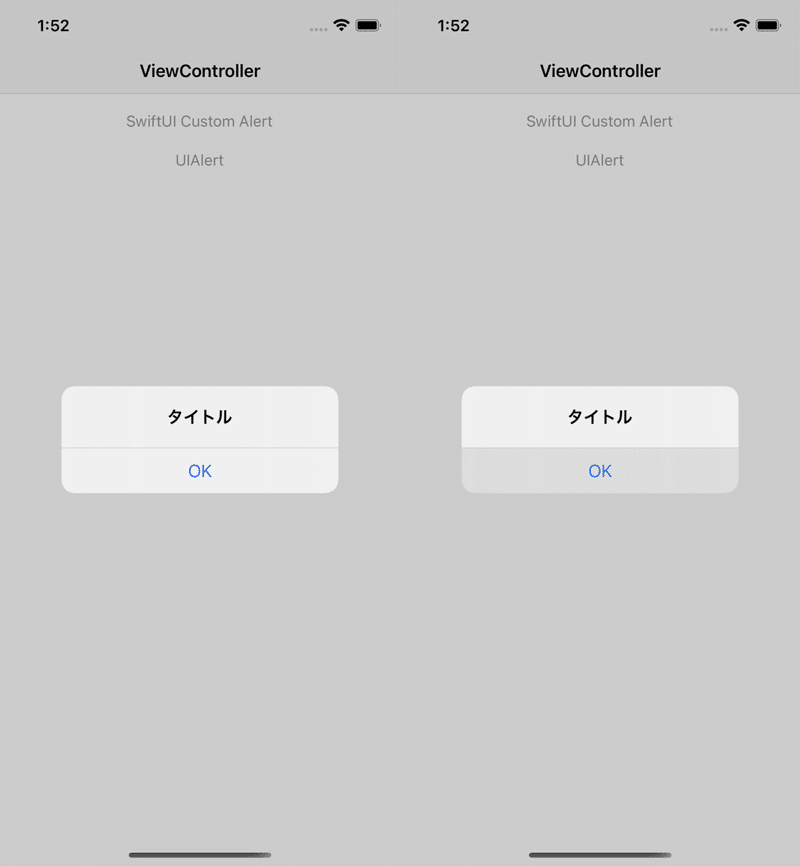
完成形
左が通常時、右がボタンタップ中のスクリーンショットです。
通常時の見た目の差はほとんどなくすことができ、ボタンタップ中のハイライト有無が残ってしまった差です。
SwiftUIで作成したCustom Alert
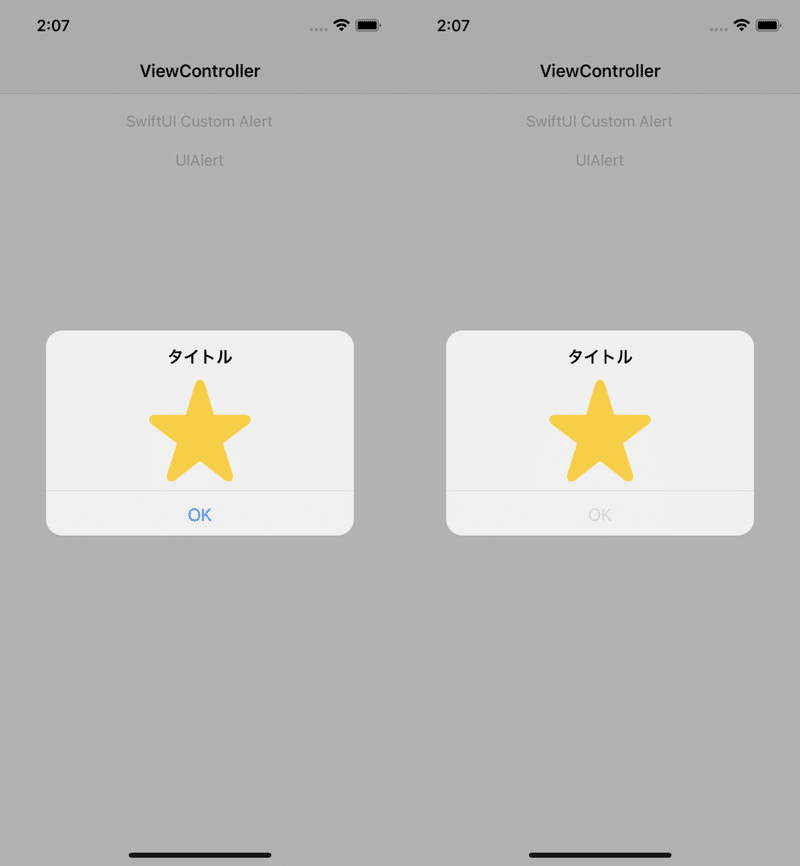
UIAlertController
SwiftUIで作成したCustom Alert
import SwiftUI

struct SwiftUiCustomAlert: View {
   let onButtonTap: () -> ()

   var body: some View {
       VStack {
           Text("タイトル")
               .bold()
               .padding(.top)

           Image(systemName: "star.fill")
               .resizable()
               .frame(width: 100, height: 100)
               .foregroundColor(.yellow)

           Divider()

           Button(action: {
               onButtonTap()
           }, label: {
               Text("OK")
                   .frame(width: 300, height: 30)
           })
           .padding(.bottom, 6)
       }
       .background(Color.black.opacity(0.06))  // UIAlertControllerに一番近い色
       .cornerRadius(16)   // ※1
       .frame(width: 300, height: 200, alignment: .center)
   }
}

struct DialogLikeSwiftUi_Previews: PreviewProvider {
   static var previews: some View {
       SwiftUiCustomAlert(
           onButtonTap: {}
       )
       .previewLayout(.fixed(width: 300, height: 200))
   }
}
Canvas上でのプレビューはこんな感じ

Custom Alertを呼び出すViewController
import UIKit
import SwiftUI
class ViewController: UIViewController {
@IBOutlet weak var swiftUiCustomAlertButton: UIButton!
@IBOutlet weak var uiAlertButton: UIButton!
private var swiftUiCustomAlert: UIHostingController<SwiftUiCustomAlert>!
@IBAction func onSwiftUiAlertButtonTap(_ sender: Any) {
guard let view = navigationController?.view else { // NavigationControllerを使っていなければlet view = viewでOK
return
}
setAllButtons(isEnabled: false)
// 半透明の黒背景を追加
let blackView = UIView()
blackView.backgroundColor = .black
blackView.alpha = 0.3
parentView.addSubview(blackView)
blackView.translatesAutoresizingMaskIntoConstraints = false
// 黒背景は親Viewと同じサイズ
blackView.topAnchor.constraint(equalTo: parentView.topAnchor).isActive = true
blackView.bottomAnchor.constraint(equalTo: parentView.bottomAnchor).isActive = true
blackView.leadingAnchor.constraint(equalTo: parentView.leadingAnchor).isActive = true
blackView.trailingAnchor.constraint(equalTo: parentView.trailingAnchor).isActive = true
// SwiftUIで作成したCustomAlertを追加
swiftUiCustomAlert = UIHostingController(rootView: SwiftUiCustomAlert(onButtonTap: {
self.swiftUiCustomAlert.view.removeFromSuperview()
blackView.removeFromSuperview()
self.setAllButtons(isEnabled: true)
}))
parentView.addSubview(swiftUiCustomAlert.view)
swiftUiCustomAlert.view.translatesAutoresizingMaskIntoConstraints = false
swiftUiCustomAlert.view.layer.cornerRadius = 16 // ※2
// CustomAlertは親Viewと中心を揃える
swiftUiCustomAlert.view.centerXAnchor.constraint(equalTo: parentView.centerXAnchor).isActive = true
swiftUiCustomAlert.view.centerYAnchor.constraint(equalTo: parentView.centerYAnchor).isActive = true
}
@IBAction func onUiAlertButtonTap(_ sender: Any) {
let alert = UIAlertController(title: "タイトル", message: nil, preferredStyle: .alert)
alert.addAction(UIAlertAction(title: "OK", style: .default, handler: { action in
alert.dismiss(animated: false, completion: nil)
}))
present(alert, animated: false, completion: nil)
}
private func setAllButtons(isEnabled: Bool) {
swiftUiCustomAlertButton.isEnabled = isEnabled
uiAlertButton.isEnabled = isEnabled
}
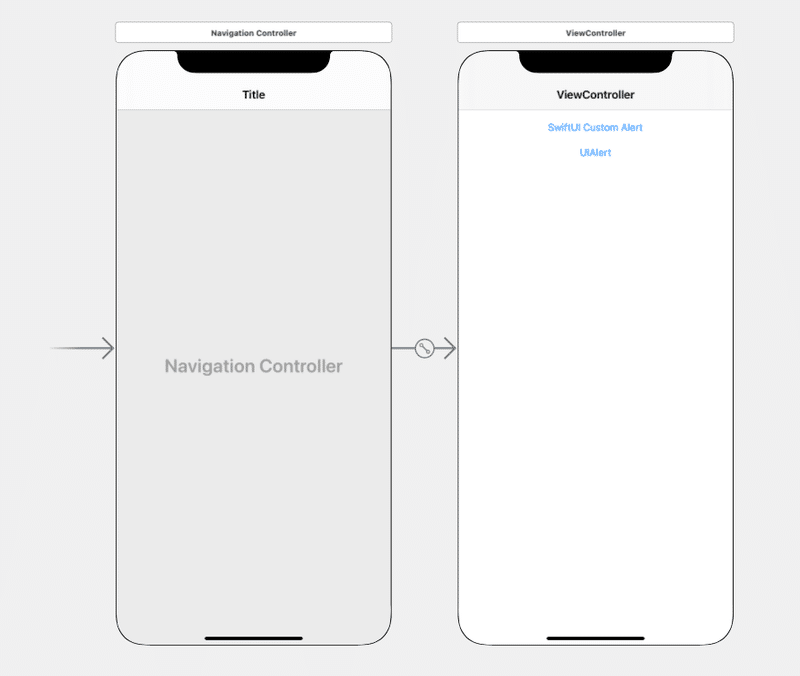
}※Storyboardはボタンを2つ置いただけです
ポイント
1. SwiftUIの背景は透過できなそう
bodyを透過しようとopacity修飾子やbackground修飾子に渡すColorのopacityで透過を試みましたが、表示するとさらにその裏に真っ白なViewが存在するようで、SwiftUIで作ったViewの背景は透過できませんでした。
そのため
1. 半透明の黒背景を追加
2. SwiftUIで作成したCustom Alertを追加
という手順で裏のViewControllerが見える状態を作っています。
2. cornerRadiusを2箇所で設定する
※1と※2の2箇所でcornerRadiusの設定を行っています。
※2は必須です。
※1についてはbackground修飾子を使わず背景が真っ白になっていい場合は不要ですが、UIAlertControllerの背景はややグレーなのでそこも合わせに行く場合は設定が必要です。
効果をわかりやすくするため背景をオレンジにするとこんな差が出ます。

※2は1で透過できなかった白背景レイヤーには効きますが、background修飾子で背景色をいじれるレイヤーには※1のみが作用するようです。
そのためbackground修飾子で背景を白指定する場合は※1も設定が必要です。
感想
ViewControllerに書くコード量が多くてあんまり嬉しくないなあというのが正直な感想です。
こんなに頑張らなくてもViewController上で
    swiftUiCustomAlert = UIHostingController(rootView: SwiftUiCustomAlert(onButtonTap: {
        self.swiftUiCustomAlert.dismiss(animated: true, completion: nil)
    }))
    present(swiftUiCustomAlert, animated: true, completion: nil)
くらいのコード量で簡単に済むと嬉しいんですけど。
表示したいCustom Alertの中身がよほどSwiftUI向きでもない限りやらない予感がします。
この記事が気に入ったらサポートをしてみませんか?