エンジニアが使ってみたChatGPT【ネットワークConfig編2】
はじめに
話題のChatGPTですが、引き続きエンジニア目線で役立つ活用方法を研究しています。
前回の記事では、ネットワークのConfigをChatGPTに解説してもらいました。
思いのほか手軽に役に立ちそうでしたので、簡単なWebアプリケーション作ってみました。
プログラム初心者でも比較的に簡単に作れました。

前回記事
簡単にWebアプリケーションが作れるpythonフレームワークのStreamlitを使っています。
利用イメージ
※今回の記事は画面イメージの紹介だけです。
Webアプリにアクセスします。
Configファイルをドラッグ&ドロップで貼り付けるか、「Browse files」ボタンでアップロードします。

アップロードが終わったら「Configの解説」ボタンをクリックします。

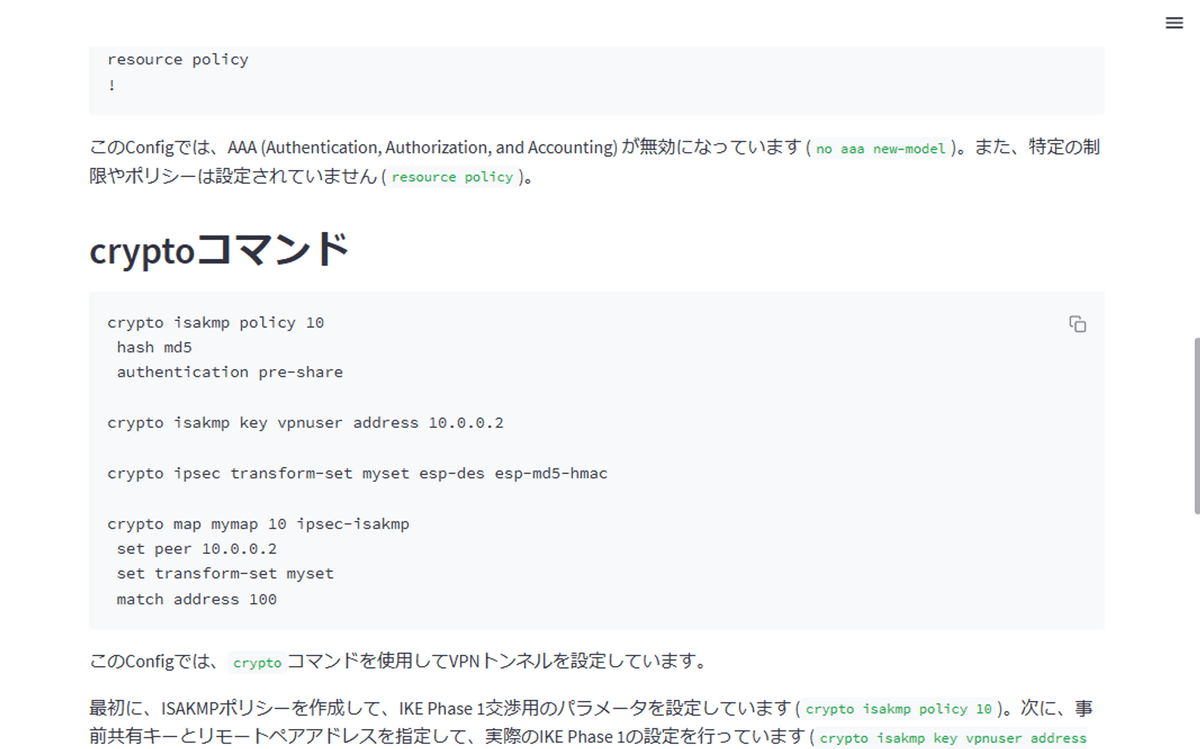
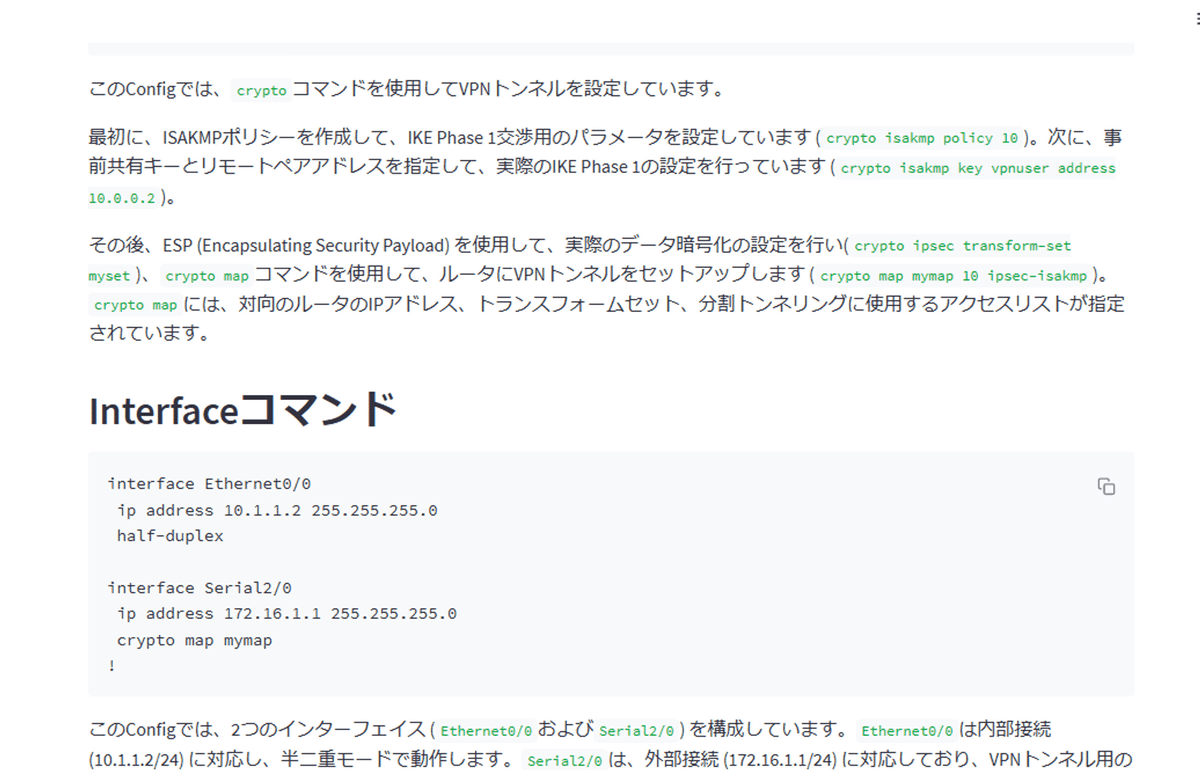
そうすると、「Configの目的と概要」からChatGPTがConfigの内容について説明してくれます。
目的と概要のところなんか、なかなかいい感じではないでしょうか。

その後も説明を続けてくれます。


まとめ
ネットワークのスペシャリストであれば、Config見ただけですぐにわかると思いますが、まだネットワークの経験の浅いエンジニアや、僕のように年に数回必要に迫られて数回見るくらいのライトなエンジニアには、Configの設定内容を説明してくれるだけで、とてもありがたいですね。
ChatGPTのことなので、きっと間違いはあると思いますが、ざっと概要を教えてくれるだけでも、飲み込みが格段に速くなります。
細かいところは検索したり検証は必要ですが、1から調べるよりははるかに効率的です。
次のステップ
Configの説明ができるのであれば、自然言語からネットワークのスイッチの設定もChatGPTでできそうですね。
もっと、ChatGPTのAPI使って勉強します。
参考元
利用したConfig
RouterA#show running-config
Building configuration...

Current configuration : 1132 bytes
!
version 12.4
service timestamps debug datetime msec
service timestamps log datetime msec
no service password-encryption
!
hostname R9
!
boot-start-marker
boot-end-marker
!
!
no aaa new-model
!
resource policy
!
!

!--- Create an ISAKMP policy for Phase 1
!--- negotiations for the L2L tunnels.


crypto isakmp policy 10
 hash md5
 authentication pre-share


!--- Specify the pre-shared key and the remote peer address
!--- to match for the L2L tunnel.


crypto isakmp key vpnuser address 10.0.0.2
!

!--- Create the Phase 2 policy for actual data encryption.


crypto ipsec transform-set myset esp-des esp-md5-hmac
!

!--- Create the actual crypto map. Specify
!--- the peer IP address, transform
!--- set, and an access control list (ACL) for the split tunneling.


crypto map mymap 10 ipsec-isakmp
 set peer 10.0.0.2
 set transform-set myset
 match address 100
!
!
!
!
interface Ethernet0/0
 ip address 10.1.1.2 255.255.255.0
 half-duplex
!


!--- Apply the crypto map on the outside interface.

interface Serial2/0
 ip address 172.16.1.1 255.255.255.0
 crypto map mymap
!

ip http server
no ip http secure-server
!
ip route 0.0.0.0 0.0.0.0 172.16.1.2
!

!--- Create an ACL for the traffic to
!--- be encrypted. In this example,
!--- the traffic from 10.1.1.0/24 to 172.16.2.0/24
!--- is encrypted. The traffic which does not match the access list
!--- is unencrypted for the Internet.

access-list 100 permit ip 10.1.1.0 0.0.0.255 172.16.2.0 0.0.0.255
!
!
control-plane
!
line con 0
line aux 0
line vty 0 4
!
!
end