Swiftで行こう!TableView(TodoList)

Tableの作り方をもう少しやっていきます。Todoリストを作成するときに必要な機能を作っていきます。
テーブルのレイアウトなどだいたいは前に書いているのを参考にしてもらえればと思います。
追加ボタンをつけるときは

な感じでボタンを作ります。
まずテーブルに入れるデータの構造を考えていきます。
class Item{
       var title :String
       var done:Bool = false
       init(title:String){
           self.title = title
       }
   }
classで作ります。内容としては、
title やること。
done チェックの有無
を決めています。
実際には
var itemArr: [Item] = []として"やること(title)"を配列に入れていきます。
まず最初にデータを入れておきます。
 override func viewDidLoad() {
    super.viewDidLoad()
    let item1 = Item(title: "買い物")
    let item2 = Item(title: "ジョギング")

    itemArr.append(item1)
    itemArr.append(item2)

   }
起動時に読み込ませます。
気をつけないといけないとこは
   override func tableView(_ tableView: UITableView, cellForRowAt indexPath: IndexPath) -> UITableViewCell {
       let cell = tableView.dequeueReusableCell(withIdentifier: "Cell", for: indexPath)
       let item = itemArr[indexPath.row]
       cell.textLabel?.text = item.title
       cell.accessoryType = item.done ? .checkmark : .none
       return cell
   }
の部分では
cell.accessoryType = item.done ? .checkmark : .none
ですね。チェックを入れる時にかくコードです。cell.accessoryType
ですね。今回は .checkmarkです。ここでセットしておいて、
override func tableView(_ tableView: UITableView, didSelectRowAt indexPath: IndexPath) {
       let item = itemArr[indexPath.row]
       item.done.toggle()
       self.tableView.reloadData()
       tableView.deselectRow(at: indexPath, animated: true)

   }
ここでセルを選択したときにチェックを付けることになります。
trueとfalseとを入れ替える命令ですが
item.done = !item.done これまで
item.done.toggle() Swift 4.2から使えます。
となっています。あと選択する時に通常であれば背景に色がつきますが、
tableView.deselectRow
を追加することで背景色が無くなります。
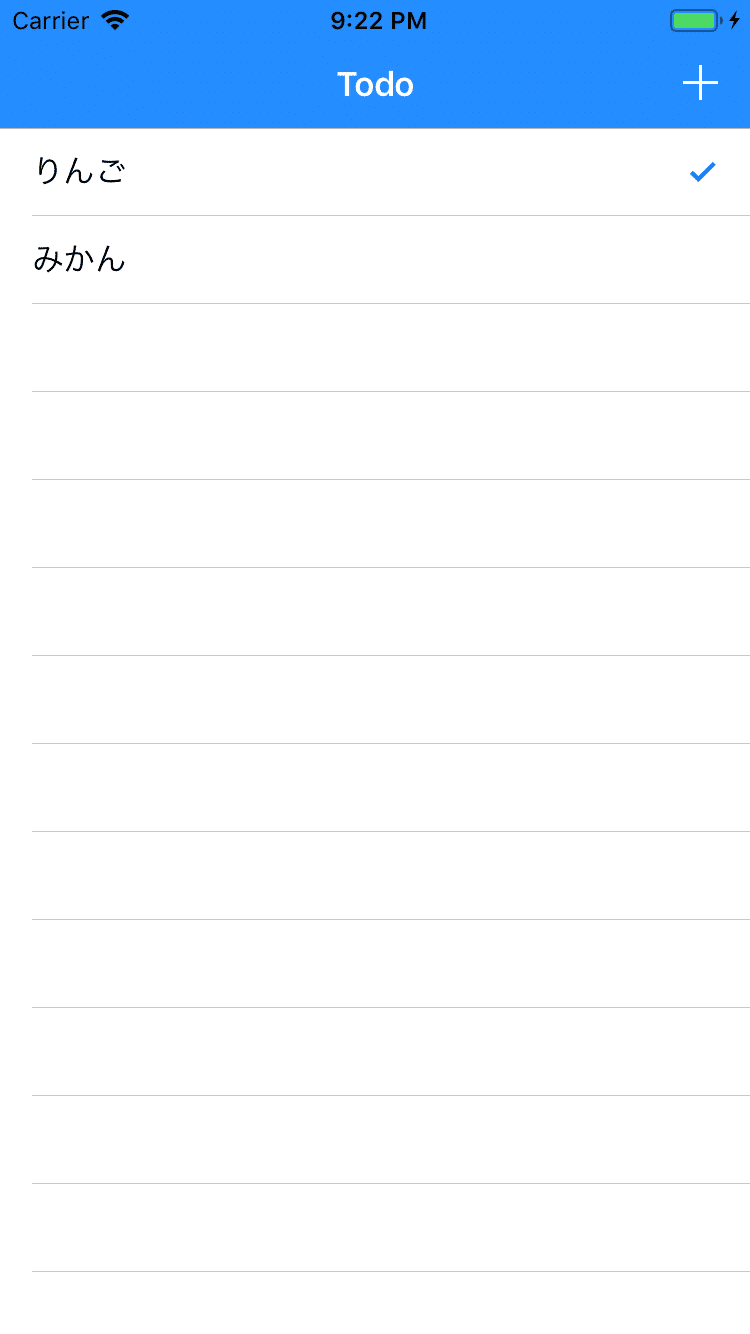
こんな感じでチェックできます。
データの追加をするコードは
@IBAction func addTask(_ sender: Any) {

           var textField = UITextField()
           let alert = UIAlertController(title: "item add", message: "追加します", preferredStyle: .alert)

           let action = UIAlertAction(title:"add",style: .default){(action) in

           let Newitem:Item = Item(title:textField.text!)
           self.itemArr.append(Newitem)
           self.tableView.reloadData()
          }

           let cancel = UIAlertAction(title: "cancel", style: .cancel){(action)  in
           print("Cancel")
          }

           alert.addTextField { (alertTextField) in
           alertTextField.placeholder = ""New Task!"
           textField = alertTextField
           alert.addAction(action)
           alert.addAction(cancel)
           self.present(alert, animated: true, completion: nil)
       }
}ここではUIAlertControllerを使ってポップアップで入力画面を出します。
実際にデータを入れるコードは、
let Newitem:Item = Item(title:textField.text!)
self.itemArr.append(Newitem)
self.tableView.reloadData()
ですね。class Itemのインスタンスを作り配列itemArrに追加していきます。そして、tableView自体をリロードしてテーブルに反映させます。
 let cancel = UIAlertAction(title: "cancel", style: .cancel){(action)  in
            }
取り消す時のコードです。
UIAlertActionを反映させるのには、
alert.addAction(action) ・・データの追加
alert.addAction(cancel) ・・キャンセル
self.present(alert, animated: true, completion: nil) ・・alertを表示させる
が必要です。
ついでに
alert.addTextField { (alertTextField) in
alertTextField.placeholder = "新しいアイテム"
textField = alertTextField
ではプレースフォルダということで入力前に薄く表示させておいて、入力をわかりやすくします。
最後にいらないタスクの削除ということで、
 override func tableView(_ tableView: UITableView, commit editingStyle: UITableViewCell.EditingStyle, forRowAt indexPath: IndexPath) {
       itemArr.remove(at: indexPath.row)
       let indexPaths = [indexPath]
       tableView.deleteRows(at: indexPaths, with: .automatic)
   }
これで該当せるをスワイプするとDelete表示がされ消すことが可能となります。
全コードです。
この記事が気に入ったらサポートをしてみませんか?