
Gatsbyサイトにページネーションを追加する

ブログの記事がだんだん増えてくると、1つのページ内に全ての記事を表示することが困難になってきます。ページを表示する時間が遅くなったり、視認性が悪くなったりもします。
そうした場合にページを分割する方法を知っておくと、一覧をみやすくすることができます。
商品がたくさんある場合に、1ページに表示する商品数を制限したりすることにも使えます。
今回は、ページネーションをGatsbyで実装する方法について説明していきます。
Gatsbyにページネーションを追加する
前回の記事で作成したカテゴリーページのブログ記事を、2記事ずつ表示するように変更してみましょう。
カテゴリーページに表示されるブログ記事の総数を、各ページに表示する記事の数で割り、作成する必要があるページ数を計算しておきます。
後は、各ページでページ数を参照して、そのページ数に該当するブログ記事をGraphQLでクエリーするようにすれば良いわけですね。
カテゴリーを作成した時と同じように、ページネーションで使う各ページもgatsby-node.jsでページを作成していきます。
各カテゴリーにあるブログ記事の数を数えるには、gatsby-node.jsのGraphQLのクエリに、totalCountを追加するだけで済みます。
  const result = await graphql(`
   {
     categoryGroup: allMdx{
       group(field: frontmatter___category) {
         fieldValue
         totalCount
       }
     }
   }
 `)
このtotalCountを利用して、各カテゴリーに必要なページ数を計算します。
   const postsPerPage = 2
   const numPages = Math.ceil(category.totalCount / postsPerPage)
categories.forEachの中で、各カテゴリーのページを作成していましたね。このforEachの中にさらにループを追加して、分割したページを作成するようにします。
const path = require("path")
exports.createPages = async ({ actions, graphql, reporter }) => {
const { createPage } = actions
const pagenationTemplate = path.resolve("src/templates/category.js")
const result = await graphql(`
{
categoryGroup: allMdx {
group(field: frontmatter___category) {
fieldValue
totalCount
}
}
}
`)
if (result.errors) {
reporter.panicOnBuild(`Error while running GraphQL query.`)
return
}
const categories = result.data.categoryGroup.group
categories.forEach(category => {
const postsPerPage = 2
const numPages = Math.ceil(category.totalCount / postsPerPage)
Array.from({ length: numPages }).forEach((_, i ) => {
const page_path = i === 0 ? `/` : `/${i + 1}`
createPage({
path: `/blogs/categories/${category.fieldValue}${page_path}`,
component: pagenationTemplate,
context: {
category:category.fieldValue,
limit: postsPerPage,
skip: i * postsPerPage,
numPages,
currentPage: i + 1,
}
})
})
})
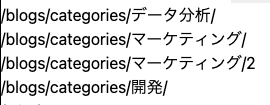
}カテゴリーの中に含まれる記事数に応じて、ページを作成するようにしました。作成されたページを見てみると、blogs/categories/カテゴリ名の下に、数字のついたページが作成されていますね。
ただ、これだと効果がわかりにくいので、categoryが"マーケティング"の記事を2つ、"開発"の記事を2つ追加してみましょう。
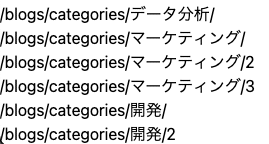
マーケティングと開発のページが想定通り増えました。
Gatsbyのブログ記事をページ数によってわける
これらのページを開いてみると、まだ全ての記事が表示されるようになっています。
テンプレートであるcategory.jsの中で、該当するブログ記事を表示するようにしなければなりません。そのために、gatsby-node.jsのcontextの中で、さまざまな値をcategory.jsに渡すようにしています。
まずはGraphQLのクエリーを変更しましょう。"skip"でそれまでのページまでのブログ記事を飛ばし、"limit"で次に表示するブログ記事の数を制限しています。
例えば、今回は2記事毎にページを作成しているので、2ページ目では最初の2記事を飛ばして次の2記事を表示するようになります。
export const pageQuery = graphql`
 query($category: String, $skip: Int!, $limit: Int!) {
   allMdx(
     limit: $limit
     skip: $skip
     sort: { fields: [frontmatter___date], order: DESC }
     filter: { frontmatter: { category: { in: [$category] } } }
   ) {
     totalCount
     edges {
       node {
         slug
         frontmatter {
           title
         }
       }
     }
   }
 }
`
続いてカテゴリーのページ間を、遷移できるリンクを追加します。
pageContextから、新たにcurrentPageとnumPagesを入手します
const { category, currentPage, numPages } = pageContextこれらの値を利用して、現在のページが、最初や最後のページかどうか判定できるようにしています。これに応じて、"前のページ"へのリンクや”次のページ”のリンクが表示されるようにします。
const isFirstPage = currentPage === 1
const isLastPage = currentPage === numPages
const previousPage = currentPage - 1 === 1 ? `` : (currentPage - 1).toString()
const nextPage = (currentPage + 1).toString()
const previousPageLink = `/blogs/categories/${category}/` + previousPage
const nextPageLink = `/blogs/categories/${category}/` + nextPage
後は好きな場所に、このリンクを追加するだけです。
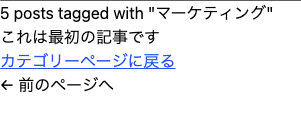
最初のページの場合、"前のページ"へのリンクを表示しないように。最後のページの場合、"次のページ"へのリンクを表示しないようにします。
<div>
    {!isFirstPage && (
     <Link to={previousPageLink} rel="prev">
       ← 前のページへ
     </Link>
    )}
    {!isLastPage && (
     <Link to={nextPageLink} rel="next">
       次のページへ →
     </Link>
    )}
</div>
これでページを移動することができるようになりました。
最初のページ
http://localhost:8000/blogs/categories/マーケティング/
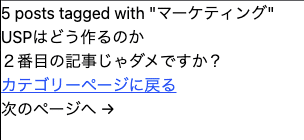
2番目のページ
http://localhost:8000/blogs/categories/マーケティング/2

3番目のページ
http://localhost:8000/blogs/categories/マーケティング/3
ソースコード全体
# src/pages/templates/category.js

import React from "react"
import { Link, graphql } from "gatsby"

const Categories = ({ pageContext, data }) => {

 const { category, currentPage, numPages } = pageContext
 const { edges, totalCount } = data.allMdx

 const categoryHeader = `[${category}]カテゴリーで${totalCount}個の記事が見つかりました。`

 const isFirstPage = currentPage === 1
 const isLastPage = currentPage === numPages
 const previousPage = currentPage - 1 === 1 ? `` : (currentPage - 1).toString()
 const nextPage = (currentPage + 1).toString()

 const previousPageLink = `/blogs/categories/${category}/` + previousPage
 const nextPageLink = `/blogs/categories/${category}/` + nextPage

 return (
   <div>
     <h1>{categoryHeader}</h1>
     <ul>
       {edges.map(({ node }) => {
         const { slug } = node
         const { title } = node.frontmatter
         return (
           <li key={slug}>
             <Link to={"/blogs/"+slug}>{title}</Link>
           </li>
         )
       })}
     </ul>
     <Link to="/blogs/categories/">カテゴリーページに戻る</Link>

     <div>
       {!isFirstPage && (
         <Link to={previousPageLink} rel="prev">
           ← 前のページへ
         </Link>
       )}
       {!isLastPage && (
         <Link to={nextPageLink} rel="next">
           次のページへ →
         </Link>
       )}
     </div>

   </div>
 )
}

export default Categories

export const pageQuery = graphql`
 query($category: String, $skip: Int!, $limit: Int!) {
   allMdx(
     limit: $limit
     skip: $skip
     sort: { fields: [frontmatter___date], order: DESC }
     filter: { frontmatter: { category: { in: [$category] } } }
   ) {
     totalCount
     edges {
       node {
         slug
         frontmatter {
           title
         }
       }
     }
   }
 }
`
実行結果
まとめ
カテゴリーページを少し改良するだけで、ページネーションを追加することができました。
ここまで読んでいただけたなら、”スキ”ボタンを押していただけると励みになります!(*´ー`*)ワクワク
この記事が気に入ったらサポートをしてみませんか?