
Djangoですぐに使える決済システム(stripe)

stripeはオンラインで支払い処理を簡単に行えるインフラです。
Shopifyのように商品管理は必要ないけれども、支払い処理は行いたい場合に、候補に上がってくるのがstripeではないでしょうか。
ドキュメントのコードもわかりやすくまとまっていて、初めて使う場合でも30分でテスト決済できるようになりました。
今回は、stripeのAPIで支払い処理のお試し機能をDjangoで実装してみましょう。
パッケージのインストール
必要なパッケージは、Djangoとstripeだけです。pipから簡単にインストールできるので非常に簡単です。pythonの仮想環境に入るのも忘れずに。
以下のコマンドを入力してパッケージをインストールしてください。
pip install django
pip install stripe
Django側の準備
Django側で特別な準備は必要ありませんが、stripeを利用するアプリケーションを作成しておきましょう。
stripe_testというプロジェクト名で、paymentというアプリケーションを作成します。
django-admin startproject stripe_test
cd stripe_test
python manage.py startapp payment
settings.pyのINSTALLED_APPSにpaymentを追加し、
# settings.py

INSTALLED_APPS = [
   ...省略...

   'payment.apps.PaymentConfig'
]
ルーティングを設定しておきます。
# stripe_test/urls.py
from django.contrib import admin
from django.urls import path, include
urlpatterns = [
path('admin/', admin.site.urls),
path('', include('payment.urls')),
]
# payment/urls.py
from django.urls import path
from . import views
app_name = 'payment'
urlpatterns = [
path('', views.PaymentIndexView.as_view(), name='index'),
]Viewはテンプレートを表示するだけの簡単なテンプレートです。
# payment/views.py

from django.views import generic

class PaymentIndexView(generic.TemplateView):
   template_name = "payment/index.html"
このテンプレートも仮のテンプレートを用意しておきます。paymentアプリケーション内に、templatesとpaymentフォルダを作成し、index.htmlを作成しておきます。ファイル構成は以下のようになっています。
stripe_test
|- payment
  |- templates
    |- payment
      |- index.html
# index.html
this is index pageここまでの設定がうまくいっているか確認するために、一度開発用サーバーを立ち上げてみます。
python manage.py runserver
↓
http://localhost:8000 にブラウザでアクセス
これでDjango側の準備は完了です。
stripe側の設定
stripeのアカウントを作成します。作成後、メールが送られてきて確認する必要があります。

登録が完了したらまずはアカウント名を変更します。この変更をしないと後で、"In order to use Checkout, you must set an account or business name at https://dashboard.stripe.com/account."というエラーが発生します。
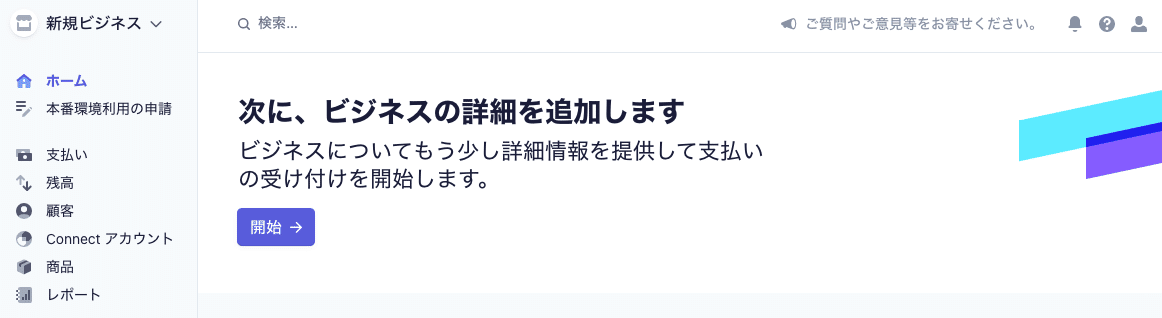
左上の[新規ビジネス]をクリックして編集を押してください。
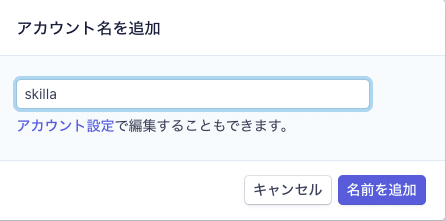
適当にアカウント名を設定します。
続いて、左側のメニューにある[開発者]→API キーを選択します。
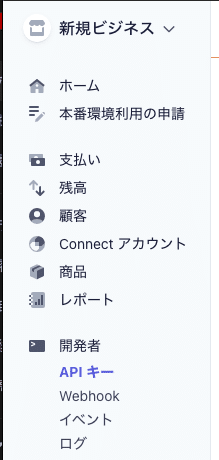
このページには、公開可能キーとシークレットキーが記載されています。クライアント側のjavascriptでは、公開可能キーを利用し、サーバー側ではシークレットキーを利用します。
テスト環境であることを確認するため、キーにtestの文字列が入っていることを確認してください。(例:pk_test_xxxxx)
stripeの支払い処理を実装する
基本的に、こちらのページを参考に作成します。[支払い]タブでフロントエンド:[HTML]、言語:[Python]のサンプルです。
まずは、必要なViewとそのテンプレート、ルーティングを用意します。
ここにはサンプルにあるようにcheckout.html、success.html、cancel.htmlがあり、stripeへセッションを繋げるためのcreate_checkout_sessionというルーティングが必要です。
# payment/urls.py
from django.urls import path
from . import views
app_name = 'payment'
urlpatterns = [
path('', views.PaymentIndexView.as_view(), name='index'),
path('checkout/', views.PaymentCheckoutView.as_view(), name='checkout'),
path('create_checkout_session/', views.create_checkout_session, name='checkout_session'),
path('success/', views.PaymentSuccessView.as_view(), name='success'),
path('cancel/', views.PaymentCancelView.as_view(), name='cancel'),
]Viewもシンプルにテンプレートだけを表示します。create_checkout_sessionは後で実装します。
# payment/views.py

from django.views import generic

class PaymentIndexView(generic.TemplateView):
   template_name = "payment/index.html"

class PaymentCheckoutView(generic.TemplateView):
   template_name = "payment/checkout.html"

class PaymentSuccessView(generic.TemplateView):
   template_name = "payment/success.html"

class PaymentCancelView(generic.TemplateView):
   template_name = "payment/cancel.html"

def create_checkout_session(request):
    pass
サンプルのhtmlファイルを参考に、テンプレートを作成します。
# templates/payment/checkout.html

<!DOCTYPE html>
<html>
 <head>
   <title>商品購入</title>
   <script src="https://polyfill.io/v3/polyfill.min.js?version=3.52.1&features=fetch"></script>
   <script src="https://js.stripe.com/v3/"></script>
 </head>
 <body>
   <section>
     <div class="product">
       <div class="description">
         <h3>skilla t-shirt</h3>
         <h5>2,000円</h5>
       </div>
     </div>
     <button type="button" id="checkout-button">Checkout</button>
   </section>
 </body>
 <script type="text/javascript">
   // Create an instance of the Stripe object with your publishable API key
   var stripe = Stripe("pk_test_あなたの公開可能キーを入れてください");
   var checkoutButton = document.getElementById("checkout-button");

   checkoutButton.addEventListener("click", function () {
     fetch("/create_checkout_session/", {
       method: "POST",
       headers: {
           'Accept': 'application/json',
           'Content-Type': 'application/json; charset=UTF-8',
           'X-CSRFToken': '{{ csrf_token }}'
       },
     })
       .then(function (response) {
         return response.json();
       })
       .then(function (session) {
         return stripe.redirectToCheckout({ sessionId: session.id });
       })
       .then(function (result) {
         // If redirectToCheckout fails due to a browser or network
         // error, you should display the localized error message to your
         // customer using error.message.
         if (result.error) {
           alert(result.error.message);
         }
       })
       .catch(function (error) {
         console.error("Error:", error);
       });
   });
 </script>
</html>
var stripe = Stripe("pk_test_あなたの公開可能キーを入れてください")、はあなたの公開可能キーをに変更してください。その他の変更点としては、headerにcsrf_tokenを設定しています。Djangoはこのトークンを入れないとpostすることができません。
# temaplates/payment/success.html

<html>
<head>
 <title>購入ありがとうございます!</title>
</head>
<body>
 <section>
   <h1>購入ありがとうございます!</h1>
   <a href="{% url 'payment:checkout' %}">商品ページにもどる</a>
 </section>
</body>
</html>
# temaplates/payment/cancel.html
<html>
<head>
<title>購入がキャンセルされました</title>
</head>
<body>
<section>
<h1>購入がキャンセルされました</h1>
<a href="{% url 'payment:checkout' %}">商品ページにもどる</a>
</section>
</body>
</html>この2つのページは、結果を表示しているだけです。
最後に、create_checkout_session関数を実装します。サンプルとほぼ同じですが、少しだけ変更を加えています。
# payment views.py
import os
import stripe
import json
from django.urls import reverse
from django.shortcuts import redirect
from django.http import JsonResponse

...省略...

def create_checkout_session(request):
   stripe.api_key = 'sk_test_あなたのシークレットキーを設定してください'

   try:
       checkout_session = stripe.checkout.Session.create(
           payment_method_types=['card'],
           line_items=[
               {
                   'price_data': {
                       'currency': 'usd',
                       'unit_amount': 2000,
                       'product_data': {
                           'name': 'Stubborn Attachments',
                           'images': ['https://i.imgur.com/EHyR2nP.png'],
                       },
                   },
                   'quantity': 1,
               },
           ],
           mode='payment',
           success_url=request.build_absolute_uri(reverse('payment:success')),
           cancel_url=request.build_absolute_uri(reverse('payment:cancel')),
       )
       return JsonResponse({'id': checkout_session.id})
   except Exception as e:
       return JsonResponse({'error':str(e)})
stripe.api_key = 'sk_test_あなたのシークレットキーを設定してください'の部分は、あなたのシークレットキーに変更してください。
success_urlとcancel_urlは、Djangoの関数(build_absolute_uri、reverse)を利用して、full pathを生成しています。サンプルと違って、Flaskは使わないので、jsonifyをJsonResponseに変更しています。
これで実装が完了したので、開発用サーバーを実行して試してみましょう。
python manage.py runserver
↓
http://localhost:8000/checkout/ にブラウザでアクセス
ブラウザでアクセスすると以下のように表示されました。デザインはしていないので見た目はアレですが( ̄▽ ̄;)
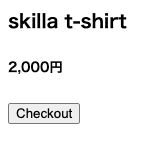
checkoutを押すと、stripeのcheckoutページに飛びます。こっちの商品情報は変更していないので、サンプルのままです。
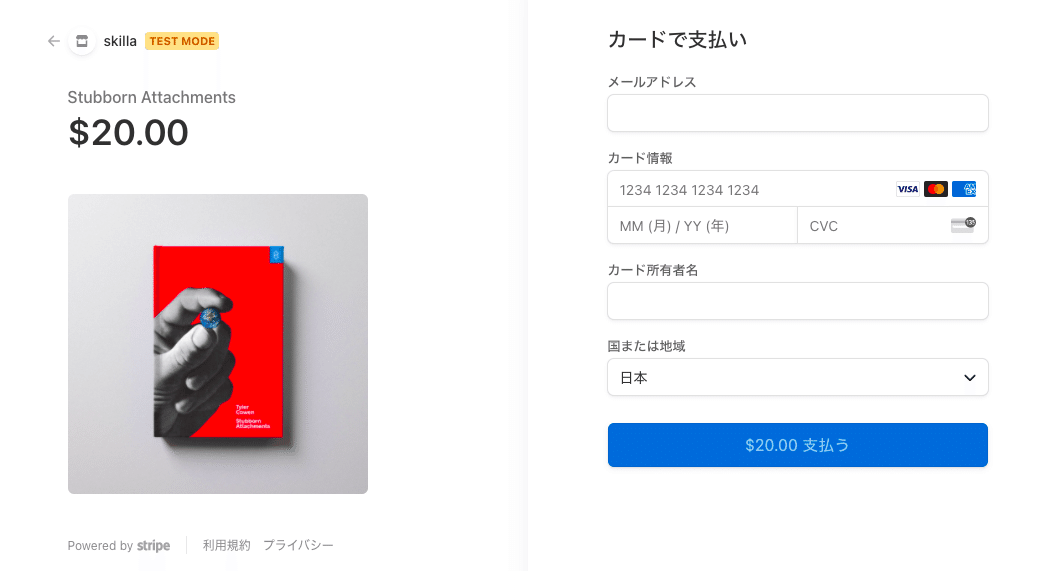
支払いのテストをするには、以下のテストカード番号を入力して実行することができます。
# 支払いが成功しました
4242 4242 4242 4242

# 支払いには認証が必要です
4000 0025 0000 3155

# 支払いが拒否されました
4000 0000 0000 9995
支払いが成功する番号を入力して、その他の情報は適当に埋めます。

[$20.00支払う]をクリックすると…
購入完了ページが表示されました。
 左上の戻るボタン (⇦)を押すと…
キャンセルページが表示されました。
まとめ
stripeのサンプルは実例があるので、すぐに実装できました。これでいつでもオンライン販売ができるようになりますね!
ここまで読んでいただけたなら、”スキ”ボタンを押していただけると励みになります!(*´ー`*)ワクワク